Log In, Log Out & Manage User Access for UAE e-Invoicing
You can log in to the UAE e-Invoicing services in TallyPrime using your Tally.NET credentials and start generating e-Invoices seamlessly.
You can also approve access for other users under your license site, log out when required, and reset the e-Invoice login details.

- Enable VAT & e-Invoicing.
- Ensure that the Tally.NET ID and TSS are active.
- The e-mail ID linked to your Tally.NET ID is accessible to receive OTPs.
- The e-mail ID registered with EmaraTax is available for e-Invoicing activation.
Log In for e-Invoicing
- Press Alt+Z (Exchange) > All VAT Options > e-Invoice Login & Logout.
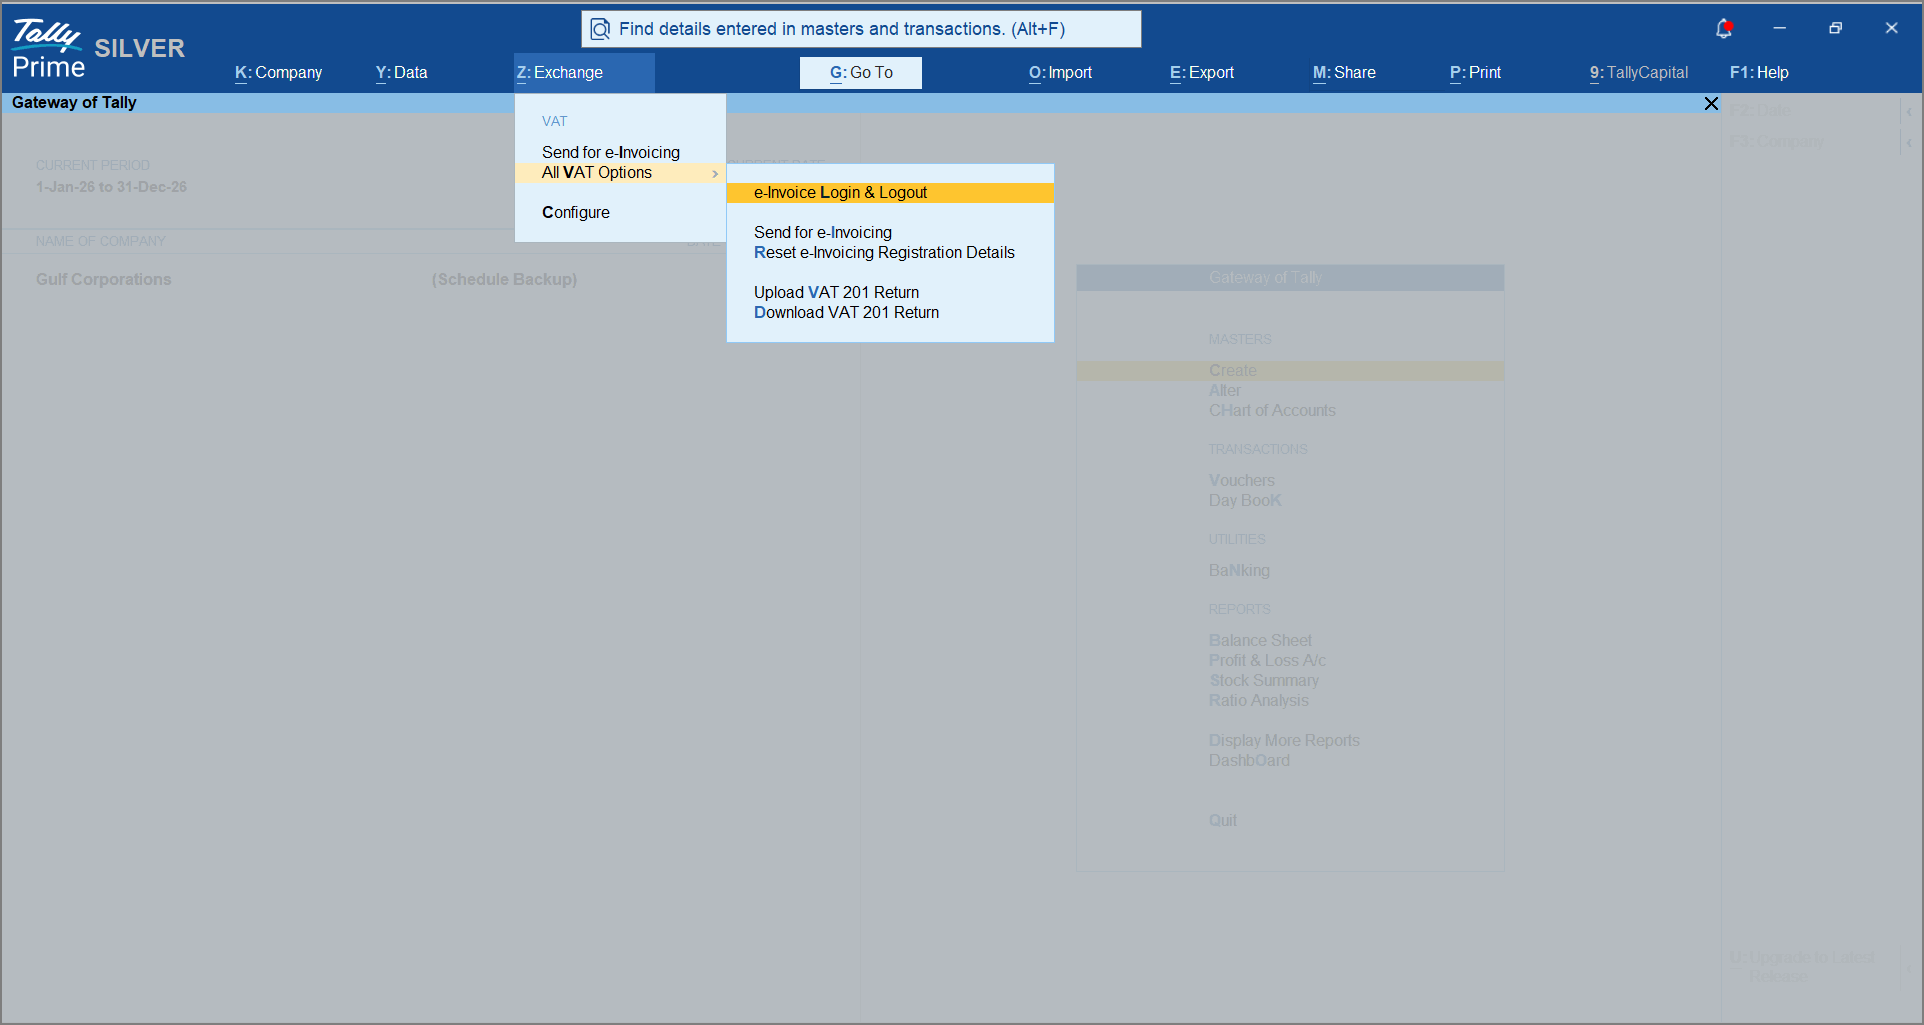
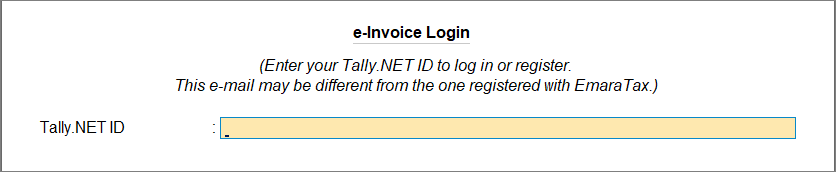
The e-Invoice Login screen appears. - Enter your Tally.NET ID to log in.
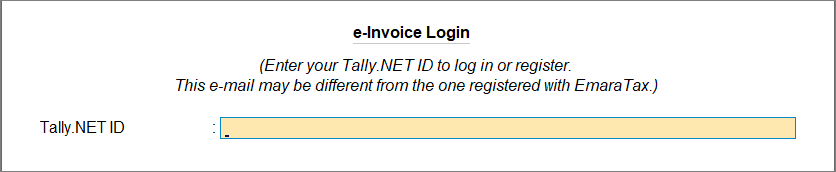
This e-mail may be different from the one registered with EmaraTax.
If you are logging in for the first time, your Tally.NET ID must be approved for access to e-Invoicing services. - Enter your Tally.NET password.
- If you have forgotten your password, press Alt+R (Reset Password) to reset the password for your Tally.NET ID.
- Enter the OTP sent to your Tally.NET ID.
- If you do not receive the OTP, press Alt+R (Resend OTP).
Once you enter the OTP, you get logged in to the e-Invoicing services.
Enable e-Invoicing for your Tally.NET ID
After logging in, you can enable your Tally.NET ID and the e-mail ID registered with EmaraTax portal for e-Invoicing.
- Enable Tally.NET ID for e-Invoicing.
- Enter the e-mail ID registered with EmaraTax.
- Specify whether the company is registered for VAT/Group VAT.
- If your company is registered only for Corporate Tax, set this option to No.
- Enter with the TRN and TIN for e-Invoicing, that you want to link to your Tally.NET ID.
- View T&C and Privacy Policy: Yes.
You will get redirected to the web page where you can read the T&C and Privacy Policy and then accept it. - Enter the OTP sent to your email registered with EmaraTax.
- If you don’t receive the OTP, press Alt+R to resend.
If your e-mail ID is linked with another Tally.NET ID, a message appears to confirm if you want to continue linking it with the current Tally.NET ID as well.
- If you don’t receive the OTP, press Alt+R to resend.
- Select Yes to proceed.
The e-mail ID is now linked with the current Tally.NET ID for UAE e-Invoicing. - Complete your e-Invoicing Registration on the EmaraTax portal.
If your company is registered for Corporate Tax, after successfully completing e-Invoicing Registration, in F11 > set Enable Value Added Tax (VAT) to No.
This ensures that VAT is not applied to your transactions.
Log Out from e-Invoicing
When you are not using any e-Invoicing facility, you can log out.
- Press Alt+Z (Exchange) > All VAT Options > e-Invoice Login & Logout.
- Press Y to log out.
Reset e-Invoice Login
In case you are unable to log out of e-Invoice or want to clear the e-Invoice Details, you can reset the e-Invoice login.
- Press F1 (Help) > Troubleshooting > Reset Login > Reset e-Invoice Login.
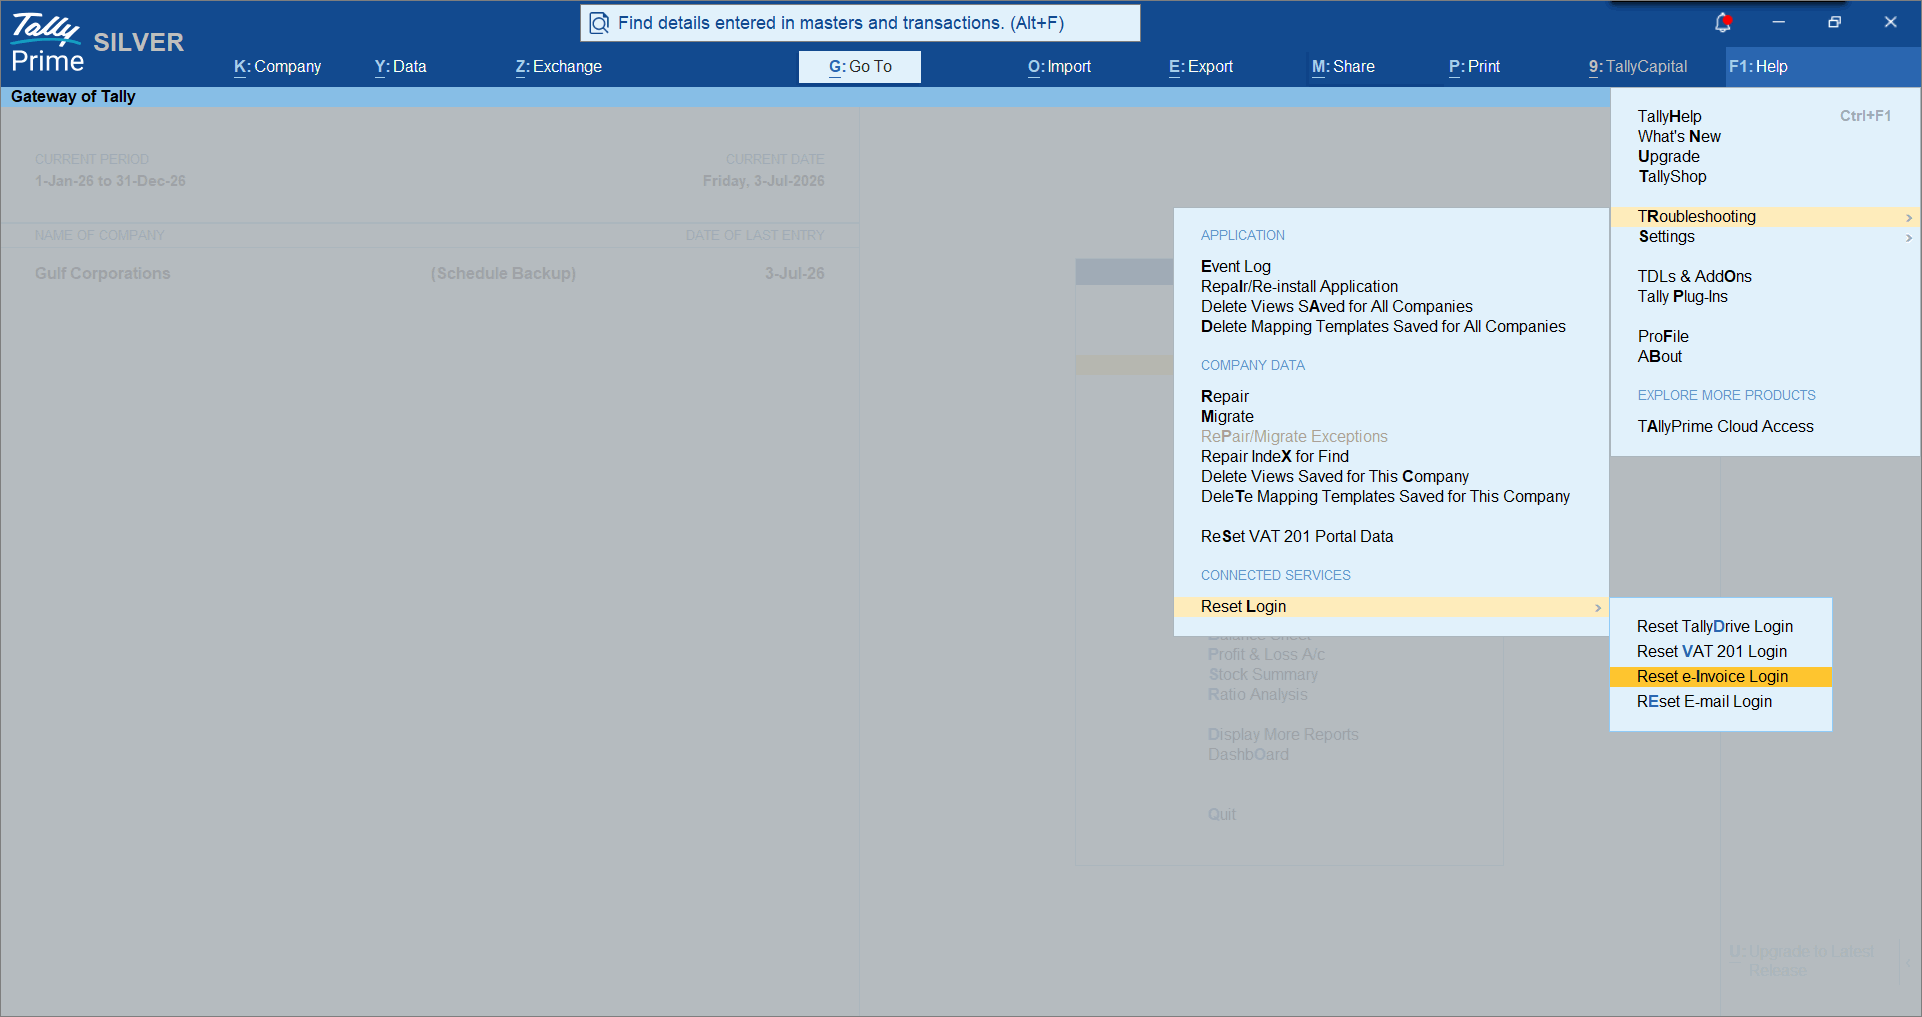
A message appears to confirm if you want to clear the e-Invoice login details for the company and the current user. - Select Yes to confirm.
The e-Invoice login details are cleared successfully.
Approve User Access to UAE e-Invoicing in TallyPrime
As an admin, you need to enable e-Invoicing for the Standard users. When you create a new user in TallyPrime, you can approve the user either in TallyPrime or on the Tally Solutions Customer Portal.
- Press Alt+Z (Exchange) > All VAT Options > e-Invoice Login & Logout.
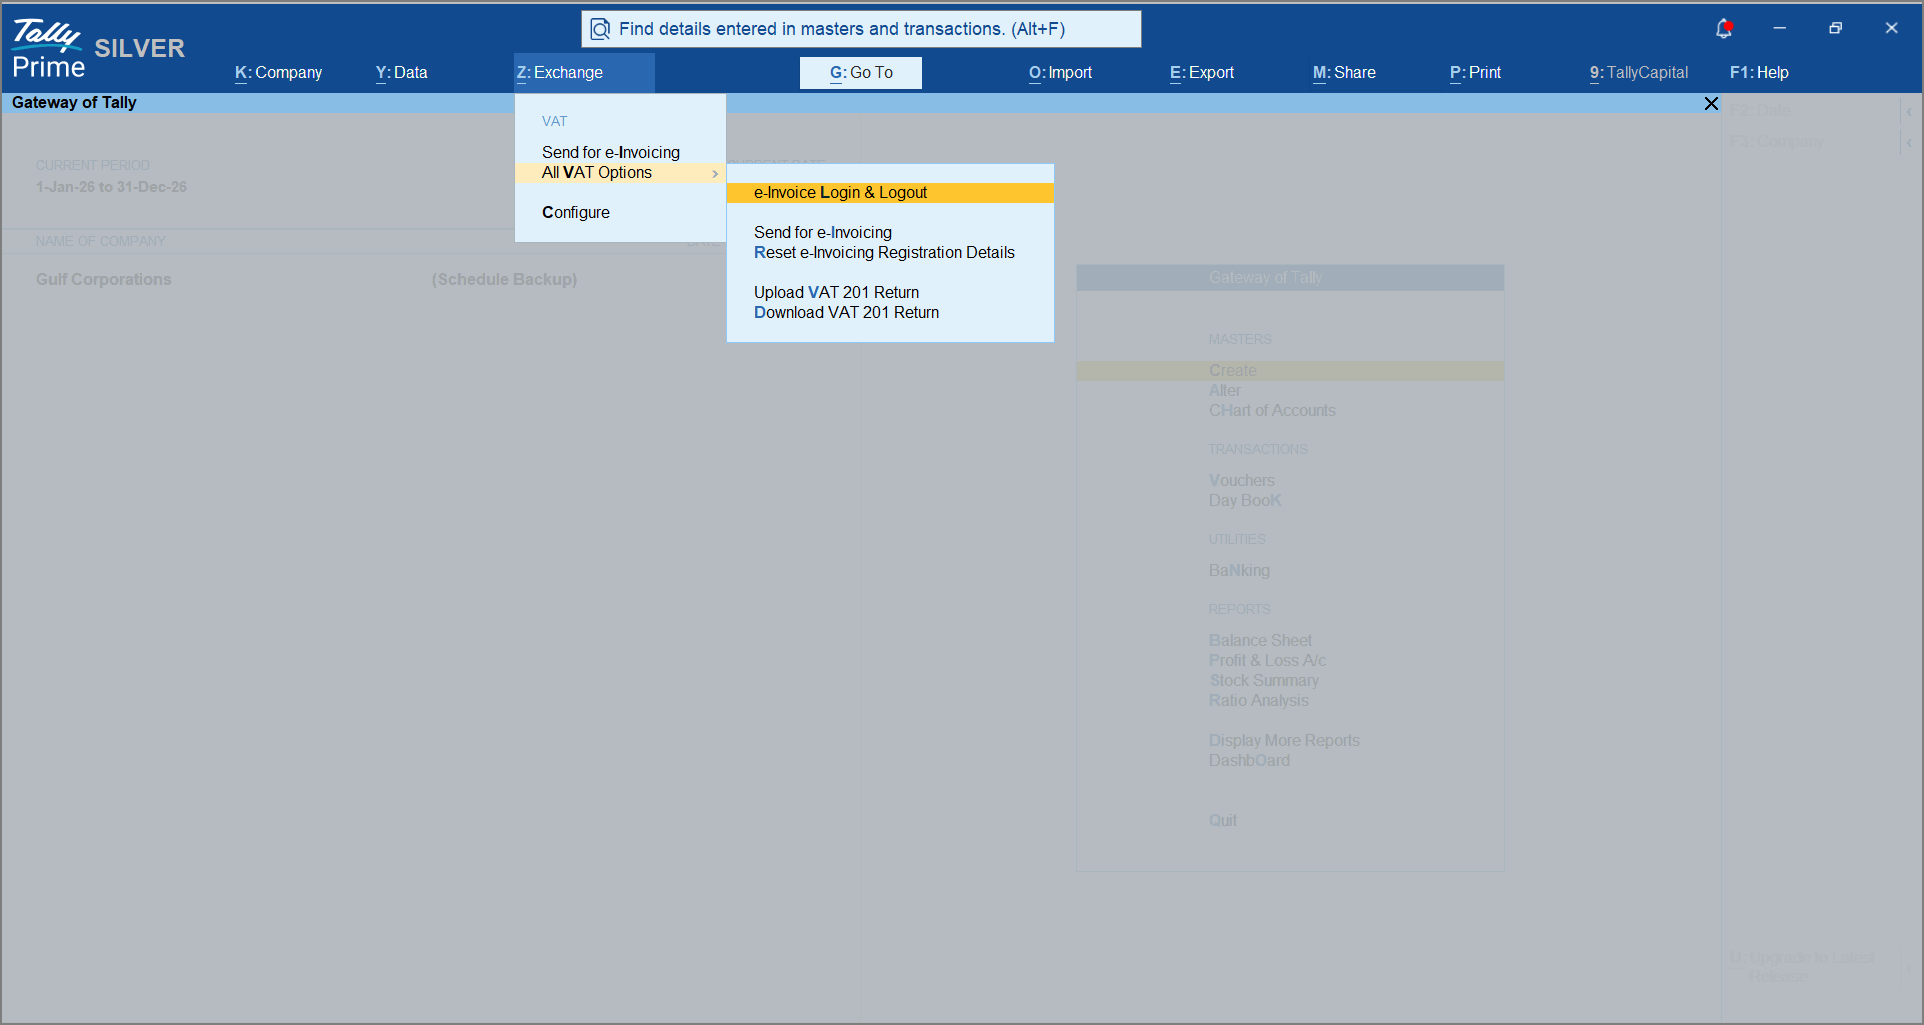
- In the e-Invoice Login screen, enter your Tally.NET ID to log in.
A message appears to confirm if you want to enable e-Invoicing services for this user.
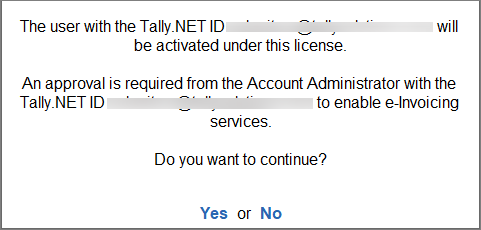
- Press Yes to proceed.
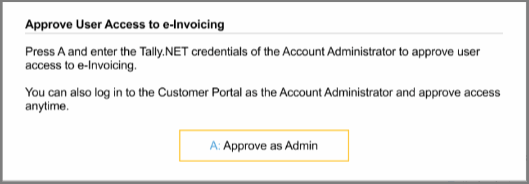
- Press A to approve as admin.
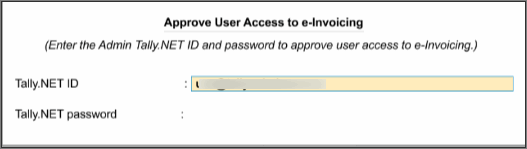
- Enter the Tally.NET ID and Password of the Account Administrator or Owner for approval.
Approve User Access to UAE e-Invoicing on the Portal
- Log in to the Tally Solutions Customer Portal.
- Click CONTROL CENTRE > User Management > Manage User.
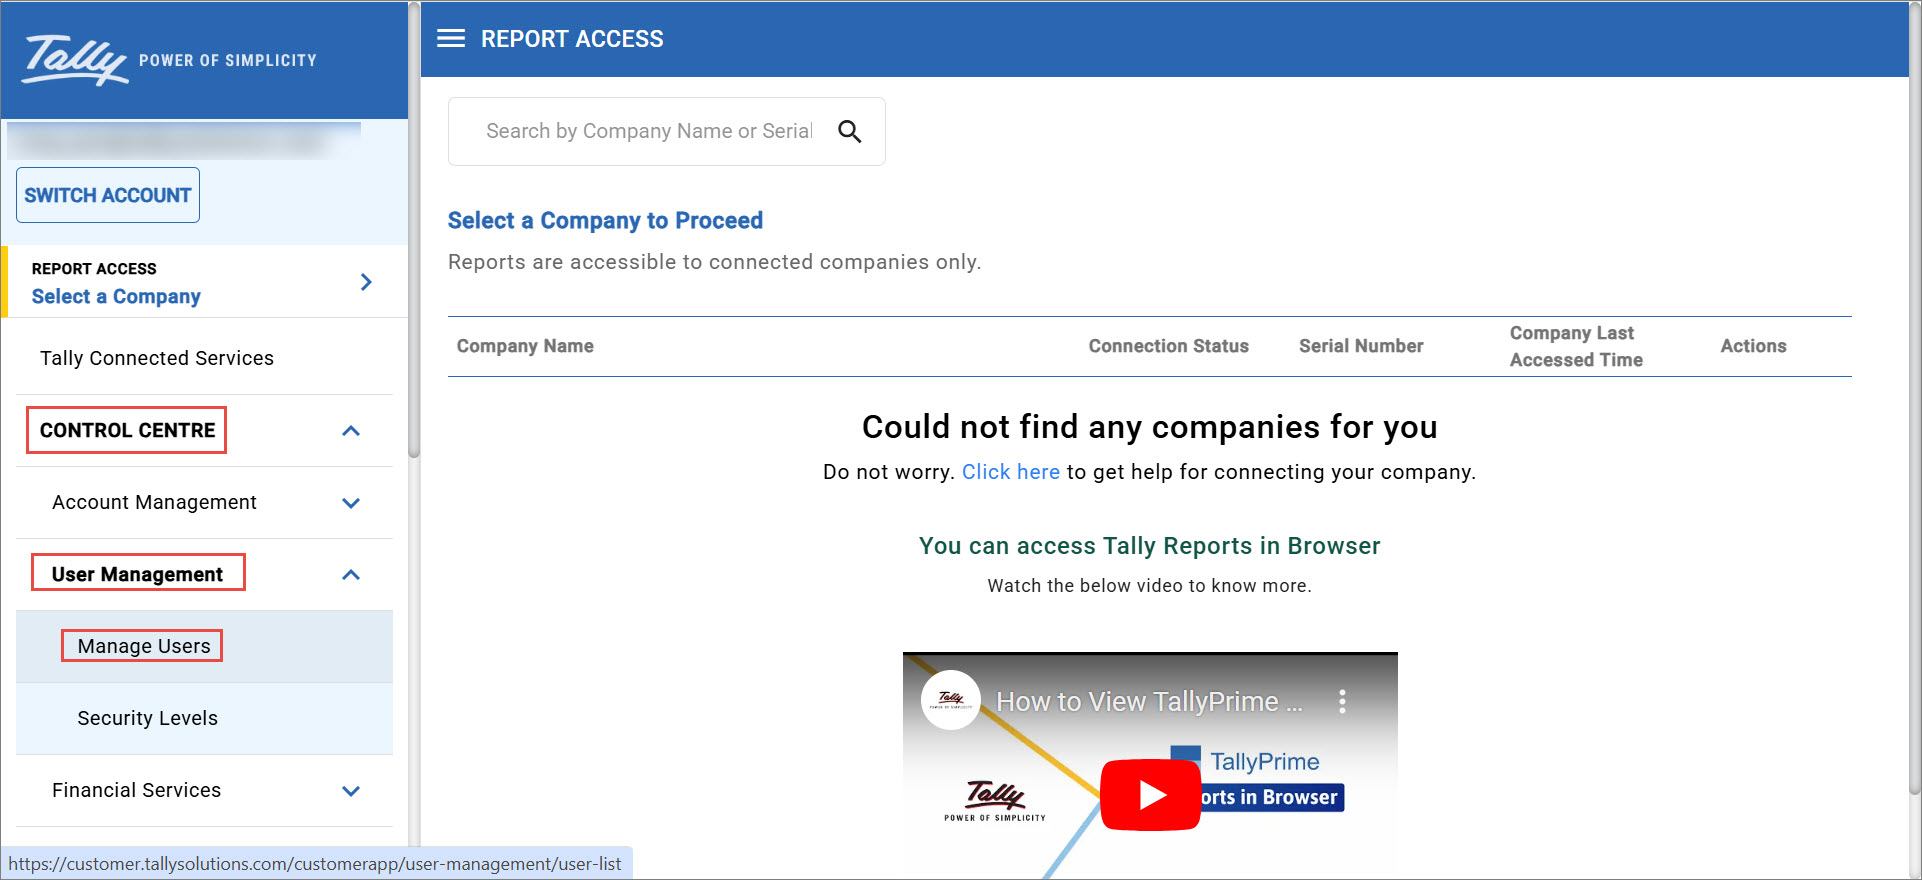
- Under E-invoice Status, click 1 Pending on the required user’s row.
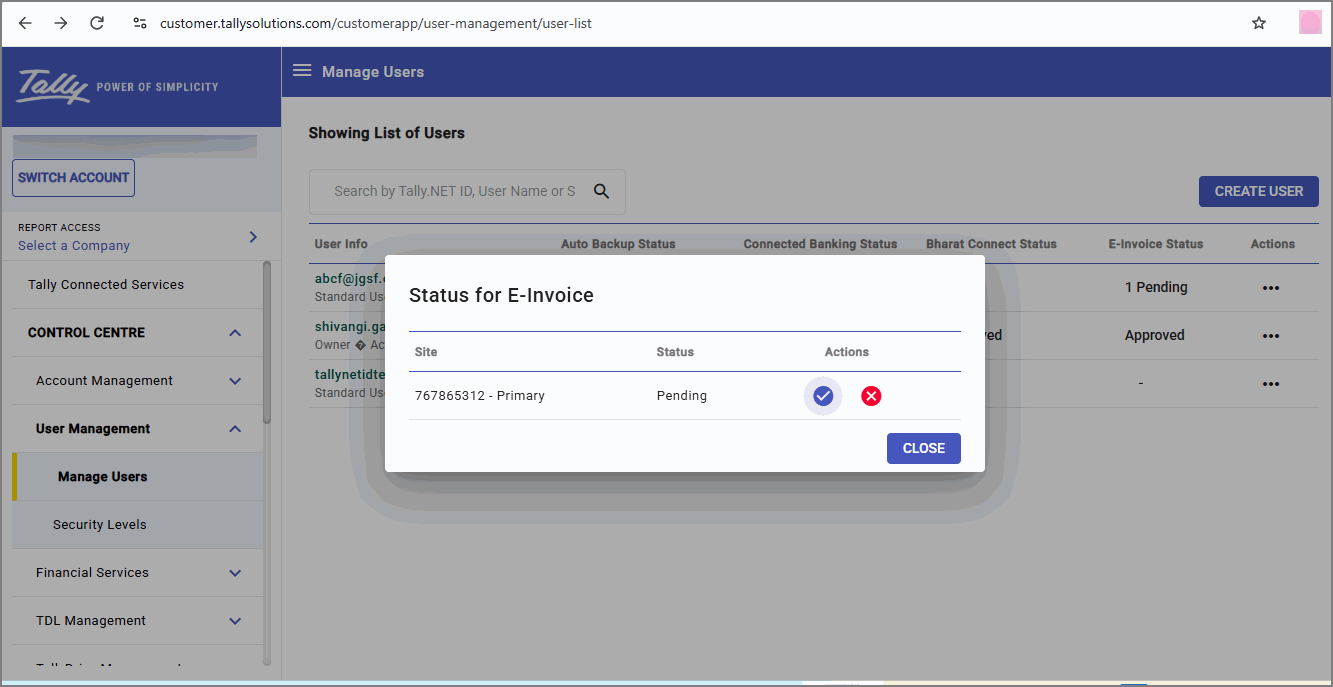
- Click the tick mark icon (✓).
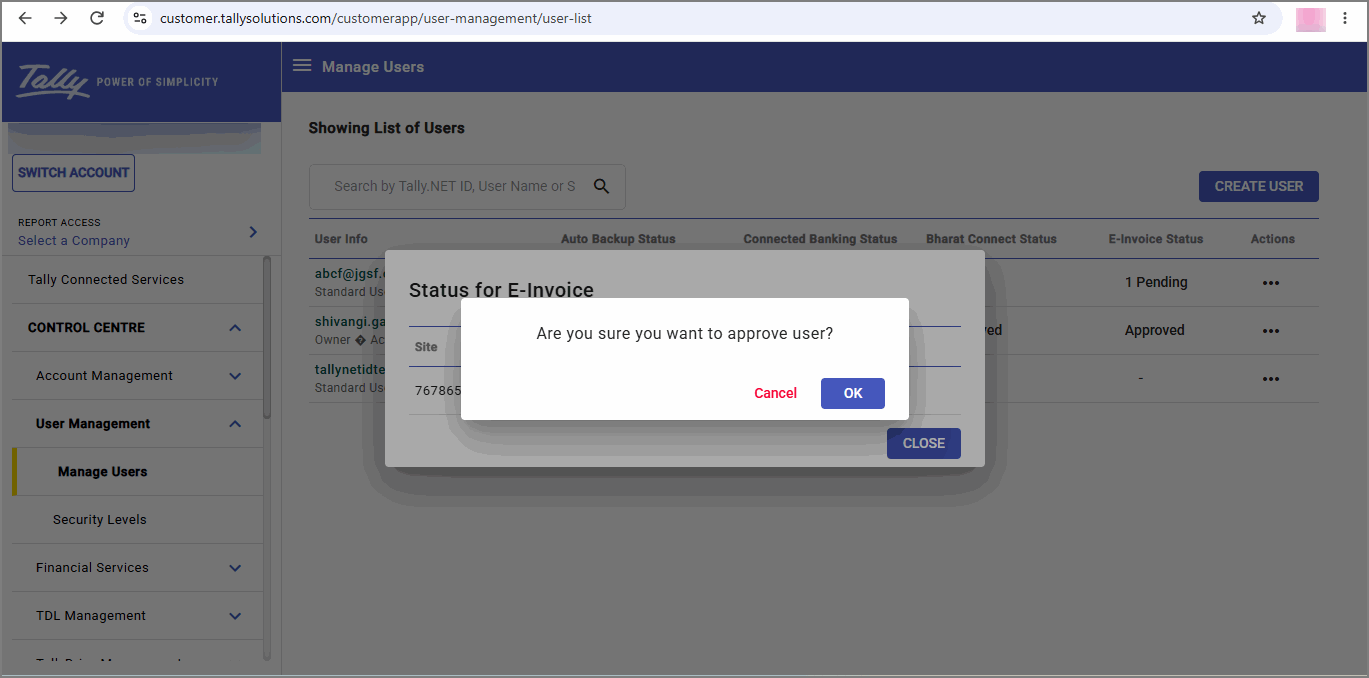
- Click OK.
It takes 10 to 15 minutes for the approved status to be updated in the browser, after which you can use the e-Invoicing services in TallyPrime.
Create User and Approve Access to UAE e-Invoicing on the Portal
- Log in to the Tally Solutions Customer Portal.
- Click CONTROL CENTRE > User Management > Manage Users.
- Click CREATE USER.
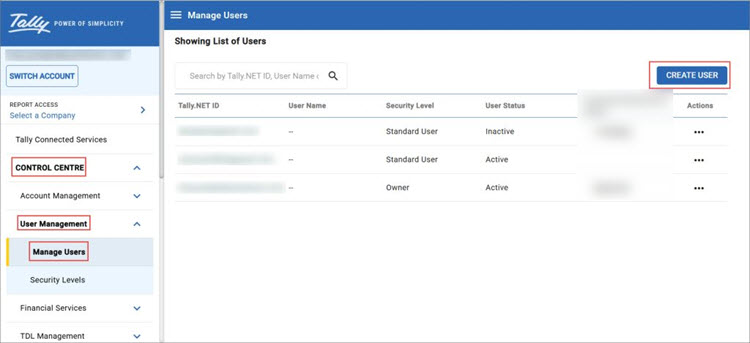
- Select the Security Level, for example, Standard User.
- Enter the e-mail address of the user.
This will be the Tally.NET ID of the user, and the user will receive a temporary password in the same e-mail address. - Click the Enable e-Invoice Services check box.
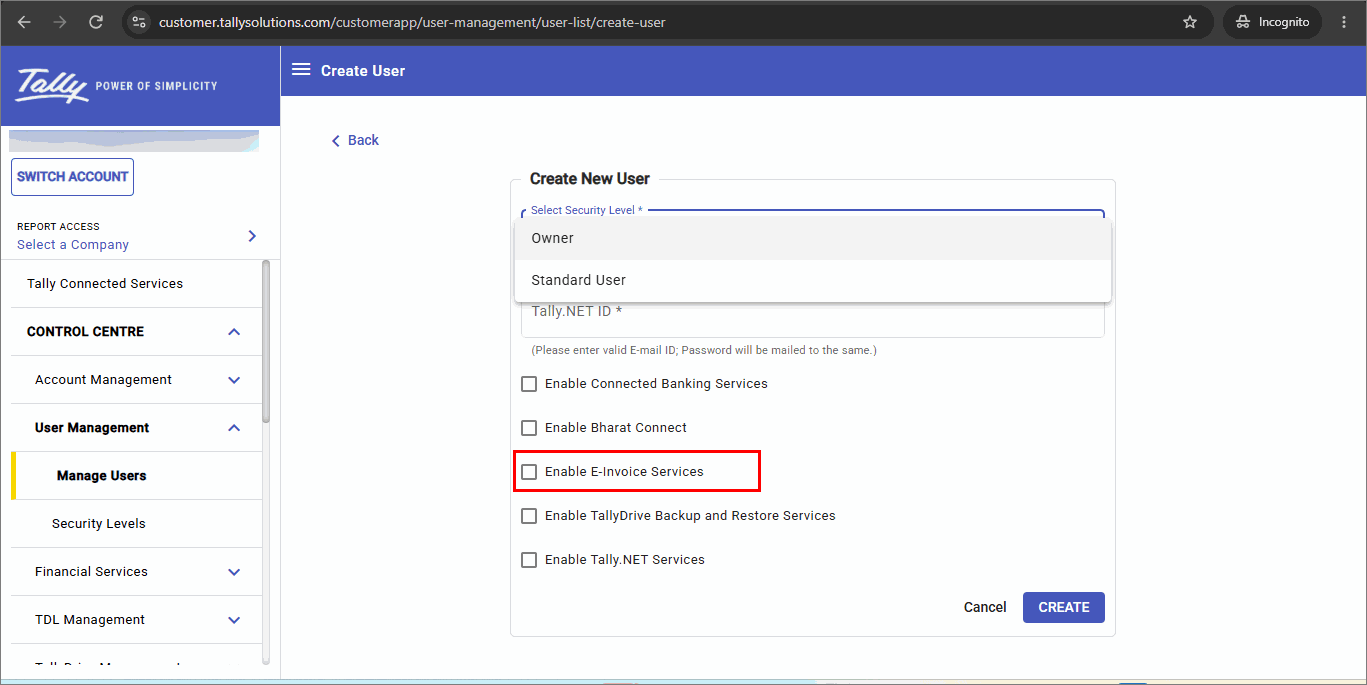
- Click CREATE.
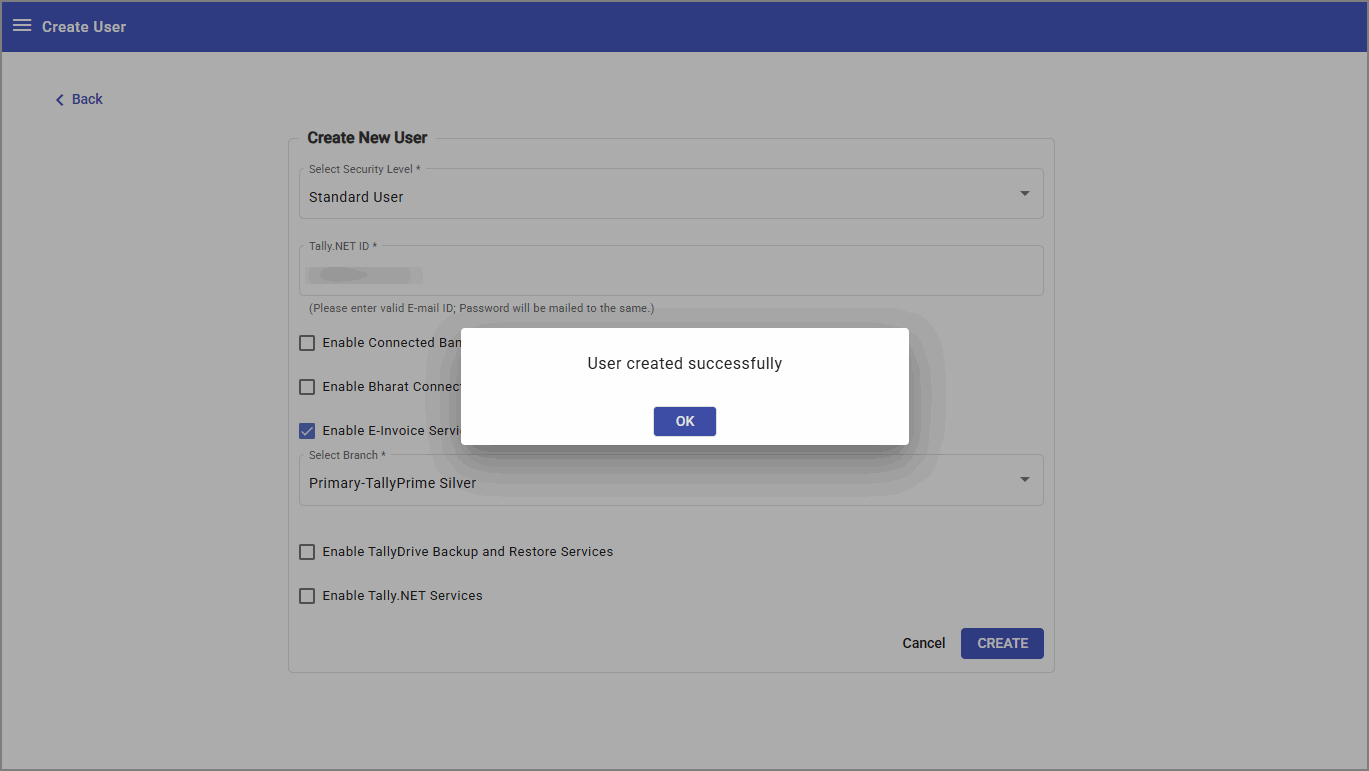
- Click OK to confirm.
As a result, the user gets created with UAE e-Invoicing approval.