
Reconciling your GSTR-1 ensures that the data on the GST portal matches your company books, helping you identify differences early and maintain accurate returns.
In TallyPrime, you can get GSTR-1 data into the reconciliation report in two ways – by downloading the data directly from the GST portal or by manually importing the GSTR-1 data. Once the data is available in the GSTR-1 Reconciliation report, you can compare it with your books and reconcile the transactions as needed.
![]()
If you are on a previous release of TallyPrime, click here to know more about GSTR-1 Reconciliation.
- Gateway of Tally > Display More Reports > Statutory Reports > GST Reports> GSTR-1.
Alternatively, press Alt+G (Go To) > type or select GSTR-1 > and press Enter. - Press Ctrl+H (Change View) > Status Reconciliation. The Status Reconciliation screen appears as shown below:
Voucher Count: Displays the total count of vouchers under the particular table for the reporting period.
Activity Status
- To Be Uploaded: Displays the number of vouchers yet to be exported. The count vouchers that are not yet exported to GSTR-1 return file are displayed in this column.
- Uploaded: Displays the number of vouchers exported. This column is automatically updated when a voucher is exported to GSTR-1 return file.
- Rejected by GST: Displays the count of vouchers marked as Rejected by GST. You can mark the voucher status as rejected when GST rejects the voucher for reasons such as, duplicate invoice, reference of original transaction is not found in case of debit/credit note, GSTIN of any user being suspended, and so on.
- Accepted: Displays the count of vouchers marked as Accepted. You can mark the status as accepted when input tax claim made by the buyer in the GSTR-1A.
- Rejected: Displays the count of vouchers marked as Rejected. You can mark the status as rejected when the buyer rejects the voucher details as displayed in the GSTR-1A.
Reconciliation Status
Not Reconciled: Displays the count of vouchers marked as Not Reconciled. You can mark the status as Not Reconciled when the details in the online portal do not match with your books.
Reconciled: Displays the count of vouchers marked as Reconciled. You can mark the status as Reconciled when the details in the online portal match with your books
Set Status
- Drill down from any table to view the voucher register with list of vouchers and change the status of the voucher.
- The voucher register displayed on drill down from a table in Status Reconciliation screen appears as shown below:
- Select a voucher or multiple vouchers using Spacebar.
- Press Alt+S (Set Status).
- Select the Activity status and Reconciliation status of the voucher based on the details in the GST portal and press Enter.
The status change based on the status set for each transaction, is displayed in the Voucher Register. Press Alt+F5 (Detailed) to view the reason provided for the status Rejected by GST.
- Press Esc to return to the Status Reconciliation screen. The voucher count in columns is changed based on the status updates.
Status-wise View
You can view the status reconciliation in the status-wise view.
- Press F8 (Status-wise View) in the Status Reconciliation screen.
F12 (Configure)
Show uncertain transactions: Enable this option to view the number vouchers that are not included in the returns due to incomplete information or mismatch. This voucher count is displayed at the bottom of the Status Reconciliation screen.
Directly Download GSTR-1 from TallyPrime
This method best suits when you are connected to the portal and want to directly download real-time GSTR-1 data.
- Press Alt+Z (Exchange) > All GST Options > Download GST Returns.
For TallyPrime 5.0 & lower versions, press Alt+Z (Exchange) > Download GST Returns.
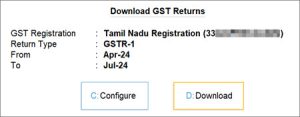
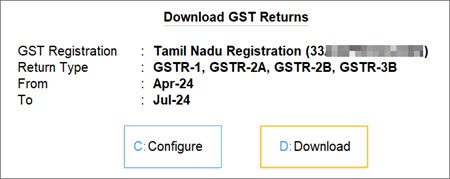
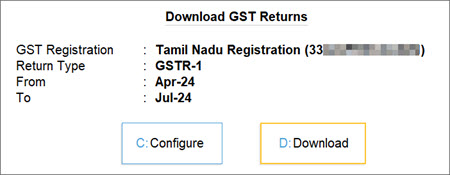
The Download GST Returns screen displays all the Return Types are selected, by default.
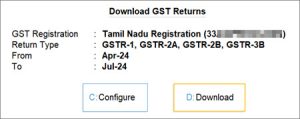
- Press C (Configure) to set the Return Type as GSTR-1 and the Return Period.
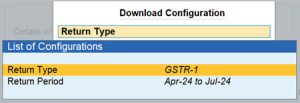
You also have the option to set the default return types for download. - In the Download GST Returns screen, press D (Download).
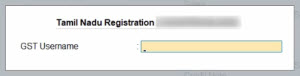
- Log in to your GST profile, if needed.
- Enter your GST Username.
- Enter the OTP received on your registered mobile number, after which your summaries will be exported to the GST portal.
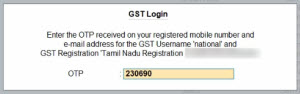
Once you have logged in, the session will be valid for six hours, which will ensure the safety and security of your activities.
- Enter your GST Username.

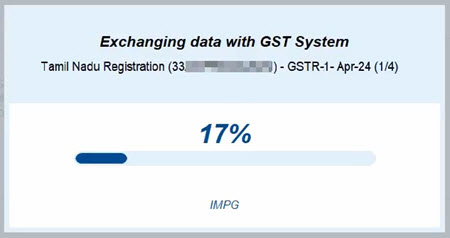
Once GSTR-1 download is initiated, you can easily track the progress.
Once the GSTR-1 data is downloaded from the GST portal, you will receive a confirmation.
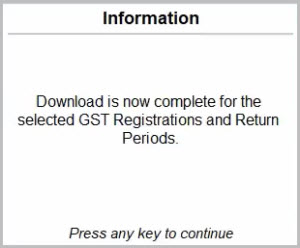
Now you can view the downloaded details in the GSTR-1 Reconciliation report.
Manually Import GSTR-1 Data
This method best suits when you already have the GSTR-1 JSON file downloaded from the portal. Import the JSON file into TallyPrime anytime, even when you are not connected to the Internet.
- Press Alt+O (Import) > GST Returns.
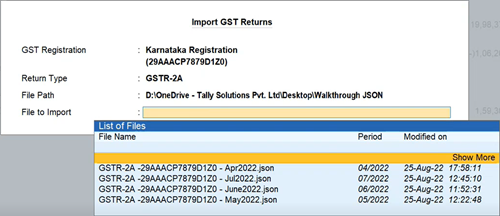
- In the Import GST Returns screen, provide the required details to import the GST details.
- GST Registration: The GST Registration for the company is selected by default. If you have created multiple GST registration for the company, you can select the GST Registration, as needed.
- Return Type: Select GSTR-1.
- File Path: Location of the return file.
- File to import: Select the JSON file that you will import into TallyPrime.
- Press Ctrl+A to save.
The Import Summary displays the number of transactions processed, imported, or failed to import.
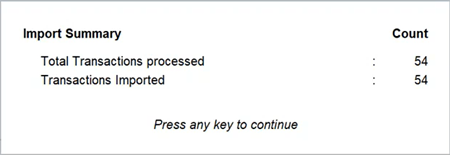
- Press any key to continue.
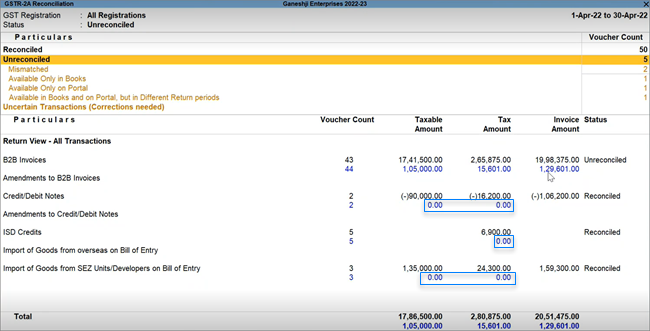
You can see that the imported details will be captured seamlessly in the Total Vouchers section (under Unreconciled) as well as in the Return View section, where the respective values from the portal will be highlighted in blue.
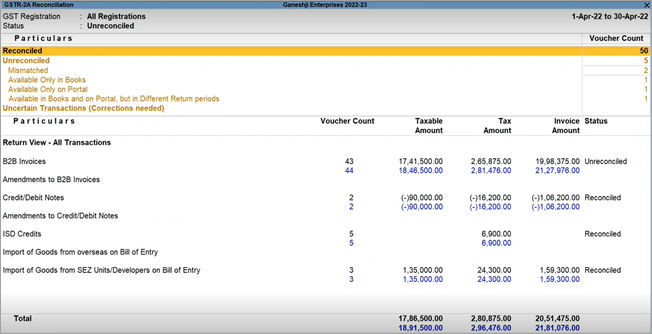
Reconcile GSTR-1 Data
The GSTR-1 Reconciliation report provides a comparison between the data in your Books and the data from the GST portal. Portal values are highlighted for easy identification, and you can drill down to view transaction-level details.
Once you get the GSTR-1 data into the GSTR-1 Reconciliation report, the data appears under the following sections:
Reconciled
Displays transactions that match between your books and the portal. No action is required.
- Drill down further to see the full list of reconciled transactions in the selected period and review them.
Unreconciled
Displays the transactions in GSTR-1 that are yet to be reconciled.
- Drill down further to see the full list of unreconciled transactions in the selected period.
Mismatched
Displays transactions where GST details differ between your books and the portal (for example, Tax Amount or document details).
- Drill down, verify the differences, and update the values or status as needed.
- Press F12 (Configure) to enable additional fields, if needed.
- Press Alt+S (Set GST Status) to mark transactions as Reconciled, if differences are acceptable or update the values in your books to resolve the mismatch.
Available only in Books
Displays transactions present in your books but not on the portal.
- Drill down to see the full list of transactions in the selected period.
- Review these and take necessary action, such as communicating with your party or uploading the transaction.
Available only on Portal
Displays transactions present on the portal but not in your books.
- Drill down to see the full list of transactions in the selected period.
- Press Alt+R (GST Portal View) to view transaction details.
- Record the corresponding transaction in your books.
Once recorded and aligned, the transaction appears as Reconciled.
Available in Books and on Portal, but in Different Return Periods
Displays transactions recorded in different return periods in your books and on the portal.
- Drill down to see the full list of transactions in the selected period.
- Update the GST Return Effective Date to align the periods, by pressing Alt+L (Set Effective Date).
Mismatch in Return periods
This section captures transactions that are present in both your books and on the portal, but in different periods, which leads to issues in reconciliation.
- Drill down to see the full list of transactions in the selected period.
- Press Alt+L (Set Effective Date) to align the return period.
Once updated, the transaction appears as Reconciled.
Excluded, but available on Portal
Displays the transactions that have been excluded from returns, but are present on the portal.
- Drill down to see the full list of transactions excluded from the current return period.


