
Save View of Reports in TallyPrime
If you generally refer to your reports for specific details at regular intervals, you will certainly want to save the report for future reference. For example, you keep a track of the payment dues from different parties or your inward and outward stock quantities with the opening and closing balances. You may even want to compare your Balance Sheet or P&L Statement on a quarterly basis to know how your business is performing. To view these reports with specific details, you will need to configure them each time and this could be really time-consuming at times. The Save View feature in TallyPrime Release 2.0 enables you to save the view of a report the way you want for future reference.
Have questions specific to the feature? Refer to our FAQ page.
Saved views for future reference: In TallyPrime, you can save your preferred configurations for a report so that you can look at the saved view by directly opening it anytime. Additionally, you can save a view for a specific period or even save the master reference that is used to open the report. You can also set your preferred view as the default view. It saves your time from configuring the report every time, yet use the saved views like you would use any other report.
User access to saved views: If other users of the company also need to view the report or update the views with any specific report details, you can manage all of these in TallyPrime Release 2.0. You can not only save views that other users can access from any system, but also set up necessary security controls to allow or disallow updating the views.
Manage saved views: As always, saved views can be used like any other reports in TallyPrime. Open the views from any screen, set any view as default, switch to the original report anytime you wish to, configure and update the views anytime, or simply delete the views that are not needed any more – manage the views the way you want.
Save Views of a Report for Future Reference
In a business, you may often need to refer to specific reports on a regular basis. Additionally, you might be configuring your reports to view specific details as per your needs. However, each time you open the report, configuring it for a specific period or to display specific details could be time-consuming. Starting TallyPrime Release 2.0, you can save the view of a report and refer back to it with the latest details when required. You can create comparative reports and save them. TallyPrime enables you to provide seamless and secure access to your saved view across applications and users.
You can save a view of a report with the following: details enabled or disabled with F12 (Configure) options, columnar options, comparisons using New Column/Auto Column, and other right button bar actions (including, Date, Period Range, Value, and so on).
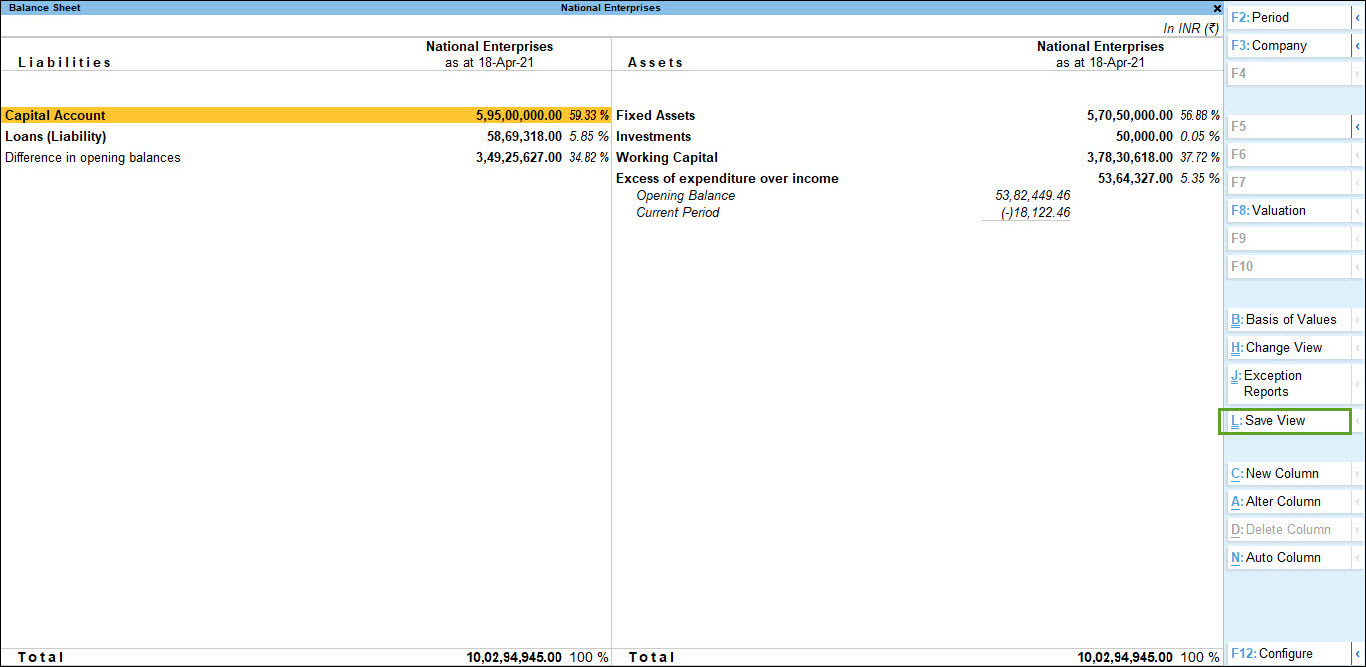
- Open any report, say Balance Sheet. Press Alt+G (Go To) > type or select Balance Sheet > press Enter.
- Configure the report as per your needs.
For example:- F2 (Period) – Set the date for which you want to view the Balance Sheet.
- F12 (Configure) – Set a few configurations if you need.
- Alt+C (New Column) – Add a column with details from different periods, or add a different company to compare the performance, depending on your needs.
- Press Ctrl+L (Save View) to save the view.
- Name – TallyPrime prefills this field with the report name as, for example, Balance Sheet – My View. Change the name as per your convenience.
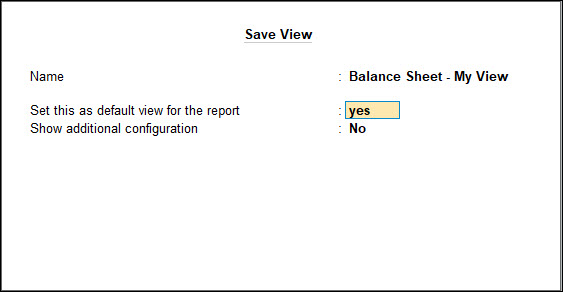
- Set this as default view for the report – Set to Yes, if you want this view to open every time you open the report (Balance Sheet in this case).
Once you have set this, you will still have access to the original report and view it any time. From the saved view, press Ctrl+H (Change View) > select Show Original View. - Set additional configurations, if needed.
If you retain the Show additional configuration option as No, the view will be saved for All Companies (On This Computer) by default.
If you set Show additional Configuration to Yes:
- Save view for: Select All Companies or This Company, as needed.
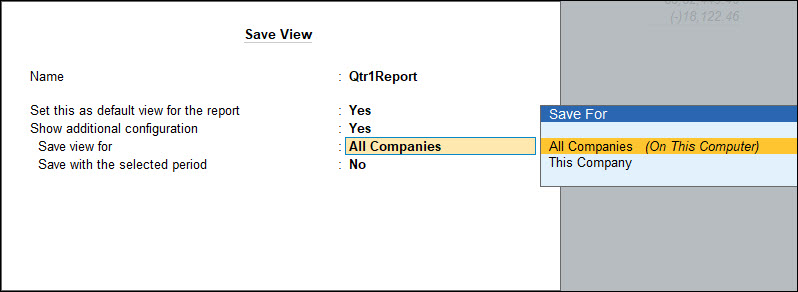
All Companies (On This Computer): Opt for this option, when you want to save the view in the current TallyPrime application folder. Saving a view for all companies by default allows users to access these views from other companies that are loaded in the same application. For example, if you have saved a view of a report in National Enterprises in your computer, when you load another company – say GaneshJi Enterprises – you will be able to access the views saved in National Enterprises.
This Company: You can choose this option, when you want to save a view at the company level so that users across different computers can also access the view. Saving a view at the company level provides the flexibility to easily share data with multiple users, when needed. If you are thinking of the security of such saved views, nothing to worry! You can restrict other users from editing or deleting the views you have saved. That means, other users will only be able to open the saved view and refer to the details in the view, but cannot change the settings.If you are remotely accessing the company, you can save the view of a report only for the All Companies option.
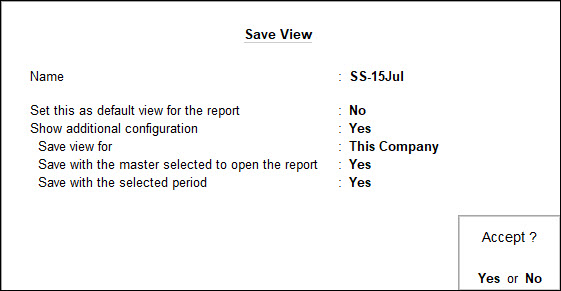
Save with the master selected to open the report: Set to Yes, if you need to refer to reports (such as Outstanding Ledgers, Cash/Bank Books, and so on) that open for a specific master. Next time you open the same report, you will not need to select the master again. Also, the report will display details, including any latest transaction that you might have recorded using that master.This option is available only for reports that display details specific to the selected master.
- Save with the selected period: Set to Yes, if you refer to a report for a specific period – for a date, or quarter, and so on.
Next time you open this report, it will display the latest report details for the saved period, including details of any transaction that you might have recorded within that period.
- Save view for: Select All Companies or This Company, as needed.
- Save the view. As always, press Ctrl+A to save.
The view gets saved with the name that you had provided. You can open the view from Go To or Change View of the original report. Refer to the User Access to Saved Views section for more details.
- Name – TallyPrime prefills this field with the report name as, for example, Balance Sheet – My View. Change the name as per your convenience.
Save comparative views of reports: If you also compare reports with details from different periods or compare reports of multiple companies, you can save such views as well. TallyPrime allows you to save views that contain details of multiple companies by opting for All Companies. Attempting to save such views for This Company will display the following error:
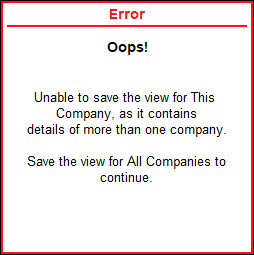
You can save the view for a consolidated report of a group company only under All Companies.
User Access to Saved Views | Save View for All Companies or This Company
On saving a view, users of the company will be able to access such views, by default. However, based on your business practices, if you need to allow/restrict other users from accessing the view, you can do all of that in TallyPrime Release 2.0.
- Open Security Levels for a user. Press Alt+K (Company) > User Roles > select a User Role (for example, Data Entry).
- Make the following settings:
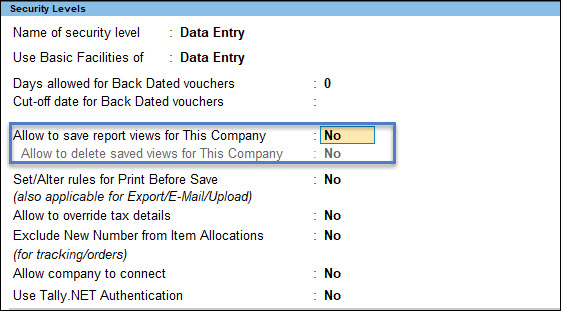
- Allow to save report views for This Company: No – This will automatically set the next option to No. Users can neither save nor delete the existing views saved under This Company.
- Allow to delete saved views for This Company: No – If you want to restrict only deletion of views saved under This Company, retain the previous option as Yes, and set only this option to No.
By default, these options will be set to Yes to enable other users to make configuration changes to the views saved for the company and also delete them.If a user has limited access for a particular report, the same security setting will be applied to the saved view of that report.
- Accept the screen. As always, press Ctrl+A to accept.
Manage Saved Views | Open Views, Set/Alter Default Views, Access Original View, Delete Views
Once you have saved views of different reports based on your needs, you will obviously want to find them easily for quick reference and use. Using TallyPrime Release 2.0, you can open the saved views the same way you open any other report. All your saved views for any report are easily available through the Go To menu. You can open the views saved for a particular report from the Change View option of the respective report. Whether you want to set a view as default or alter the same, all of these are possible on the fly.
In this section
- Open saved views
- Set/alter default views
- Show the original view
- Alter details of a view
- Delete saved views
Open saved views
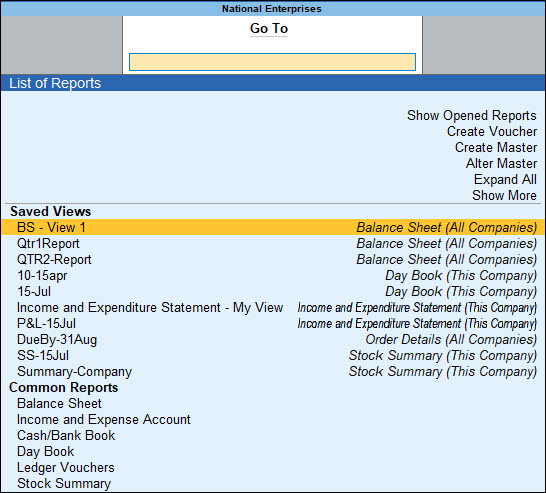
- Open saved views from Alt+G (Go To).
All the views saved for All Companies or This Company will be listed under Saved Views.
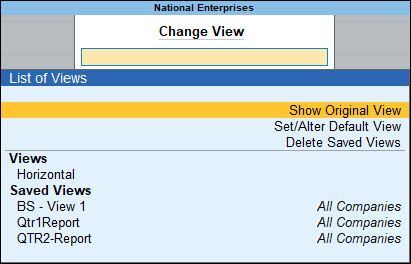
- Open saved views from Change View.
From a report that you had used to save views, press Ctrl+H (Change View) > under Saved Views, select the view that you need to open.
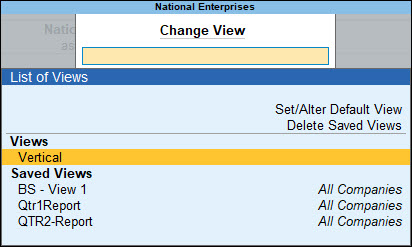
The list of views appearing under Saved Views will display whether the view is saved for All Companies or This Company.
- Open a view saved as default.
While saving a view for a report (say Balance Sheet), set the option Set this as default view for the report as Yes. Next time, when you select Balance Sheet from Gateway of Tally or Go To, the view that you had set as default for Balance Sheet will be displayed instantly.
If you had saved a view by comparing details of a report from multiple companies, you can open such a view the same way. However, you will need to load all the companies that you had added to a specific view before saving.
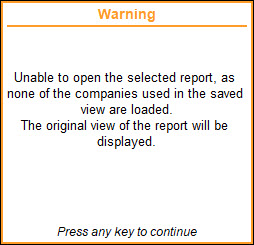
- If none of the companies that were used for saving a view is loaded, the following warning appears:
- If one or more companies are not loaded while you attempt to open a saved view, the following warning message appears:
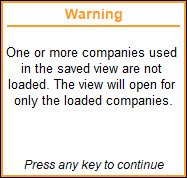
On pressing any key, the view will open and display details of the companies that are loaded in your application.
Set/alter default views
Once you have saved the views of a report, you can set a view as default so that every time you open that report, the view is available for your quick reference.
When you save a view of a report, you may or may not set it as the default for the report. In case, you did not set any view as default, no worries!
- Open the original report from Go To or Gateway of Tally.
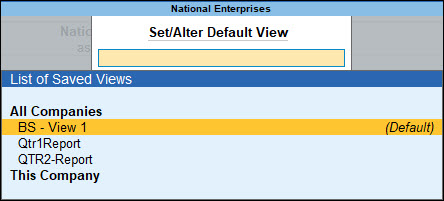
- Press Ctrl+H (Change View) > select Set/Alter Default View.
- Select one of the saved views and press Enter. The selected view is set as default.
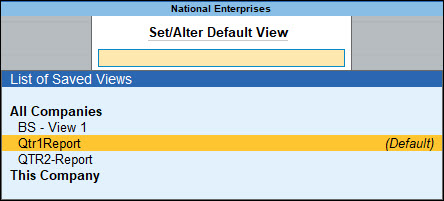
Next time you create another view of the same report and want the view to be the default, select the view and press Enter. The existing default setting will be removed from the earlier view and applied to the selected view.
If you have saved views under both This Company and All Companies, you can set a view as default from each of these. In this case, the view saved under All Companies takes precedence. That means, next time you open the report, the view saved under All Companies and set as default will be displayed.
If you have already set a default view, but you do not want it to be the default any more:
- Open the original report from Go To or Gateway of Tally.
- Press Ctrl+H (Change View) > select Set/Alter Default View.
- Select the view from the list and press Enter.
The report will no more be the default.
Show the original view
Although you might have saved views of a report, you may need the original report for real-time information. Using TallyPrime Rel 2.0, you can easily switch from a saved view to the original view of a report.
- If you have opened a saved view, press Ctrl+H (Change View) > select Show Original View > press Enter.
The original report will be displayed.
Alter details of a view
Altering your saved views is really easy. Whether you are viewing the original report or the saved view, you can make necessary changes and either save as a new view or override the existing view.
- To save as a different view with the changes needs, from the original report or the saved view, press Ctrl+L (Save View) > provide a different Name > and press Ctrl+A.
- To override an existing view, from the original report or the saved view, press Ctrl+L (Save View) > ensure to provide the Name of the existing view > and press Ctrl+A.
Delete saved views
While saved views are good for quick references by you or other users at any point, some of these views may not be needed any more after a certain period. In such cases, you can choose to delete the views, irrespective of whether they are saved in All Companies or This Company.
From the report for which you have saved views:
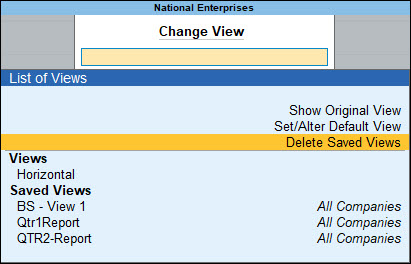
- Press Ctrl+H (Change View) > select Deleted Saved Views.
This lists the views available under All Companies and This Company.
- Select the view that you want to delete. Press Enter or Y to confirm deletion.
If you want to delete all the views that are saved under All Companies or This Company, from anywhere in TallyPrime:
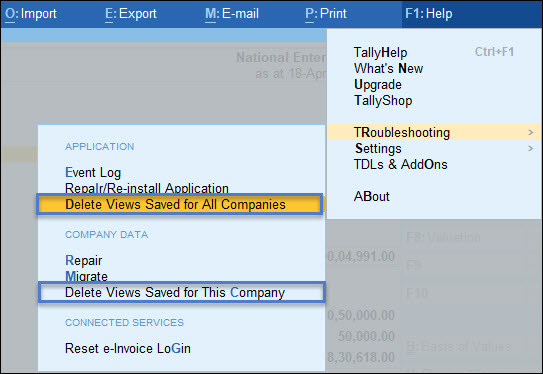
- Press F1 (Help) > Troubleshooting.
- Select the following, depending on the views you want to delete:
- Application > Delete Views Saved for All Companies
- Company Data > Delete Views Saved for This Company
In this case, you can select the company from Go To, for which you want to perform the action.
- Press Enter or Y to confirm deletion.
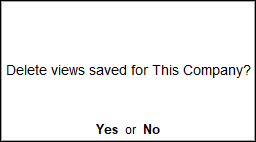
Since this step will delete all your saved views permanently, TallyPrime prompts you to reconfirm. - Are you sure? Press Enter or Y to reconfirm.
Using the Save View feature in TallyPrime Release 2.0 you can not only refer to the saved views with the updated details, but also save your time from configuring the reports time and again.


