Reconcile GSTR-2B Data in TallyPrime
GSTR-2B is a reconciliation report automatically generated based on the your suppliers’ filed returns including GSTR-1, GSTR-5, or GSTR-6 after the due date. Unlike GSTR-2A, GSTR-2B is static for a return period once generated.
In TallyPrime, you can download or import GSTR-2B data, reconcile it with your books, and resolve differences including mismatches in values, return periods, and document numbers.

- To download GSTR-2B data from the portal.
- Log in to the GST portal from TallyPrime using your credentials.
- Set default return types and GST registrations for download, if required.
- To manually import data:
- Download the GSTR-2B data file in the required (Excel or JSON) format in your system.
Directly Download GSTR-2B Data from Portal into TallyPrime
- Press Alt+Z (Exchange) > All GST Options > Download GST Returns.
The Download GST Returns screen displays all return types selected by default.
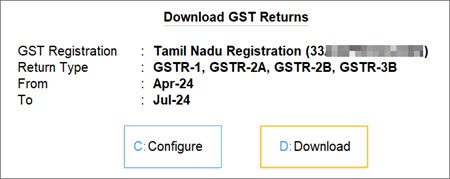
For TallyPrime 4.1 or earlier, press Alt+Z (Exchange) > Download GST Returns.
You can also set default return types and GST registrations for download. - Press C (Configure).
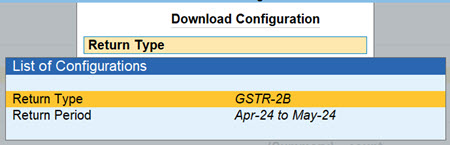
- Set Return Type as GSTR-2B and set the Return Period.
- Press D (Download).
- If not already logged in, enter your GST Username and the OTP received on your registered mobile number.
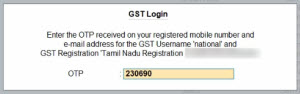
The session will be valid for six hours, which will ensure the safety and security of your activities.
Once the download is complete, you will receive a confirmation. The GSTR-2B data will be available in the GSTR-2B Reconciliation report.
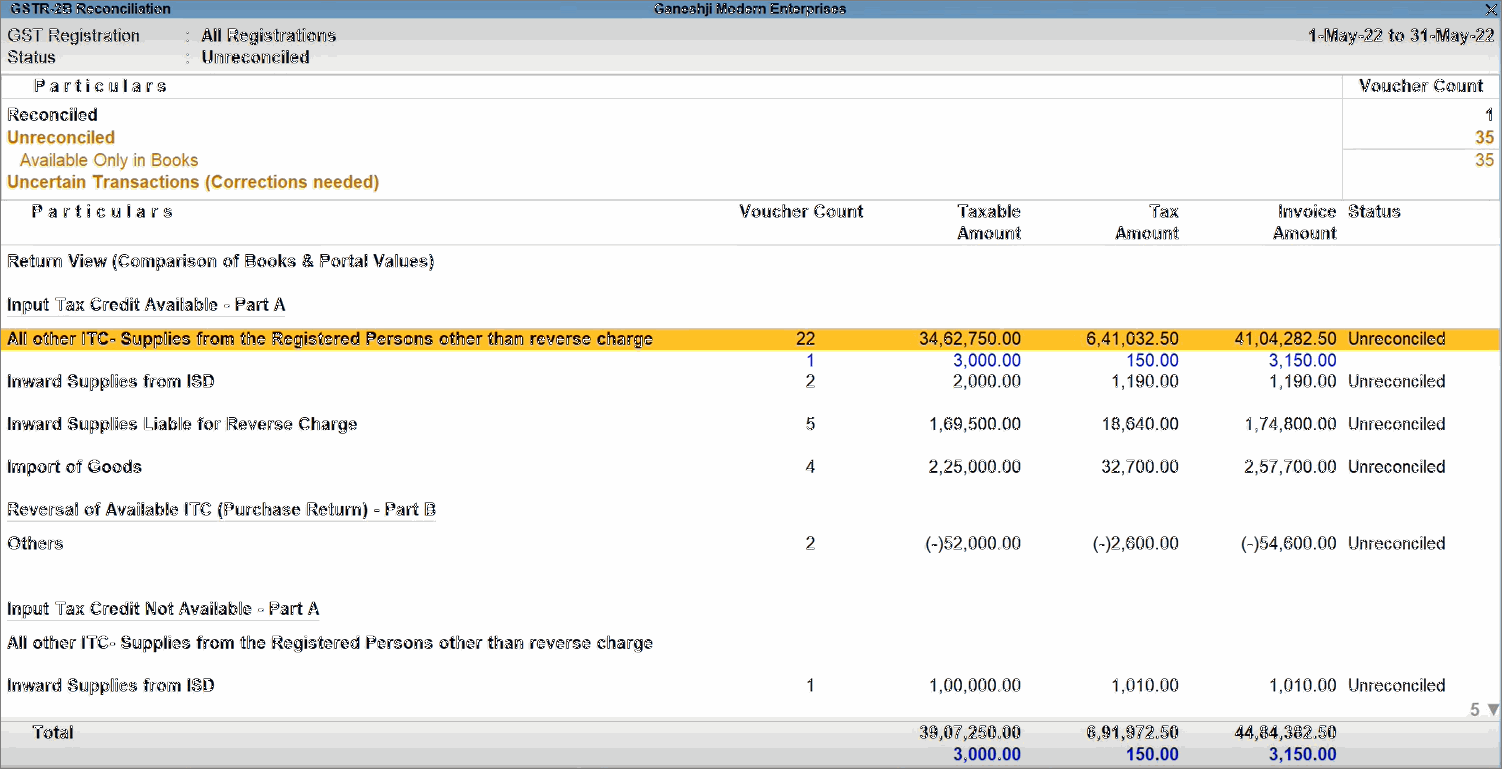
You can also re-download any previously downloaded returns. The latest downloads will replace the existing versions.
Manually Import GSTR-2B Data into TallyPrime
- Press Alt + O (Import) > GST Returns.
- On the Import GST Returns screen,
- GST Registration: It will be selected by default.
In case of multiple GST registrations, select the required one. - Return Type: Select GSTR-2B.
- File Path: Select the path where the downloaded GSTR-2B file from GST portal is located.
- File to Import: Select the GSTR-2B file to be imported.
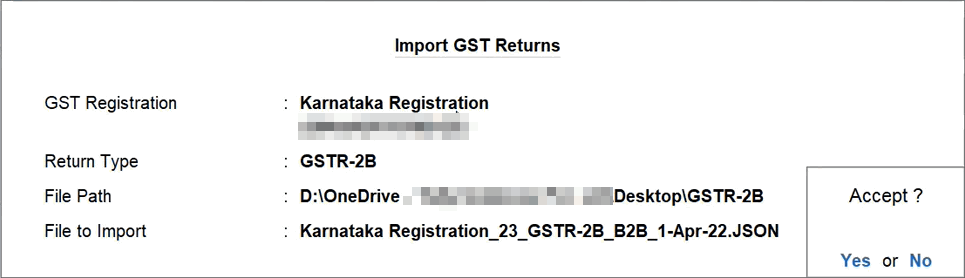
- GST Registration: It will be selected by default.
- Press Ctrl+A to accept.
The Import Summary screen displays the number of transactions processed, imported, and failed.
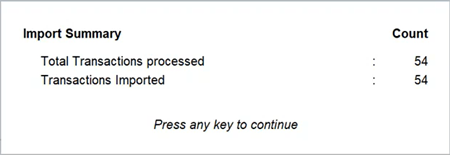
The GSTR-2B data will be available in the GSTR-2B Reconciliation report.
Reconcile GSTR-2B
Open the GSTR-2B Reconciliation report to view your transactions categorised by reconciliation status. You can also view and reconcile transactions under Potential Matches, where the Taxable Amount and Tax Amount match, but one detail, such as the Section, GSTIN, or Document Number, differs.
- Press Alt+G (Go To) > type and select GSTR-2B Reconciliation.
All the pending activities will be highlighted in amber colour, while the values from the portal will be presented in blue colour for easy identification.
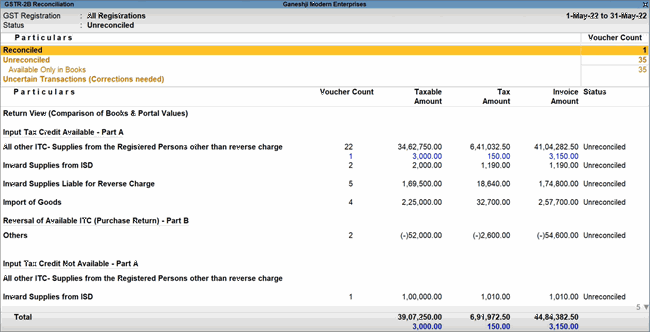
The Reconciliation Statistics section will display the following sections, based on your actions and transactions.
- Reconciled
- Unreconciled
- Mismatched
- Available Only in Books
- Available Only on Portal
- Mismatch in Return Period
- Excluded, but available on Portal
- Uncertain Transactions (Corrections needed)
- Invoices Rejected in IMS
The Return View section is your personal map of the GSTN portal. Every section or table in Form GSTR-2B is faithfully represented in this section, so that you can conveniently view and compare the values.
You can drill down from any of the above sections for a more detailed view of the status of reconciliation and reconcile the transactions.
Before reconciling transactions, you can configure company GST Details to automate reconciliation. For example, you can enable auto-reconciliation for differences in taxable amount, round-off values, and TDS/TCS amounts.
Step 1: Configure your GSTR-2B as needed before Reconciliation
- If you have multiple GST registrations, the report shows consolidated data for all registrations by default. Press F3 (Company/Tax Registration) > select the required company or registration.
- Press Ctrl+B (Basis of Values) > and set the option Show report details based on as required, to view transactions based on the reconciliation status.
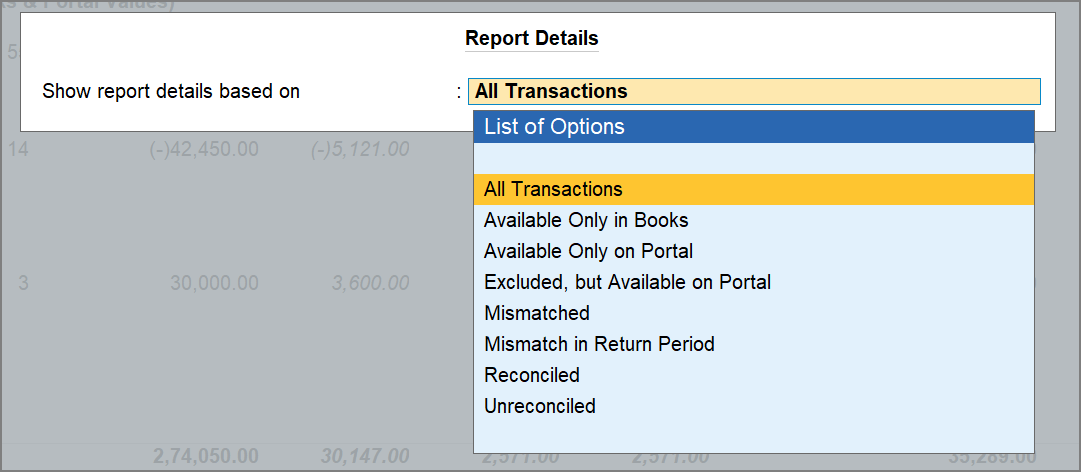
- Press Ctrl+H (Change View) to view the report as per the Reconciliation Statistics or Voucher Statistics view.
- To view the potential matches in the GSTR-2A Reconciliation report, press F12 (Configure) > enable Show potential matches between Books and Portal.
- Press F12 (Configure) and enable the option Show Reconciliation Status to view the GST Status column for each party.
Step 2: Drill down from any of the Unreconciled party
You can view transactions as per the following categories:
- Mismatched
- Mismatch in Return Period
- Available only on Portal
Step 3: Reconcile transactions
Reconcile Mismatched transactions
This section displays transactions where GST details such as Tax Amount or voucher number differ between your books and the portal.
- Under the Mismatched section, drill down from the required transaction.
- For minor differences such as rounding off, press Alt+S (Set GST Status) > set status as Reconciled.
You can also review the differences and update your books manually, if required.
The transaction moves to the Reconciled section.
Reconcile transactions with Mismatch in Return Period
This section displays transactions with difference in Return period between books and portal. For example, if your supplier invoiced in a different month than when you received the supply.
- Under the Mismatch in Return Period section, drill down from the required transaction.
- Select the transaction and press Alt+L (Set Effective Date).
- Update the GST Return Effective Date to match your supplier’s return period.
The transaction moves to the Reconciled section.
Reconcile transactions Available only on Portal
This section displays transactions present in your supplier’s GSTR-2A on the portal but not recorded in your books.
- Under the Available Only on Portal section, drill down from the required section.
- Press Alt+R (GST Portal View) to view the full details.
- Note the necessary invoice details and record the corresponding entry in your books.
Once recorded, the transaction moves to the Reconciled section.
Exclude transactions Available Only on Portal
If a transaction on the portal is not relevant for your books, for example, a supplier has entered your GSTIN by mistake, you can exclude it.
- Press Alt+G (Go To) > GSTR-2B Reconciliation.
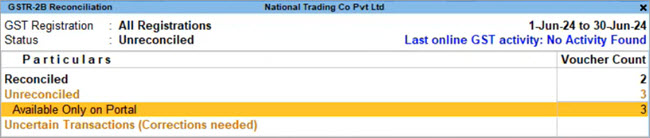
- Under the Unreconciled section, drill down from the Available Only on Portal section.
- Select the transaction and press Alt+S (Set GST Status) > set Status of Return as Excluded.
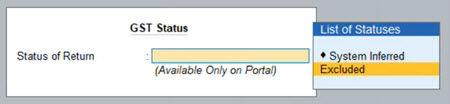
The transaction moves to the Excluded Portal Transactions section.
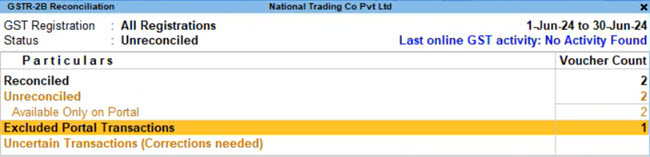
In case you want to restore it, press Alt+S (Set GST Status) > set status to System Inferred. The transaction will move back to Available Only on Portal.
Resolve Potential matches (Excluding Section)
This section displays transactions with matching detail, except the Section. For example, a transaction appearing as B2B in your books but as CDNR on the portal.
- Under Potential matches (Excluding Section), drill down from the required transaction.

- Press Alt+F10 (Other Vouchers) > select the correct voucher type, for example, Credit Note.
- Enable Provide GST Details > enter the Reason for Issuing Note, Supplier’s Debit/Credit Note No., and Date.

- Press Ctrl+A to save the voucher.
The transaction will move to the Reconciled section.
Resolve Potential matches (Excluding Party GSTIN/UIN)
This section displays transactions with matching details, except the party’s GSTIN/UIN. For example, a typing error where O is used instead of 0.
- Under Potential matches (Excluding Party GSTIN/UIN), drill down from the required transaction.

- Press Ctrl+Enter on the party name to open the party master.
- Update the GSTIN/UIN in the Party Details of the transaction.
- Press Ctrl+A to save the voucher.
The transaction will move to the Reconciled section.
Resolve Potential matches (Excluding Doc No.)
This section displays transactions with matching details, except the Doc No. or Vch No.. For example, MC/233 in your books versus MC/2333 on the portal.
- Under Potential Matches (Excluding Doc No.), select the transaction and press Alt+W (Copy Doc No. & Date).

To update multiple transactions at once, select them using Spacebar. - Press Enter to confirm.
For Release 4.1 and earlier, drill down from the voucher and update the voucher number.

The transaction will move to the Reconciled section.
Recompute GSTR-2B
You may need to recompute GSTR-2B when changes affect ITC availability. For example by rejecting or pending invoices in IMS, reversing ITC, modifying purchase invoices, or changing the GSTR Effective Date. Also, an error during GSTR-3B upload will prompt you to recompute.
- Press Alt+Z (Exchange) > All GST Options > Recompute GSTR-2B.
- In Recompute GSTR-2B Configuration, select the required GST Registration and press Enter.
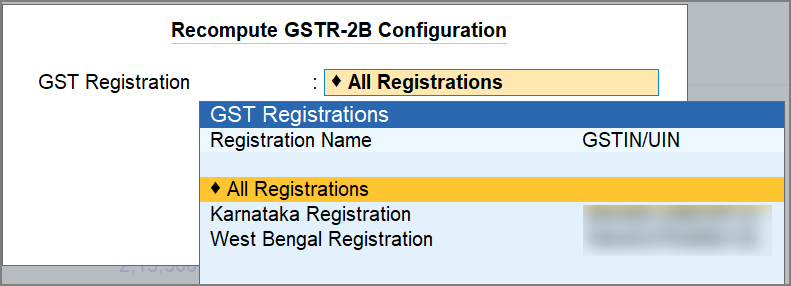
- Press C (Configure) to change the Return Period, if required.
The return period is prefilled based on the upcoming GSTR-3B filing date. - Press R (Recompute).
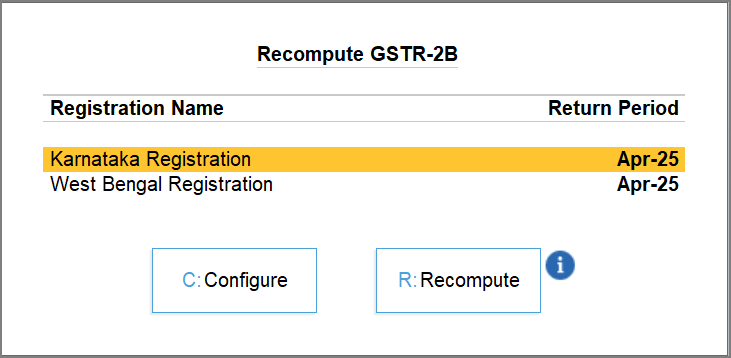
Once successful, you will receive a confirmation message. You can check the Online GST Activity Tracker report for real-time status. Download GSTR-2B after recomputing to view the latest data.
Export GSTR-2B to Excel as per the old GSTR-2 format
In TallyPrime Release 5.0 onwards, you can export the GSTR-2B report to Excel as per the old GSTR-2 format.
- Press Alt+E (Export) > Current > F8 (File Format).
- Select Excel (Spreadsheet) as the File Format and set the option As per old format (GSTR-2) to Yes.
The report will be exported in the GSTR-2 format.
Questions and Answers
How can I view the trade name of a party available only on the GST portal?
In the Available Only on Portal section, if the party ledger does not exist in your books, the party name appears in italics. Press Alt+R (Portal View) to view details such as the Trade Name and Place of Supply. You can use these details to create the party ledger or exclude the transaction if it is not relevant.