Upload GSTR-1 Using IFF (for QRMP Dealers)
If you have opted for the Quarterly Return Filing and Monthly Payment of Taxes (QRMP) scheme and prefer filing through the GST portal, you can export the required section-wise JSON files from TallyPrime and upload them directly using the Invoice Furnishing Facility (IFF) for the first two months, and GSTR-1 (Quarterly) for the third month.
You can upload selected or all applicable transactions, track their status, and handle rejections—all within TallyPrime.

-
Enable QRMP for your GST registration.
-
Press F11 (Company Features) > Goods and Services Tax (GST).
-
Set Periodicity to Quarterly.
-
Set Enable IFF / Online Upload for QRMP to Yes.
-
-
Resolve all exceptions and conflicts in GSTR-1.
-
Enable API access on the GST portal.
-
Log in to the GST Portal and connect via TallyPrime.
Upload GSTR-1 Using IFF Directly from TallyPrime
- Press Alt+G (Go To) > GSTR-1.
- Press F2 (Period) and select the required month or quarter.
- Press Alt+Z (Exchange) > Upload GST Returns > GSTR-1.
- Press F12 (Configure) and enable Consider Report Period instead of Return Filing Period for Online Upload (for QRMP/IFF).
- Select the required vouchers (or upload all applicable vouchers).
- Press S (Send).
- Log in to the GST portal, if needed.
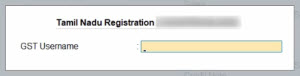
- Enter your GST Username.
- Enter the OTP sent to the mobile number registered on the portal.
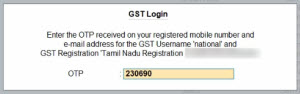
Once you have logged in, the session will be valid for six hours, which ensures the safety and security of your activities.
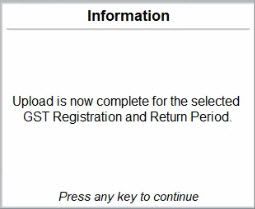
Once uploaded, a confirmation message appears.
- Enter your GST Username.
The uploaded vouchers move to the No Action Required section.
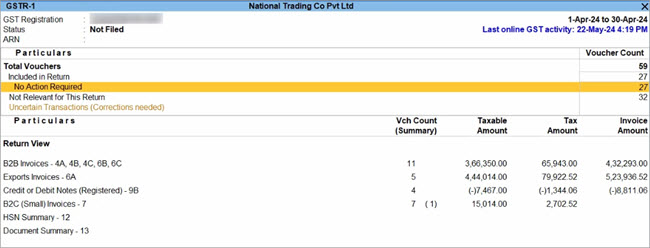
Based on your recent activities, you can always see your last online GST activity in the top right corner of the report.
Upload GSTR-1 for QRMP Using the JSON File
You can export the required section-wise JSON files from TallyPrime and upload them to IFF or GSTR-1 (Quarterly) on the GST portal.
Step 1: Export GSTR-1 for Manual Upload
If you prefer filing through the GST portal, you can export section-wise JSON files from TallyPrime.
For the first two months of a quarter, export only the following sections:
- B2B Invoices (4A, 4B, 4C, 6B, 6C)
- Credit/Debit Notes (Registered) (9B – CDNR)
- Amended B2B Invoices (9A – B2BA)
- Amended Credit/Debit Notes (Registered) (9C – CDNRA)
In the third month:
- Export B2B invoices and CDNR for that month.
- Export all remaining sections for the entire quarter.
- Press Alt+G (Go To) > GSTR-1.
- Press F2 (Period) and select the required month or quarter.
- Press Alt+E (Export) > GST Returns > GSTR-1.
- Press F12 (Configure) and enable Show Section.
- Select the required sections.
- Press X (Export).
- Select JSON (Data Interchange) as the File Format.
- Enable Export Separate Files for Each Section, if required.
- Press E (Send).
The section-wise JSON files are saved in the selected folder.
For TallyPrime 1.1.3 and later versions, click here.
Export Separate CSV Files for Each Section of GSTR-1
In TallyPrime Release 1.1.3 and later versions, you can easily export JSON files for different sections under the IFF provision. However, if you are yet to update to the latest version of TallyPrime, you can export section-wise CSV files and then convert them into JSON files using the GST Offline Tool.
- From any screen in TallyPrime, press Alt+E (Export) > GST Returns. The Export GSTR-1 screen will open, where you can select the required period, company, or tax registration.
Note: You can view the report for the required period by pressing F2 (Period). Accordingly, you can export the CSV files for the relevant month or quarter. - Explore and set the required options in Ctrl+B (Basis of Values). For example, based on your business needs, you can choose to either include or exclude the HSN Summary and Document Summary in your exported GSTR-1 data
- Explore and set the required options in F12 (Configure)
- Select the transactions and/or summaries that you want to export to the portal for filing, and press X (Export).
- Select CSV as the File Format, and enable the Export separate files for each Section option.
- Press E (Send) to export.
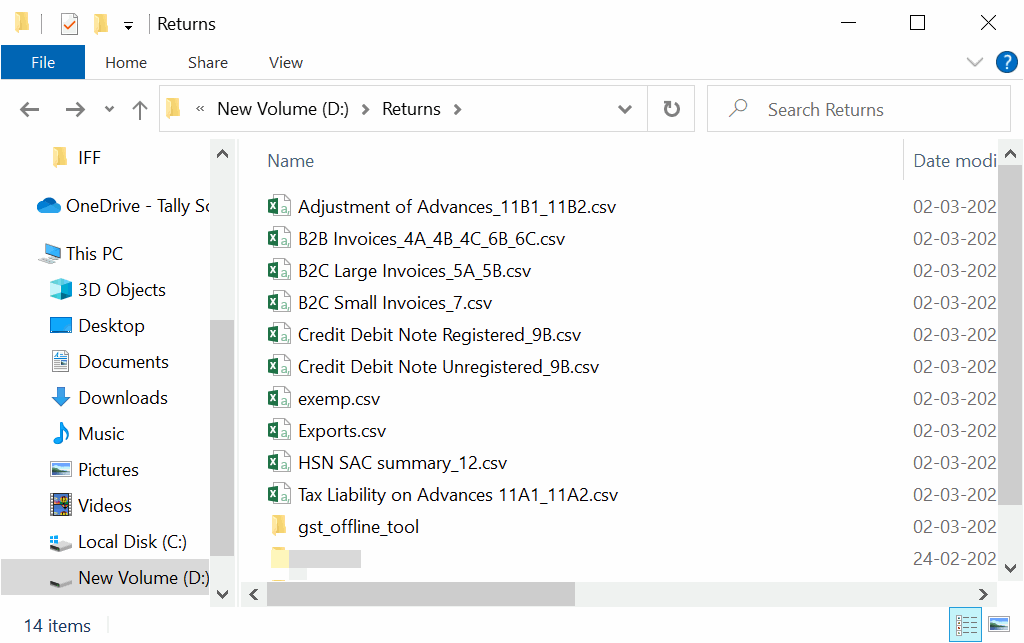
The section-wise CSV files will be saved in the selected Folder Path, which will be automatically opened by TallyPrime. Now you can proceed to upload the files on the GSTR-1 portal.
Convert CSV files into JSON files using GST Offline Tool for IFF
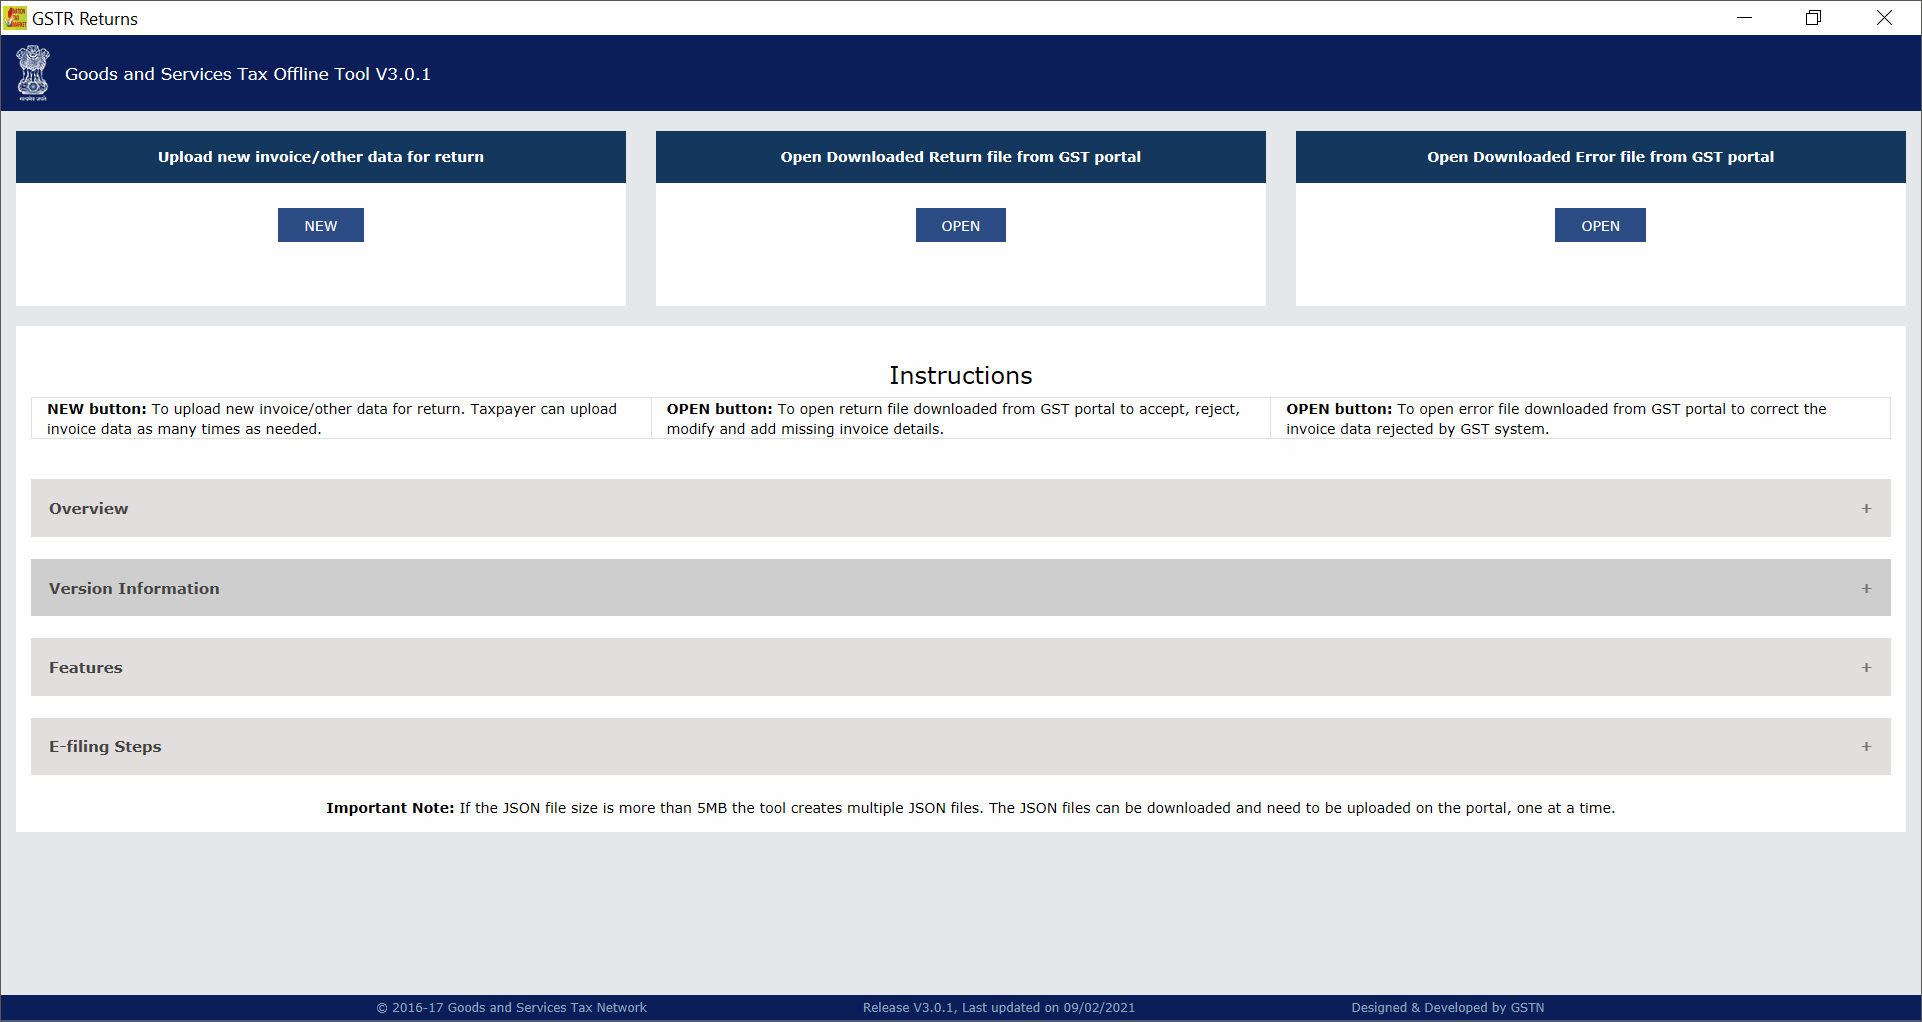
- Open the Goods and Services Tax Offline Tool, and under Upload new invoice/other data for return, click NEW.
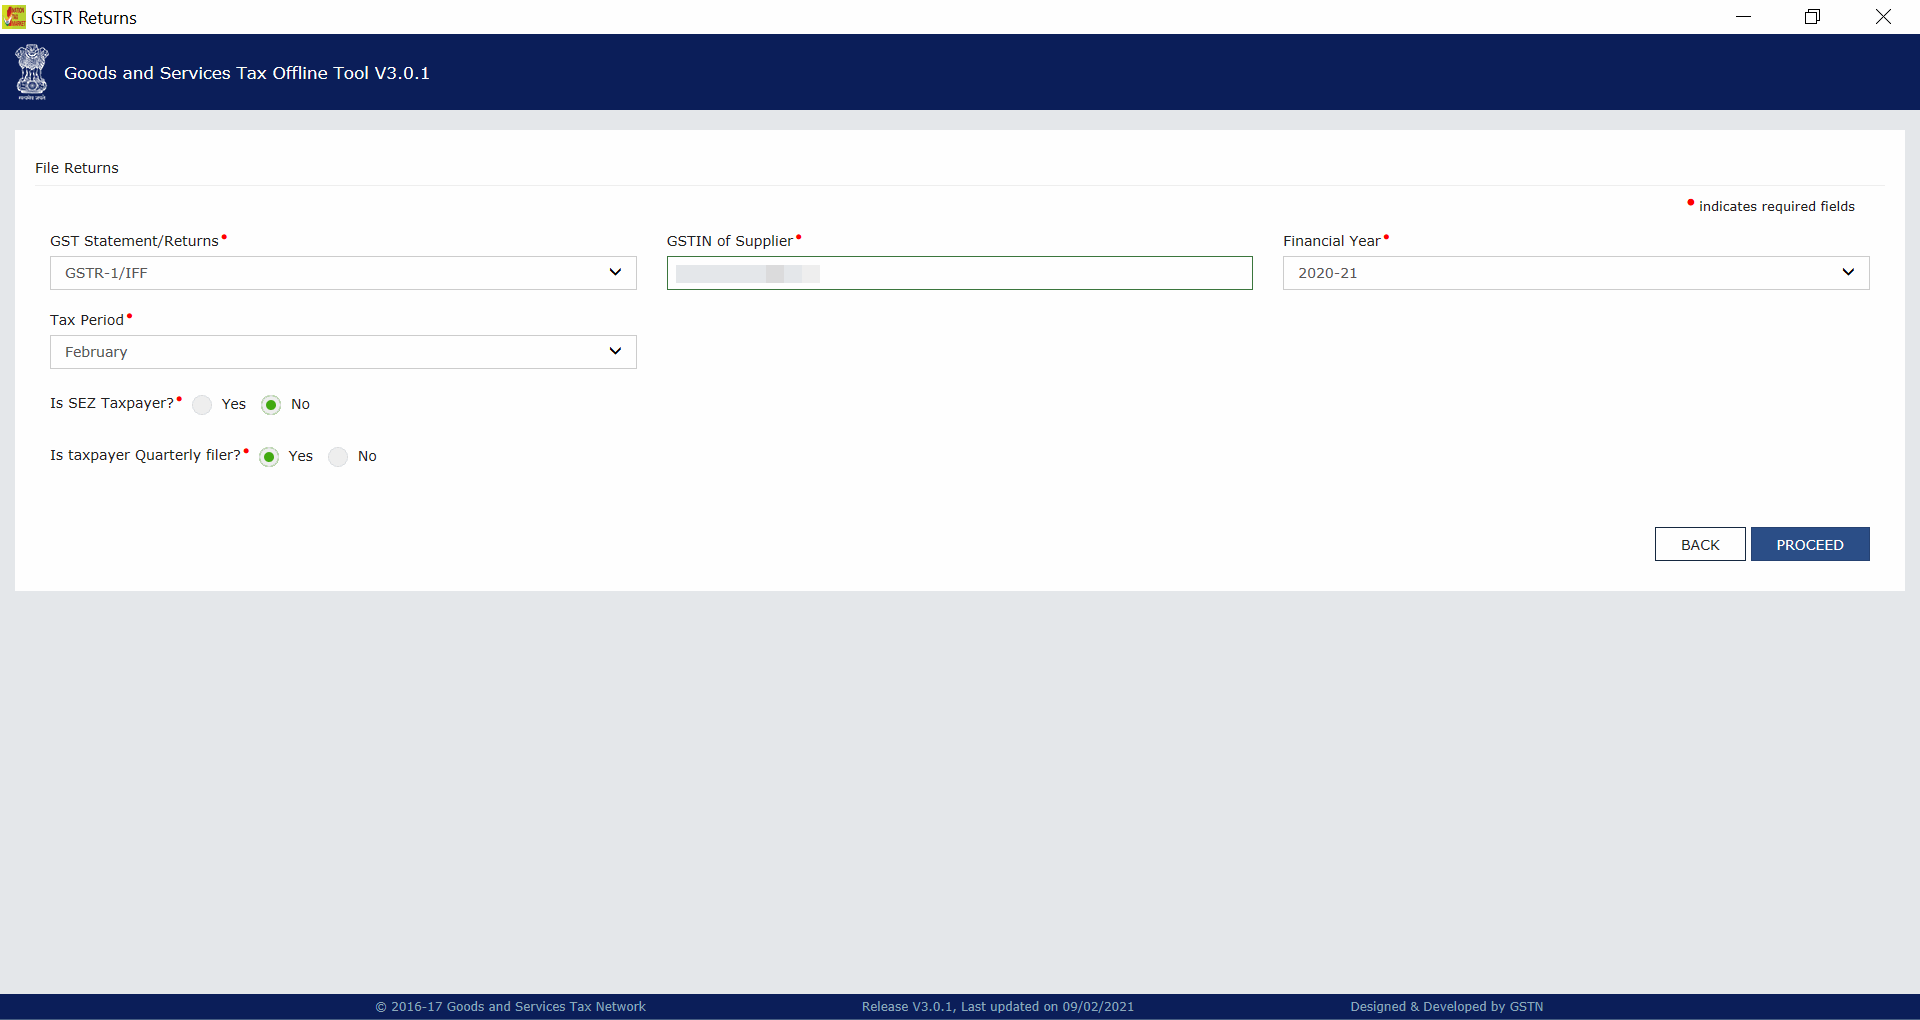
The File Returns screen opens. - Specify the required details.
- Under GST Statement/Returns, select GSTR-1/IFF.
- Enter the GSTIN of your business under GSTIN of Supplier.
- Select the Financial Year for which you are filing returns.
- Select the Tax Period. This will be the period or month for which you are going to upload the CSV files.
- Set Is SEZ Taxpayer? to No.
- Set Is taxpayer Quarterly filer? to Yes and click PROCEED.
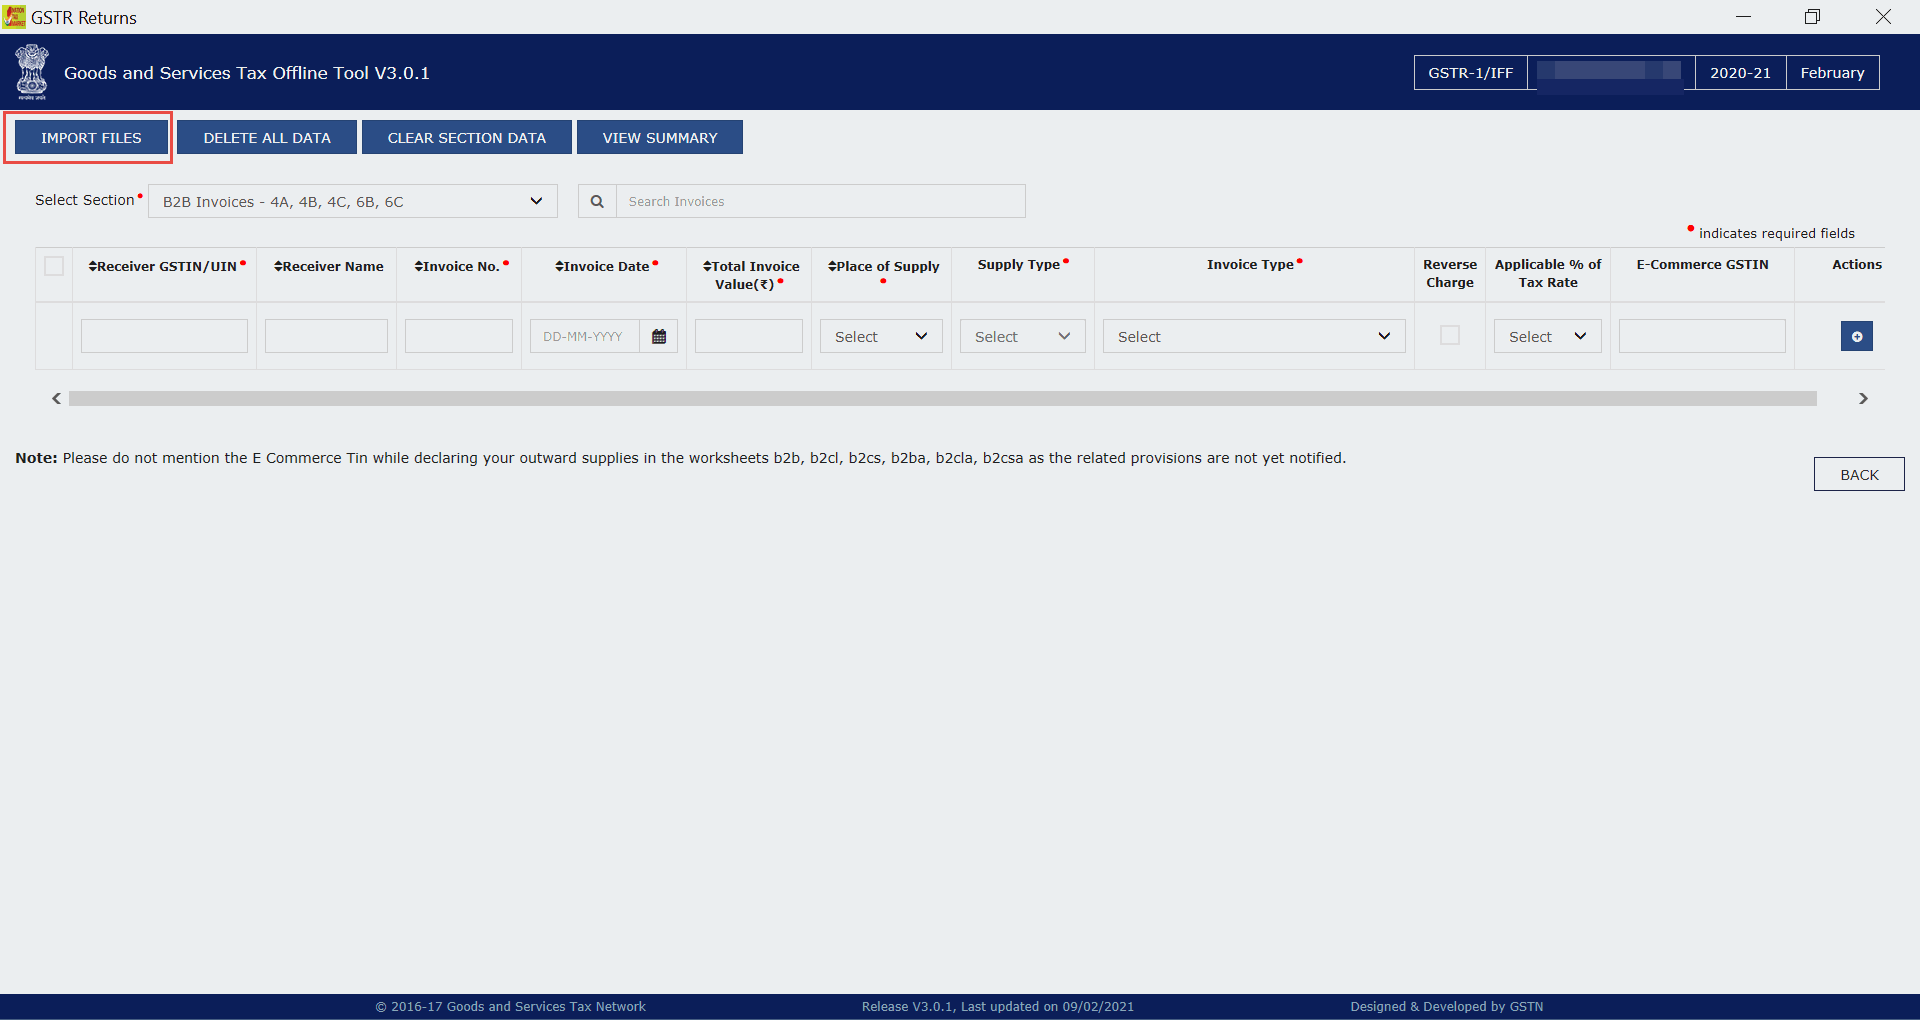
- Select the required section, for instance, B2B Invoices – 4A, 4B, 4C, 6B, 6C, and click IMPORT FILES.
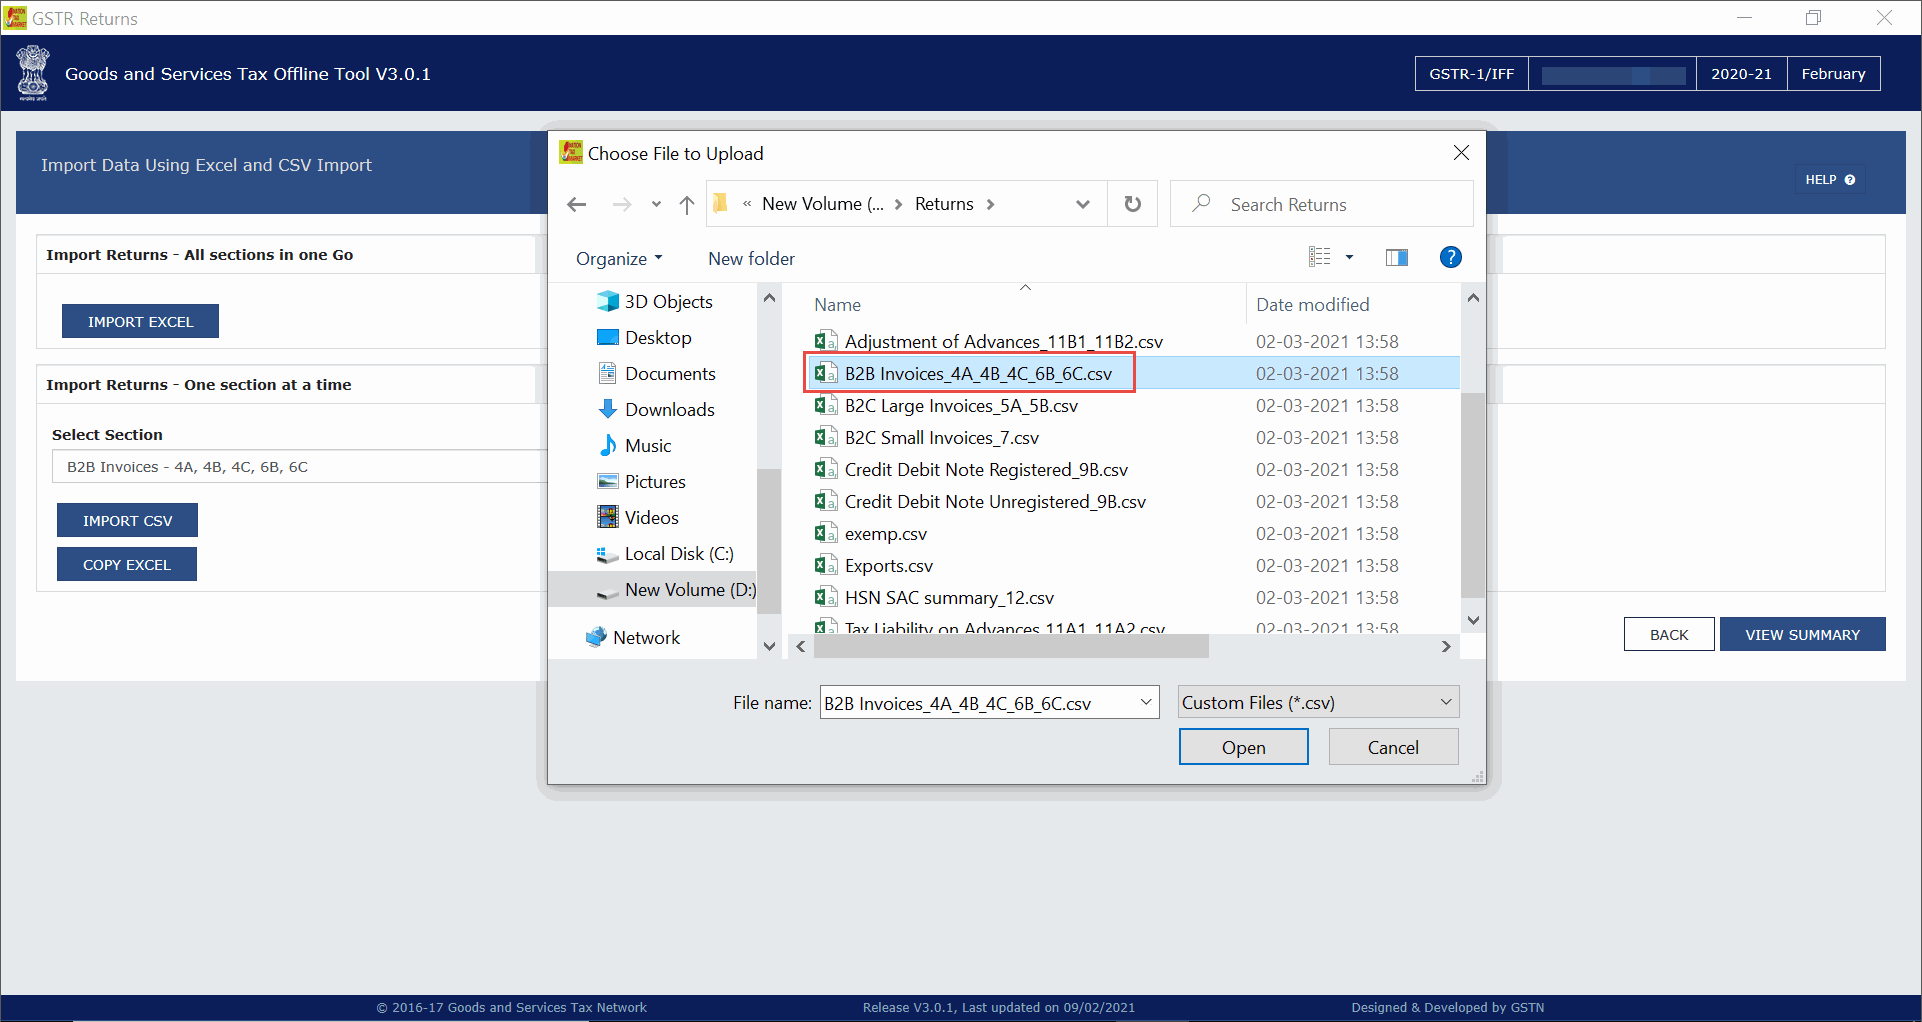
- Import the CSV file for the required section.
- Click IMPORT CSV.
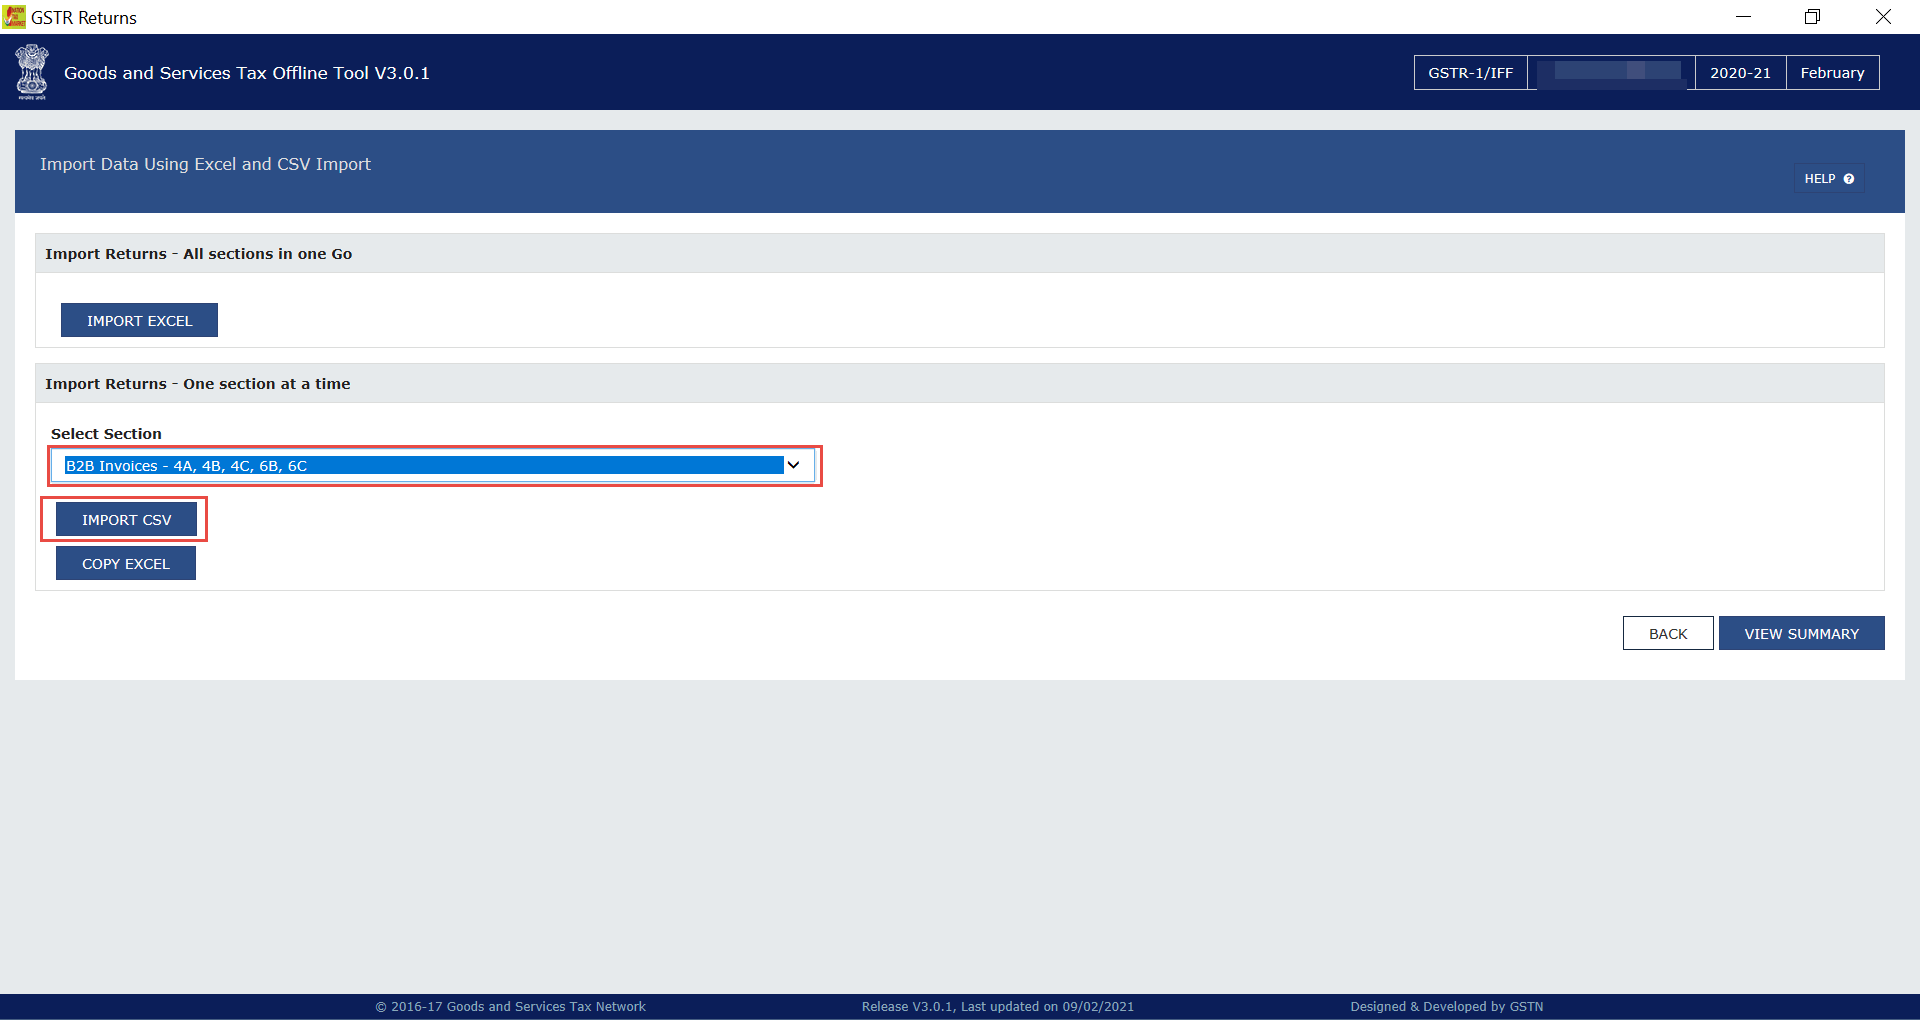
- Select the CSV file for B2B invoices and press Enter.
Similarly, you can import the CSV files for credit notes.
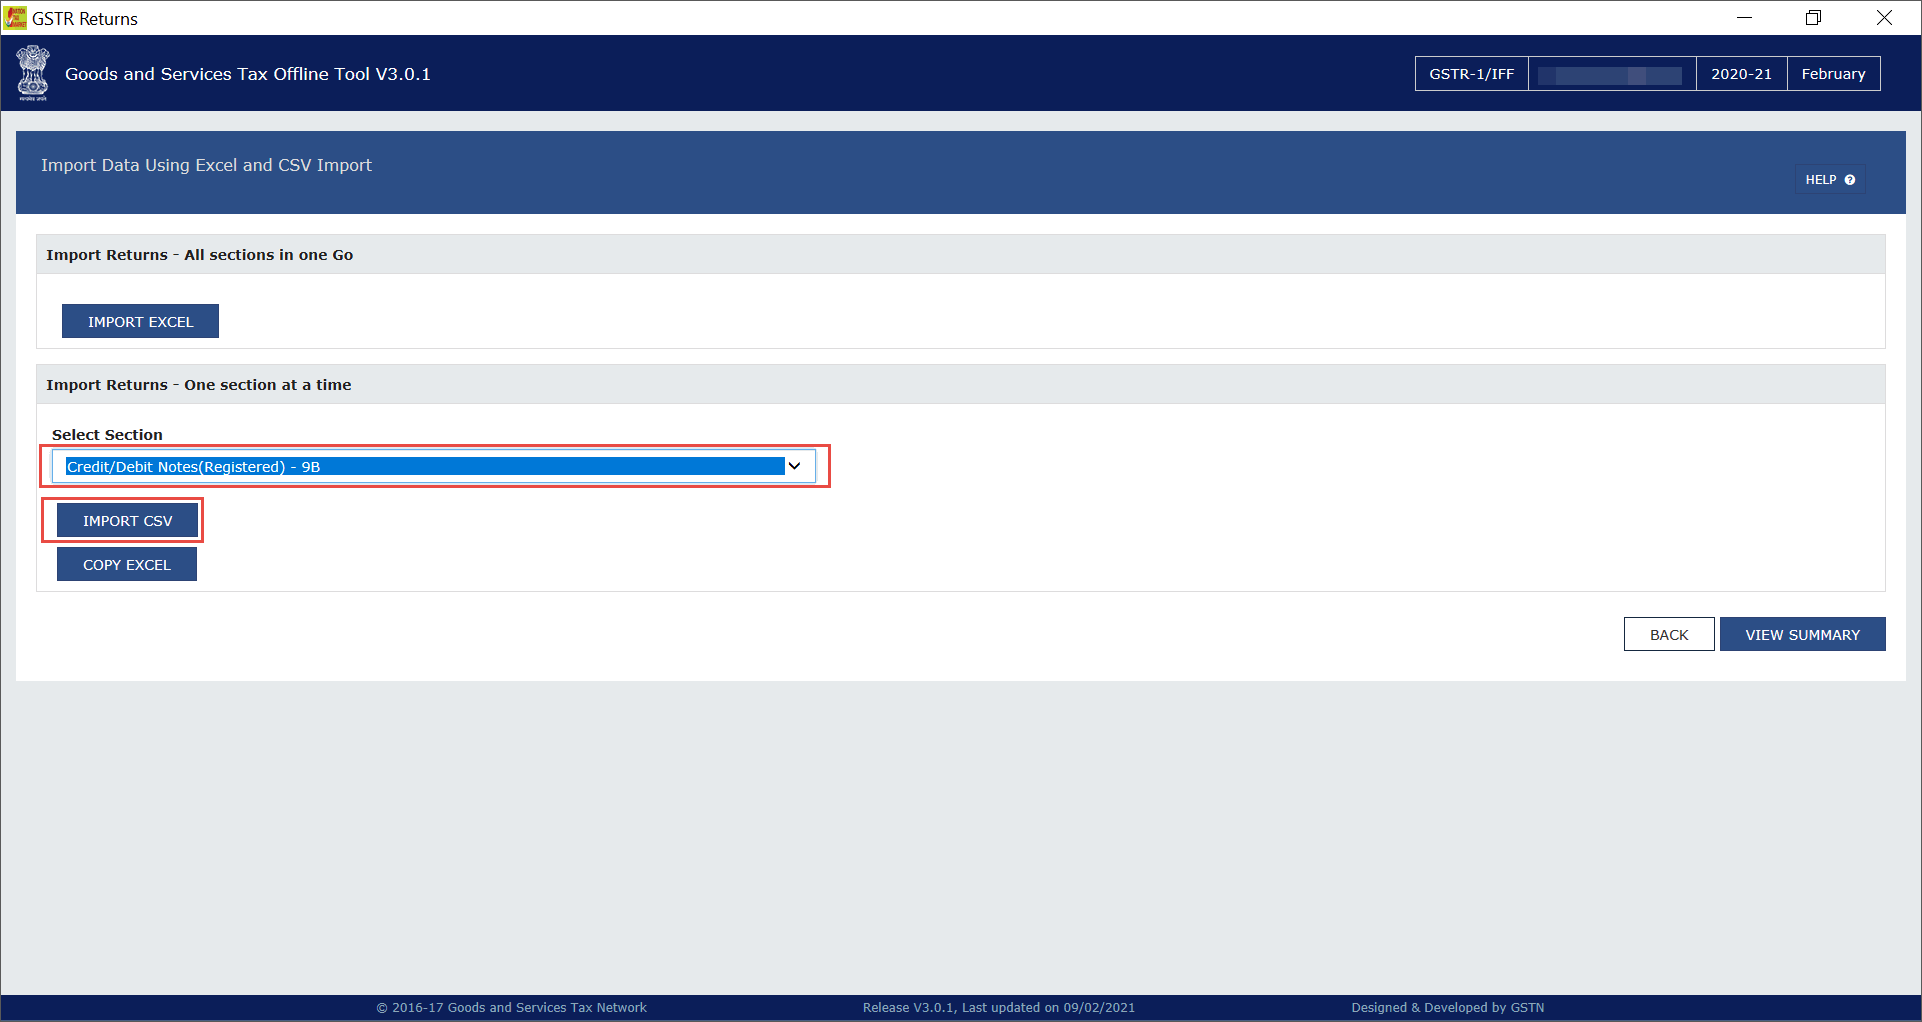
- Click IMPORT CSV.
- Generate the JSON files corresponding to the uploaded CSV files.
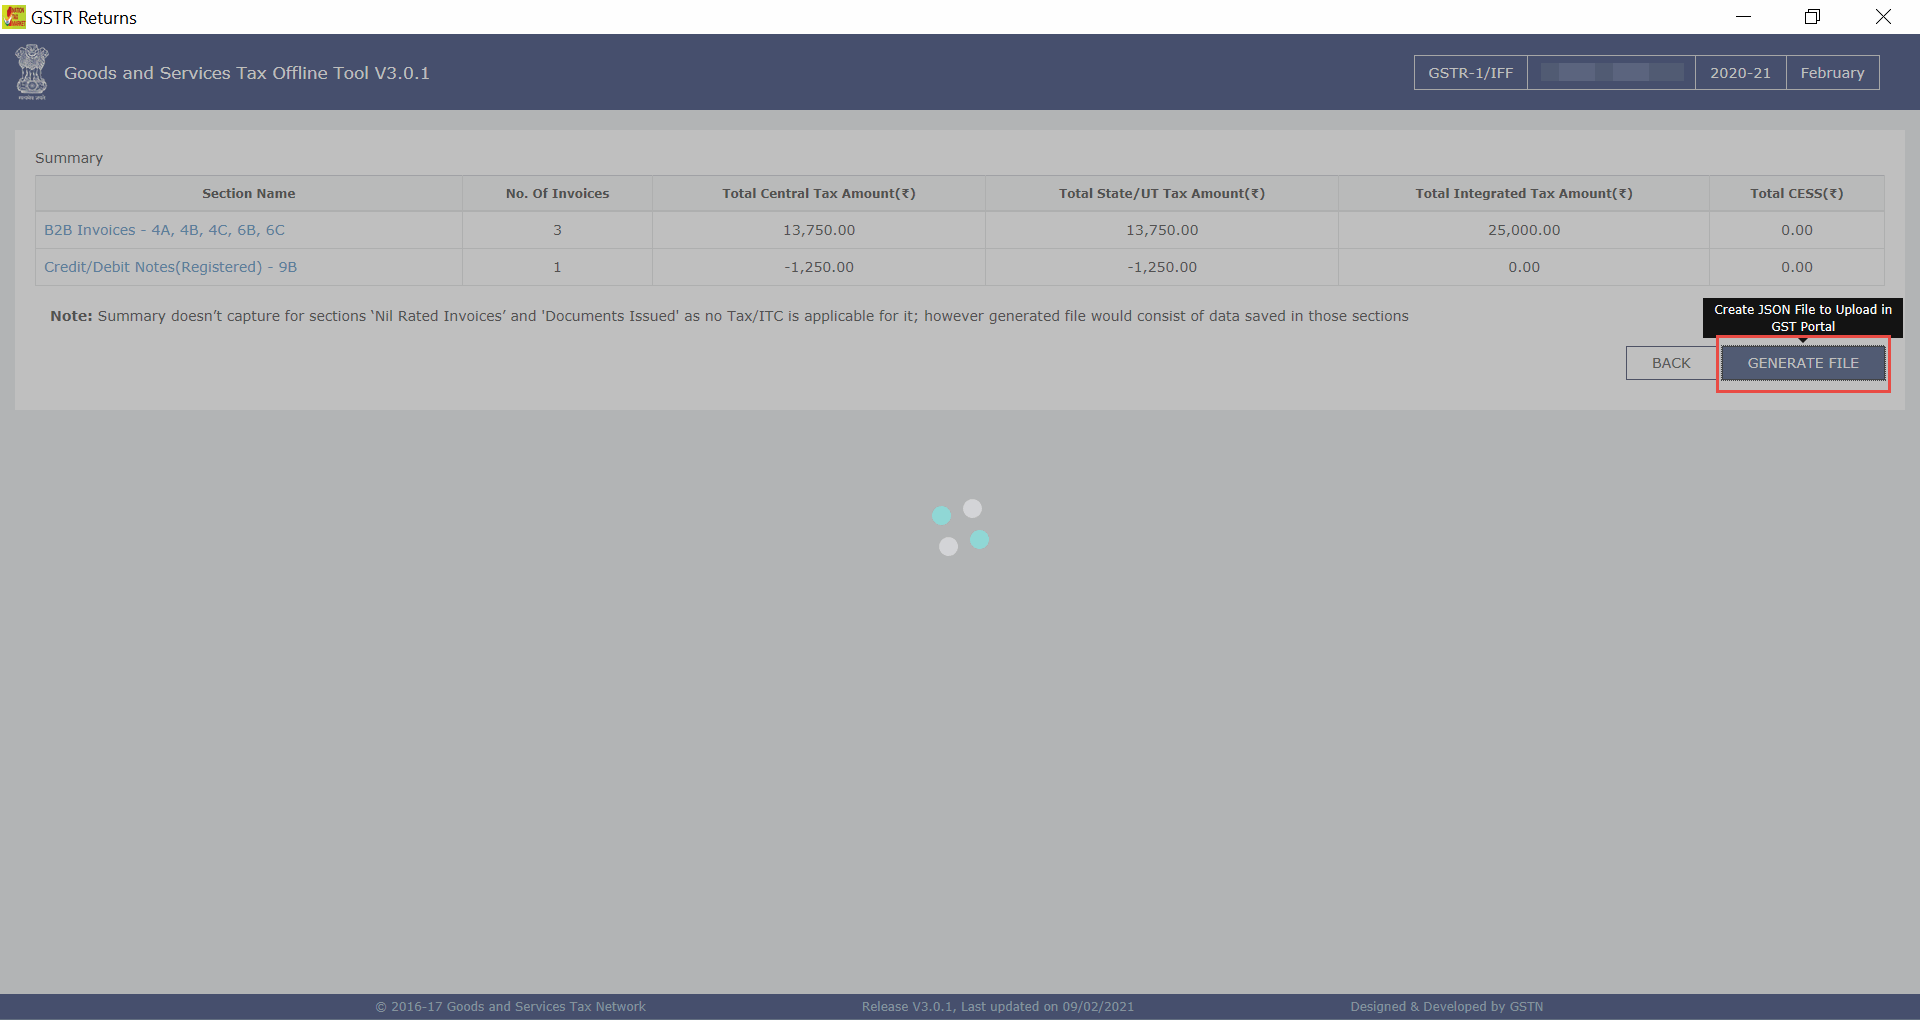
- Click VIEW SUMMARY. The Summary screen will open.
- Click GENERATE FILE. The JSON files corresponding to the uploaded CSV files will be downloaded.
Step 2: Upload JSON Files on the GST Portal
- Log in to the GST portal.
- Open Return Dashboard, and select the financial year.
- Select the first month.
- Open Invoice Furnishing Facility (IFF), and click Prepare Offline.
- Upload the JSON files for the applicable sections.
- Select the second month and repeat steps 4 and 5.
- Open GSTR-1 (Quarterly).
- Select the third month of the quarter, and click Prepare Offline.
- Upload:
- B2B Invoices and CDNR for the third month.
- All remaining quarterly sections.
- Submit and file the return.
Download GSTR-1 as per QRMP/IFF
After filing your return, you can download the filed GSTR-1 directly into TallyPrime.
- Press Alt+Z (Exchange) > All GST Options > Download GST Returns.
For TallyPrime 5.0 and earlier, press Alt+Z (Exchange) > Download GST Returns. - Press C (Configure).
- Select the GST Registration, if applicable, Return Type, and Return Period.
- Enable Download GSTR-1 as per QRMP/IFF.
- Press Ctrl+A to save.
- Press D (Download).
After the download is complete, you can view the data in the GSTR-1 Reconciliation report.