Verification of Chart of Accounts
Ledger Wise Verification of Chart of Accounts
Verification of Chart of Accounts in TallyPrime will help the user check and compare the list of accounts used during the analysis year with the previous year. This report highlights all the exceptions in the chart of accounts and prompts the user to concentrate only on the exceptional items.
In this section
View the Verification of Chart of Accounts report
Button Options in the Verification of Chart of Accounts report
View the Verification of Chart of Accounts report
Gateway of Tally > Display More Reports > Analysis & Verification > Data Analysis > Verification of Chart of Accounts.
Alternatively, Alt+G (Go To) > type or select Verification of Charts of Accounts > and press Enter.
If the previous year (year before the Analysis year) data is there in a different Company, then it should be loaded before accessing this Verification of Chart of Accounts report for correct analysis.
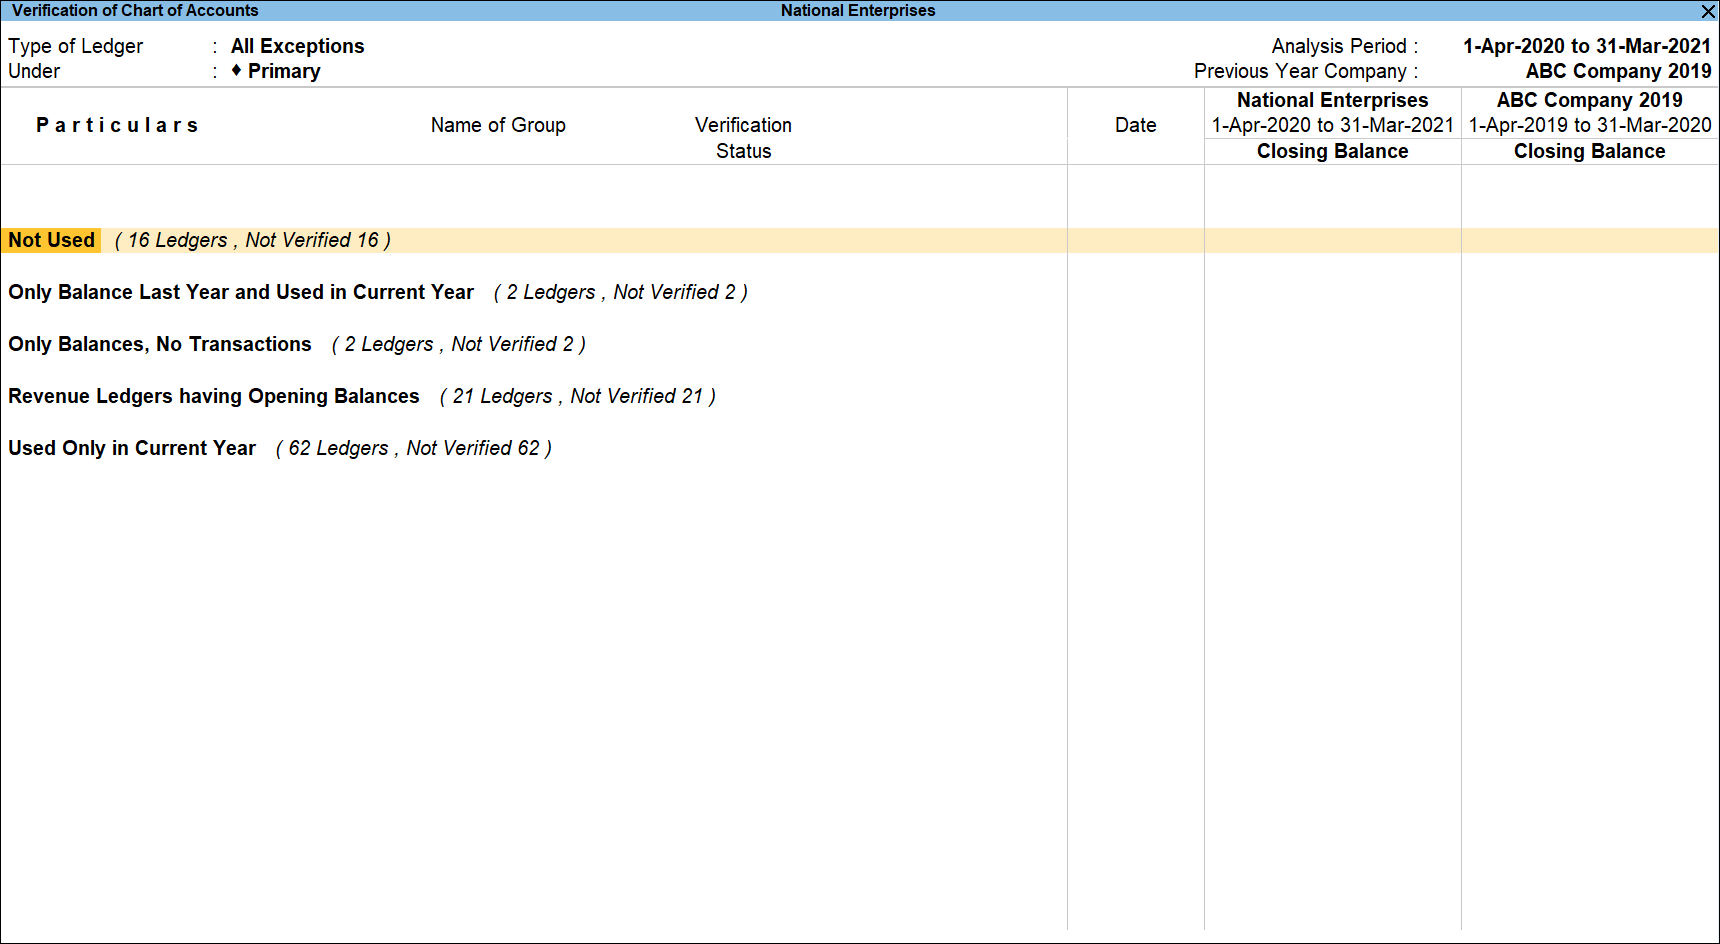
The Verification of Chart of Accounts report classifies and displays all the exceptional ledgers (All Exceptions) along with the ledger count and verification count with the following status:
- Accounts squared-off during the year: Ledgers having transactions with accounts squared-off (nullified/adjusted) will be displayed under this status.
- Not Available in Current Year: Ledgers that have been discontinued (not present) in the current year will be listed under this status.
- Not Used: Ledgers which do not have any balance and have not been used in recording any transaction during both the years will be displayed under this status.
- Not Used in Current Year: Ledgers which have been used for recording transactions only in the previous year, have no Closing Balance (from the previous year), and have no Opening Balance in the current year will be listed under this status.
- Only Balance Last Year and Used in Current Year: Ledgers that have only balances in the previous year but have been used for recording transactions during the current year will be displayed under this status.
- Only Balances, No Transactions: Ledgers that have only balances, but have not been used for recording transactions during both the years will be displayed under this status.
- Regrouped: Ledgers for which the Primary Groups are different for the two years will be displayed under this status. Sub-group level changes can be seen by using F12 (Configure).
- Revenue Ledgers having Opening Balances: Ledgers created under the P&L Group (e.g. Expenses, Income etc.) and having Opening Balance will be listed under this status.
- Used Only in Current Year: Ledgers (with or without Opening Balance) that have been used to record transactions only in the current year will be displayed under this status.
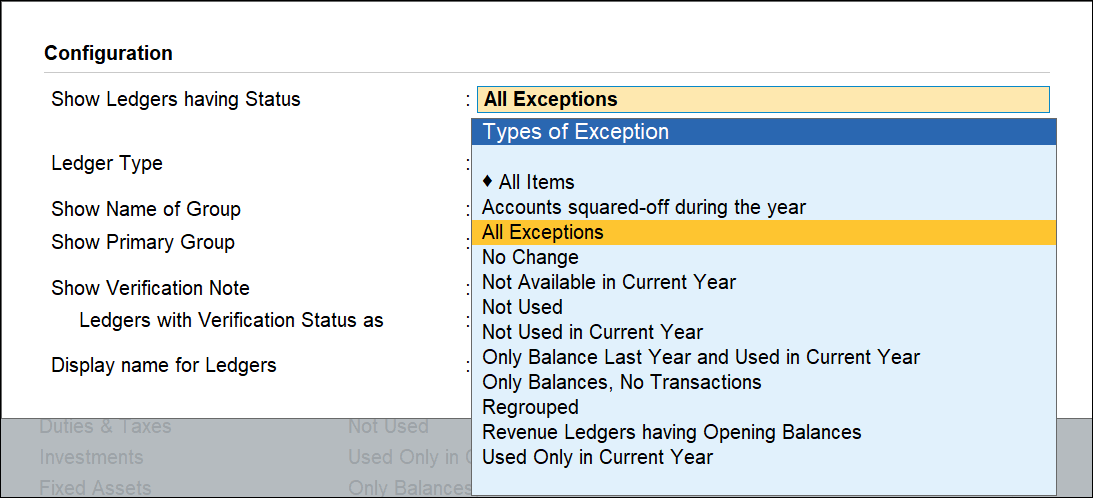
Other status which can by using F12 (Configure) button are:
- All Items: Displays all ledgers irrespective of the status.
- No Change: Displays the ledgers which have been used in both the years.
Button Options in the Verification of Chart of Accounts report
- F3 (Company): press F3 to change the company.
- F4 (Group): press F4 to filter for ledgers belonging to particular group.
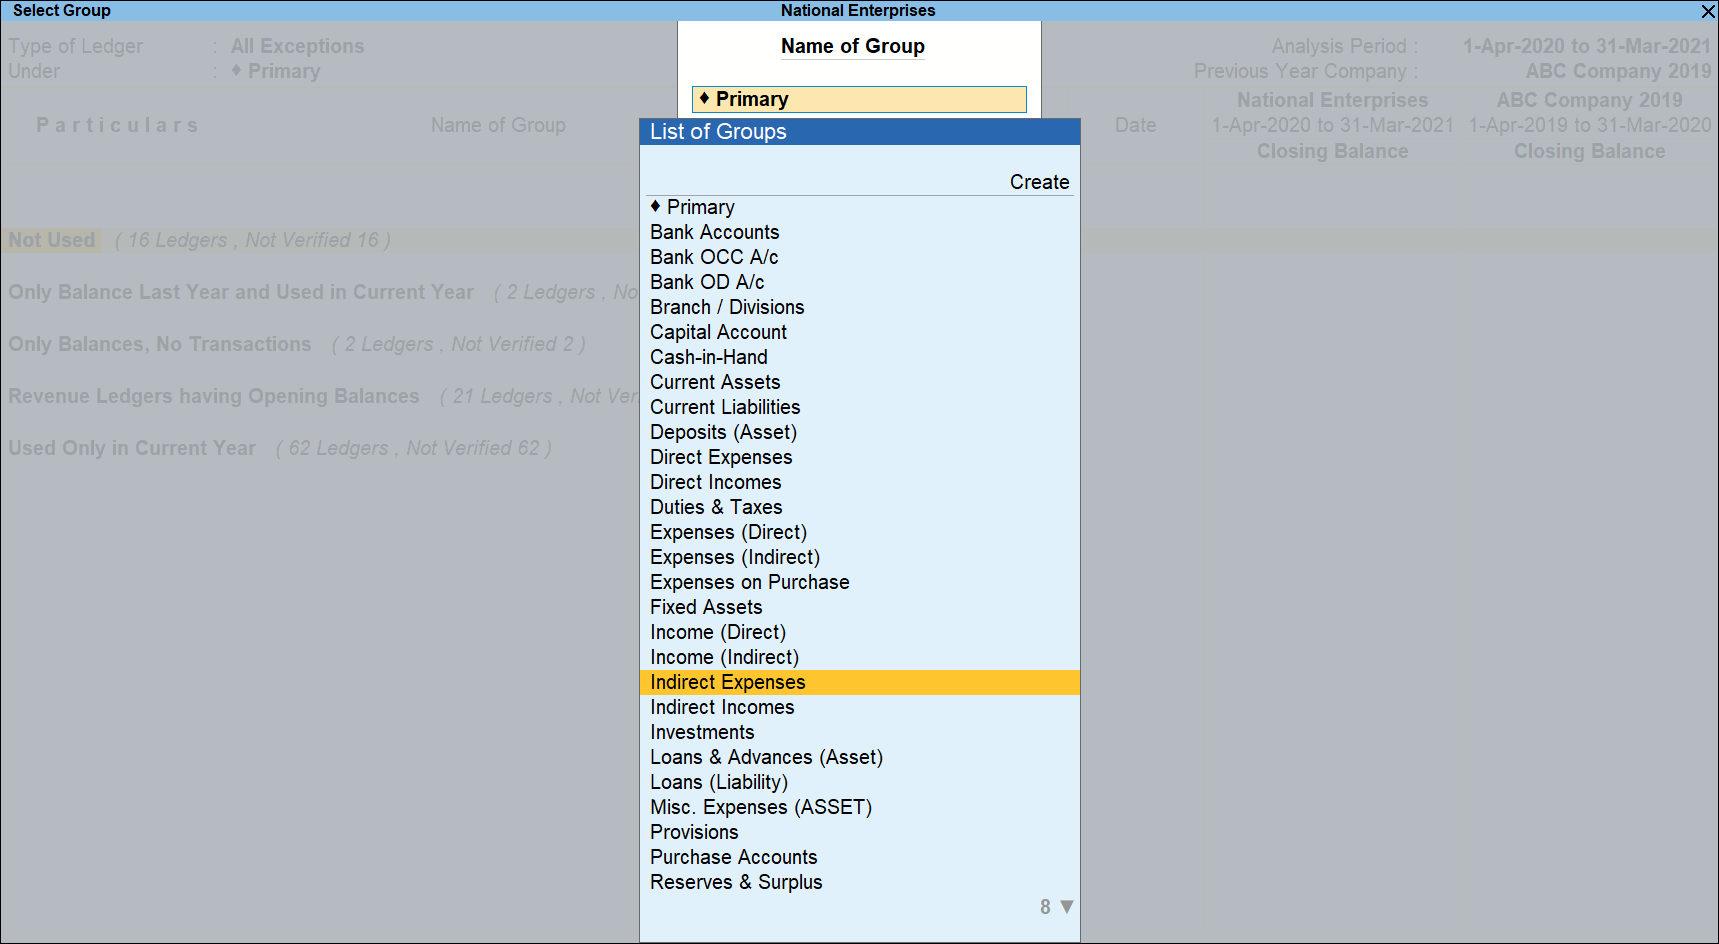
Select the required Group from the above screen and press Enter.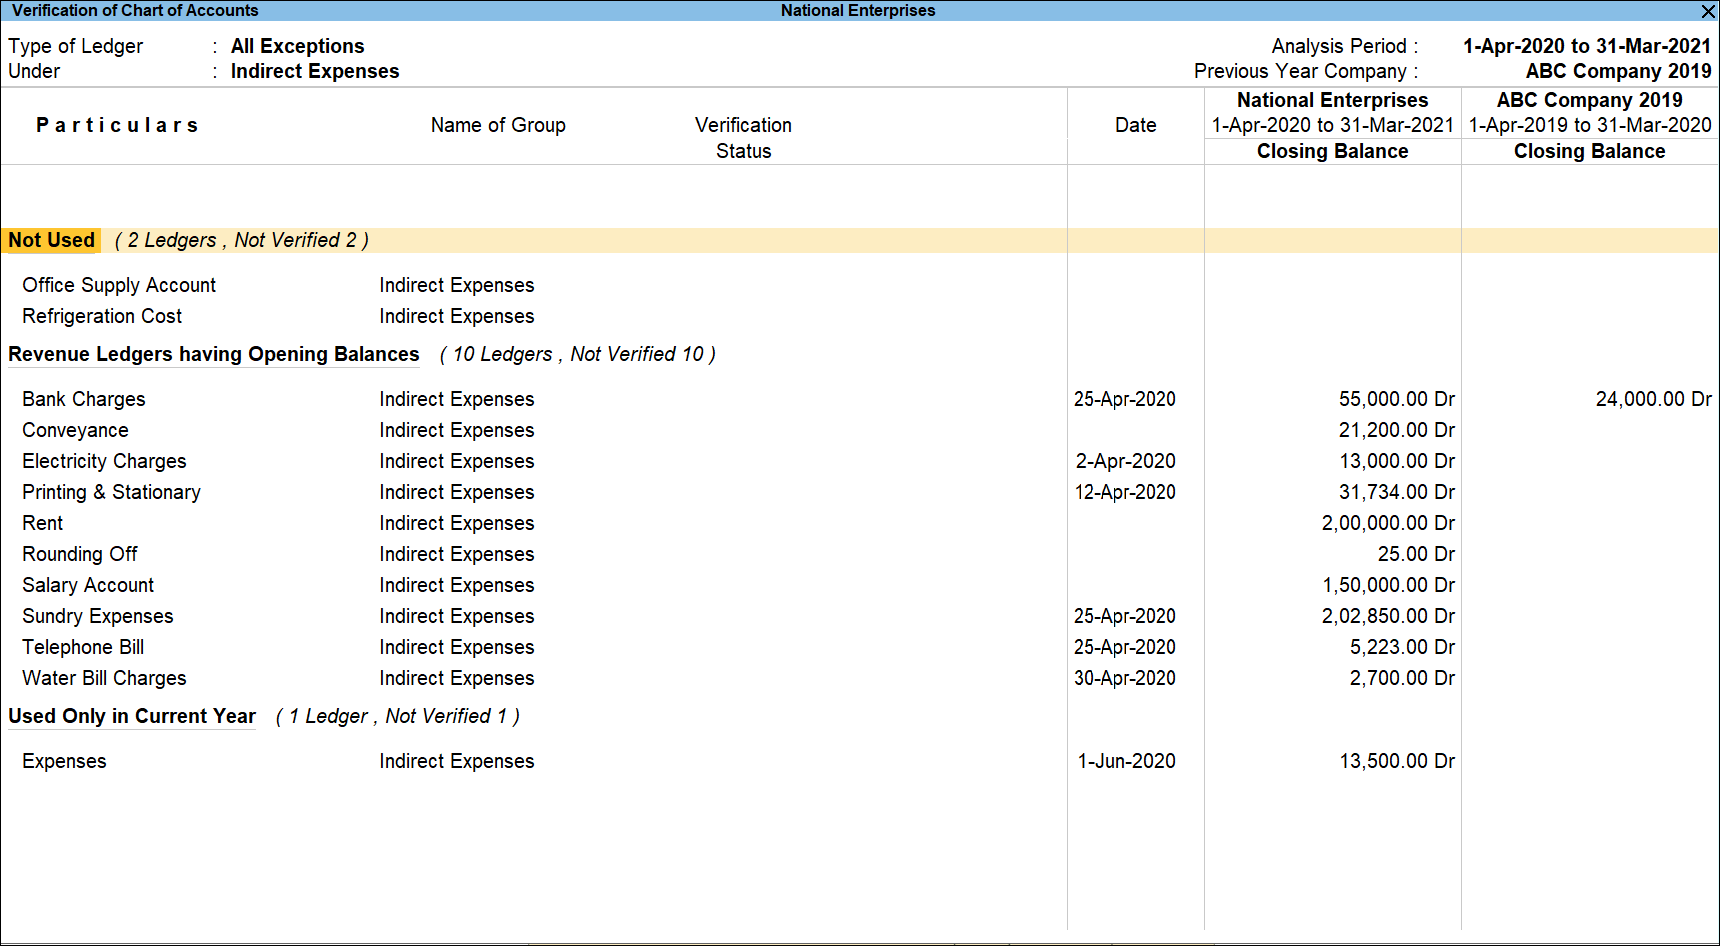
- F5 (Ledger-wise): press F5 to view the ledger-wise Verification of Chart of Accounts report as shown:
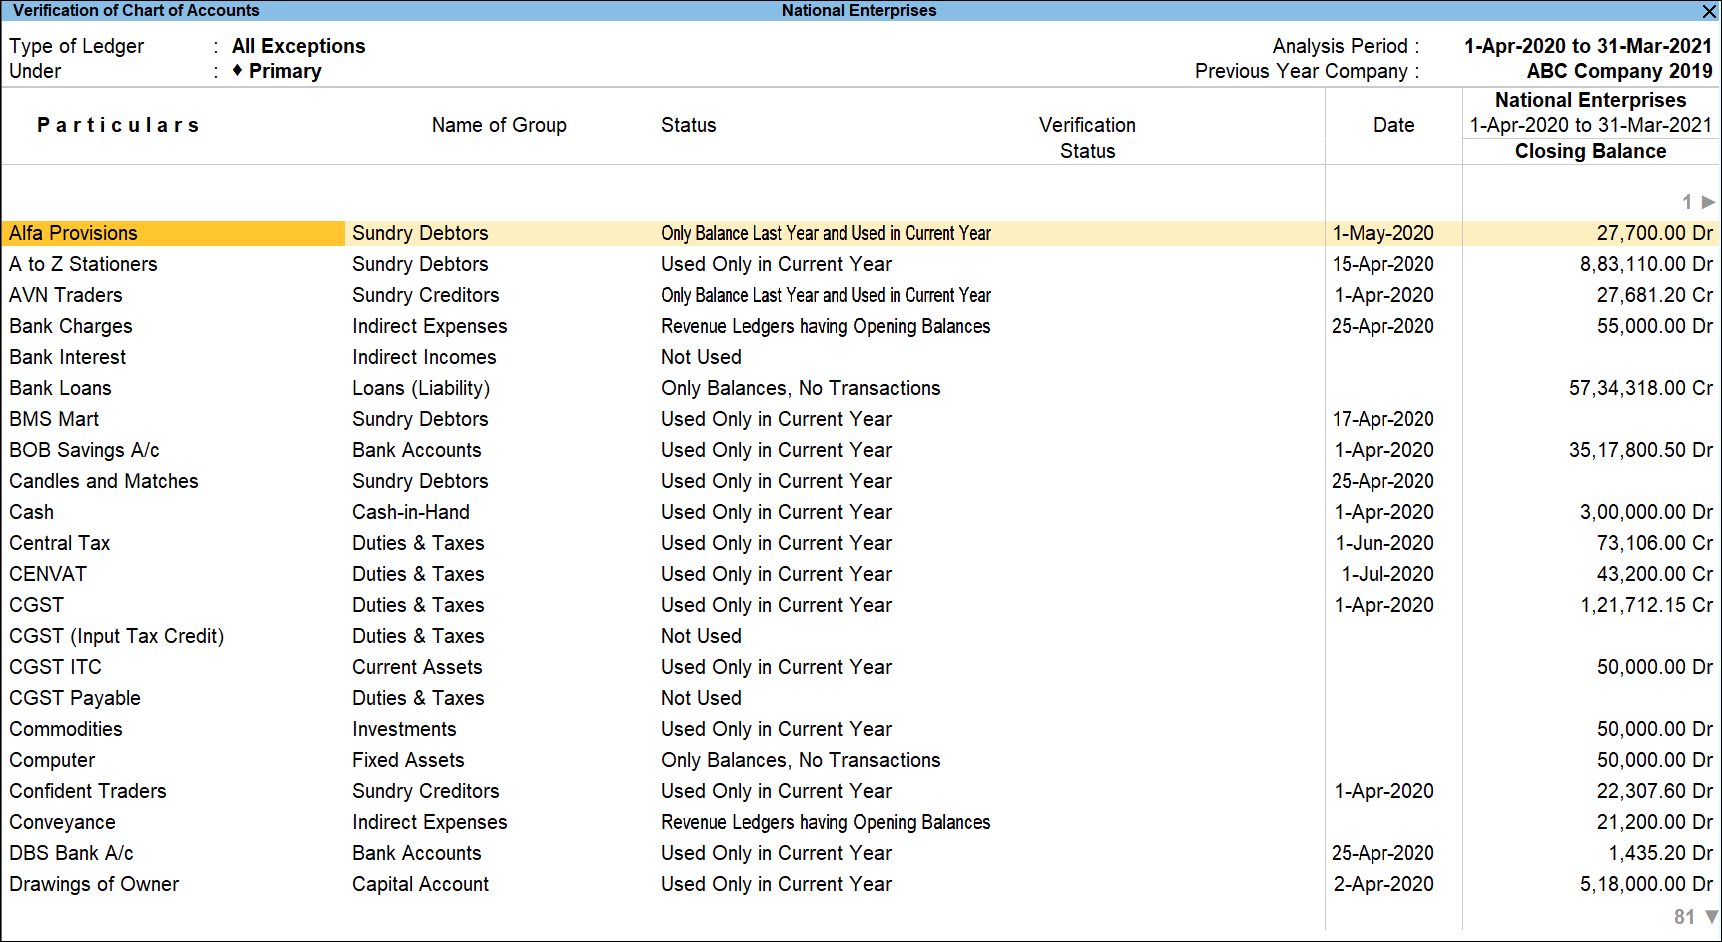
- Press F5 (Group-wise) or F5 to toggle to Group-wise report.
- Alt+F5 (Detailed): press Alt+F5 to view the list of ledgers under each status explained in the earlier section.
- F7 (Compare Company): press F7 to load the company that contains the data for the year prior to the analysis period.
- F8 (Show Ledger): press F8 to view ledger voucher report.
- F9 (Analysis & Ver Reports): Press F9 (Analysis & Ver Reports) > type or select Pending Advances > and press Enter.
You can follow this step to open any of the Accounting, Inventory, and Analysis Reports from the list.
- Alt+R (Verify): press Alt+R to mark any ledger as Verified.
Note: The facility to mark a Ledger as Verified is provided only for those Ledgers which are present in the Analysis Year (List of Accounts).
In Verification Details screen, under Verification Status field, select the required status – On Hold or Verified.
Enter the required remarks in the Verification Note.Note: In the case of Verification of ledgers, there will be only options Verify and Hold in the Verification Status. However, in the case of verification of vouchers, there will be an additional two options: Internal observation and External Clarification.
- Alt+S (Remove Verify): press Alt+S after selecting the required ledgers from the above report to change the Verification Status to blank.
- Alt+V (Master Configurations): press Alt+V to identify the parties as Related Party, Periodic Payments and Receipts and Sampling Methods for verifying.
Configuration Options
Press F12 (Configure) to change the configuration for the displayed report.
- Show Ledgers of Having Status: Select the required Types of Exception from the list to display the ledgers belonging to the selected Status.
- Include Subgroup Changes also: Set this option to Yes to view the subgroup level changes for a ledger from previous year to current year.
Note: The option Include Subgroup Changes also (Regrouped) will be available only while viewing the report for Regrouped status from the Types of Exception. - Ledgers Type: Select to filter the information for revenue ledgers or non revenue ledgers or both for the Types of Exception already selected.
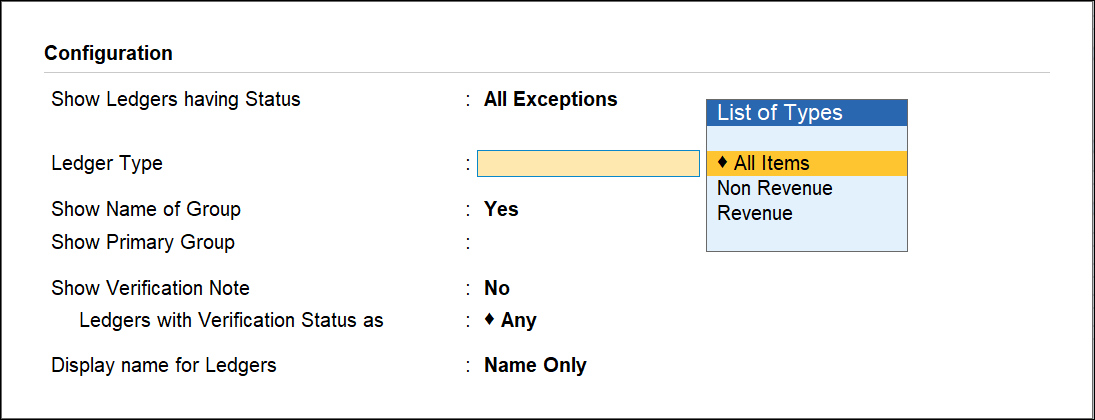
- Show Name of Group: Set this option to Yes to display the name of immediate Group for each ledger.
- Show Primary Group: Set this option to Yes to display the name of the Primary Group for each ledger.
- Show Verification Note: Set this option to Yes to display the verification note entered by the user.
- Ledger of Verification Status as: Select to filter the information for On Hold ledgers or Verified ledgers or Altered ledgers or Any for the Types of Exception already selected.
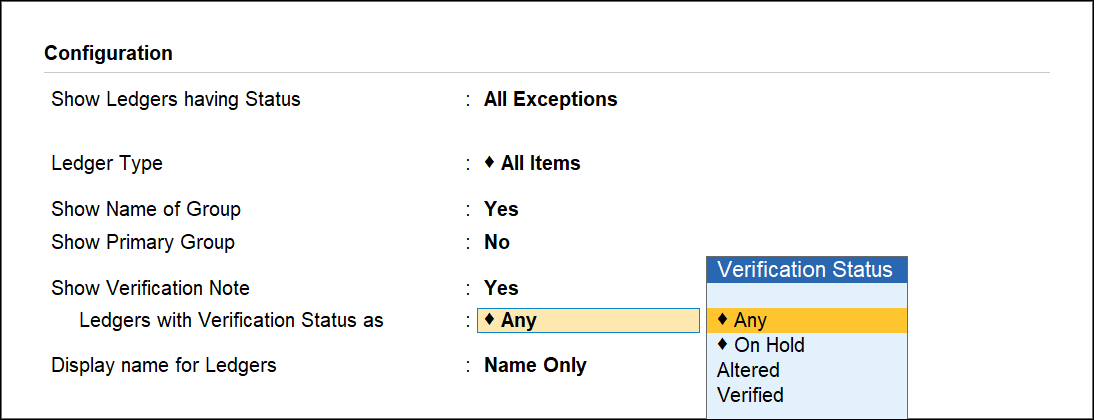
- Display name for Ledgers: Select the required Display Names Styles from Alias (Name), Alias Only, Name (Alias) and Name Only for the Ledger names.
The facility to view the ledgers belonging to a particular status is also provided by pressing Enter on the required status form the Verification of Chart of Accounts report for All Exceptions. The report for ledgers Not Used in Current Year is displayed below: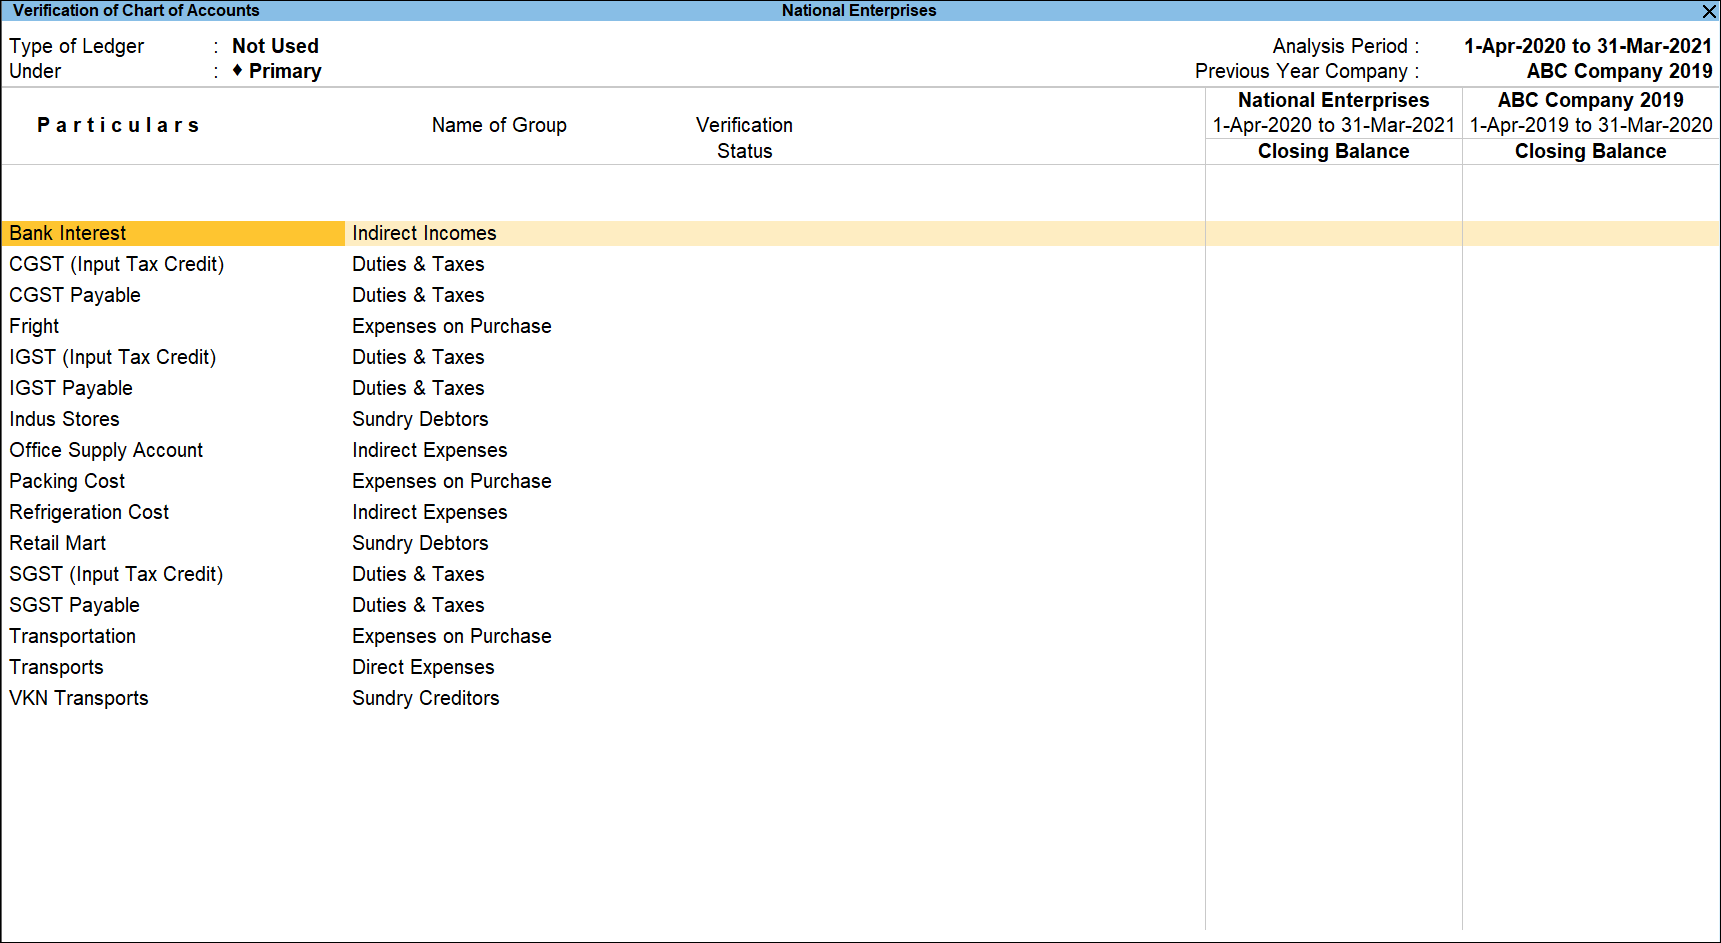
The buttons available in the above report are similar to the buttons available under Verification of Chart of Accounts report for All Exceptions.
Ledger Vouchers – Verification of Chart of Accounts
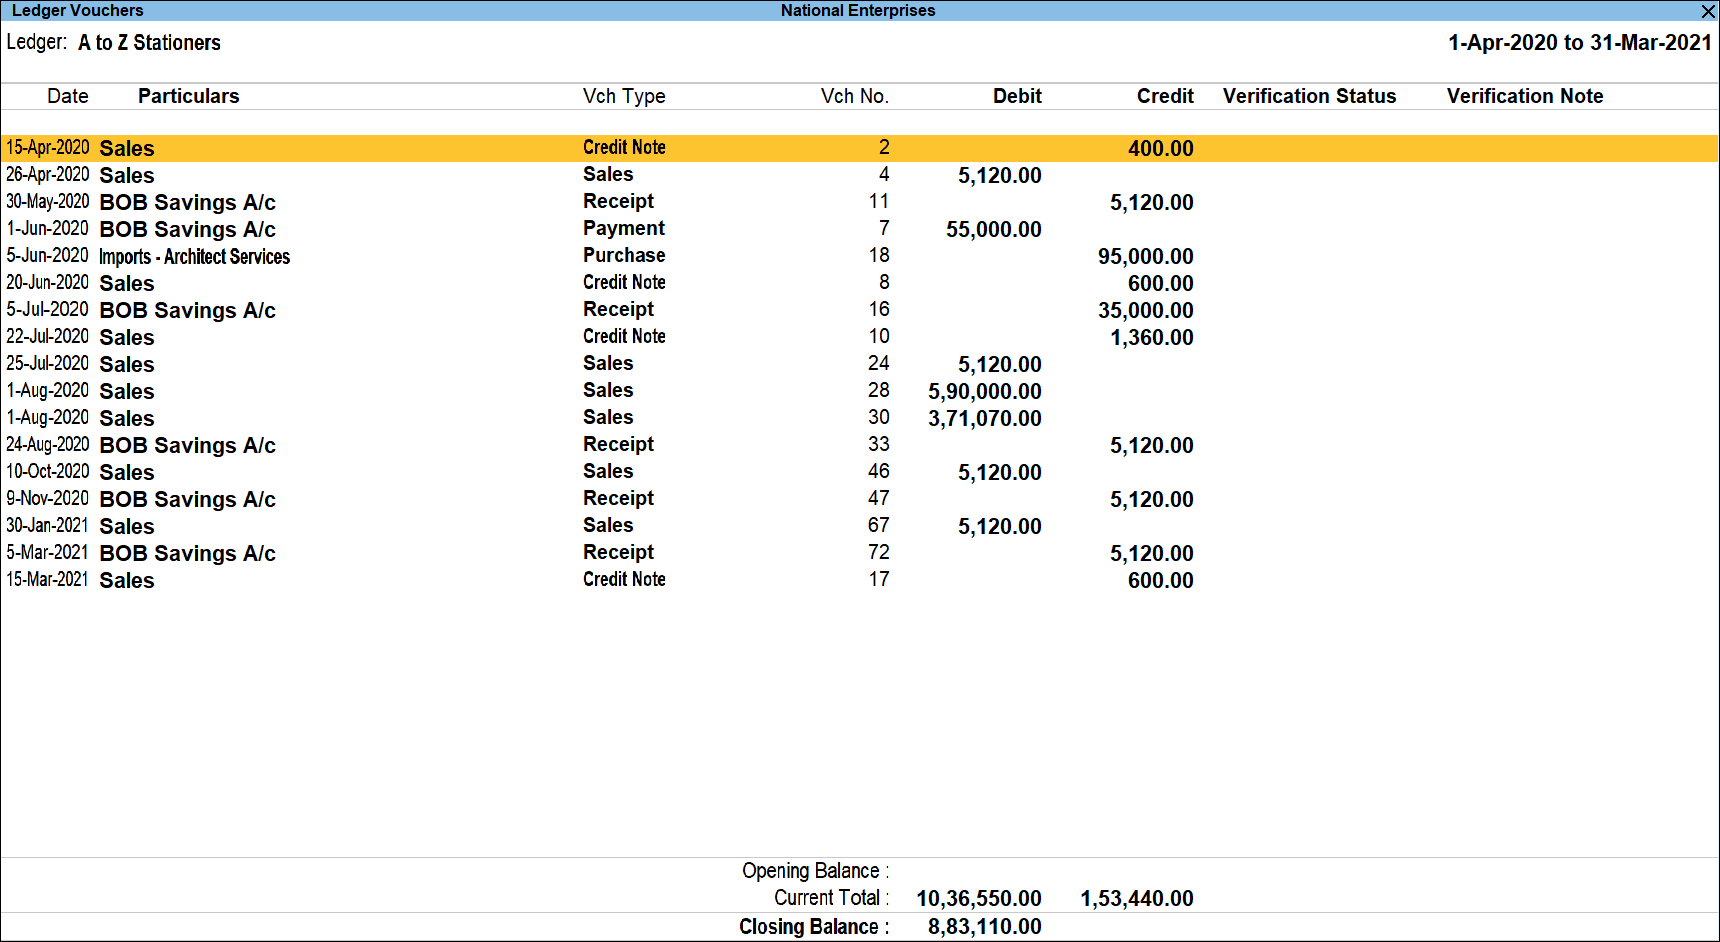
The Ledger Vouchers report for ledgers used in the Current Year (Analysis Year) displays all the transactions pertaining to the selected Ledger.
In this section:
View the Ledger Vouchers report for Verification of Chart of Accounts
Button Options in the Ledger Vouchers report for Verification of Chart of Accounts
View the Ledger Vouchers report for Verification of Chart of Accounts
- Gateway of Tally > Display More Reports > Analysis & Verification > Data Analysis > Verification of Chart of Accounts.
Alternatively, Alt+G (Go To) > type or select Verification of Chart of Accounts > and press Enter. - Select the required Exception Status and press Enter.
- Select the required Ledger and press F8 (Show Ledger).
The Ledger Vouchers report will be available only for those Ledgers which are used in the Current Year alone.
The Ledger Vouchers report displays all the vouchers with details such as Voucher Date, Particular, Vch Type, Vch No., Debit & Credit amount, Verification Status and Verification Note. The report also shows the Opening Balance, Current Total and Closing Balance for the selected ledger.
Button Options in the Ledger Vouchers report for Verification of Chart of Accounts
- F2 (Period): press F2 to change the selected period.
- F3 (Company): press F3 to change the company.
- F4 (Ledger): press F4 to view the Ledger Vouchers for a different ledger.
- F5 (Bill-wise): press F5to view the bill wise details for particular ledger.
- Alt+F5 (Detailed): press Alt+F5 to viewed the detailed Ledger Vouchers report.
- F6 (Monthly): press F6 to view the Ledger Voucher report on monthly wise.
- Alt+F6 (Quarterly): press F6 to view the Ledger Voucher report on Quarterly wise.
- Ctrl+F6 (Daily): press F6 to view the Ledger Voucher report on Daily wise.
- F8 (Columnar): press F8 to view the columnar report.
- F9 (Analysis & Ver Reports): Press F9 (Analysis & Ver Reports) > type or select Pending Documents > and press Enter.
You can follow this step to open any of the Accounting, Inventory, and Analysis Reports from the list. - Ctrl+B (Basis of value):You can configure the values in your report for that instance, based on different business needs.
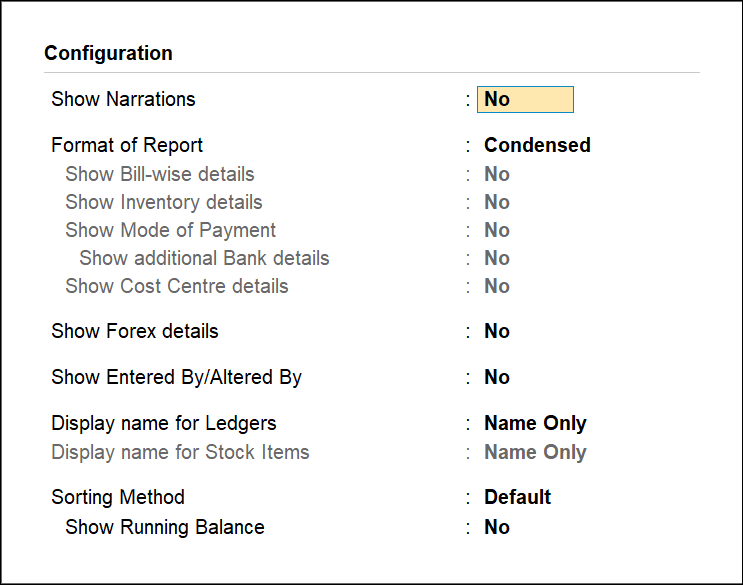
In Ledger Vouchers report for Verification of Chart of Accounts, you can display the Forex transactions only. Press Ctrl+B (Basis of Values) > set Show Forex transactions only as Yes. Press Esc to view the default values.
Similarly, you can select different Type of Voucher entries. Press Ctrl+B (Basis of Values) > Type of Voucher entries > select Accounting Entries Only. Press Esc to view the default values. - Alt+J (Set Manual Sampling): press Alt+J to mark the selected vouchers (using spacebar) as sampled. The manual sampling method will get applied to all such vouchers and they will appear under the sampled column on the dashboard.
- Alt+L (Delete Manual Sampling): press Alt+L to delete the manual sampling method already applied for the selected vouchers (using the spacebar).
- Alt+R (Verify): press Alt+R to verify the selected vouchers. For more details on verifying refer Verification Status.
Note: The Alt+R (Verify)button will be highlighted when one or more vouchers are selected for verification using Spacebar. - Alt+S (Remove Verify): press Alt+S to change the status for the selected vouchers as Not Verified (blank).
- Alt+F12 (Range): press Alt+F12 to use the Range Filter option to search the specific vouchers from the list of ledger vouchers displayed.
- Press Ctrl+F to open Search Verification Note screen, it is a hidden key and it is used for searching vouchers based in verification note.

