Track Loans and Advances in TallyPrime (Payroll)
TallyPrime Payroll facilitates tracking of loans and advances paid to employees and allow defining simple to complex criteria for recovery of such advances. The Loan/Advances can be recovered in complete or a number of installments from Employee’s salary.
The process of tracking the Loans/Advances given and recoveries involves the following steps:
- Creating Salary Advance Deduction Pay Head
- Disbursement of salary advances to employees
- Alter/Create Salary details screen to include salary advances pay head
- Recovery of salary advances during Payroll processing
- Tracking salary advances
- Stopping salary advance deduction
Creating Salary Advance Deduction Pay Head
- To create the Salary Advance Deduction Pay Head, refer to Loans and Advances Pay Head Creation.
Note: If fixed EMI’s needs to be deducted to recover the Loan given, then the Calculation Type should be selected as Flat Rate.
Payment of Salary Advances
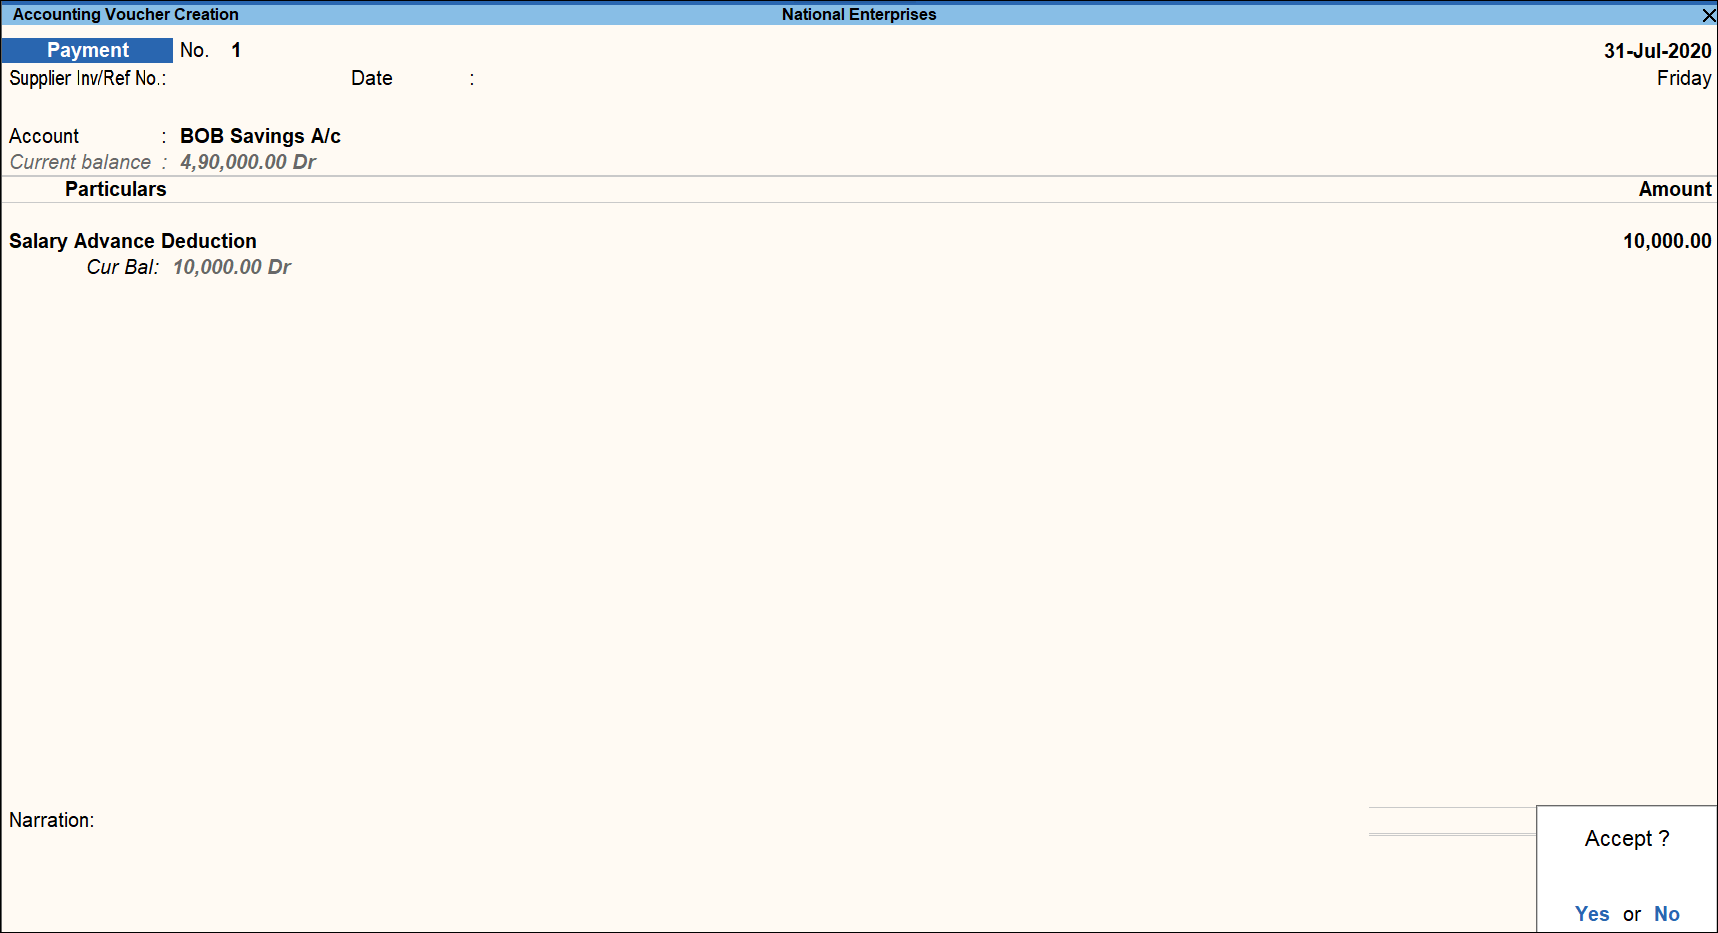
To account for the Loan payment to an employee, enter the Payment Voucher as shown below:
- Gateway of Tally > Vouchers > press F5 (Payment).
Alternatively, press Alt+G (Go To) > Create Voucher > press F5 (Payment). - Press F2 (Date) to change the voucher date.
- Press Ctrl+H (Change Mode) to select the Double Entry mode.
- Debit Salary Advance Deduction Ledger with the required amount. A sub-form appears to allocate this debit to a Cost Centre.

- Select the required employee name and accept the sub-form.
- Credit Bank account and press Enter.
- Accept the screen. As always, you can press Ctrl+A to save.

If you are using the Single entry mode of Payment voucher, then select Bank Account in the voucher header and select Salary Advance Deduction from the List of Ledgers.
Create/Alter Salary Structure to Include Salary Advance Pay Head
To create/alter the salary structure to include Loans/Advances Pay Head, refer Defining Salary details.
Note: When a Loan is to be recovered in Multiple Fixed Installments, it is added to an Employee’s Pay Structure with Calculation Type as Flat Rate.
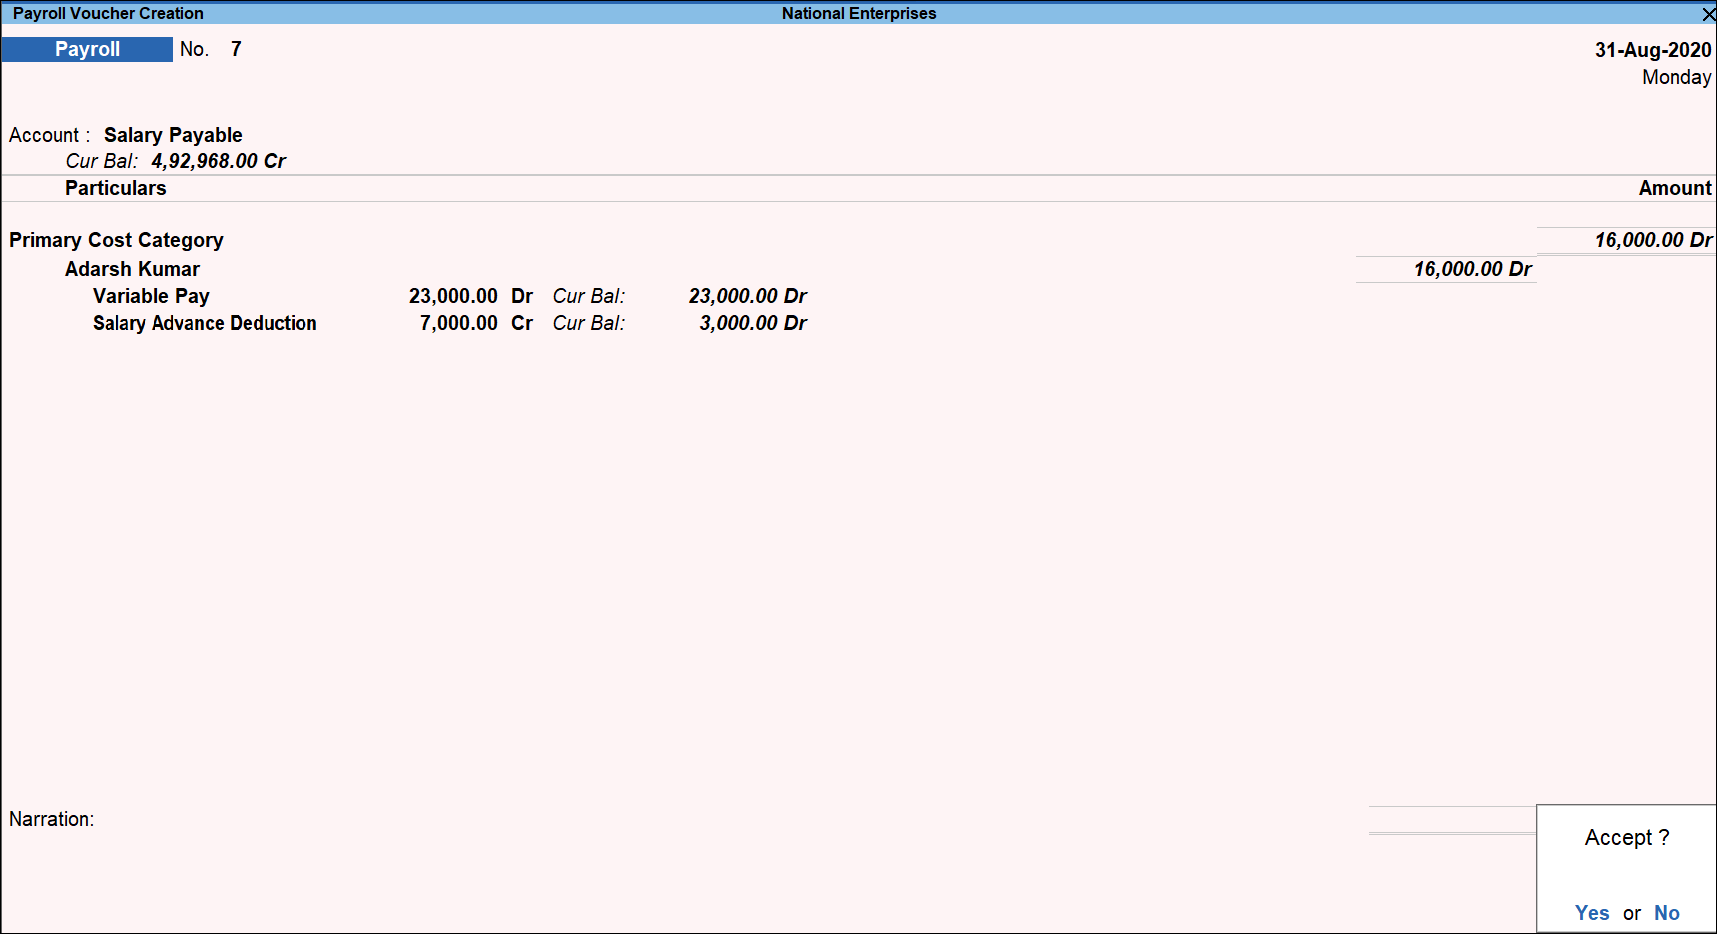
Recovery of Salary Advance Through Payroll Voucher
- Gateway of Tally > Vouchers > press Ctrl+F4 (Payroll).
Alternatively, press Alt+G (Go To) > Create Voucher > press Ctrl+F4 (Payroll).
In case the voucher type is inactive, you will be prompted to enable the Payroll feature for your Company. Select Yes or press Y to proceed. - Press F2 (Date)to Change the Voucher Date.
- Press Ctrl+F (Autofill) for Payroll Auto Fill.
- Select Payroll Autofill for Type of transaction field, and select the Salary in Process for field.
- Enter the From (blank for beginning) and To (blank for end) date in the Autofill screen.
- Select the appropriate Employee Category, you can select Cost Categories also.
- Select the Employee/Group (select Employee A alone) from the List of Employees / Group.
- Select the Appropriate Payroll Ledger from the List of Ledger Accounts.
- Enter the User Defined Pay Head Values e.g. Variable Pay and Salary Advance Deduction.

- Accept the screen. As always, you can press Ctrl+A to save.
Track Salary Advance Balances
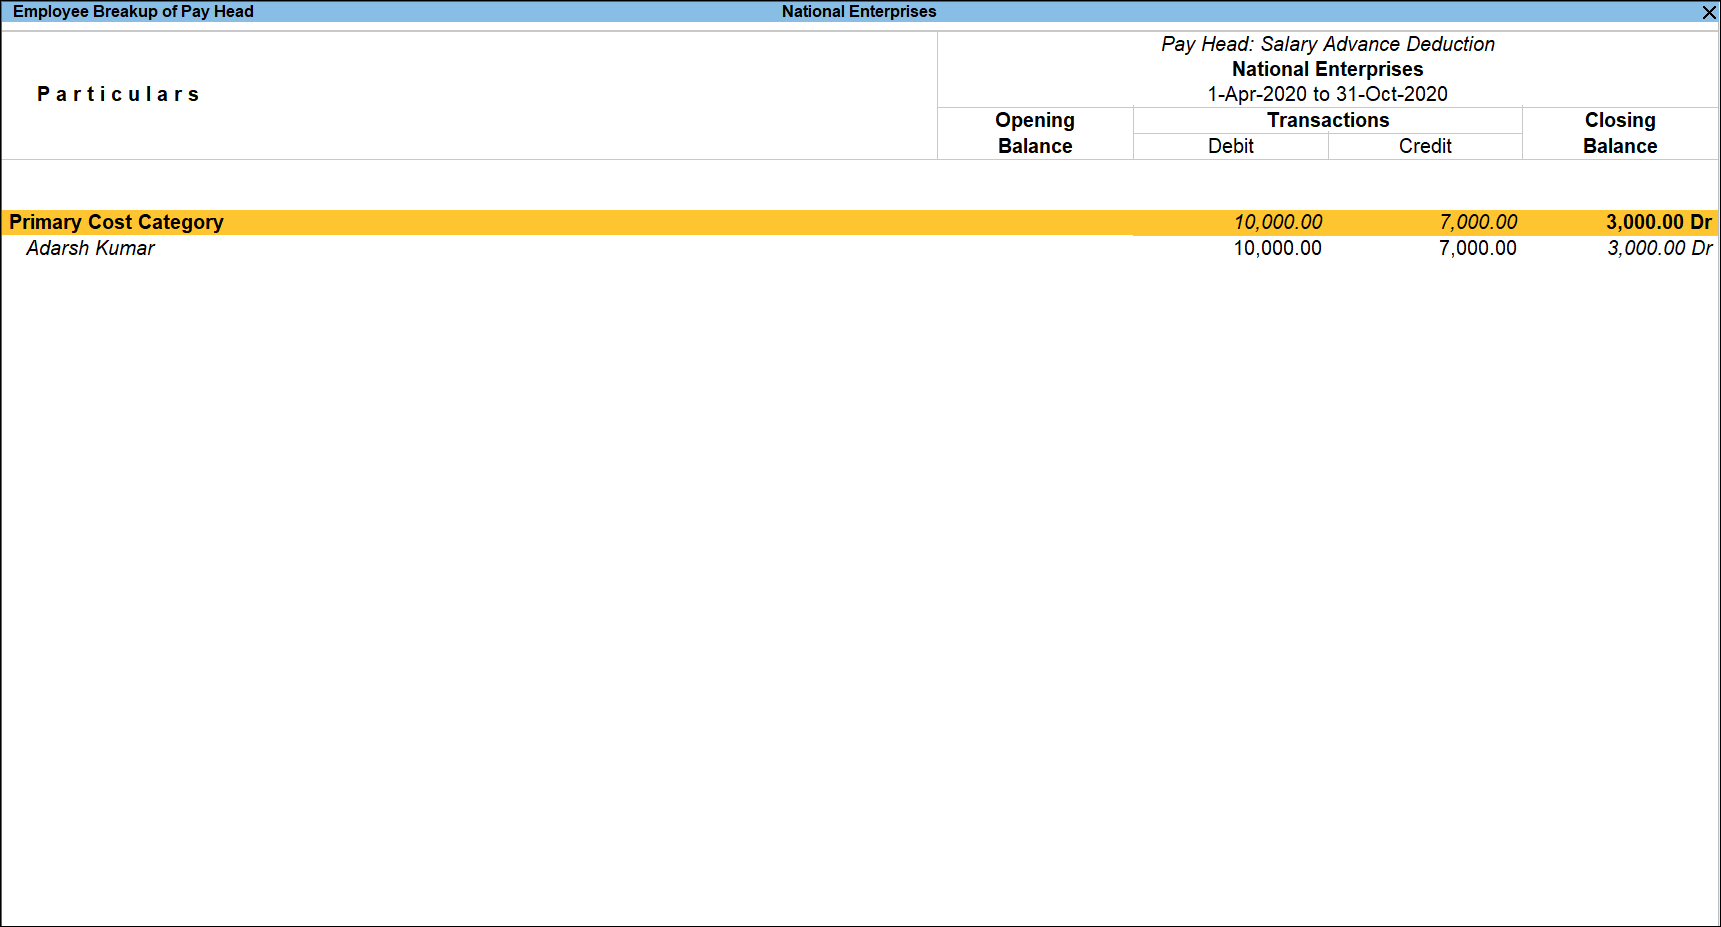
- Gateway of Tally > Display More Reports > Payroll Reports > Payroll Statement> Employee Pay Head Breakup.
Alternatively, press Alt+G (Go To) > type or select Employee Pay Head Breakup > and press Enter. - Select Salary Advance Deduction.

- All the salary advances given to employees will be listed here with details of opening and closing balances.
- As per the requirements this report can be configured using the F12 (Configure) button.
Stop Salary Advance Deduction
Once the loan amount is repaid, you can remove the Salary Advance deduction Pay head from the Salary Details of the relevant employee to avoid erroneous deduction of Salary Advance during the Payroll Voucher. However, if the Calculation type is given as user-defined, you may press Enter to skip the field.


