
Import Data into TallyPrime
If you have existing business data and want to bring it into TallyPrime, the Import Data feature provides a simple and flexible way to move your masters and transactions into your company.
Use the Import Data feature when you want to:
-
Import masters and transactions from one TallyPrime instance to another.
-
Bring data exported from other ERPs in Excel, XML or JSON formats.
- Import data you are maintaining in Excel.
Choose the import path that fits how your data is currently organised.
Import from Another TallyPrime Instance
Use this method when you want to replicate or migrate data between two TallyPrime environments.
-
Export masters or transactions from TallyPrime in XML or JSON format.
-
Import the exported file into another TallyPrime company.
Import from Other ERP Systems
If you are switching from another ERP or accounting system:
-
Export the data from your current ERP in Excel, XML JSON format.
-
Import the exported file into TallyPrime.
Import from Your Own Excel File
Use this if you are already maintaining data in your own Excel format.
-
Map the columns in your Excel with the corresponding fields in TallyPrime using Mapping Templates.
-
Import your data without modifying your existing Excel format.
Learn: How to Import Data using Any Excel File | User-defined Excel Templates
Advanced Import Scenarios
If your Excel sheet is structured differently, you can still import data into TallyPrime by mapping fields appropriately.
Learn how to:
-
Map Top & Bottom Voucher Entries using Fixed Ledger Columns
Configure mapping when debit/credit details appear in separate sections. -
Map Data from Multiple Rows & Columns
Import data where a single voucher’s details span across multiple rows or multiple columns. -
Map Data With & Without Column Headers
Import data from Excel file with or without header titles. -
Map Nett Amount Values
Use net amounts directly when ledger-wise amounts are not available. -
Exclude Rows During Import
Skip unwanted Excel rows using mapping rules. -
Map Attendance Data from Excel
Import attendance records into TallyPrime using structured mapping. -
Set Up Unique Values in Mapping Templates
Select parameters to define uniqueness and create the required masters or transactions.
Import from Sample Excel Files Provided by TallyPrime
Use this if you want a ready-made Excel structure.
-
Download predefined Sample Excel Files that already contain the correct structure.
-
Enter your data in the specified columns—no mapping required.
-
Import the file directly into TallyPrime.
Import from Other Templates/Sample Files for e-Commerce Businesses
These sample files are designed to help you record and import data seamlessly, especially if you are engaged in e-commerce or online retail business.
You can use templates specific to the following platforms:
Click here to know how to use the files.Step 1: Click the required sample file to download.
- You can download more than one zip files, if needed.
- You can also reach this table by selecting the Other Templates/Sample Files option available from the Import Masters or Import Transactions screen.
Step 2: Unzip the file in the downloaded folder.
Step 3: Move the mapping template (.tsf file) to the excelmaps folder under the TallyPrime application folder.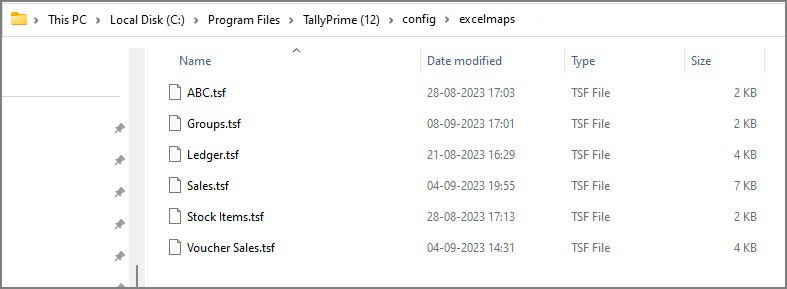
This is needed to list the mapping templates under the List of Mapping Templates, while you select the template for importing data from Excel. It is also recommended that you keep a backup of these templates in a separate folder.
Just fill in the worksheet with relevant data based on your day-to-day transactions or master details, and import using the mapped templates. Moreover, you can use the Excel files as is or make any necessary modifications to record data and alter the corresponding mapping files as needed.
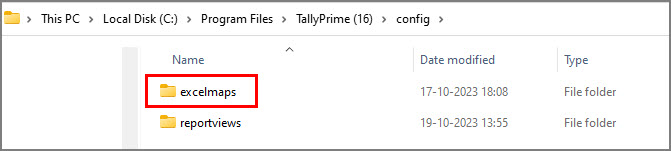
If you are downloading the TSF files for Other Templates/Sample Excel Files for the first time, you must manually create the config > excelmaps folder under the TallyPrime installation folder.
Step 4: Import data from the sample file using the downloaded templates.
Ensure that you check the Templates and Sample Excel Files and alter them according to the data that you want to import into TallyPrime.
Resolve Data Exceptions During Import
Exceptions occur when your data does not match TallyPrime’s requirements during import- such as missing mandatory fields, invalid names, incorrect GST details, duplicate records, or unsupported formats.
Use the Exceptions Report to identify and correct these issues before completing the import.
Additional Resources
-
Import Data – FAQ
Explore frequently asked questions about importing data into TallyPrime. -
Import Data – Errors & Resolutions
Learn about possible errors during import and their detailed resolutions.


