Add a New Contact Number to WABA
If you don’t have a mobile number that is registered for your WhatsApp Business Account, you can add a new contact number to your WhatsApp Business Account. You can also connect your existing WhatsApp Business App number for the WhatsApp API account.
It is recommended to follow the sign-up process on a computer where you are already logged in to your Facebook business account.

Ensure that you have:
- GST registration certificate.
- A new contact number with SMS access.
- Facebook account credentials (if using Facebook login).
- Business website URL or Facebook business page link (required only when GST verification is not used).
Step 1: Log in to the Interakt portal.
Log in to your Interakt portal and access your account.
Step 2: Verify the prerequisites and update your Business location.
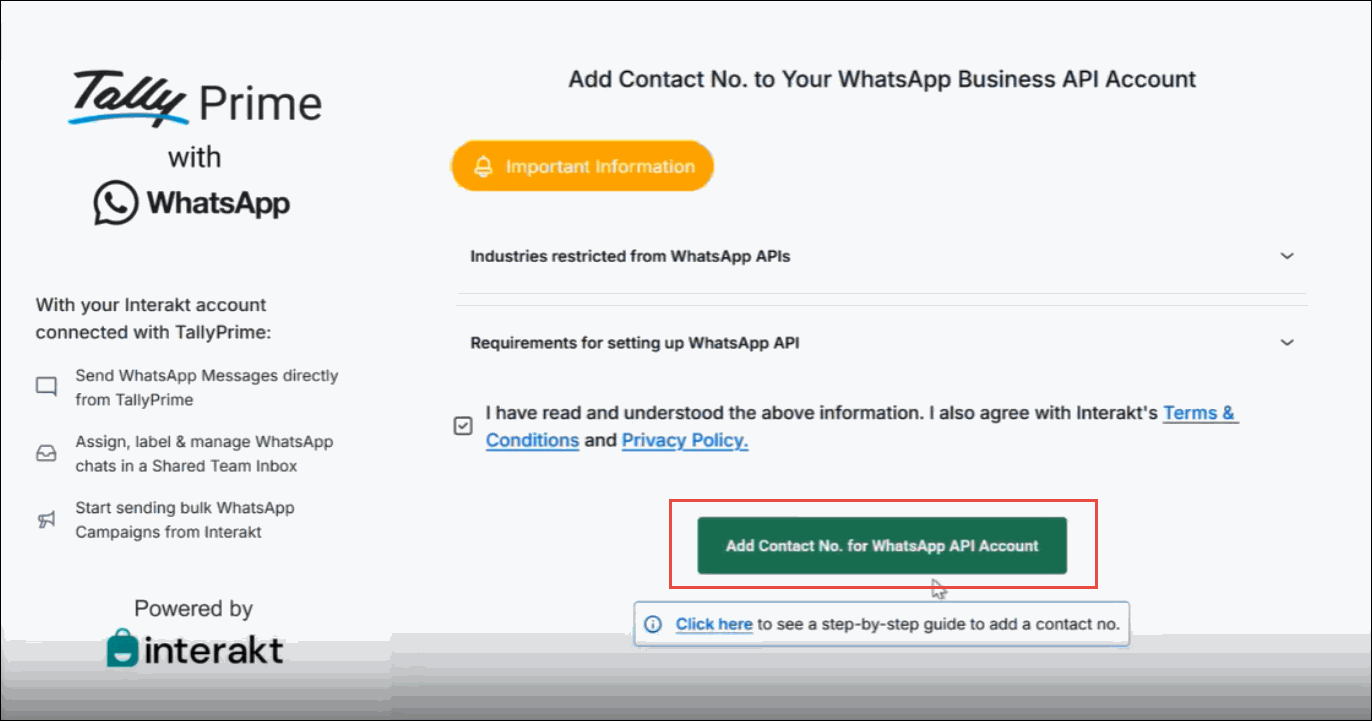
- Select Add Contact No. for WhatsApp API Account.
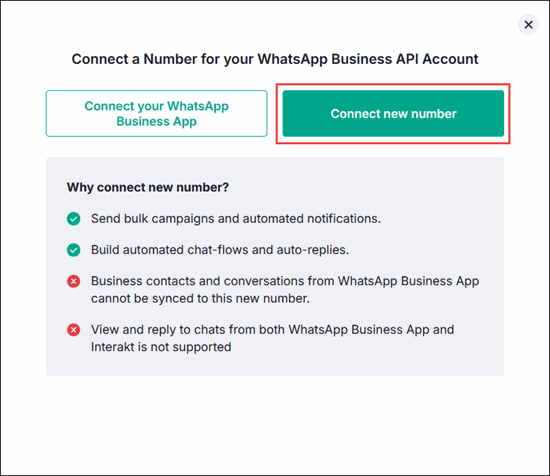
- Select Connect new number.
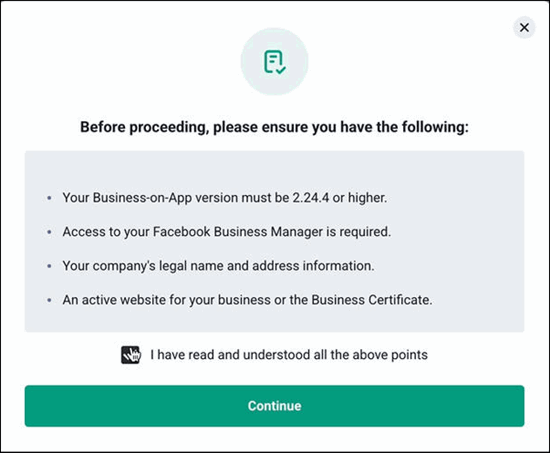
- In the pop-up screen, read the prerequisites, select the check box to confirm, and click Continue.
- Share your business location and the relevant document before proceeding for verification.
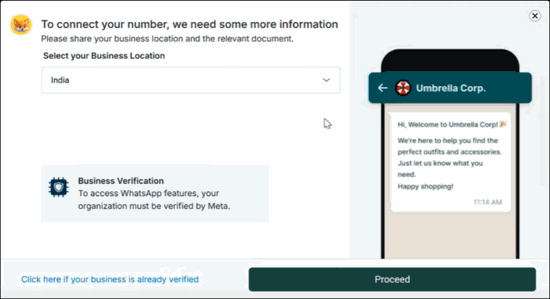
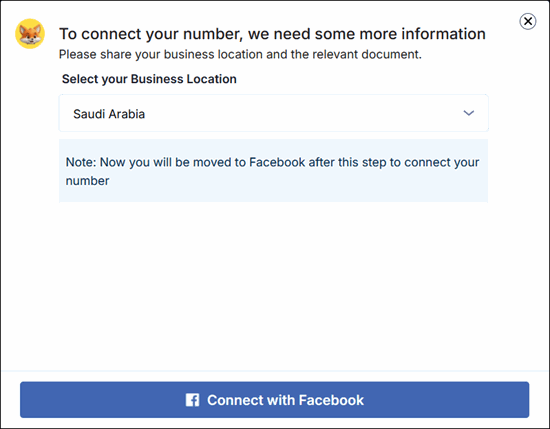
If your business location is outside India, you will see the option to connect your number using Facebook account.
Step 3: Upload Your GST Certificate
We highly recommend uploading your GST certificate for a hassle-free approval by Meta. However, if you do not have one, click Continue Without GST Certificate, and move to step 4 directly.
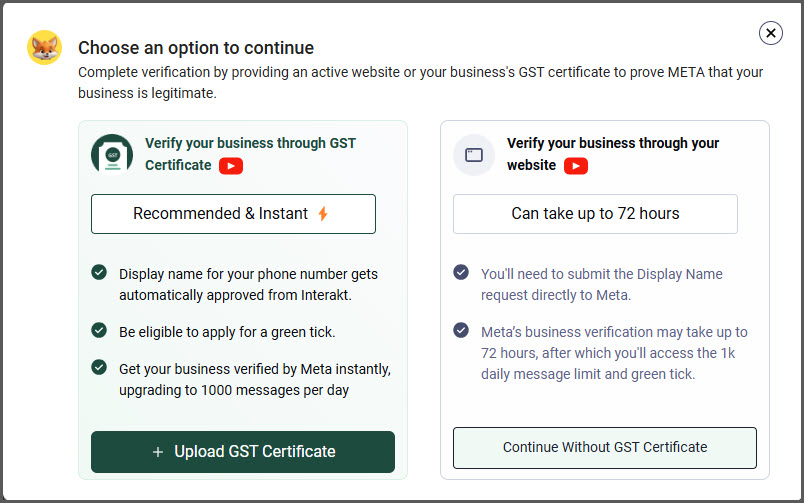
- Click Upload GST Certificate and select your GST certificate to upload.
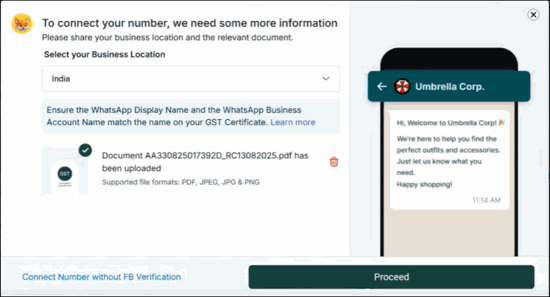
- On successful upload, click Proceed.
Step 4: Log in with Your Facebook page
If you are already logged in to Facebook, you will be prompted to continue with the same log in.
- Enter your log in credentials in the Log in to use your Facebook account with Interakt screen, if not logged in.
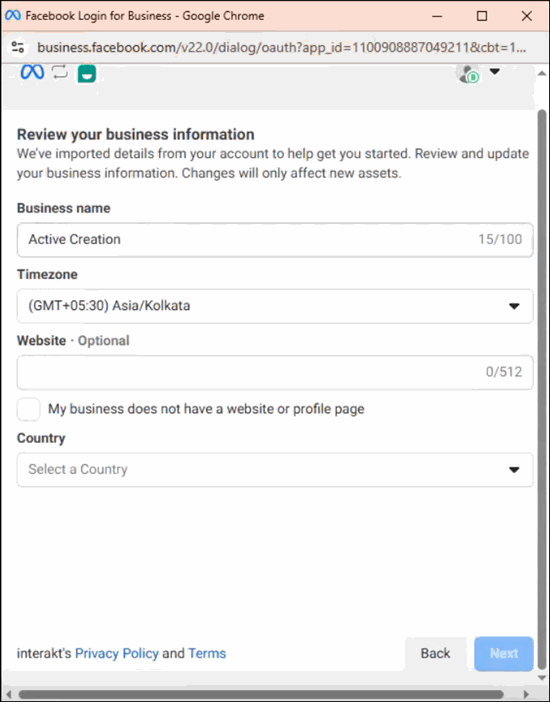
Alternatively, click Continue as… - Fill in your Business Information.
- Verify your Business name as per your GST certificate.
- Verify the timezone or update the appropriate timezone, as per your business location.
- Website or Profile Page: This is required on if you have not uploaded your GST Certificate or your business location is outside India. Enter your business website URL or Facebook page link.
- Select the country as applicable, and click Next.
-
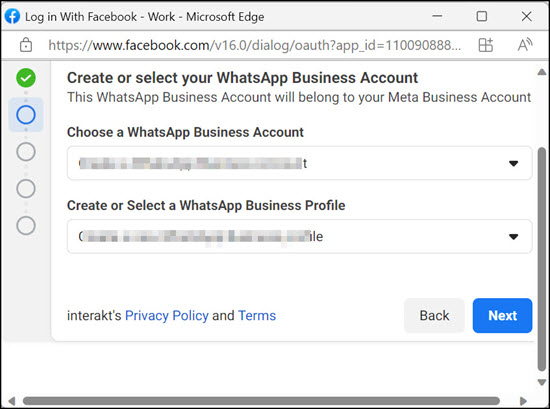
Create or select your WhatsApp Business Account.
-
Under Choose a WhatsApp Business Account, select Create a WhatsApp Business Account.
If you had already created an account, the Choose a WhatsApp Business Account and Create or Select a WhatsApp Business Profile fields are prefilled. -
Click Next.
-
Step 5: Create a WhatsApp Business Profile.
In this screen, you can enter or validate the following business information.
- WhatsApp Business Account Name: This is required for saving your profile details.
- WhatsApp Business Profile Display Name: The recipient will see this name on receiving the message from your WABA number. Therefore, it is recommended that the display name be the same as your Business Name.
- Select the Timezone, and the Category of your business.
- Enter a Business Description, and click Next.
Step 6: Add a phone number for WhatsApp.
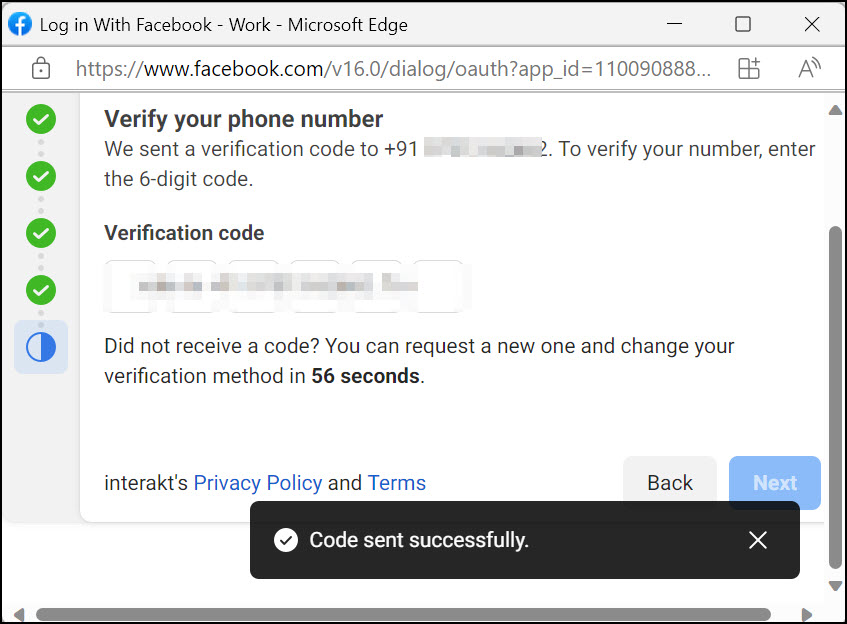
- Under Phone number, enter the phone number that you want to add for the WhatsApp Business Account.
This number will be used for all your business communications, including sharing documents from TallyPrime, with your parties. - Select the Text message or Phone call mode to receive the verification code, and click Next.
- In the Verify your phone number screen, enter the verification code, and click Next.
- On successful verification of your phone number, in the next screen, click Finish.
On your Interakt account screen, you will see a congratulations message for successfully adding your contact number to your WhatsApp Business Account. If you do not see the congratulations message, just refresh the Interakt screen.
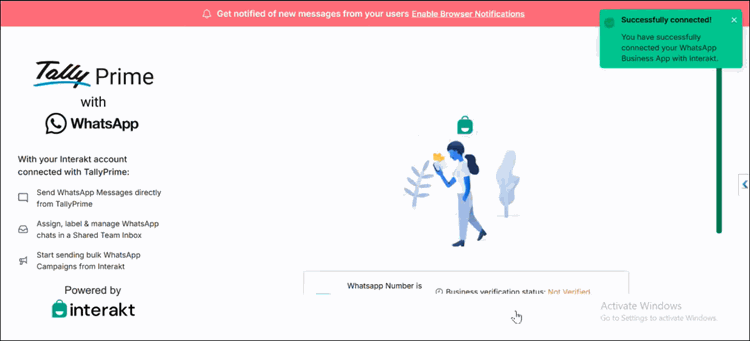
Now that you have successfully connected your contact no. to WABA, you can proceed for business verification.