Record Purchase in TallyPrime | Stock Items, Services
In your business, you might need to purchase goods or services to fulfill the demands of your customers. You may make a simple cash purchase or purchase on credit. For each purchase transaction, you will need to keep a record of the items you bought, payments made, goods returned, and so on. TallyPrime provides you the facility to perform all such actions and much more, effortlessly. Moreover, you can view reports at any time to know about all the purchases made in your business and compare them against the sales performance.
Generate purchase bills: Record a cash bill or invoice when you make an instant payment to the supplier, using cash or any other mode like a cheque or credit/debit card. If it is a purchase on credit, record a credit purchase by using the supplier ledger. There are also situations when you want your supplier to deliver goods to a specific location that is different from your billing address. Similarly, you can record the transaction in various voucher modes as required like Item Invoice or Accounting Invoice, and so on. TallyPrime handles all your requirement to record the purchase of goods and services with party details, dispatch details, and more.
Record additional charges, discounts, and free items: Your purchase transaction may include additional expenses, such as transportation charges, insurance, and taxes. If your supplier has given discounts on your purchases, you will need to record the discounts in your invoices as well. Similarly, if you have received free items or samples from your supplier, all of these can be recorded and tracked in TallyPrime.
Reports: In TallyPrime, you can track all your purchase of goods and services using different reports, such as Purchase Register, Day Book, and so on. You can view your purchases across different periods, filter the data for specific details, configure the reports to view more purchase-related details, and more.
Record Purchase of Goods or Services
Whether you make a purchase on cash or credit, the procedure in TallyPrime remains similar. The only difference is that you will select cash or bank for cash purchases and the supplier ledger for credit purchases. You can record purchases of items using the Item Invoice mode and record purchases without items using the Accounting Invoice mode. TallyPrime also provides the flexibility to use these invoice modes interchangeably for recording purchases. You can also print the invoices with the necessary details, if needed.
![]()
- Open the Purchase voucher.
- Press Alt+G (Go To) > Create Voucher > press F9 (Purchase).
Alternatively, Gateway of Tally > Vouchers > press F9 (Purchase). - Press Ctrl+H (Change Mode) to select the required voucher mode (Item Invoice, in this case).
- Press Alt+G (Go To) > Create Voucher > press F9 (Purchase).
- Specify the supplier details.
- Supplier Invoice No. and Date: The invoice number and date should be the same as given in the corresponding sales bill.
- Party A/c name: Select Cash or Bank for cash purchases. For credit purchases, select the supplier ledger. As in other transactions, you can create the item or ledger on the fly by pressing Alt+C.
- Receipt Details: Enter receipt details like receipt doc no., bill of landing, destination, and so on, if needed.
- Party Details: Enter the supplier’s name and address, if needed.
If you do not see the Party Details screen, press F12 (Configure), and set Provide Receipt, Order, and Import details to Yes.
You may want to maintain specific details about your suppliers, such as address with landmark, alternative contact number, and so on, in the invoices. In such cases, you can create party ledgers with the required details. In the Suppliers field of Party Details screen, select the required ledger.
- Purchase ledger: Select the common purchase ledger created under Purchase Accounts.
If you do not see this field on the screen, press F12 (Configure) and set Select common Ledger Account for Item Allocation to Yes.
In Accounting Invoice, you can select the purchase ledger under Particulars. - Provide the stock item or service details.
As in other transactions, you can create the item or ledger on the fly by pressing Alt+C.
In Item Invoice, select the stock item and enter the Quantity. The Rate will be auto-filled, if available for the stock item. However, you may choose to enter the Rate or Amount.
In Accounting Invoice, select the service ledger and enter the Amount. - Select additional ledgers, like transportation charges, insurance, or discount, if any.
- Provide Narration, if needed, and accept the screen. As always, you can press Ctrl+A to save.
- Print the invoice.
- Press Alt+P (Print) > press Enter on Current.
- Press I (Preview) to check the invoice before printing, if needed.
- Press F12 (Configure) to view the Print Configuration screen and configure the invoice, if needed.
- Press P (Print) to print.
The following is a sample preview screen of the purchase invoice.
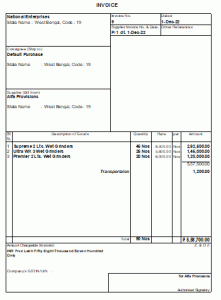
Payment Against Purchase
After the purchase, you pay money to your supplier instantly or later. You can pay the money either in cash, from the bank, or through an online payment. If you do an instant payment, then you can directly record it in the purchase voucher. In that case, instead of a Party ledger, you can directly select Cash. Else, you can record the payment entry later when you pay the amount.
Record Payment Against Purchase – Cash/Bank
In case of instant payment after sales, you can record cash sales using a sales voucher. In the sales voucher instead of selecting the party ledger, you can select cash account.
To know more about recording receipts, refer to the Record a Payment Voucher section in the Payments and Receipts topic.
However, if you want to know the turnover details of your suppliers or the cash is not paid immediately then you need to record the purchase separately with the party ledger. After recording a purchase voucher, once you pay cash, you need to record the payment using cash and adjust it with the purchase voucher.
- Open a Payment Voucher in the Single-entry mode.
- Press Alt+G (Go To) > Create Voucher > press F5 (Payment).
Alternatively, Gateway of Tally > Vouchers > press F5 (Payment). - Press Ctrl+H (Change Mode) > select Single Entry.
- Press Alt+G (Go To) > Create Voucher > press F5 (Payment).
- Enter the Cash and Buyer details.
- Account: Select cash/Bank ledger.
- Particulars: Select the ledger of the party whom you paid the cash.
- Amount: Enter the amount received and press Enter.
The Bill-wise Details screen appears. - In the Bill-wise Details screen, select Agst Ref as the Type of Ref and select the purchase voucher number.
- Provide the receipt details in the Bank Allocation screen.
- In the payment voucher, press F12 (Configure) > Set Ledger-wise Bank Allocations during voucher creation as Yes to view the bank details of each party in case of single payment to more than one supplier.
You can record payment for more than two suppliers in one payment voucher in cases like if the suppliers are sister concerns.
- In the Bank Allocations screen, press F12 (Configure) > set Show Favouring Name to Yes, to view the party name to whom the amount is paid.
- Received From – The Party ledger mentioned in the payment voucher, appears in the Favouring Name field in the Bank allocation screen.
- Transaction Type – Select the required transaction type.
In case of Transaction Type selected as e-Fund Transfer, in the Bank Allocations screen, press F12 (Configure) > set Show Transfer Mode for e-Payments, to view the Transfer mode field.

- Press Ctrl+A to save the screen.
- In the payment voucher, press F12 (Configure) > Set Ledger-wise Bank Allocations during voucher creation as Yes to view the bank details of each party in case of single payment to more than one supplier.
- As always, press Ctrl+A to save the payment voucher.
If you want to set a default account for all your payment vouchers, you can create a voucher type with the option Enable default accounting allocation set to Yes, and record the transactions. In this case, the vouchers appear in the single-entry mode.
You have recorded the cash/Bank payment against purchase in the payment voucher.
Use Less Paper Space for Printing
By default, TallyPrime prints invoices on A4-size papers. But it also provides you the flexibility to optimize the print space and fit in more data to reduce the usage of paper. In certain cases, your transaction may involve more stock items, which can be printed by optimizing the print space.
![]()
- In the Purchase invoice, press Alt+P (Print) > press Enter on Current.
- Press C (Configure) > type or select Optimise printing to save paper and press Enter to set it to Yes. This will print maximum information in the print area and save paper.
This option will appear only when: The Country selected for the company is India. The company is enabled for GST/VAT/TDS/TCS. The service tax and excise features are disabled.
- Press Esc to return to the Voucher Printing screen.
Henceforth, all the purchase invoices you print will continue to have the same print size, until you change the option in F12 (Configure) for invoice printing. - In the Voucher Printing screen, press P (Print) to print the invoice on the paper used.
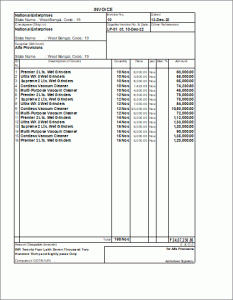
As the above invoice is printed by enabling the option Optimise printing to save paper, all the stock items are appearing on a single page. If this option was set to No, the same information would have been printed on two pages.
Specify Separate Supplier and Consignee Details
In some business scenarios, you may want your supplier to deliver goods to a location different from your billing address. TallyPrime provides you with the option to enter the delivery address as the consignee details when recording a purchase transaction.
![]()
- In the Party Details screen of the purchase invoice, press F12 (Configure) > set Provide separate Buyer and Consignee details to Yes.
Henceforth, you can add both the consignee and supplier details in every purchase invoice, until you change the option in F12 (Configure) of the invoice. - Enter the Consignee and Supplier details.
- Accept the screen. As always, you can press Ctrl+A to save.
When you print the invoice, the consignee’s name and address where the supplier will deliver the consignment or goods will be printed.
Purchase of Items with Discount
In your business, it may be common for you to receive discounts on the purchase of goods and services. You may receive discounts from the supplier on the total item amount or on each item amount separately. Using TallyPrime, you can record all such discounts with or without using the discount ledger. You can also record the item-level discounts as either indirect incomes or rate discounts.
In this section
Purchase with a discount on the total item amount
If you have received a discount on the total item amount, say 10%, you can account for such discounts while recording your purchase invoice using a discount ledger grouped under Indirect Incomes.
![]()
- In the Purchase voucher, after you have selected the stock items, press Enter twice to skip one line.
Alternatively, press Enter > Spacebar > and select End of List.
This takes you to the next line in the screen where you can now select the discount ledger.
In Accounting Invoice, you can simply select the discount ledger after entering the purchase details. - Provide details of the discount.
- Select the ledger for discounts created under Indirect Incomes.
- Enter the discount percentage (%) under Rate as a negative number (in minus, for example, -10%). TallyPrime applies the discount to the total item amount and displays the discount Amount against the selected discount ledger.
Alternatively, you can enter the Amount.
- Enter the remaining details and accept the screen. As always, you can press Ctrl+A to save.

TallyPrime calculates the invoice total by subtracting the discount from the total amount for the items.
If your supplier calculated the discount after including additional charges, such as transportation, press F12 (Configure) > set Show more configuration to Yes > set Show all configurations to Yes > set Calculate Tax on Current Subtotal to Yes.
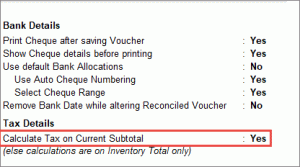
Henceforth, when you select the discount ledger, the discount will be applied to the total amount after including any additional charges, until you change the option in F12 (Configure) of the invoice.
Purchase with trade discount
While making a purchase of goods and services, based on your business terms with your supplier, you may get discounts on certain items depending on the quantity or supply. To record a purchase with such trade discounts in TallyPrime, you can show the discount percentage against the quantity of the item. Also, you have the flexibility to enter the discount percentage or amount for each item and book the total discount as indirect income in your purchase invoice.
For example, say you have purchased 100 pcs of Item A from a supplier. The standard buying price for this item is Rs. 100 each. Since this was a bulk purchase of 100 pcs, your supplier offered a discount of 10% on the item rate.
You can record this discount received in two ways:
- You can enter the discount % along with the item. The total item amount will appear as Rs. 9,000 for all 100 pcs of Item A. Here, as the item amount is changed to Rs. 9,000, this amount will be booked as a purchase.
- You can create a discount ledger for 10% as an indirect income and use it to calculate the total discount. That means, your per-item rate will show Rs. 100 and therefore Rs. 10,000 for all 100 pcs. The discount received for 100 pcs of the item will appear as Rs. 1,000, and the total payable at the end of the voucher will appear as Rs. 9,000.
In this section
- Enter the discount percentage against each item – without using the ledger account
- Enter discount percentage and amount on item rates – using the ledger account
Enter the discount percentage against each item – without using the ledger account
You can enter the discount percentage against each item and the Amount will be calculated automatically.
![]()
- Press F11 (Features) > set Use Discount column in invoices to Yes.
If you do not see this option, set Show more features to Yes.
Henceforth, you will see the Disc % column in every purchase invoice.
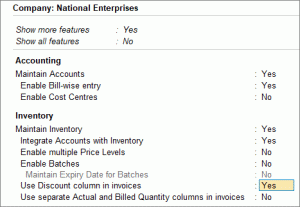
- In the purchase invoice, after you have provided the Quantity and Rate, enter Disc % for the selected item.
The Amount for the given quantity of the stock item is displayed after deducting the discount, without showing any change in the Rate.

- Enter the remaining details and accept the screen. As always, you can press Ctrl+A to save.
The discounted item amount appears against each item.
Enter discount percentage and amount on item rates – using the ledger account
You can enter the discount percentage or the discount amount directly after entering the quantity and rate of the stock items. Once the stock details are entered, you can select the discount ledger for the discount to be applied to the invoice amount.
![]()
- In the purchase invoice, press F12 (Configure) > set Provide Cash/Trade Discount to Yes.
If you do not see this option, set Show more configurations to Yes. If the option does not appear, press F11 (Features) > enable the statutory options (GST or VAT) applicable to your business. - After you have entered the Amount of the stock item, in the Discount field, enter the discount percentage that you have received for that item.
This automatically calculates the discount and displays the amount in the next field.
Alternatively, press Enter to leave the first field blank and enter the discount amount in the next field. - Select the discount ledger created under Indirect Incomes.
Ensure that in the discount ledger, the option Type of ledger is set to Discount.
- Enter the remaining details and accept the screen. As always, you can press Ctrl+A to save.
The total discount amount appears against the selected discount ledger. This amount is the sum of the discounts displayed under each stock item.
Purchase Import Invoice Entry – Case Study
In a case of imports, stock items are purchased from a foreign country in another currency, for example, US Dollar. The expenses incurred to bring the stock item to the production unit will be in local currency.
In this scenario, the supplier’s bill amount should not include expenses incurred within the country. However, the item value should include such expenses to arrive at the actual cost.
For example, here is the invoice received from the supplier.
| Purchase Import Invoice | ||||
| Date | 01-11-2020 | |||
| Party | Foreign Supplier | |||
| Address | USA | |||
| Sl. No. | Particulars | Quantity | Rate ($) | Amount ($) |
| 1 | Item A | 10 Nos | 100.00 | 1,000.00 |
| 2 | Item B | 15 Nos | 150.00 | 2,250.00 |
| Total | 25 Nos | 3,250.00 | ||
| Dollar Three Thousand Two Hundred and Fifty Only | ||||
Expenses incurred for procuring the material:
- Custom Duty – Rs.15,000.00
- Clearing and forwarding charges – Rs.20,000.00
- Freight Charges – Rs.10,000.00
Amount payable to the foreign supplier is $3250.00, considering the currency exchange rate of Rs. 73/$. Also, the above expenses need to be appropriated to the item cost.
| Purchase Import Invoice | |||||
| Particulars | Quantity | Rate | Amount | Rate of Exchange | Item Rate in Rs. |
| Item A | 10 Nos | $ 100 | $ 1000 | Rs. 73/$ | 73,000 |
| Item B | 15 Nos | $ 150 | $ 2250 | Rs. 73/$ | 1,64,250 |
| Total | 25 Nos | $ 3250 | 2,37,250 | ||
| Additional Cost of Import | |||||
| Customs Duty | 15,000 | ||||
| Clearing and Forwarding Charges | 20,000 | ||||
| Freight Expenses | 10,000 | ||||
| Total Additional Cost | 45,000 | ||||
Let us create the masters and transaction in TallyPrime
Create Groups
- Press Alt+G (Go To) > Create Master > Group.
Alternatively, Gateway of Tally > Create > Group. - Create Import Expenses group under Direct Expenses. Set the option Method to allocate when used in purchase invoice to Appropriate by Value.
- Create Import Expenses Payable group under Current Liabilities. Set the option Method to allocate when used in purchase invoice to Not Applicable.
Create Ledgers
- Press Alt+G (Go To) > Create Master > Ledger.
Alternatively, Gateway of Tally > Create > Ledger. - Under Sundry Creditors group, create 2 ledgers – Foreign Supplier and Freight Forwarders.
- Under Import Expenses group, create 3 ledgers – Customs Duty, Clearing and Forwarding Charges, and Freight Charges – Import.
- Under Import Expenses Payable group, create 3 ledgers – Customs Duty Payable, Clearing and Forwarding Charges Payable, and Freight Charges – Import Payable.
- Under Purchase Accounts group, create Purchase – Import
Create Stock Items
- Press Alt+G (Go To) > Create Master > Stock Item.
Alternatively, Gateway of Tally > Create > Stock Item. - Create Item A and Item B with unit of measurement set to Nos.
Record a purchase invoice
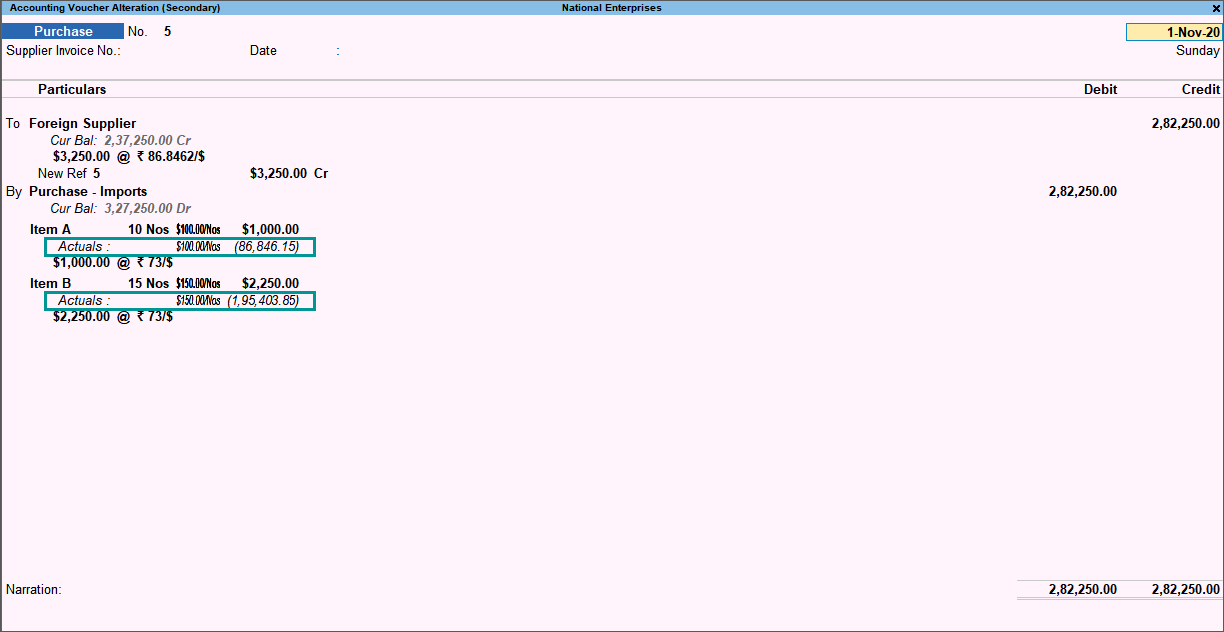
- Enter the details in purchase invoice as shown below:
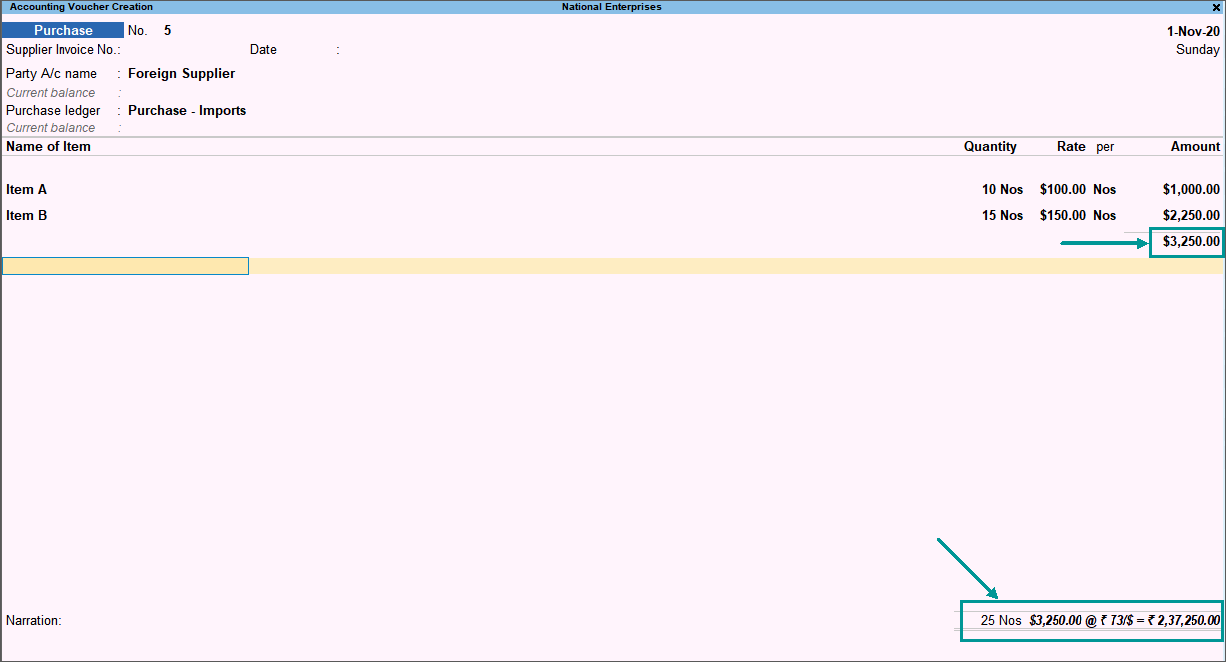
- Enter the additional costs incurred.
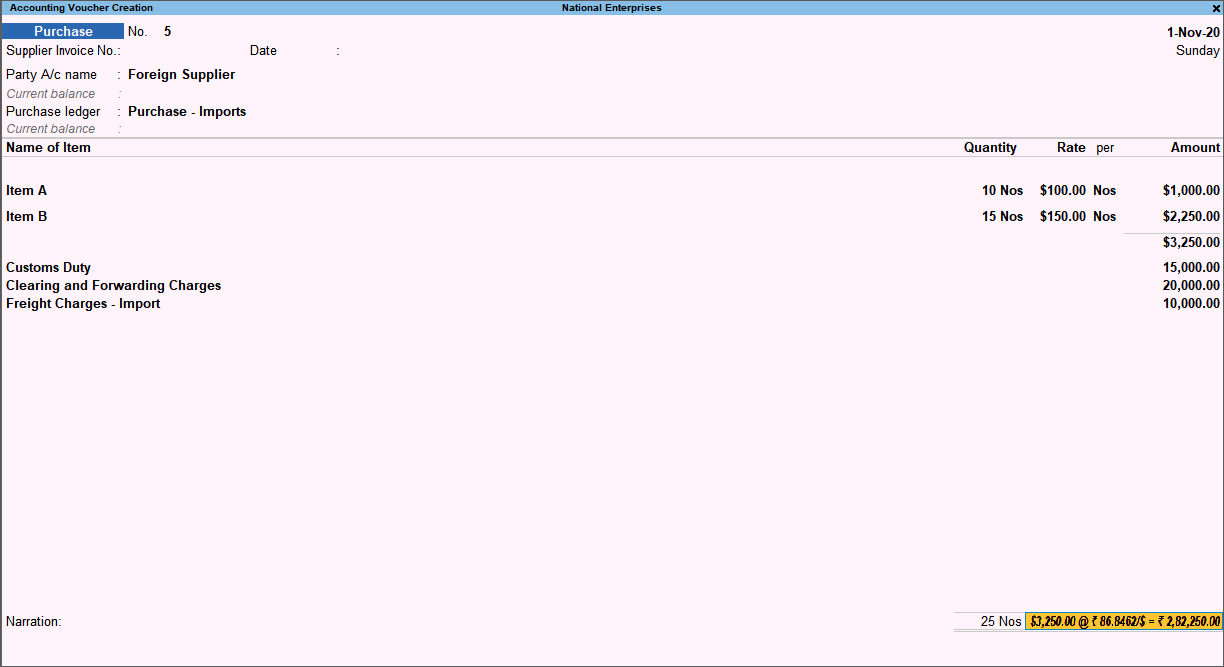
- Accept the invoice. You can press Ctrl+A to accept.
- You can view the break-up of additional expenses appropriated to item cost in the voucher mode. To view it,
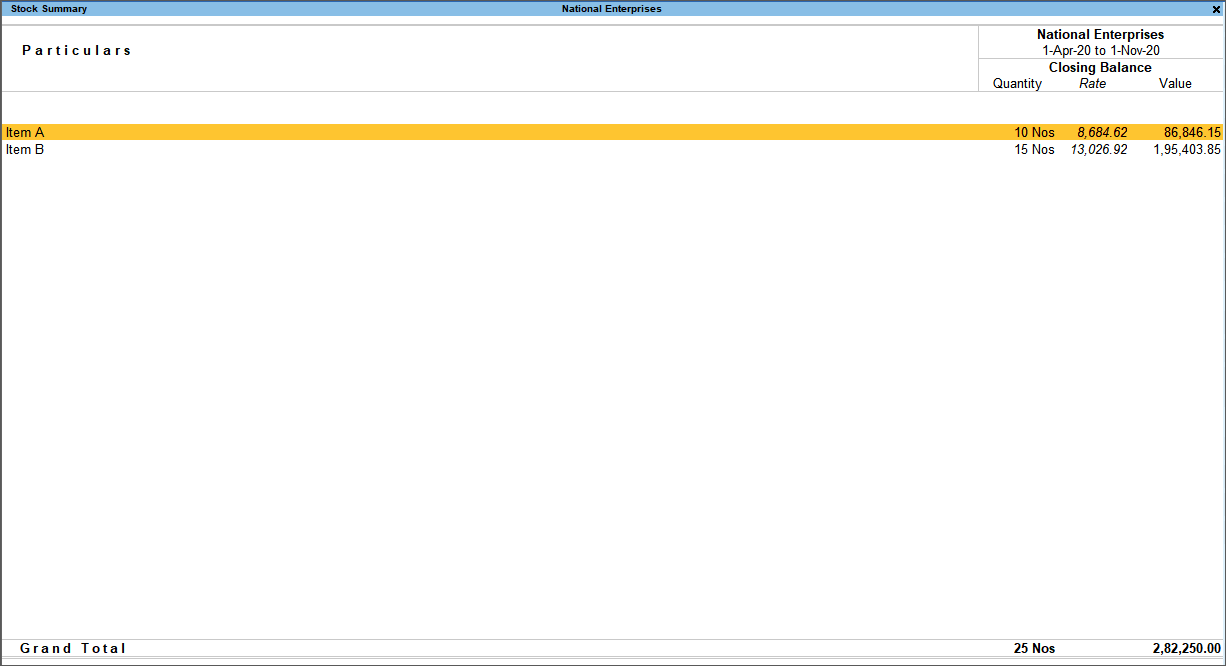
Check the Stock Summary
Press Alt+G (Go To) > type or select Stock Summary > and press Enter.
Record the vouchers for additional expenses
- Customs duty payment
Debit: Custom Duty Payable – 15,000
Credit: Cash – 15,000
- Clearing and forwarding journal voucher
Debit: Clearing and Forwarding Charges Payable – 20,000
Credit: Freight Forwarders – 20,000
- Freight payment voucher
Debit: Freight Charges – Import Payable – 10,000
Credit: Cash – 10,000
This is how you can record a Purchase Invoice for importing goods in TallyPrime.
Purchase of Free items
In some business cases, when you make a purchase, you might receive a few items for free from the supplier. For example, if you had placed an order for 12 pieces of an item, the supplier might have billed you for only 10 pcs and given the remaining 2 pcs without any additional cost. Alternatively, the supplier might have billed you for all 12 pieces and sent 2 additional pieces of the same item or a different item as samples. TallyPrime provides you the flexibility to record such purchases in two different ways. You can account for free items with transparency and mention the actual quantity and billed quantity of stock items. Also, you can create a purchase voucher without mentioning the rate and amount of the free item but only the quantity.
In this section
- Account for free items using Actual and Billed quantities
- Account for free items using zero-valued transaction
Account for free items using Actual and Billed quantities
You can create a Purchase voucher mentioning the actual quantity and billed quantity of items.
![]()
- On the Gateway of Tally, press F11 (Features) > set Use separate Actual and Billed Quantity columns in invoices to Yes.
If you do not see this option, set Show more features to Yes.
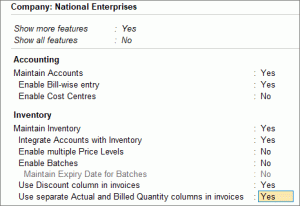
Henceforth, you will see the Actual and Billed columns under the Quantity column in every purchase invoice. - Select the stock item and enter the Actual quantity and Billed quantity.
Actual: Enter the quantity purchased from the supplier, say 25 Nos of the item.
Billed: Enter the quantity for which you will pay the supplier, say 24 Nos of the same item.
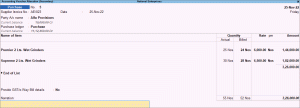
- Enter the remaining details and accept the screen. As always, you can press Ctrl+A to save.
The total amount calculated is based on the billed quantity; however, the items supplied to you are based on the actual quantity, which includes the free items.
Account for free items using zero-valued transaction
You can create a Purchase voucher to record free items received by mentioning only the quantity and not the rate or amount.
![]()
- Press Alt+G (Go To) > Alter Master >Voucher Type > select Purchase > and press Enter.
Alternatively, Gateway of Tally > Alter > Voucher Type > select Purchase > and press Enter. - Set the option Allow zero-valued transactions to Yes.
Henceforth, you can enter stock items without entering the Rate (zero value) in every purchase invoice. - In the purchase invoice, provide details of the items – Quantity, Rate, and Amount – that you have been billed for.
- Select the same item again or a different item, as supplied to you for free, and enter the Quantity. Leave the Rate and Amount fields blank.
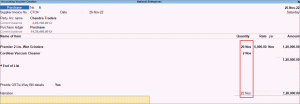
- Enter the remaining details and accept the screen. As always, you can press Ctrl+A to save.
The invoice generated displays the billed items with the Amount details, along with the total quantity received from the supplier.
TallyPrime also provides you the flexibility to record purchase transactions only for zero-valued items, such as free items or samples received from suppliers.
Purchase of Fixed Assets
In your business, if you purchase fixed assets like buildings, machinery, equipment, vehicles, tools, and more that you do not trade in, then you can record such purchases in TalllyPrime using a Purchase voucher.
![]()
- Open the Purchase voucher in Accounting Invoice mode.
- Press Alt+G (Go To) > Create Voucher > press F9 (Purchase).
Alternatively, Gateway of Tally > Vouchers > press F9 (Purchase). - Press Ctrl+H (Change Mode) and select Accounting Invoice.
- Press Alt+G (Go To) > Create Voucher > press F9 (Purchase).
- In Party A/C name, select the supplier’s ledger.
- Under particulars, select the capital goods ledger grouped under Fixed Assets and enter the Amount.

- Provide Narration, if needed, and accept the screen. As always, you can press Ctrl+A to save.
This value will appear on the Balance Sheet.
You can record the same transaction in voucher mode, as per your business needs.
- Open the purchase voucher screen, and press Ctrl+H (Change Mode) to select the required voucher mode (As Voucher, in this case).
- Under Particulars, credit the party or cash/bank ledger and debit the fixed asset ledger.

- Accept the screen. As always, you can press Ctrl+A to save.
Reports | Know Your Purchases
For any business, it is very important to get real-time updates on the day-to-day purchase of goods and services to take decisions regarding upcoming movements in trade. This also helps in keeping track of stock availability. Tracking purchases day-wise, month-wise, or for any period provides insights on the overall purchase, returns if any, payment dues, and so on. TallyPrime provides different reports to get purchase-related data to analyze and make informed decisions for the business.
In this section
Day Book
This report tracks all your transactions on a day-to-day basis. You can filter this report to check all the purchase transactions made on a particular day.
![]()
- Press Alt+G (Go To) > type or select Day Book.
Alternatively, Gateway of Tally > Display More Reports > Day Book.
By default, this report displays all the transactions as of the Current Date displayed on the Gateway of Tally screen. - To view the purchases recorded on any given day:
This report lists all the purchase transactions recorded on the selected date. For more information, refer to the topic Day Book.
Purchase Register
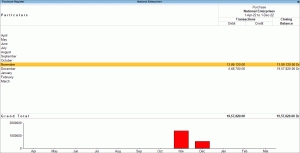
This report provides a comprehensive view of the month-wise purchases done in your business. You can drill down from the selected month to view the voucher-wise listing of purchases. You can further configure the report to view the data for different periods and represent the purchase details in different ways, based on your business needs.
![]()
- Press Alt+G (Go To) > type or select Purchase Register.
Alternatively, Gateway of Tally > Display More Reports > Account Books > Purchase Register. - Move your cursor up or down and press Enter to view purchase vouchers recorded in the selected month.
View Edit Log for Purchases
You may be making changes to your purchase voucher for various reasons. You may have ordered some quantity of a product and then you may want to change for which you need to change the purchase voucher recorded for your supplier. Similarly, you may record a purchase order and then you may need to cancel it because your supplier cannot supply the product. To make such changes, you will be performing an activity in the voucher that would lead to the creation of an Edit Log, if you are using TallyPrime Edit Log or TallyPrime Release 2.1 and its successors.
To know how to view Edit Log, refer to View Edit Log for Transactions section in the Accounting Entry in TallyPrime topic.


