Generate e-Invoice Online Using TallyPrime (KSA e-Invoice Integration Phase)
As per the regulations by Zakat, Tax and Customs Authority (ZATCA), If your company or organisation is in the Kingdom of Saudi Arabia (KSA), it is mandatory to integrate your e-Invoicing solution, like TallyPrime, with the Fatoora portal or e-Invoice System to start generating e-Invoices online. This topic covers the complete e-Invoicing process, including setting up TallyPrime and the required company information for e-Invoice integration.
Also, as per the ZATCA guidelines, vouchers with generated e-Invoices cannot be deleted, modified, or canceled. Any changes must be made through a Credit/Debit note. However, data may still face potential undesired modifications in certain scenarios. With TallyPrime Edit Log, any attempt at data tampering will be flagged, ensuring transparency in such cases.
Set Up for e-Invoice Integration Phase
Setting up TallyPrime Edit Log for e-Invoice Integration Phase involves three major steps – specifying the necessary details in the Company, generating e-Invoice Login Credentials, and then specifying the e-Invoicing details under F11 (Company Features), as you enable e-Invoice Integration.
In this section:
Specify necessary information in Company
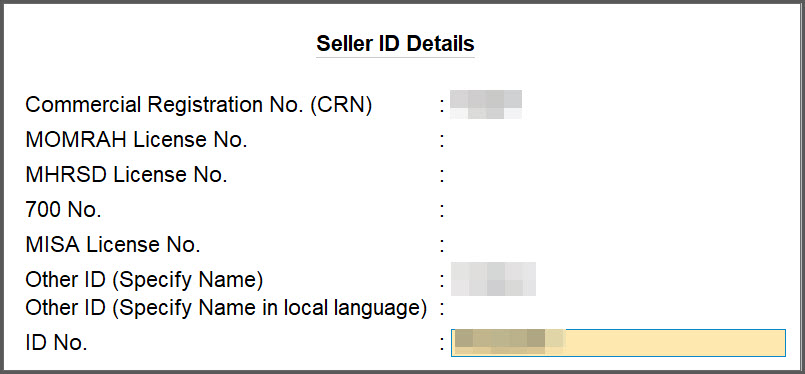
To start e-Invoicing for a Company, you will need to ensure that the information such as telephone number, mobile number, and e-mail ID is specified in the Company. Also, in the Seller ID Details screen, you need to update at least one ID to ensure your business is authentic/verified.
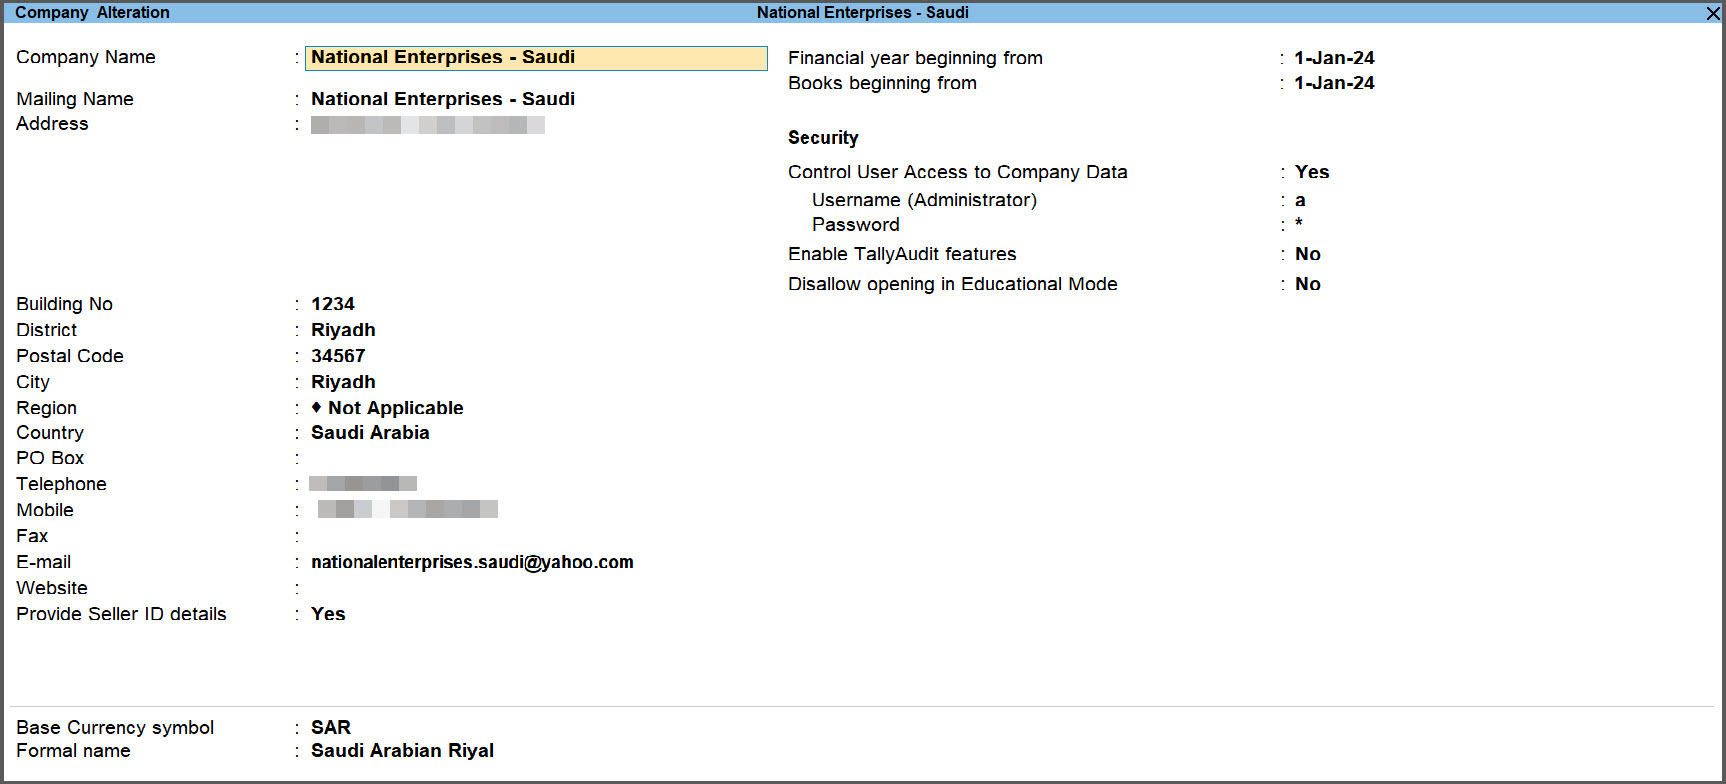
In the company alteration screen specify the required details.
- Enter Address, Building No., District, Postal Code, and City.
- Specify Telephone, Mobile, and E-mail.
These details are necessary to generate or renew e-Invoice Login Credentials for your Company. - Set Provide Seller Details to Yes and press Enter.
In the Seller ID Details screen, specify any one ID out of the following:- Commercial Registration No. (CRN): The CRN is a 10-digit number that can be found in the top left corner of the commercial registration certificate.
- Momrah License No.: The identification number of the license provided by The Ministry of Municipal Rural Affairs and Housing.
- MLSD License No.: The identification number of the license provided by The Ministry of Labor and Social Development.
- 700 No.: This is applicable if your Company is a defence institution or organization.
- MISA License No.: The identification number of the license provided by The Ministry of Investment.
- Other ID (Specify Name): The name of Other ID such as Driving License, Passport, or other, as applicable.
- ID No.: The identification number of the Other ID.

Generate e-Invoice Login Credentials
![]()
Once you enable e-Invoice Integration Phase under F11 (Company Features), you can generate e-Invoice Login Credentials for e-Invoice integration.
Before you proceed to generate e-Invoice Login Credentials for your Company, you need to have your e-Invoice System or Fatoora portal credentials ready. This is because you will need to generate an OTP on the Fatoora portal to generate e-Invoice Login Credentials in TallyPrime.
- In TallyPrime, press F11 (Company Features) > set Enable Value Added Tax (VAT) to Yes and press Enter.
The VAT Details screen appears.
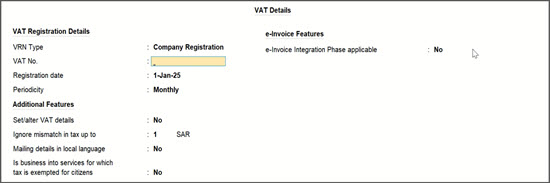
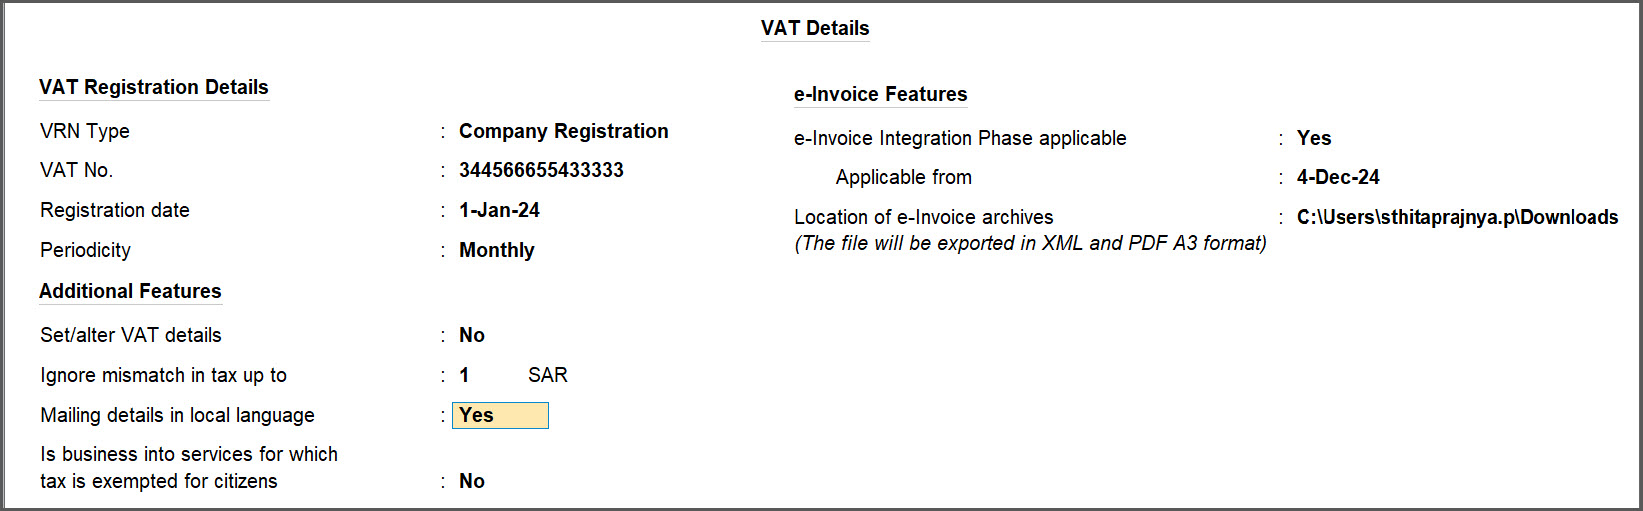
- Specify the VAT Registration Details.
- VRN Type: Company Registration or Headquarter Registration, based on the registration of your Company.
- VAT No.: VAT registration number of your Company.
- Registration Date: Date on which your Company had registered for VAT.
- Periodicity: Periodicity of your VAT returns.
- Specify the applicability of e-Invoice Integration Phase.
- e-Invoice Integration Phase: Yes.
- Applicable from: The date from which e-Invoice Integration Phase is applicable to your Company.
- Press Enter.
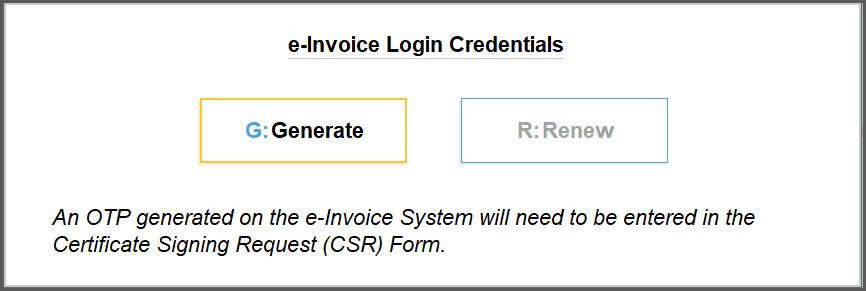
The e-Invoice Login Credentials screen appears.

- Press G (Generate).
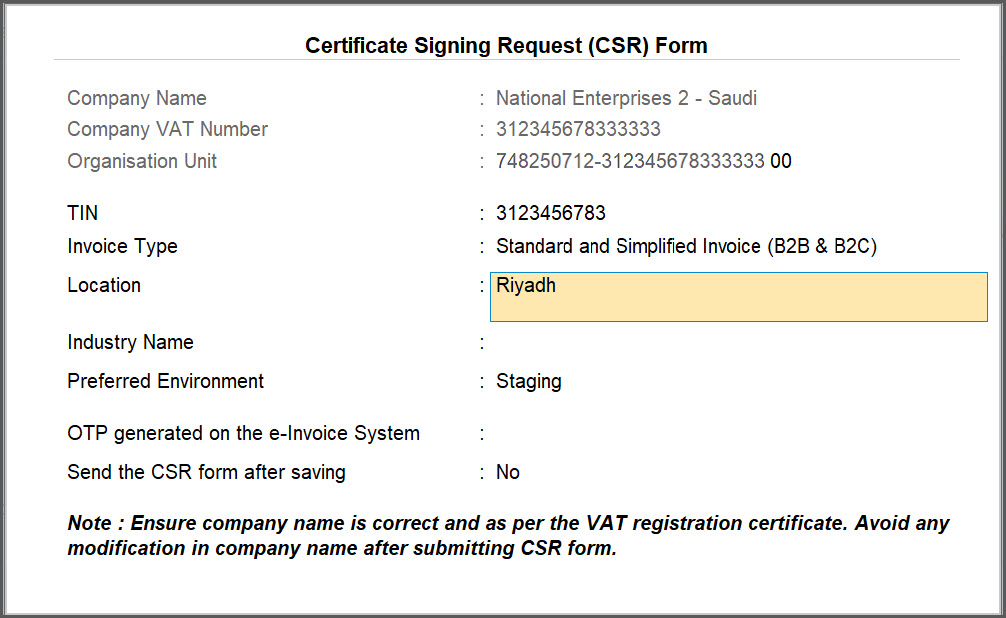
The Certificate Signing Request (CSR) Form appears.
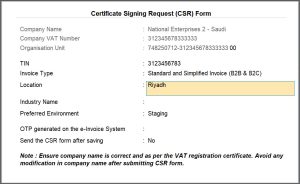
- Enter the required details in the Certificate Signing Request (CSR) Form, except for the prefilled fields like Company Name, Company VAT Number, and Organisation Unit.
- TIN: Taxpayer Identification Number, as per your VAT registration.
You can change it, if needed. - Select Invoice Type, as applicable.

- Simplified Invoice: If your Company has only B2C transactions.
- Standard Invoice: If your Company has only B2B transactions.
- Simplified and Standard Invoice: If your Company has B2C and B2B transactions.
- Location: Mention the location of your company.
- Industry Name: The name of your industry, such as Automobile, Oil & Gas, or other, as applicable.
- TIN: Taxpayer Identification Number, as per your VAT registration.
- Generate an OTP on the e-Invoice System and enter it in the OTP field.
- Log in to the e-Invoice System or Fatoora portal and generate an OTP.
If you are not logged in to the e-Invoice System and want to generate e-Invoice Login credentials later, then you can press Ctrl+A to save the details. - Enter the OTP and press Enter.
The CSR Form with all the necessary details appears.
- Log in to the e-Invoice System or Fatoora portal and generate an OTP.
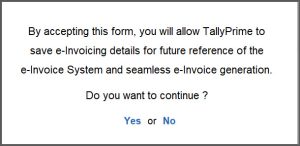
- Send the CSR Form after saving: Yes.
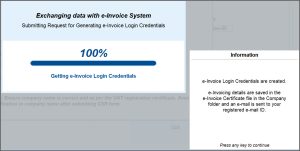
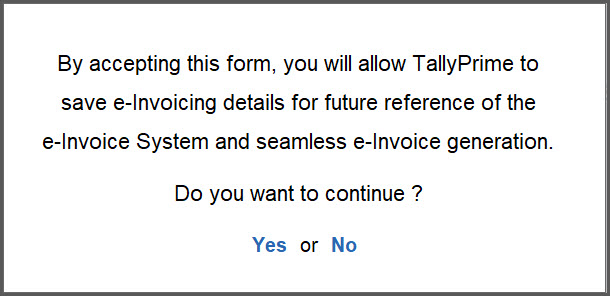
- Press Y or select Yes to continue.
Once the e-Invoice Login credentials are generated, you will receive an e-mail on your e-mail ID that is mentioned in the company creation/alteration screen. You will also receive an e-Invoice Certificate, which gets stored in your Company folder.
- After generating credentials, you will be redirected to the VAT Details screen, where you can provide e-Invoice archive path to automatically save PDF of A3 size after successful generation of e-Invoice.


After creating the e-Invoice login credentials, certain fields, such as the VRN Type, VAT No., Registration Date, and the e-Invoice Integration Phase applicable field, cannot be edited. Once you onboard with these information, they are stored with ZATCA, as these details are mandatory for generating e-Invoices. Any modifications to these fields after onboarding will prevent you from generating e-Invoices.
Provide mailing details in local language
![]()
Now, to provide the mailing details of the company in the local language:
- Press F11 (Company Features) > set Enable Value Added Tax (VAT) to Yes and press Enter.
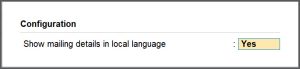
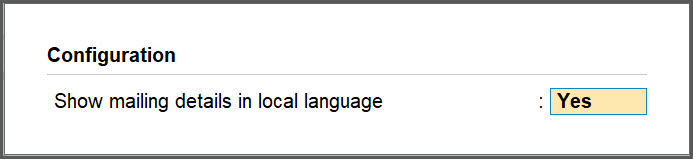
- In the VAT Details screen, press F12 (Configure).
- In the Configuration screen, set Show mailing details in local language to Yes.
- Set Mailing details in local language to Yes.

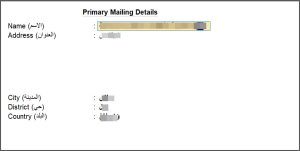
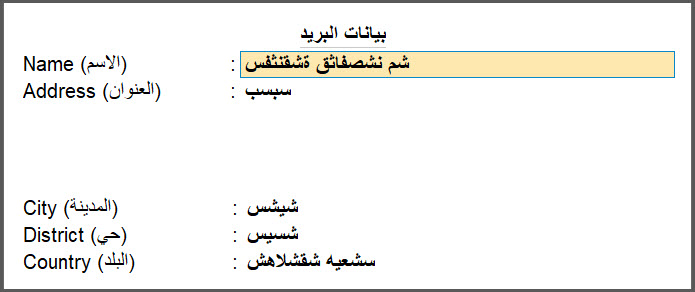
- In the Primary Mailing Details screen, enter the name of the company and mailing details in Arabic.
- Press Ctrl+A to save.
If you have multiple addresses, press F11 (Company Features) > Enable multiple addresses and provide relevant details.
Now, while printing the invoice, you can see the mailing details in Arabic appearing in the invoice in the Preview screen when the Print Type is configured as Bilingual.
View e-Invoice Integration (History)
![]()
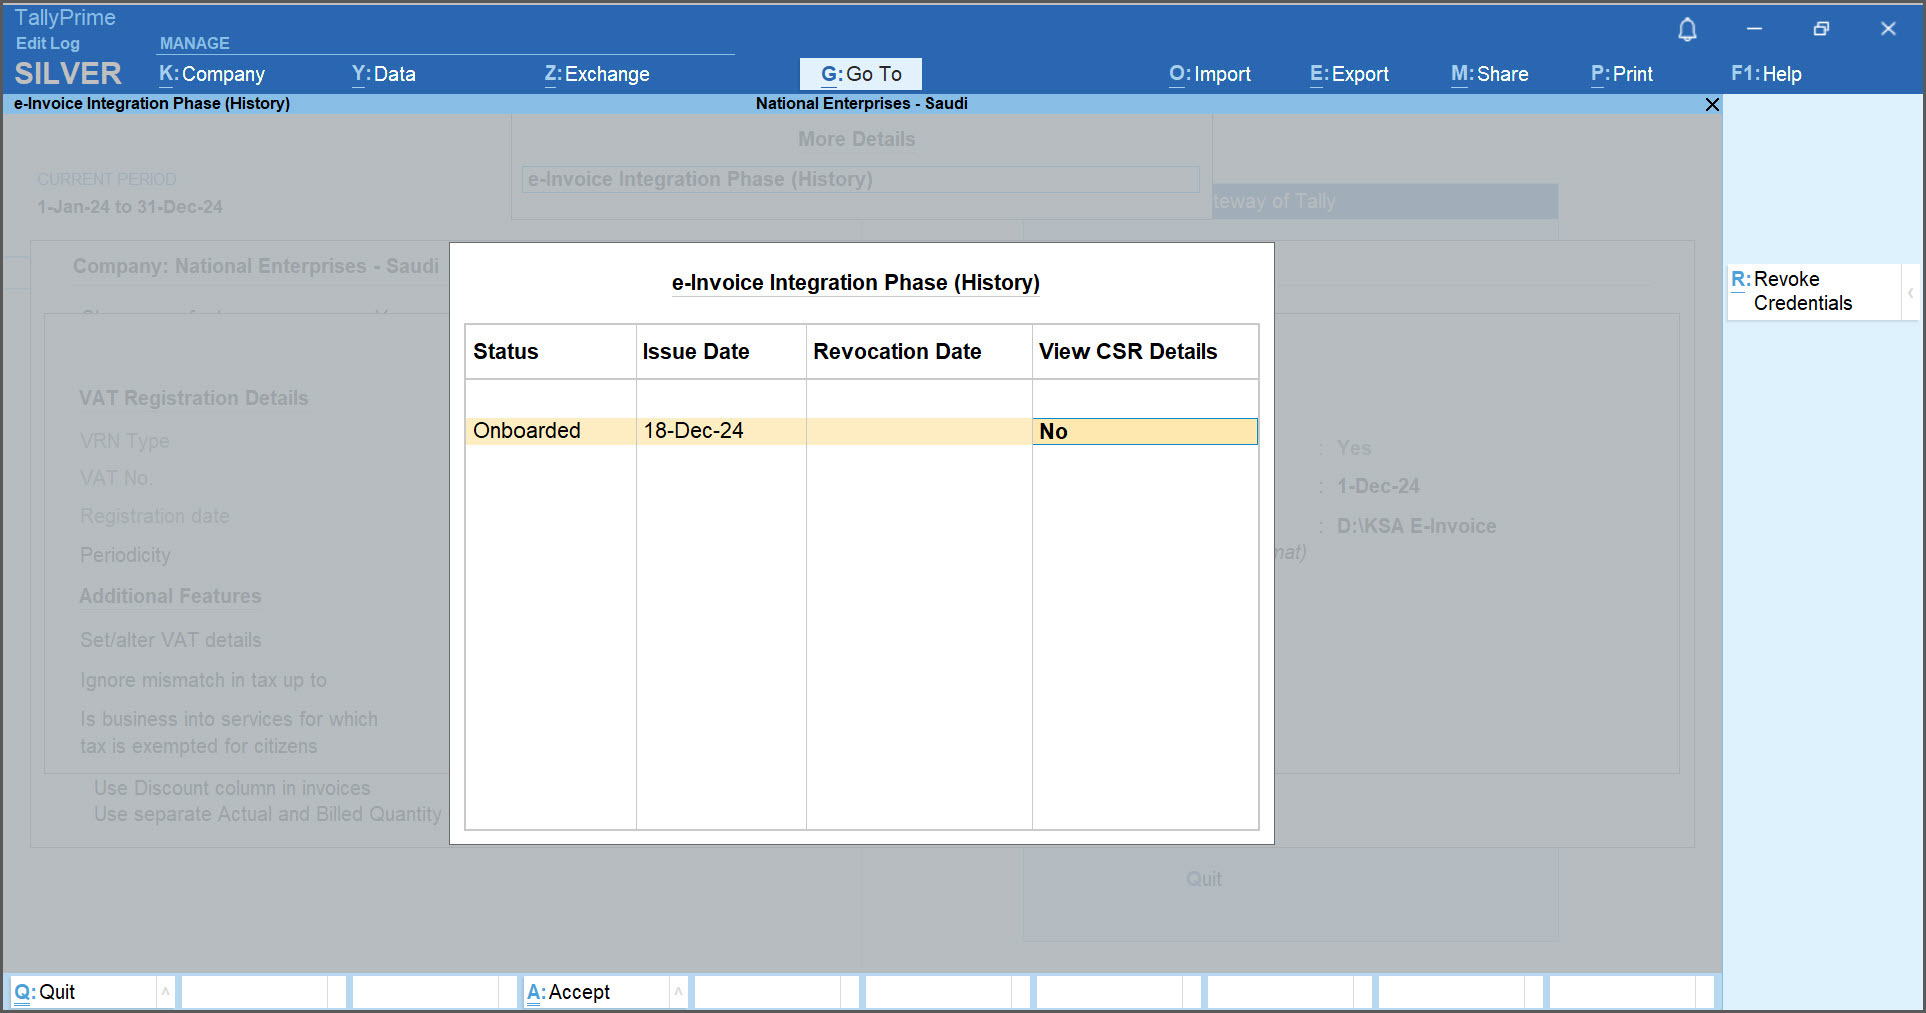
With e-Invoice Integration Phase (History), you can quickly gain information about the onboarding and e-Invoice Login Credentials renewal details. You can gain information such as date on which you had issued or renewed the e-Invoice Login Credentials and the Revocation Date, if applicable.
You can always view the CSR details such as Country name, Company name, TIN, and others.
- Press F11 (Company Features) > set Enable Value Added Tax (VAT) to Yes and press Enter.
The VAT Details screen appears. - Press Ctrl+I (More Details) > e-Invoice Integration Phase (History).
The e-Invoice Integration Phase (History) screen appears.

e-Invoice Integration Phase (History) enables you to view the CSR Details filled at any point in the history of your e-Invoicing journey – be it while generating e-Invoice Login Credentials, renewal, or revocation. - In the e-Invoice Integration Phase (History) screen, set View CSR Details to Yes.
Revoke e-Invoice Login Credentials
![]()
You may need to revoke your e-Invoice Login Credentials in the following scenarios:
- You want to generate new e-Invoice Login Credentials for another e-Invoicing solution or software.
- You want to renew the details such as TIN, Invoice Type, or any other filled in the CSR form.
- You might have accidentally revoked your e-Invoice Login Credentials from the e-Invoice System.
In such cases, you need to revoke the e-Invoice Login Credentials in TallyPrime. Moreover, if you revoke your e-Invoice Login Credentials in TallyPrime, then you will also need to revoke it on the e-Invoice System.
In such cases, you need to revoke the e-Invoice Login Credentials in TallyPrime. Moreover, if you revoke your e-Invoice Login Credentials in TallyPrime, then you will also need to revoke it on the e-Invoice System.
- Press F11 (Company Features) > set Enable Value Added Tax (VAT) to Yes and press Enter.
- In the VAT Details screen appears, press Ctrl+I (More Details) > e-Invoice Integration Phase (History) and press Enter.
- Press Ctrl+R (Revoke Credentials).
A confirmation message appears.
- Press Y or select Yes to continue.
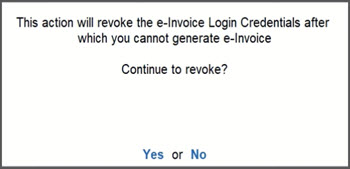
The e-Invoice Login Credentials get revoked.
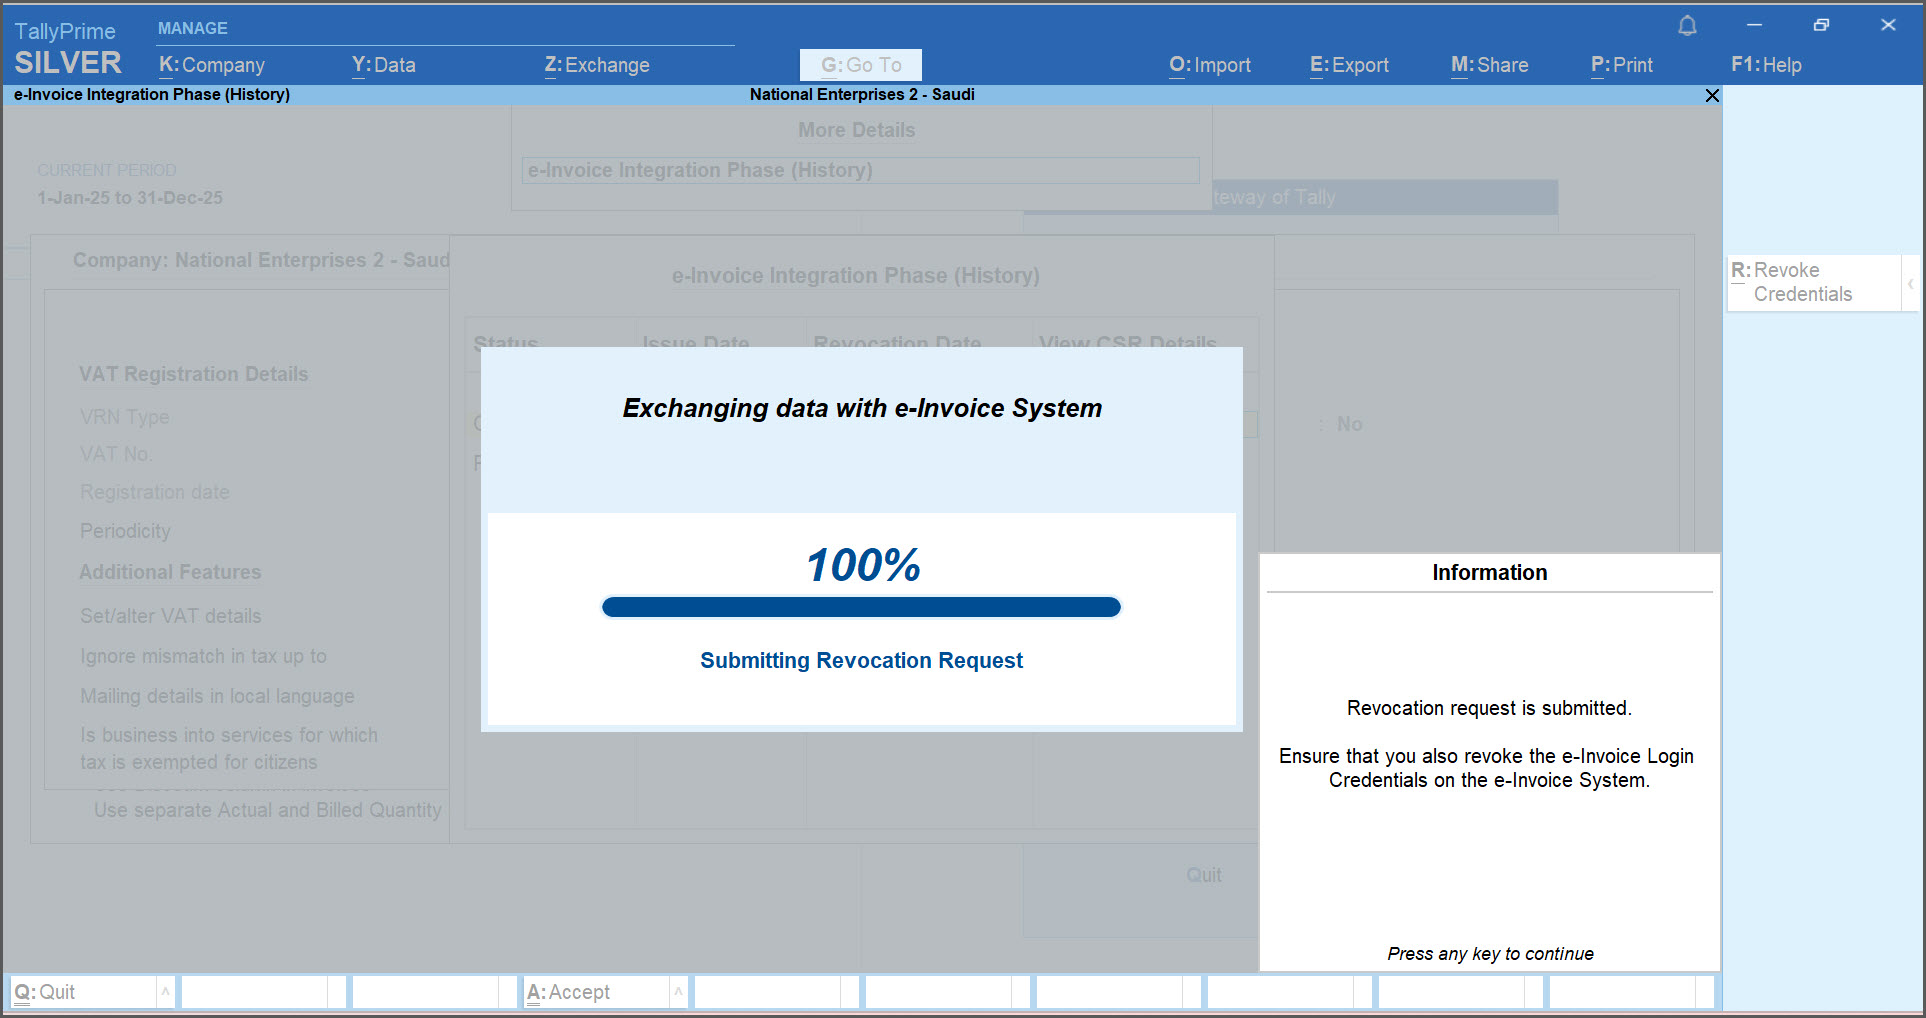
After revoking the e-Invoice Login Credentials in TallyPrime or on the e-Invoice System or both, then you will not be able to generate e-Invoices. For generating e-invoices using the same Company Name and VAT No., you need to need to generate e-invoice login credentials again for your company.
Set Up Voucher Types for e-Invoicing
![]()
To generate e-Invoices, you need to alter the voucher types for which e-Invoicing is applicable, such as Sales, PoS Invoice, Debit Note, Credit Note, and Receipt voucher types.
As you enable e-Invoicing for the Voucher Type, the default Method of Voucher Numbering will get set to Automatic (Manual Override). Furthermore, you will not be able to create multiple e-Invoices for a specific voucher number, as ZATCA does not allow you to create e-Invoices for repeated voucher numbers. Only a single e-Invoice can be generated against a voucher number.
If you are creating a Voucher Class under a specific voucher type, then you have the flexibility to enable e-Invoicing in the same.
- Open a Voucher Type in alteration mode.
You can select any Voucher Type for which e-Invoicing is applicable. - Allow e-Invoicing: Yes.
The Method of Voucher Numbering gets set to Automatic (Manual Override).
Prevent creating duplicate Voucher Nos. gets set to Yes. - Press Ctrl+A to save.
While setting up Voucher Types for e-Invoicing, you can also restart voucher numbering with prefixes and suffixes to ensure that all the voucher numbers are unique.
A sample sales voucher type screen with all the necessary details.
In a similar way, you need to allow e-Invoicing for Debit Note, Credit Note, and Receipt voucher types.
Set Up Ledgers for e-Invoicing
![]()
For the successful generation of an e-Invoice, it is mandatory to provide some specific details of the party for whom you are recording transactions.
The following details of the party are mandatory:
- Mailing details, as per the party’s official address.
ZATCA also requires the mailing details of the buyer in Arabic. -
National ID is required if taxability is zero-rated and category code reason is
- Private Healthcare for Citizens
- Qualifying Metals
- VAT Registration Details including registration type and VAT no.
You can also mention the date of registration, if needed.
Apart from the aforementioned details, you can provide Buyer ID details such as National ID, Tax Identification Number (TIN), Momra License (MOM), or others, as needed.
Once you have all the details of the buyer, you can enter the details in the respective ledger.
- Open a ledger in alteration mode or create a new ledger.
- Specify the Building No., City, District, Region, Country, PO Box, and Pin Code.
- Specify the Buyer ID Details.
- Buyer ID Details: Yes.
The Buyer ID Details screen appears.
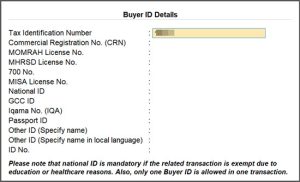
- Specify only one of the buyer ID details.
- Press Ctrl+A to save.
- Buyer ID Details: Yes.
- Specify the address in local language.
- Mailing details in local language: Yes.
- Enter the address in Arabic.
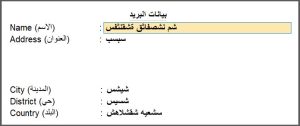
- Press Ctrl+A to save.
- Under VAT Registration Details, specify the required details.
- Registration type: Registered or Unregistered, as applicable.
- Date of VAT registration: The date on which the Company had registered for VAT.
- VAT No.: The Company VAT registration number.
- VRN Type: Company Registration or Headquarter Registration, based on the nature of registration.
A party ledger screen with all the necessary details appears.
ZATCA now validates customer TIN and CRN during invoice exchange, so you can use the Buyer ID Details Report in TallyPrime to review all Buyer IDs in one place.
View Mailing Details (History)
You need to update the party ledger with the latest mailing details. In the Mailing Details (History), you can always view the history of mailing details along with the dates from which they became applicable.
- Press Alt+G (Go To) > Alter Master > Ledger > type or select ledger and press Enter.
- Press Ctrl+I (More Details) > Mailing Details (History) and press Enter.
The Mailing Details (History) screen appears.
Set Up Stock Items for e-Invoicing
![]()
As per the regulations by ZATCA, for the successful generation of e-Invoices, you need to provide Stock Item alias in Arabic.
- Open a stock item in alteration mode or create a new stock item.
- Enable language aliases or name.
- Press F12 (Configure) > set Provide language aliases or Name to Yes.
- Press Ctrl+A to save the setting.
- Under Stock Item Name, enter the name of the stock item in English and press Enter.
- Select Arabic (Saudi Arabia) to enter the name of the stock item in Arabic.
If Arabic is not appearing in the List of Languages, go to Gateway of Tally and press Ctrl+K to add your preferred language and change the language to Arabic. Now, as you continue with the alteration of stock item, you can see Arabic appearing in the List of Languages.
- Update other details, as required, and press Ctrl+A to save.
A stock item screen with the name specified in Arabic appears.
You can manage large volumes of master details, such as Stock Items and Ledgers in Excel and import them into TallyPrime for sending to the KSA e-invoicing system.
Generate e-Invoice Online
Once you specify all the necessary details in the masters, you are all set to generate e-Invoices online using TallyPrime for single or multiple vouchers at the end of the day.
Note: You need to generate e-Invoices for B2B transactions as a part of voucher creation, as the e-Invoice System requires B2B e-Invoices to be generated in real time. On the other hand, you can generate e-Invoices for B2C transactions within 24 hours of creating the voucher.
Generate e-Invoice for a single Sales invoice
![]()
For sales of goods or services, TallyPrime enables e-Invoice generation as an integral part of the voucher creation process. All you need to do is specify the party details and add the stock items or service ledgers, as applicable to the transaction.
Once you generate an e-Invoice for a specific voucher, you can view it only in the display mode.
- Open a Sales voucher in the Item Invoice mode.
- Update the details in the Party Details screen.
- Ensure that the details such as Building No. and Secondary No. are prefilled, based on the information specified in the party ledger.
You can update the buyer details while recording the transaction, as needed, and print the same in the invoice.
- Mailing details in local language: Yes.
The address is prefilled in Arabic, based on the information provided in the party ledger.
- Ensure that the details such as Building No. and Secondary No. are prefilled, based on the information specified in the party ledger.
- Enter the stock item details, such as Quantity and Rate, Disc% and then select the VAT ledger.
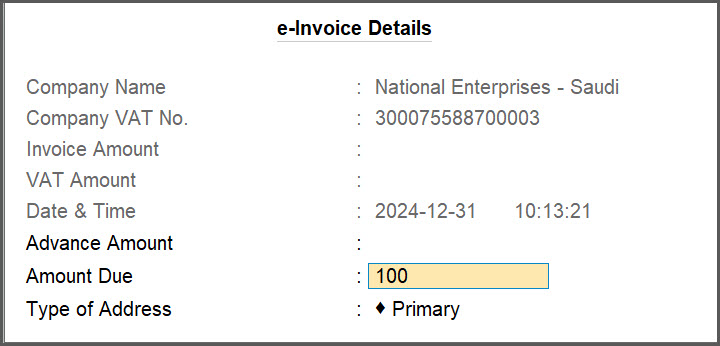
If you are unable to see the Disc% column, you can enable Use Discount column in invoices in the F11 (Features) screen. - Specify the e-Invoice details.
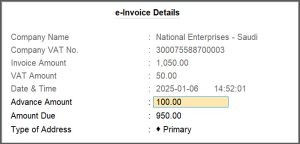
- Show e-Invoice details: Yes.
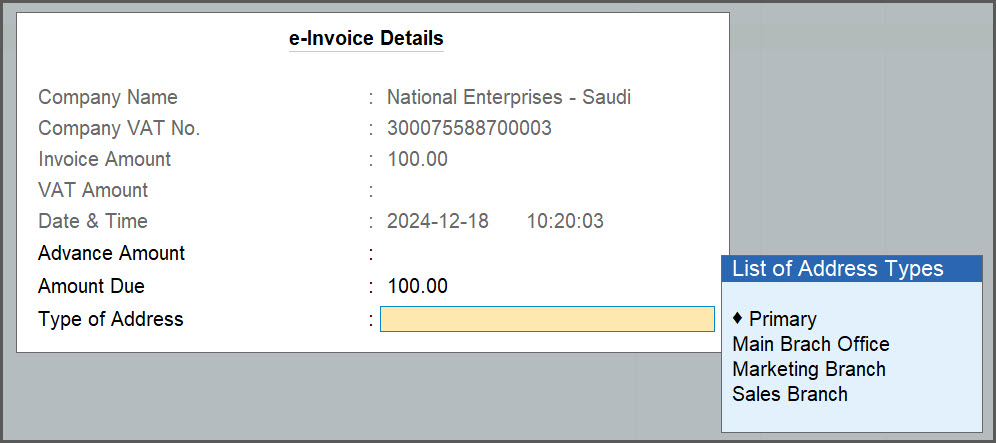
The e-Invoice Details screen appears. - Specify the Advance Amount, if you had received an advance from your customer.
The Amount Due gets calculated.
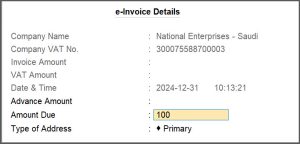
- In Type of Address field, select the relevant address, if you have enabled multiple addresses.
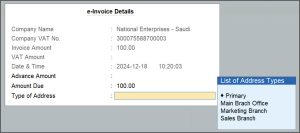
The Company Mailing Name of selected addresses in TallyPrime should exactly match with the Company Name specified in the e-Invoice certificate, which is saved in the company data folder.
- Show e-Invoice details: Yes.
- Provide other necessary details such as Narration and Bill-wise Details, as needed.
- Press Ctrl+A to save the sales invoice.
- Press Y or select Yes to generate e-Invoice.
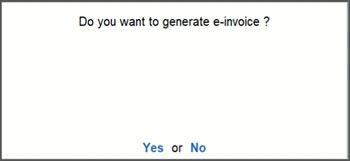
The e-Invoice gets generated.
You need to generate e-Invoices for B2B transactions as a part of voucher creation, as the e-Invoice System requires B2B e-Invoices to be generated in real time. On the other hand, you can generate e-Invoices for B2C transactions within 24 hours of creating the voucher.
After passing the e-invoice, you can check the PDF A3 format file embedded with XML in the archived location of e-Invoices.
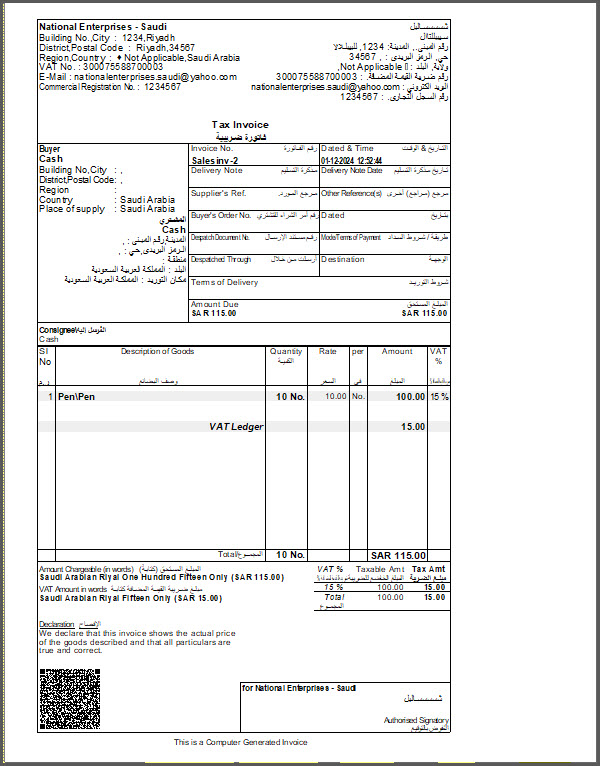
While printing the invoice, configure the print for bilingual invoice by selecting Print Type as Bilingual.
In the preview of the invoice, you can see all the e-Invoice details including the QR code.
In a similar way, you can generate an e-Invoice for PoS invoice.
View e-Invoice Details
Once the e-Invoice is generated, the information related to e-Invoice gets stored in the voucher. You can view the e-Invoice details, whenever required.
- Select the invoice for which you have generated an e-invoice and press Alt+Enter.
The Voucher Display screen with all the e-Invoice Details appears.
Generate e-Invoice for Advance Receipt
![]()
When you receive an advance amount from your customer against a specific sales order, you will need to generate an e-Invoice for the same. When you allow e-Invoicing for a Receipt Voucher Type, the default voucher when you open a receipt will be an advance receipt. You can maintain a separate voucher type to create normal receipts.
You can generate an e-Invoice only for an advance receipt and not a normal receipt.
-
Ensure that the bill-wise option is configured for the Company and the party ledger.
-
For Company, press F11 (Features) > Enable Bill-wise Entry: Yes.
-
For the party ledger, press F12 (Configure) > Maintain balances bill-by-bill: Yes.
-
- Open a Receipt voucher to record an advance receipt.
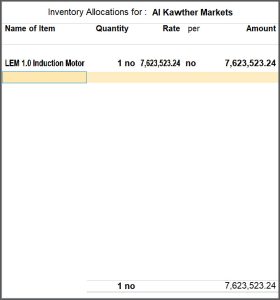
- In the Inventory Allocations for screen, select one item and enter the details, such as Quantity, Rate, and Amount.
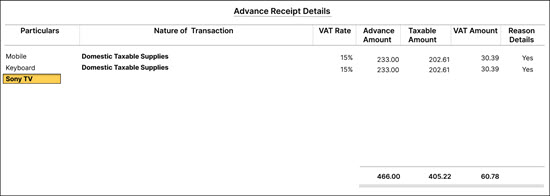
- In the Advanced Receipt Details screen, give advance receipt details such as Nature of Transaction, Vat Rate, Advance Amount, Taxable Amount, and so on.
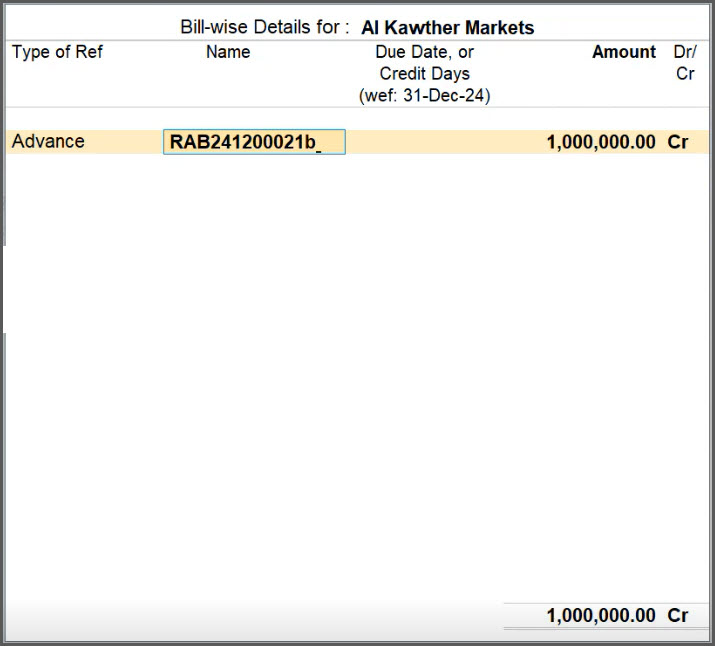
- In the Bill-wise Details for screen
- Under Type of Ref, select Advance.
- If you want to add multiple stock items in the advance receipt, then you should add any prefix or suffix, to make it unique.
Say you added ‘a’, in the Reference name at the end. You can add any other alphabet, number, or any special character of your preference as prefix or suffix in the Reference name.

- Press Ctrl+A to save the Bill-wise Details.
- In the Advanced Receipt Details screen, give advance receipt details such as Nature of Transaction, Vat Rate, Advance Amount, Taxable Amount, and so on.
- Select the same party again, and in the Inventory Allocations for screen, select another item and enter the details, such as Quantity, Rate, and Amount.
- In the Advanced Receipt Details screen, give advance receipt details such as Nature of Transaction, Vat Rate, Advance Amount, Taxable Amount, and so on.
- In the Bill-wise Details for screen
- Under Type of Ref, select Advance.
- Add any suffix, say ‘b’, in the Reference name at the end as it should be unique.
You can add any other alphabet, number, or any special character of your preference as prefix or suffix in the Reference name.

- Press Ctrl+A to save the Bill-wise Details.
To select more items, as per your requirement, you can follow the same procedure by selecting same party again.
- In the Advanced Receipt Details screen, give advance receipt details such as Nature of Transaction, Vat Rate, Advance Amount, Taxable Amount, and so on.
- Specify the e-Invoice details.
- Show e-Invoice details: Yes.
- In the e-Invoice Details screen, skip the Advance Amount field, as it is not applicable for the voucher.
The Amount Due gets calculated.
- In the Type of Address field, select the relevant address, if you have enabled multiple addresses.
The Company Mailing Name of selected addresses in TallyPrime should exactly match with the Company Name specified in the e-Invoice certificate, which is saved in the company data folder.
- Provide other necessary details, as needed, and press Ctrl+A to save.
- Press Y or select Yes to generate e-Invoice.


You need to generate e-Invoices for B2B transactions as a part of voucher creation, as the e-Invoice System requires B2B e-Invoices to be generated in real time. On the other hand, you can generate e-Invoices for B2C transactions within 24 hours of creating the voucher.
After passing the e-invoice, you can check the PDF A3 format file embedded with XML in the archived location of e-Invoices.
While printing the invoice, configure the print for bilingual invoice by selecting Print Type as Bilingual.
In the preview of the advance receipt voucher, you can see all the e-Invoice details including the QR code.
Preview of an advance receipt voucher with all the e-Invoice details including the QR code appears.
Adjust advance received in Sales invoice
![]()
When you receive an advance amount from your customer, you can adjust it in the sales invoice. You can do so by mentioning the Amount Due as the differential amount pending to be received from your customer against a specific sales order.
-
Ensure that the bill-wise option is configured for the Company and the party ledger.
-
For Company, press F11 (Features) > Enable Bill-wise Entry: Yes.
-
For the party ledger, press F12 (Configure) > Maintain balances bill-by-bill: Yes.
-
- Update the details in the Party Details screen.
- Ensure that the details such as Building No. and Secondary No. are prefilled, based on the information specified in the party ledger.
You can update the buyer details while recording the transaction, as needed, and print the same in the invoice. - Mailing details in local language: Yes.
The address is prefilled in Arabic, based on the information provided in the party ledger.
- Ensure that the details such as Building No. and Secondary No. are prefilled, based on the information specified in the party ledger.
- Enter the stock item details, such as Quantity and Rate, and then select the VAT ledger.
- Specify the e-Invoice details.
- Show e-Invoice details: Yes.
- In the e-Invoice Details screen appears, specify the Advance Amount, if you had received an advance from your customer.
The Amount Due gets calculated.
- In Type of Address field, select the relevant address, if you have enabled multiple addresses.
The Company Mailing Name of selected addresses in TallyPrime should exactly match with the Company Name specified in the e-Invoice certificate, which is saved in the company data folder.
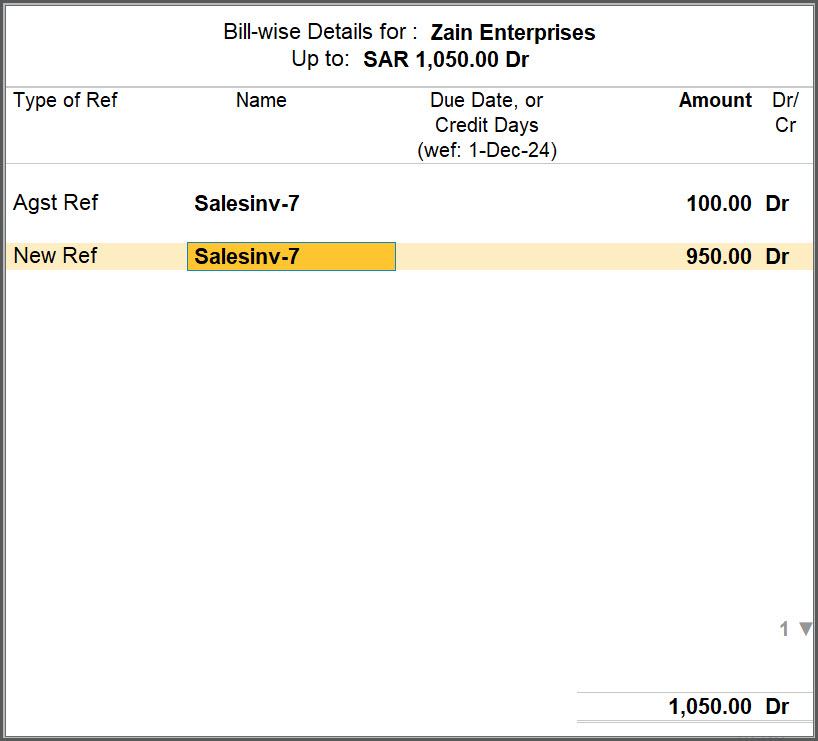
- Enter the reference of advance received in the Bill-wise Details screen.

- Press Ctrl+A to save the voucher.
- Press Y or select Yes to generate the e-Invoice.

You need to generate e-Invoices for B2B transactions as a part of voucher creation, as the e-Invoice System requires B2B e-Invoices to be generated in real time. On the other hand, you can generate e-Invoices for B2C transactions within 24 hours of creating the voucher.
After passing the e-invoice, you can check the PDF A3 format file embedded with XML in the archived location of e-Invoices.
While printing the invoice, configure the print for bilingual invoice by selecting Print Type as Bilingual.
In the preview of the sales invoice in which the amount of advance received is adjusted, you can see all the e-Invoice details including the QR code.
Generate e-Invoice for Credit Note
![]()
In case of sales returns, you will record a credit note for your customer. You need to generate an e-Invoice for a credit note with the correct reason for return.
- Open a Credit Note in the Item Invoice mode.
- Enter the stock item details, such as Quantity and Rate, and then select the VAT ledger.
- Specify the e-Invoice details.
- Show e-Invoice details: Yes.
- In the e-Invoice Details screen, skip the Advance Amount field, as it is not applicable for the voucher.
The Amount Due gets calculated.
- In the Type of Address field, select the relevant address, if you have enabled multiple addresses.
The Company Mailing Name of selected addresses in TallyPrime should exactly match with the Company Name specified in the e-Invoice certificate, which is saved in the company data folder.
- Specify the VAT details.
- Provide VAT details: Yes.
- In the VAT Details screen, ensure that the Original Invoice No., Date, and Reason for Returns fields are prefilled.
- Press Ctrl+A to save the screen.
- Press Ctrl+A to save.
- Press Y or select Yes to generate e-Invoice.
The e-Invoice gets generated.
You need to generate e-Invoices for B2B transactions as a part of voucher creation, as the e-Invoice System requires B2B e-Invoices to be generated in real time. On the other hand, you can generate e-Invoices for B2C transactions within 24 hours of creating the voucher.
After passing the e-invoice, you can check the PDF A3 format file embedded with XML in the archived location of e-Invoices.
While printing the invoice, configure the print for bilingual invoice by selecting Print Type as Bilingual.
In the preview of the credit note, you can see all the e-Invoice details including the QR code.
Generate e-Invoice for Debit Note
![]()
In case of purchase returns, you will record a credit note for your seller. You need to generate an e-Invoice for a credit note with the correct reason for return.
- Open a Credit Note in the Item Invoice mode.
- Enter the stock item details, such as Quantity and Rate, and then select the VAT ledger.
- Specify the e-Invoice details.
- Show e-Invoice details: Yes.
- In the e-Invoice Details screen, skip the Advance Amount field, as it is not applicable for the voucher.
The Amount Due gets calculated.
- In the Type of Address field, select the relevant address, if you have enabled multiple addresses.
The Company Mailing Name of selected addresses in TallyPrime should exactly match with the Company Name specified in the e-Invoice certificate, which is saved in the company data folder.
- Specify VAT details.
- Provide VAT details: Yes.
- In the VAT Details screen, ensure that the Original Invoice No., Date, and Reason for Returns fields are prefilled.
- Press Ctrl+A to save the screen.
- Press Ctrl+A to save.
- Press Y or select Yes to generate e-Invoice.
The e-Invoice gets generated.
You need to generate e-Invoices for B2B transactions as a part of voucher creation, as the e-Invoice System requires B2B e-Invoices to be generated in real time. On the other hand, you can generate e-Invoices for B2C transactions within 24 hours of creating the voucher.
After passing the e-invoice, you can check the PDF A3 format file embedded with XML in the archived location of e-Invoices.
While printing the invoice, configure the print for bilingual invoice by selecting Print Type as Bilingual.
In the preview of the debit note, you can see all the e-Invoice details including the QR code.

Generate e-Invoices for multiple vouchers through Exchange
![]()
Depending on your business requirement, you may be creating numerous vouchers in a day and might want to generate e-Invoice for them in just one shot. Say, you are a data entry operator, and you may want to verify the vouchers to check if they have the right information for e-Invoice generation. If issues like internet failure or power cuts interrupt e-Invoice generation, you can easily generate them later for affected and ready vouchers.
In TallyPrime, you can generate multiple e-Invoices at once and receive a summary of successful and rejected vouchers.
- Press Alt+Z (Exchange) > Send for e-Invoicing and press Enter.
The Send for e-Invoicing screen appears with the vouchers in the Ready for e-Invoice Generation section.
If there are vouchers in the Uncertain Transactions section and those required to be reuploaded, then those will appear in the Send for e-Invoicing screen, too.

- Press Spacebar to select the vouchers that you want to send for e-Invoicing.
- Press S (Send).
The Exchange Summary appears with vouchers for which e-Invoice is generated. Moreover, if there are some vouchers rejected by the e-Invoice System due to some incorrect information or other such reasons, then you will know the count of those vouchers too:
To view the e-Invoice details of any of the vouchers for which e-Invoice is generated, you can either drill down from the e-Invoice Generated section of the e-Invoice Overview report, or you can open the voucher in the display mode from any ledger vouchers report.
To know how to view e-Invoice details, refer to the View e-Invoice Details section.
In TallyPrime, you can view the e-Invoice Overview report for B2C, B2B, or both together to check the reporting status of B2C e-Invoices and the clearance status of B2B e-Invoices.
e-Invoice Archives
![]()
As per ZATCA regulations, you must archive e-Invoices for the last five, seven, or ten years, as applicable. Store them in a designated folder for easy access during audits.
TallyPrime’s e-Invoice Archives report lets you configure a storage path for easy access by authorities. When you generate an e-Invoice under the e-Invoice Integration Phase, a PDF A3 file (with embedded XML) is saved in the folder.
If you need another copy, you can retrieve it from the e-Invoice Archives report, which stores all generated e-Invoices. You can also archive e-Invoices in one click for easy storage.
First of all, you need to specify the folder in which you want to archive all the e-Invoices.
- Press F11 (Company Features) > set Enable Value Added Tax (VAT) to Yes and press Enter.
- Location of e-Invoice Archives: Specify Path or Select from Drive.
Once you specify the folder path, you can start archiving your e-Invoices.
- Press Alt+G (Go To) > type or select e-Invoice Archives and press Enter.
Alternatively, Gateway of Tally > Display More Reports > VAT Reports > e-Invoice > e-Invoice Archives and press Enter. - Press Alt+R (Pending for Archiving).
- Press Spacebar to select one or more e-Invoices and press Alt+A (Archive).
Now, you can go the specific folder and check the PDF A3 files of your invoices.
PDF A3 file of the e-Invoice
After passing the invoice, you can check the PDF A3 file embedded with XML. The PDF A3 format supports Multi-currency, Buyer’s Order No., Date, Remarks, and Exchange Rate.
- Open archived location of e-Invoices.
- Press F11 (Company Features).
- Set Enable Value Added Tax (VAT) to Yes and press Enter.
You can see the Location of e-Invoice Archives.
- Go to the location and select the Exports folder to get the PDF file embedded with XML.
e-Invoice Event Log
e-Invoice Event Log provides you with a bird’s-eye view of the e-Invoicing activities performed on all the vouchers. It helps you in monitoring the activities and identifying tampered e-Invoices in your Company data.
To view e-Invoice Event Log:
- Press Alt+G (Go To) > type or select e-Invoice Event Log and press Enter.
Alternatively, Gateway of Tally > Display More Reports > VAT Reports > e-Invoice > e-Invoice Event Log and press Enter.