
E-mail Invoices and Reports in TallyPrime
Using the E-mail feature in TallyPrime, you can quickly send your invoices, payslips and reports in different file formats, such as PDF, XML, and so on, to one or more E-mail addresses at the same time. To send an E-mail from TallyPrime, all you need is an Internet connection, a valid source E-mail address, which can be your company E-mail, and the E-mail address of the recipients.
One-time Setup
In TallyPrime, you can set up your profile as a one-time setup to make the communication between you and your stakeholders a lot easier.
Create E-mail Profiles
![]()
You need to create a profile when you send an e-mail from TallyPrime for the first time. You can create multiple profiles if needed. Next time you can instantly select the profile from which you want to e-mail documents to your parties.
- On any invoice/report, press Ctrl+M (Current) > E-mail from > Create.
In the Create E-mail Profile subscreen appears, the E-mail sender name is pre-filled as per your Company Name. You can change the E-mail sender name, if needed.
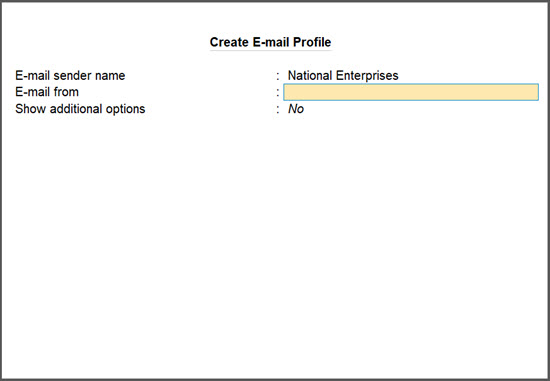
- Enter your E-mail address in the E-mail from field.
- Press Ctrl+A to save.
Your E-mail profile will be created and appear under List of Profiles.
E-mail Authentication
E-mail authentication in TallyPrime ensures that your e-mail service providers (Gmail, Microsoft, Yahoo, and others) allows TallyPrime to send e-mails on your behalf, keeping your account secure.
There are 2 popular authentication methods
- OAuth
- App Password
Many service providers are now phasing out App Password-based authentication. For example, Microsoft (Outlook/Hotmail) has already discontinued support, which may prevent users from sending e-mails from TallyPrime. To address this, TallyPrime now supports OAuth-based authentication.
Set up E-mail authentication
![]()
Depending on your E-mail server, you will have to set up the E-mail server configurations.
- In the Create E-mail Profile screen, set Show additional options to Yes.
- Update the Username (for authentication) field as per your preference. This field appears to be prefilled with the E-mail address provided in the E-mail from field.
- Configure the E-mail Server.
- Select the required E-mail Server from the list of Common E-mail Servers.
The remaining fields in the Create E-mail Profile subscreen will appear to be pre-filled, which you can change based on your preference. - If you are using a different E-mail server, select User Defined.
- For the Server address, enter the name of your SMTP server.
On selecting Gmail, Yahoo Mail, or Hotmail, the server address appears automatically. You need to manually configure other E-mail servers. For Outlook, enter the Server address as smtp-mail.outlook.com:25. - Enter the Port Number.
- For the Server address, enter the name of your SMTP server.
- Select the required E-mail Server from the list of Common E-mail Servers.
- Configure SSL and use of SSL/TLS.
- Set the option Use SSL to Yes, if you are using a secured network or sending E-mails using secured mail servers.
- Set the option Use SSL/TLS on standard port, as required. For Outlook or Hotmail, set this option to Yes.

- Press Ctrl+A to save.
After creating multiple E-mail profiles, you can easily select your preferred E-mail address from the List of Profiles while sharing the business documents, making the process more efficient and straightforward.
Authenticate and Send E-mail using OAuth
OAuth is a secure, browser-based authentication method. Instead of sharing your password with TallyPrime, you directly log in through your e-mail provider (such as Google or Microsoft), and grant permission.
-
Open any report, say Balance Sheet and press Alt+M (Share).
-
Press Ctrl+M (Current) to share the report.
Select Others for Multi-Account Reports. - In the E-mail from field:
- New users: Select Create and set up a new e-mail profile.
- Existing users: Select an e-mail profile from the List of Profiles.
- In the E-mail to field, select New Address, Multiple Address, or Show Last Used, as required.
- Set Show Additional Options to Yes, enter the required details.
- Press M (E-mail).
- To use OAuth-based authentication
- Press L (Login via Browser).
Alternatively, press Ctrl+P (Login with App Password) to use an app password. - Based on the service provider, the authentication page opens in the browser.
- Click Sign in with Google (or the relevant provider) and choose an account.
- New users: Select Use another account and enter the e-mail ID and password.
- Existing users: Select the same account configured in TallyPrime.
- Grant the required permissions.
- For Google, select Send email on your behalf and click Continue.
- For Microsoft, click Accept to approve permissions.
- For Google, select Send email on your behalf and click Continue.
- Press L (Login via Browser).
- Once your login is successful, close the browser window.
- Return to TallyPrime, and press S (Verify Login & Send).
Once authenticated via OAuth, you can now send e-mails seamlessly from TallyPrime.
Set up two-step authentication
To ensure that you can use your Gmail account to E-mail invoices, reports, and reminder letters, you need to authenticate your E-mail service providers, such as your Gmail and Yahoo account.
To change your Gmail settings to use your E-mail ID from TallyPrime,
- Log in to your Gmail account.
- From Google Apps, select Account > Security.
- Add Two-step verification and generate App passwords.
- Click Done.
To change your Yahoo Mail settings to use your E-mail ID from TallyPrime,
- Log in to your Yahoo account.
- Select Account Info > Account Security.
- Add Two-step verification and generate App passwords.
- Click Done.
Once you have generated the passwords, you can use the same passwords for authenticating your E-mail address while e-mailing the documents from TallyPrime.
Create E-mail message templates
![]()
Similar to creating E-mail profiles, you can have predefined message templates and select them while sending E-mails.
- On any invoice/report, press Ctrl+M (Current).
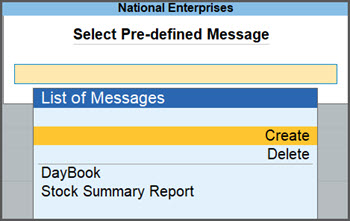
- In the E-mail screen, press Alt+S.
- In the Select Pre-defined Messages screen, select Create.
- In the Create E-mail Message screen, enter Message Name and Message.

The message template will be saved in the Message Name for easy reference.
- In the Select Pre-defined Messages screen, select Create.
- Press Ctrl+A to save.
The message will now appear under the List of Messages.
Similarly, you can create multiple E-mail messages and select one from the List of Messages while sending an E-mail.

E-mail an Invoice
E-mail an invoice from TallyPrime to your party’s e-mail address anytime you need. For illustration purposes, let’s consider e-mailing a sales invoice and a payment invoice with Payment link.
E-mail a sales invoice
![]()
- On a sales invoice, press Ctrl+M (Current).
- Select an e-mail profile under E-mail from.
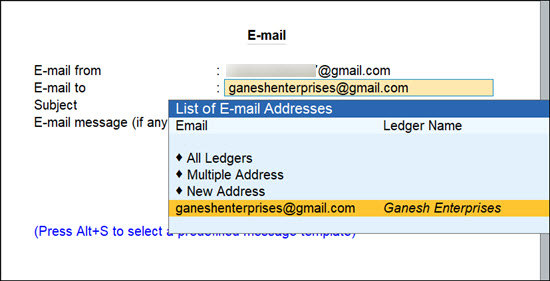
- Select your party’s e-mail address in the E-mail to field.
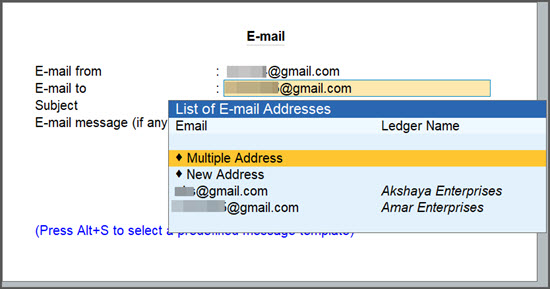
- Select Multiple Addresses, to send the invoice to multiple E-mail addresses.
- Select New Address, to send the invoice to a specific E-mail address.
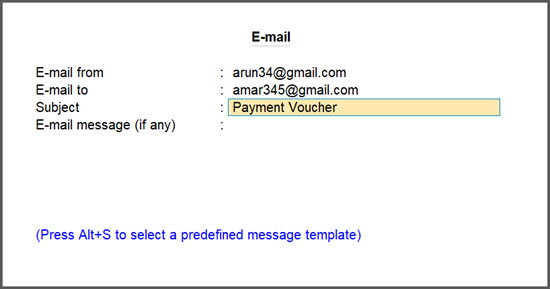
- Verify the Subject field.
This field is prefilled with the invoice type. Change the subject, if needed. - For E-mail message (if any), enter a message, if needed. This is an optional field.
Press Alt+S to select a predefine message template, if you have created one earlier. - In the E-mail screen, press C (Configure) to configure, as needed.
- Press M (E-mail).
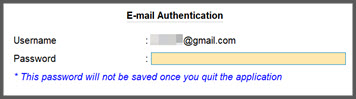
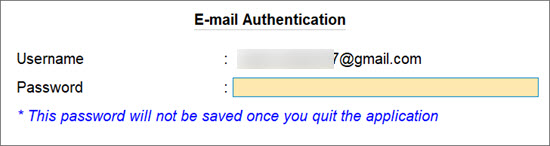
- Depending on your e-mail server, in the E-mail Authentication screen enter Password for your e-mail to authenticate.
With the ability to send invoices to multiple e-mail addresses simultaneously, TallyPrime enhances the convenience of sending e-mails in just a few simple steps.
E-mail a sales invoice with payment link
The steps for e-mailing a payment invoice are the same as you would do for sending any invoice.
- Open the invoice with Payment links or QR codes that you want to send, and press Ctrl+M (Current).
- Select an e-mail profile under E-mail from.
- Select your party’s e-mail address in the E-mail to field.
- Select Multiple Addresses, to send the invoice to multiple E-mail addresses.
- Select New Address, to send the invoice to a specific E-mail address.
- Verify the Subject field.
This field is prefilled with the invoice type. Change the subject, if needed. - For E-mail message (if any), enter a message, if needed. This is an optional field.
Press Alt+S to select a predefine message template, if you have created one earlier. - In the E-mail screen, press C (Configure) to configure, as needed.
- Depending on your e-mail server, in the E-mail Authentication screen enter Password for your e-mail to authenticate.
After receiving your E-mail, your customers will be able to pay you back instantly using the payment link or QR code.
E-mail Pay Slips
![]()
In TallyPrime, you can E-mail a single Pay Slip or multiple Pay Slips, as per your business needs.
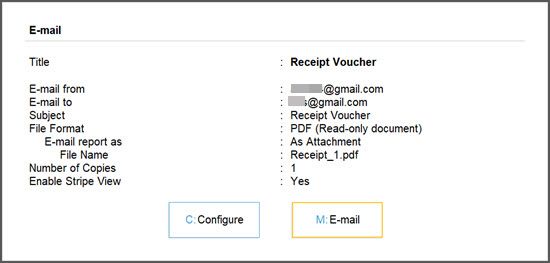
- Open the Pay Slip or Multi Play Slips report, and press Ctrl+M (Current).
- Select an e-mail profile under E-mail from.
If you have not created a profile yet, you can create one now. - Verify the E-mail to field.
- In case of a single pay slip, this field is prefilled with the e-mail address of the employee you have selected. You can enter a new e-mail address, if needed.
- In case of multiple play slips, this field does not appear. Based on the e-mail addresses for the employees, the pay slips will be e-mailed.
- Verify the Subject field.
This field is prefilled as Pay Slip. Change the subject, if needed. - For E-mail message (if any), enter a message, if needed. This is an optional field.
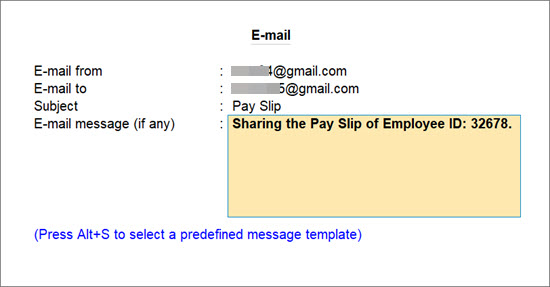
Press Alt+S to select a predefine message template, if you have created one earlier. - In the E-mail screen, press C (Configure) to configure, as needed.
- Press M (E-mail).
- Depending on your e-mail server, in the E-mail Authentication screen enter Password for your e-mail to authenticate.
The pay slips will be sent to the employee’s e-mail address instantly.
E-mail Reminder Letters
![]()
E-mail Reminder Letters, including the due amount and due date, to your parties for making timely payments.
Let’s consider the Bills Receivable report for illustration purposes.
- Open Bills Receivable report, and press Ctrl+M (Current).
- Select an e-mail profile under E-mail from.
- Select your party’s e-mail address in the E-mail to field.
- Select All Ledgers, to send reminders to all the parties in the report.
- Select Multiple Addresses, to send reminders to multiple e-mail addresses.
- Select New Address, to send the reminder letter to a specific e-mail address.
- Verify the Subject field.
This field is prefilled as Pay Slip. Change the subject, if needed. - For E-mail message (if any), enter a message, if needed. This is an optional field.
Press Alt+S to select a predefine message template, if you have created one earlier. - In the E-mail screen, press C (Configure) to configure, as needed.
- Set Report Type to Reminder Letter.

- Configure the Company Aging Alteration.

- Set Report Type to Reminder Letter.
- Press M (E-mail).
- Depending on your e-mail server, in the E-mail Authentication screen enter Password for your e-mail to authenticate.
In TallyPrime, you can E-mail a reminder letter to a single or multiple parties in one go. For detailed information, refer to Send Reminder Letters to Parties.
E-mail Multi Account Reports
![]()
Apart from a single voucher or a report, you can also e-mail Multi Account Reports from TallyPrime.
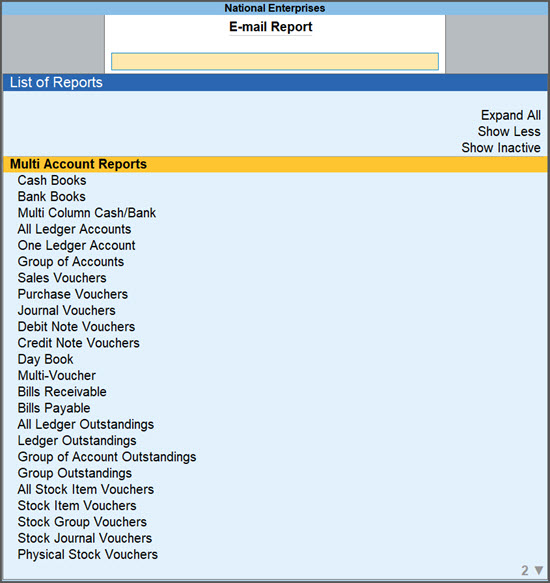
- Open the multiple account report that you want to e-mail.
- Press Alt+M (Share) > under E-MAIL select Others.
- Type or select the report you want to send via e-mail.
- Select an e-mail profile under E-mail from.
- Select your party’s e-mail address in the E-mail to field.

- Select All Ledgers, to send e-mail to all the parties in the report.
- Select Multiple Addresses, to send e-mail to multiple e-mail addresses.
- Select New Address, to send the e-mail to a specific e-mail address.
- Verify the Subject field.
This field is prefilled as per the document. Change the subject, if needed. - For E-mail message (if any), enter a message, if needed. This is an optional field.
Press Alt+S to select a predefine message template, if you have created one earlier. - In the E-mail screen, press C (Configure) to configure, as needed.
- Press M (E-mail).
- Depending on your e-mail server, in the E-mail Authentication screen enter Password for your e-mail to authenticate.
TallyPrime sends the document to the e-mail address as per your requirements.
E-mail Dashboard Tiles
![]()
Using E-mail in TallyPrime, you can share a single tile or all the tiles of your dashboard with stakeholders for their easy reference.
- Open Dashboard and select the tile that you want to e-mail.
- To send a selected tile, press Ctrl+M (Current).
- To send all the tiles, press Alt+M (E-mail) > All Tiles.
- Select an e-mail profile under E-mail from.
- Select your party’s e-mail address in the E-mail to field.

- Select Multiple Addresses, to send the Dashboard tile or tiles to multiple e-mail addresses.
- Select New Address, to send the Dashboard tile or tiles to a specific e-mail address.
- Verify the Subject field.
This field is prefilled with the select tile name or All Tiles. Change the subject, if needed. - For E-mail message (if any), enter a message, if needed. This is an optional field.
Press Alt+S to select a predefine message template, if you have created one earlier. - In the E-mail screen, press C (Configure) to configure, as needed.
- Press M (E-mail).
- Depending on your e-mail server, in the E-mail Authentication screen enter Password for your e-mail to authenticate.
Now, the recipient will be able to view the summary of your financials, sales and purchase trends, and so on, in the form of tiles.


