
Accept Invoices and Credit Notes Through Bharat Connect for Business in TallyPrime
As a buyer, you receive invoices and credit notes from your supplier and accept them to create a voucher. You can then initiate a full or partial payment, which the supplier can accept. Once accepted, you can record it by creating a payment voucher and share the payment details with the supplier.
During this process of accepting invoices and sharing payment details, the voucher passes through multiple stages where your action is required.
Ensure that:
- Bharat Connect for Business plug-in is enabled.
- You are logged in to Bharat Connect for Business and connected to the internet.
- Bharat Connect registration is done, and B2B ID is created.
- Your GSTIN/UIN is registered on the Bharat Connect for Business platform.
- Suppliers have shared invoices through Bharat Connect.
- You have user access to manage Bharat Connect for Business data.
Create Vouchers and Accept Invoices from Suppliers
Invoices sent by the suppliers appear under Bharat Connect Activities – Buyer > Bharat Connect > New Invoices Received. From here, you can either create a purchase or journal voucher against the invoice or simply accept it.
- Press Alt+G (Go To) > type or select Buyer – Activities.
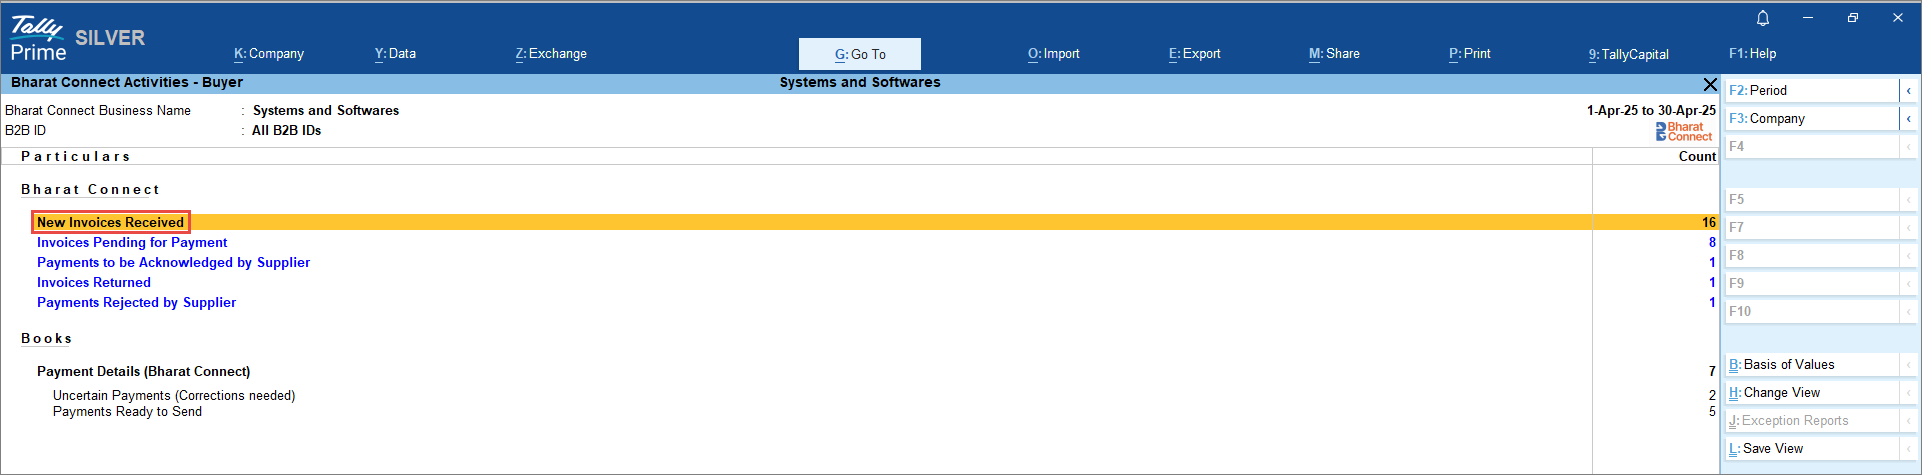
- In the Bharat Connect Activities – Buyer screen, drill down from New Invoices Received.
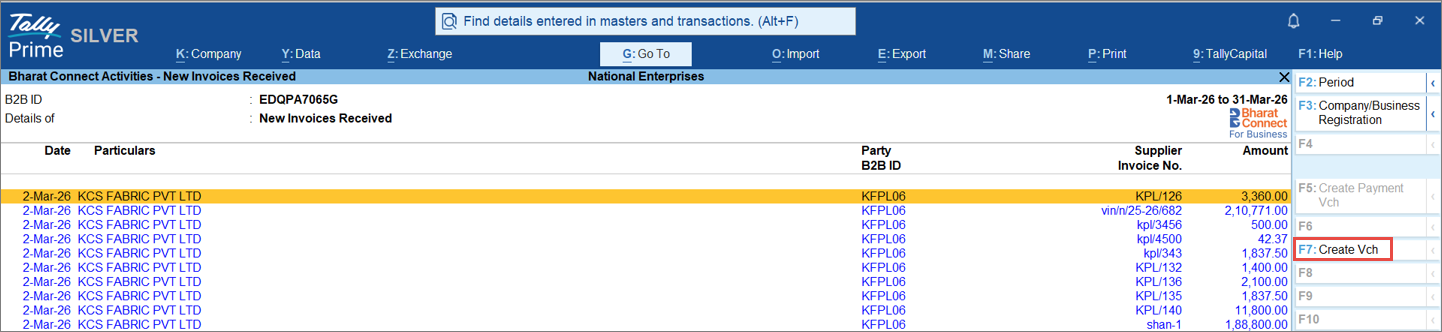
- In the Bharat Connect Activities – New Invoices Received screen, select the transaction and press F7 (Create Vch).
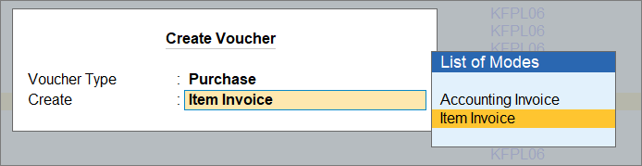
- In the Create Voucher screen, select the Voucher Type as either Journal or Purchase, and choose the required voucher mode.
- Purchase: Under the Purchase voucher type, you have two modes.
-
Item Invoice: To include the inventory details shared by the supplier while recording the voucher. If the invoice does not contain inventory details, then they will not be auto-filled.
-
Accounting Invoice: To record the voucher by grouping the total value of all stock items under a single accounting ledger.
-
-
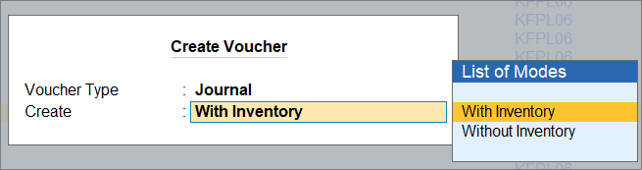
Journal: By default, TallyPrime will create a Journal Voucher as an Expense. Under the Journal voucher type, you have two modes.
-
With Inventory: To include the inventory details shared by the supplier while recording the voucher. If the invoice does not contain inventory details, then they will not be auto-filled.
Enable Show Inventory Details in F12 (Configure) to view item details in the voucher. - Without Inventory: To record the voucher by grouping the total value of all stock items under the appropriate accounting ledgers.
Only the purchase ledger is displayed; inventory details are not shown.If you select With Inventory, enable Show Inventory Details in F12 (Configuration) to view item details in the voucher. If you select Without Inventory, only the purchase ledger will be displayed, without any inventory details.
-
- Purchase: Under the Purchase voucher type, you have two modes.
- Review and map existing masters, and create missing masters instantly, if required.
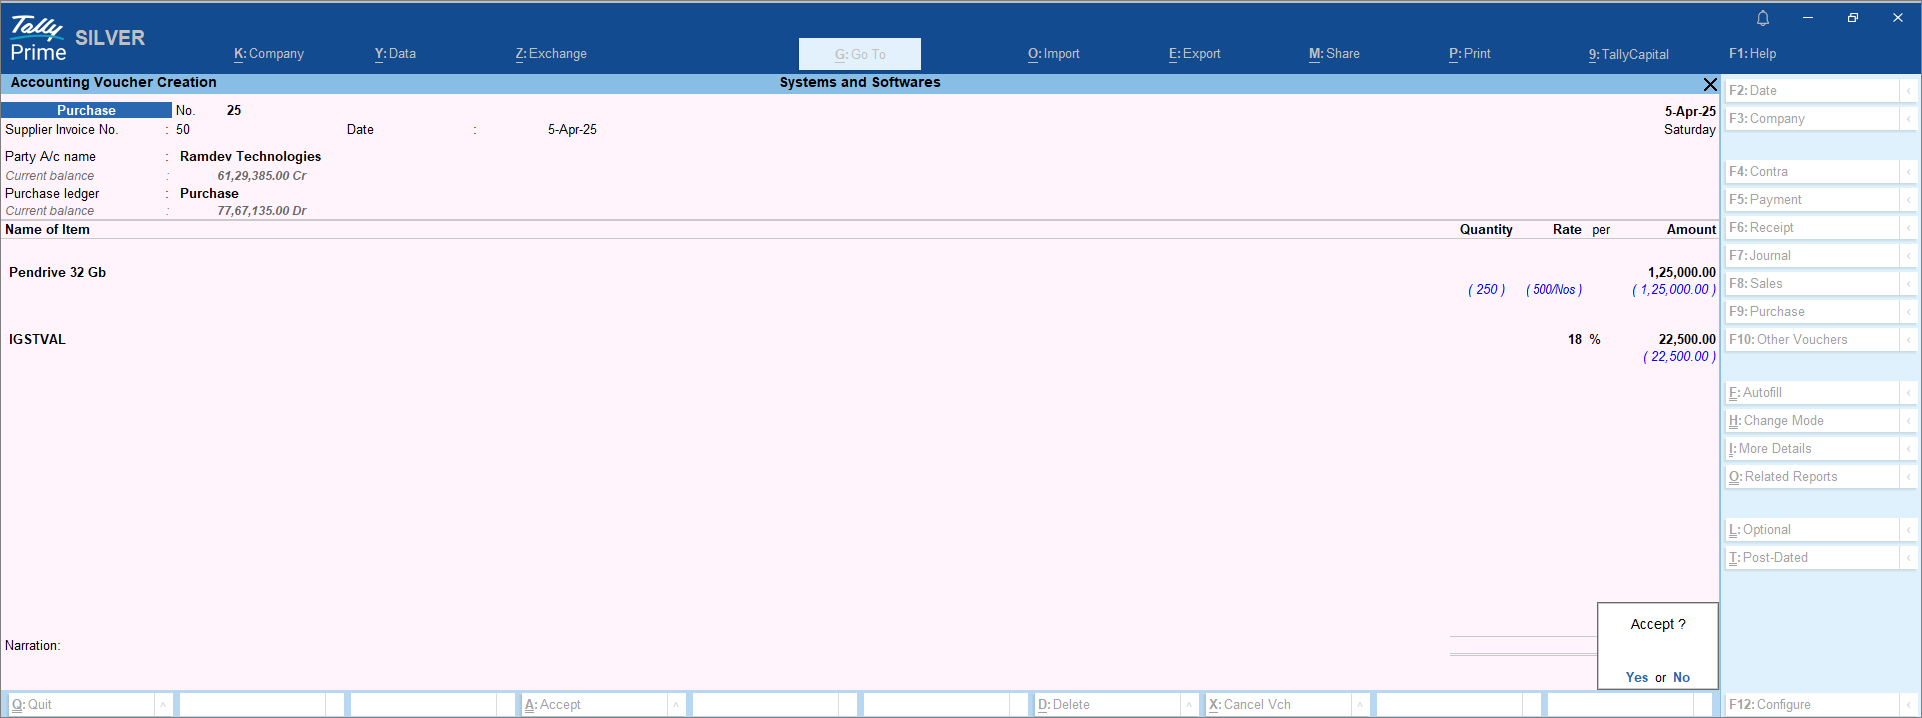
- Press Ctrl+A to save.
On accepting the voucher, you will get an option to send the Invoice Acceptance to the supplier. - To send the Invoice Acceptance now, press Y.
To send the acceptance later, press N.
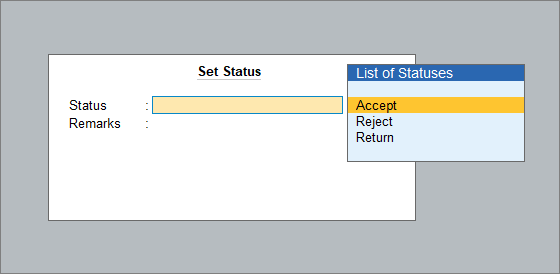
- To accept the invoice later, press Alt+S (Set Status) and select Accept.
Alternatively, you can accept the invoice first. Once accepted, it moves to Invoices Pending for Payment, where you can create a purchase voucher.
Create Vouchers and Accept Credit Notes from Suppliers
Credit Notes sent by the suppliers appear under Bharat Connect Activities – Buyer > Bharat Connect > New Invoices Received. From here, you can either create a debit note or journal voucher against the invoice or simply accept it.
- Press Alt+G (Go To) > type or select Buyer – Activities.
- In the Bharat Connect Activities – Buyer screen, drill down from New Invoices Received.
- In the Bharat Connect Activities – New Invoices Received screen, select the transaction and press F7 (Create Vch).
- In the Create Voucher screen, select the Voucher Type as either Journal or Debit Note, and choose the required voucher mode.
- Debit Note: Under the Debit Note voucher type, you have two modes.
- Item Invoice: To include the inventory details shared by the supplier while recording the voucher.
If the credit note does not contain inventory details, then they will not be auto-filled. - Accounting Invoice: To record the voucher by grouping the total value of all stock items under a single accounting ledger.
- Item Invoice: To include the inventory details shared by the supplier while recording the voucher.
- Journal: By default, TallyPrime will create a Journal Voucher as an Expense.
Under the Journal voucher type, you have two modes.
- With Inventory: To include the inventory details shared by the supplier while recording the voucher. If the credit note does not contain inventory details, then they will not be auto-filled.
Enable Show Inventory Details in F12 (Configure) to view item details in the voucher. - Without Inventory: To record the voucher by grouping the total value of all stock items under the appropriate accounting ledgers.
Only the debit note ledger is displayed; inventory details are not shown.
- With Inventory: To include the inventory details shared by the supplier while recording the voucher. If the credit note does not contain inventory details, then they will not be auto-filled.
- Debit Note: Under the Debit Note voucher type, you have two modes.
- Review and map existing masters, and create missing masters instantly, if required.
- Press Ctrl+A to save.
On accepting the voucher, you will get an option to send the Invoice Acceptance to the supplier. - To send the Invoice Acceptance now, press Y.
To send the acceptance later, press N.
- To accept the credit note later, press Alt+S (Set Status) and select Accept.
Alternatively, you can accept the credit note first. Once accepted, it moves to Invoices Pending for Payment, where you can create a voucher.
Create Missing Masters
You can create missing masters in three ways while recording the purchase voucher.
Create all masters by saving voucher
- In the purchase voucher, when you press Ctrl+A to save the voucher, all the missing masters are created along with the voucher.
Create master with the extracted value
This option allows you to create a new master directly from the extracted value, one at a time.
- In the purchase voucher, place the cursor on the missing master.
You can see the master name as per the invoice in the List of Ledger Accounts.
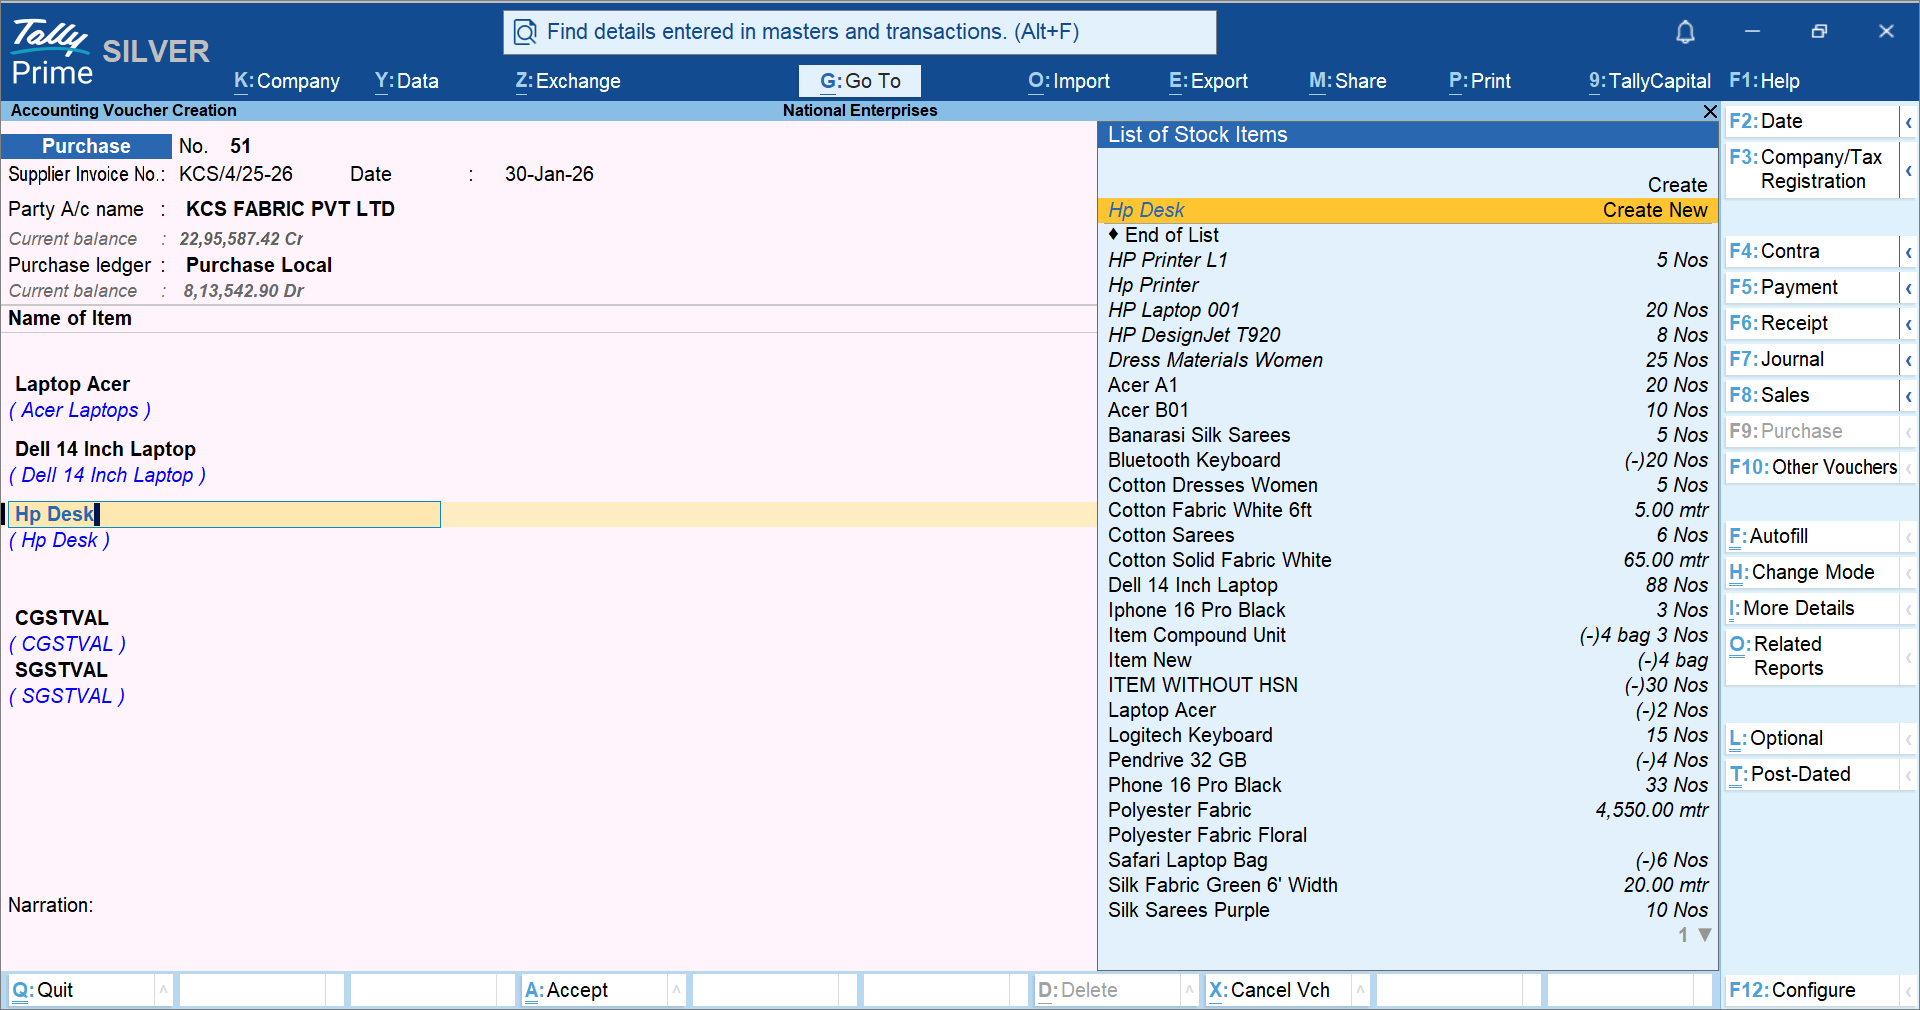
- Select Create New beside the master name.
The Ledger Creation screen opens with the master details auto-filled.
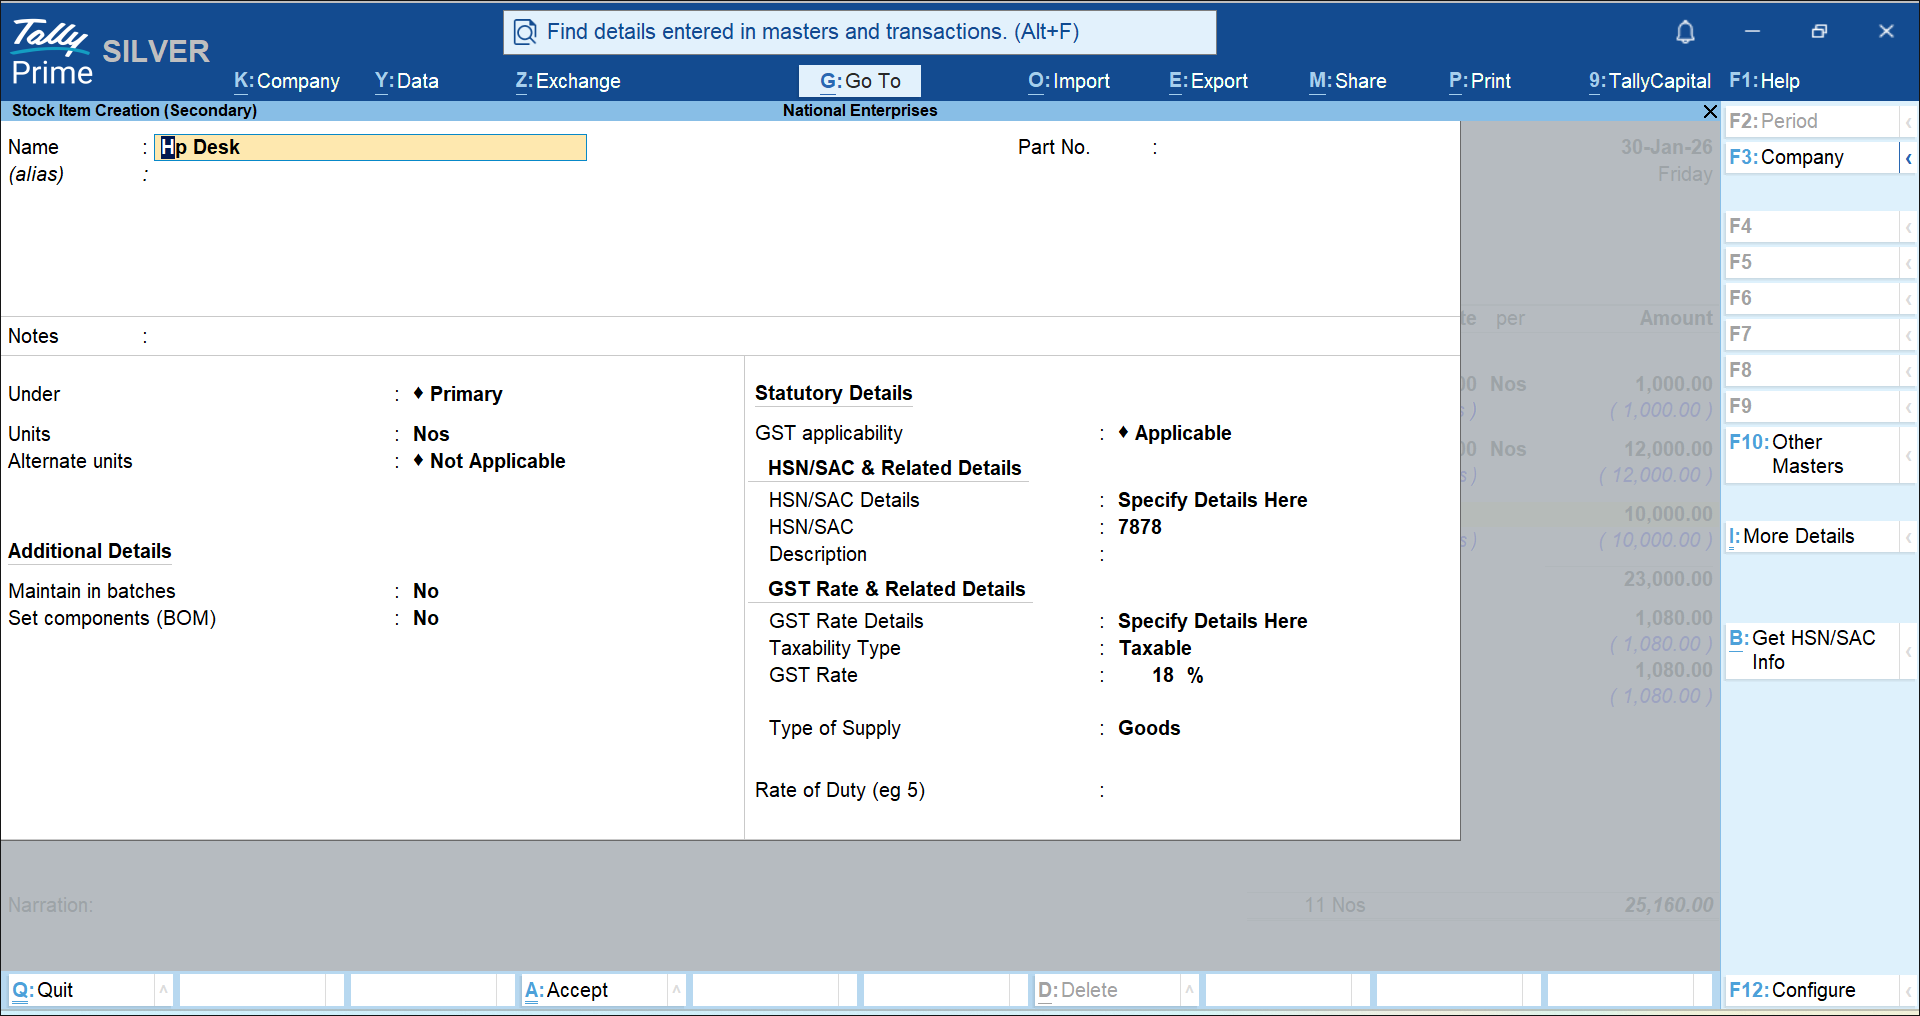
- Review the details and press Ctrl+A to save the master.
- Press Ctrl+A again to save the voucher.
Map the master value with an existing master
If the master already exists in TallyPrime with a different name, you can map it in the voucher. This mapping will be saved for future use.
- In the purchase voucher, place the cursor on the missing master.
You can see the master name as per the invoice in the List of Ledger Accounts.
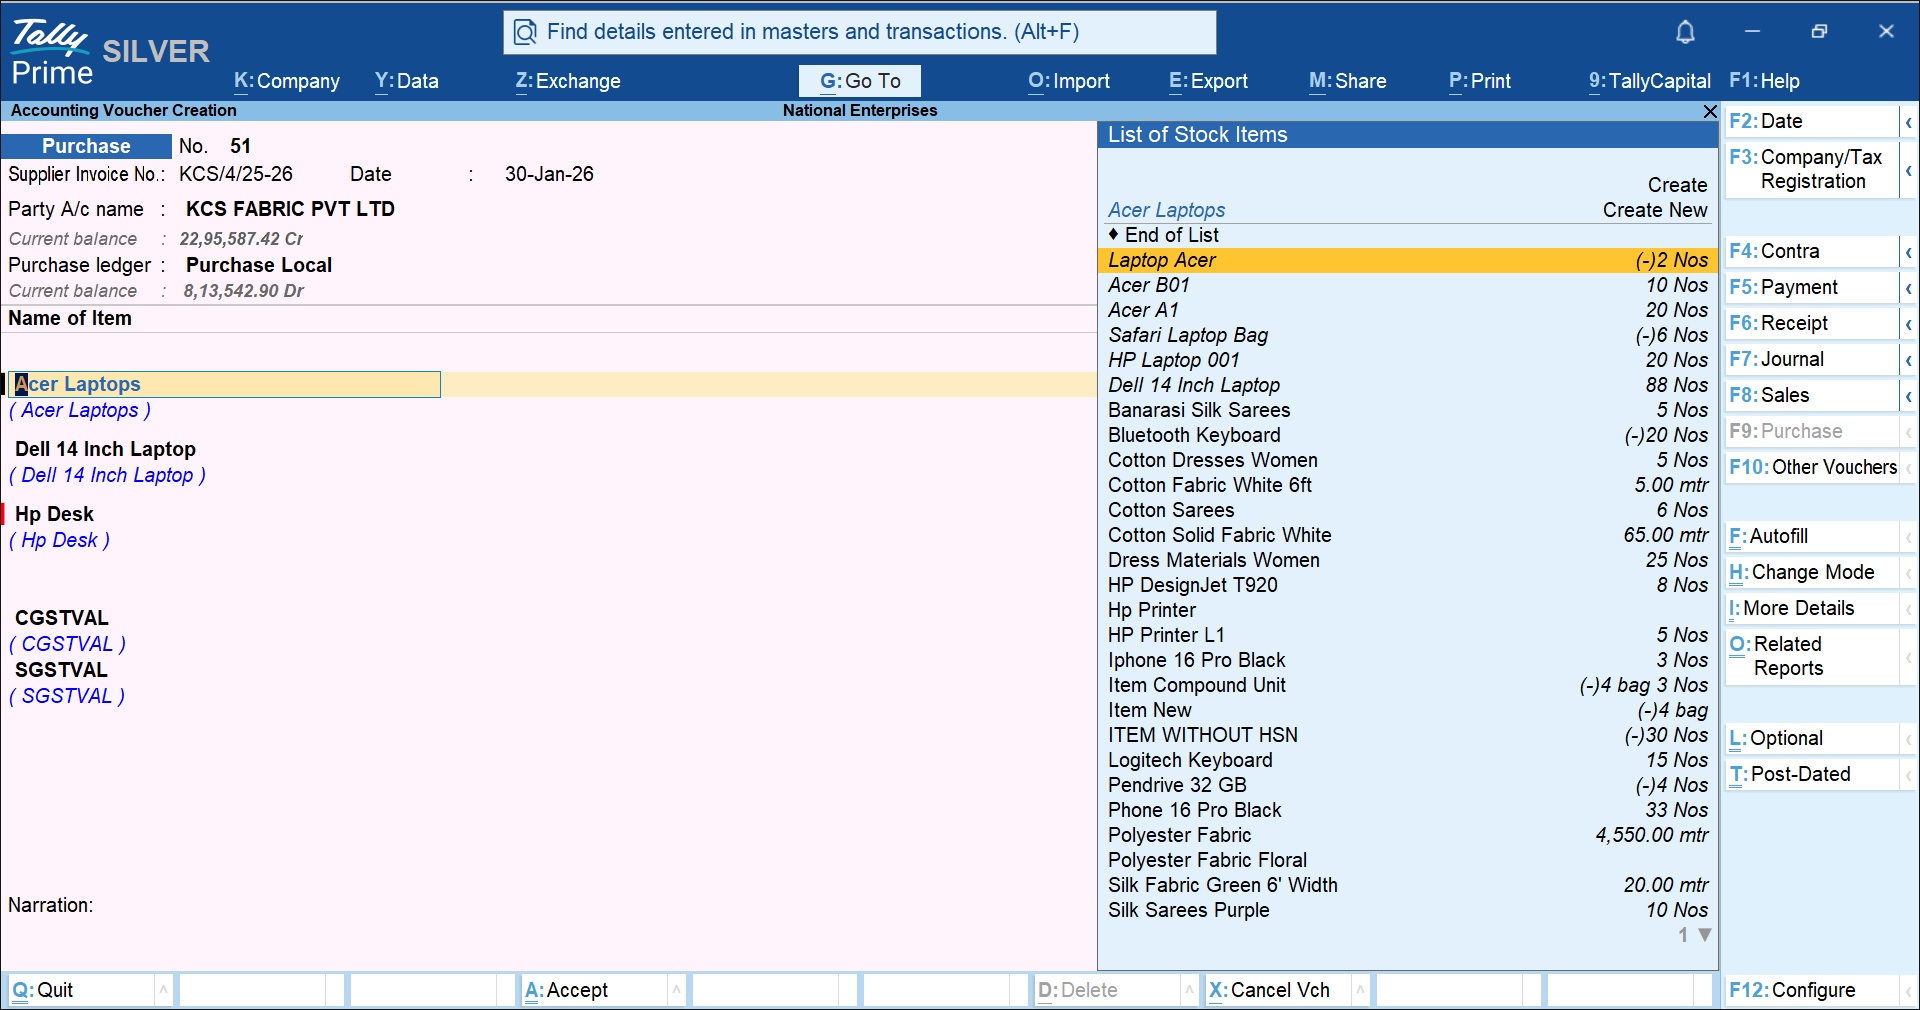
- Select the existing master that you want to map.
The existing master is mapped to the master derived from the invoice. - Press Ctrl+A to save the voucher.
If you want to map your masters with those shared in the invoice before creating the purchase voucher, you can do it from the Master Mapping report.
Questions & Answers
- If my supplier uses different item names than what I have in my books, how can I map that?
You can perform a one-time mapping between the supplier’s item name and your existing item master. Once mapped, TallyPrime will automatically use your mapped item name in future transactions. - How are item or ledger codes from other ERP systems handled during voucher creation?
If the item or ledger does not exist in your books, TallyPrime allows you to create a new master using the received invoice data. Key details like HSN, GST rate, and other attributes are auto-filled, making it easier to align with external ERP formats. - What should I do if the supplier’s invoice includes items or ledgers that are not present in my books?
You can manage this directly while recording the voucher by:-
Automatically creating all missing masters when saving
-
Creating each master individually using invoice data
-
Mapping them to existing masters in your books
-
- Will the master mappings I create be reused automatically in future transactions?
Yes, once you map a master, the mapping is saved and automatically applied for future invoices from the same supplier, reducing repeated effort. - If I accept an invoice first, can I create the purchase voucher later?
Yes, you can accept the invoice without creating the voucher immediately. Once accepted, it moves to Invoices Pending for Payment, from where you can create the purchase voucher at any time. - How do I decide whether to use Item Invoice or Accounting Invoice while creating the purchase voucher?
Use Item Invoice if you want to capture detailed inventory (item-wise data).
Use Accounting Invoice if you prefer to record the total amount under a single ledger without tracking item-level details.


