Set Up Price List and Price Level in TallyPrime
In TallyPrime, you can create Price Lists to define different selling prices and discounts for stock items based on Price Levels such as Wholesaler, Retailer, or Dealer. You can specify the applicable date and quantity range for each price, making it easier to manage pricing for different customer categories. Once a Price List is created for a stock group or category, any new stock items created under it appear in the Price List, where you can specify their applicable prices and discounts.
Set Up Price List for Stock Item
You can define different selling prices and discounts for stock items based on Price Levels such as Wholesaler, Retailer, or Dealer. You can also specify the applicable date and quantity range for each price.

Ensure that:
- In F11 (Company Features), Enable multiple Price Levels is set to Yes.
- The required Price Levels are created from Alt+G (Go To) > Create Master > Price Levels.
- Press Alt+G (Go To) > Create Master > type or select Price Lists (Stock Group).
- In the Price List screen, enter the required Price Level and press Ctrl+A.
- Under Applicable From, enter the date from which the price list is applicable.
- Select the stock item and enter the quantity range in From and Less than.
- Enter the Rate and Disc. %.
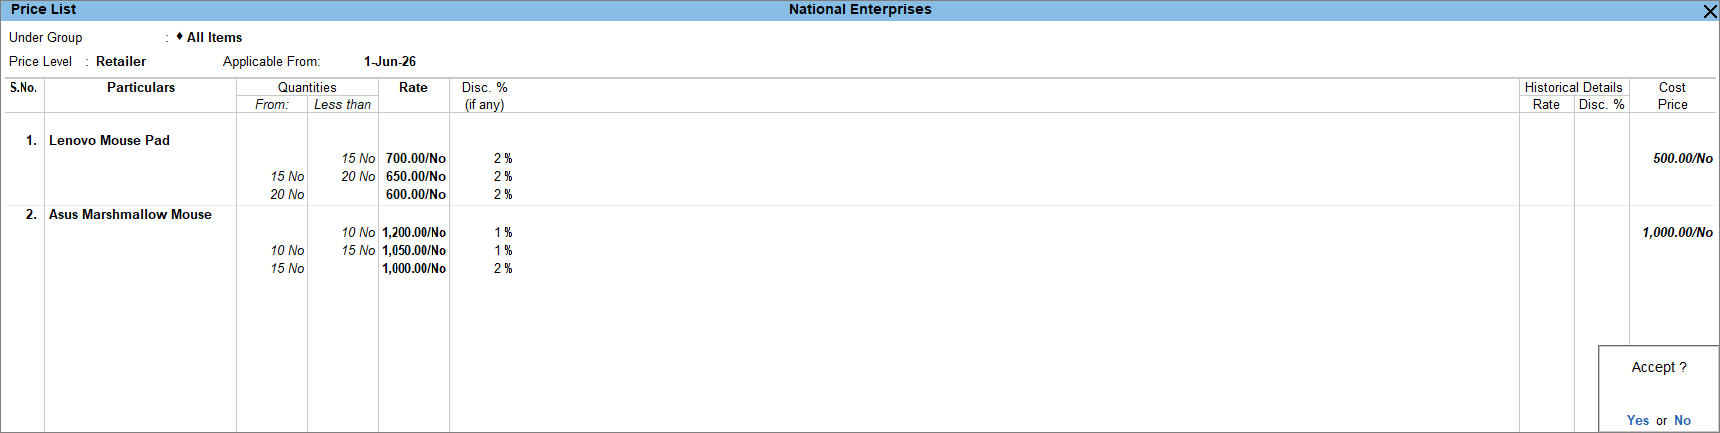
- Press Ctrl+A to save the price list.
The price is updated automatically based on the stock valuation method defined for the stock item. You can use it as a reference while defining the selling price. If you create new stock items under a stock group or category with an existing price list, the items appear in the price list. You can then specify the applicable price and discount, if required.
Revise Price Lists
You can revise the prices and discounts for multiple stock items in a price list at the same time. You can also view the earlier price list alongside the revised prices to compare the changes.
- Press Alt+G (Go To) > Alter Master > Price List (Stock Group) > press Alt+R (Revise Price).
- In the Price List screen, select the Stock Group Name, Price Level, and applicability date.
- Set the revise price and revise discount.
- Under Revise Price, select the Type of Revise Price, such as Decrease By Amount, Decrease By Percentage, Increase By Amount or Increase By Percentage.
- Enter the amount.
- Under Revise Discount, select the Type of Revise Discount, such as Decrease By Percentage or Increase By Percentage.
- Enter the percentage.
- Press Ctrl+A to save.
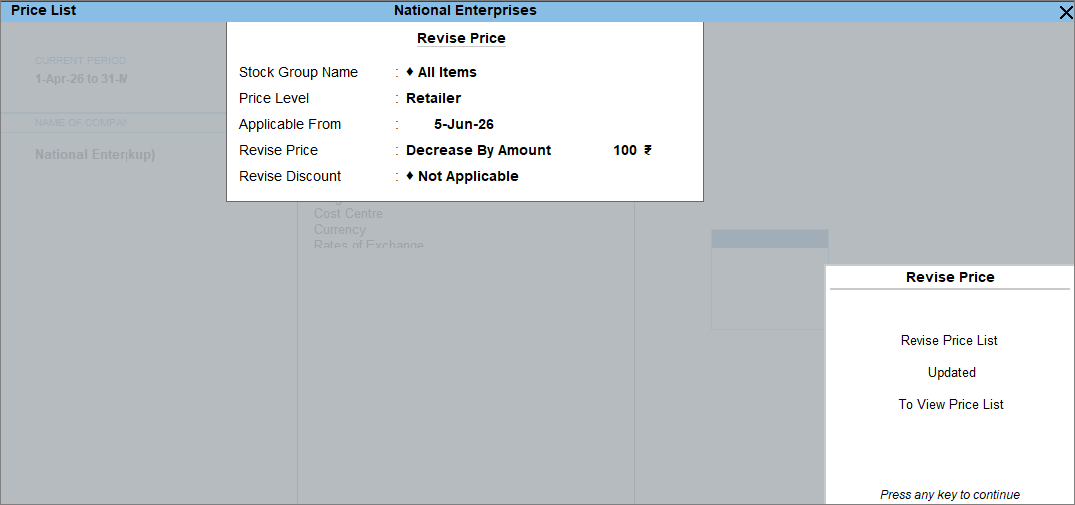
- Review the revised price list and press Ctrl+A to save.
Set Up Price Level to Party Ledger
If a particular Price Level is generally applicable to a customer, you can predefine it in the party ledger. This avoids selecting the Price Level manually each time you record a sales invoice.
In the Ledger Alteration screen of the party:
- Press F12 (Configure) and enable Use Price Levels for Party Ledgers.
- Under Pricing level applicable, select the required price level.
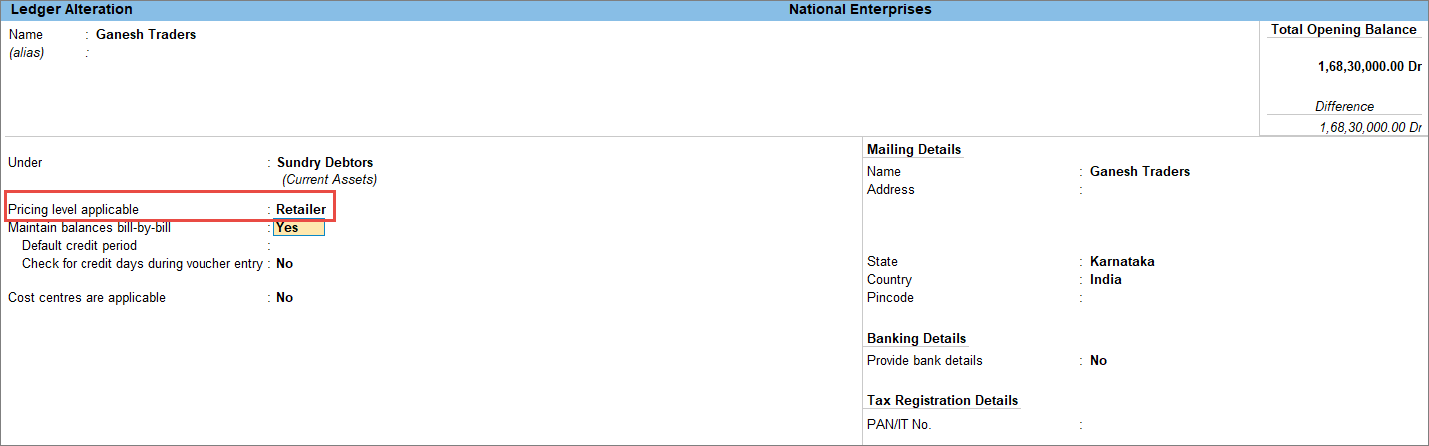
- Press Ctrl+A to save the ledger.
Questions & Answers
- Can I create a Price List for a Stock Category?
Yes. You can create a Price List for stock items grouped under a specific Stock Category by selecting Price List (Stock Category) while creating the price list. - Can I change the name of a Price Level?
Yes, you can change the name of a price level.- Press Alt+G (Go To) > Alter Master > Price Levels.
- Select the required Price Level, and change its name.
- Press Ctrl+A to save the changes.
- Can I view historical prices and discounts in a Price List?
Yes. When you revise the prices or discounts in a price list, TallyPrime retains the historical details. You can view the earlier prices and discounts along with the current price list.