
Getting Started with TallyPrime
TallyPrime brings delightful ease to your accounting and bookkeeping tasks, and its seamless onboarding gets you started in just a few simple steps. TallyPrime keeps every step intuitive, helping even new users work confidently from the start.
Whether you choose a Silver, Gold, or Rental license, the journey begins easily in simple steps:
- Download TallyPrime from the Tally Solutions website.
- Install TallyPrime on your system.
- Activate your license in just a few steps.
Once you have TallyPrime on your computer, you can create your company. While creating the company, you can select the country in which your business is based. TallyPrime supports key compliance needs across regions depending on the country you select—India (GST that constitutes taxation, e-Invoice, and e-Way Bill), Kenya VAT and UAE VAT, and KSA VAT (including e-Invoice), and so on.
After creating your company, for systematic accounting, you can set up masters either individually or in bulk. What’s more, you can import masters and even transactions from an MS Excel or XML files, if available.
However, TallyPrime does not mandate creating masters in advance. You can create masters on the fly when you record daily transactions like sales, purchases, payments, receipts, and credit/debit notes.
Before you begin | Prerequisites
- Your computer must have the recommended system configuration.
- Based on your requirement, you have installed the correct TallyPrime product for you.
Download, Install, and Activate
- Download TallyPrime.
- Visit Tally Solutions website.
- Click Download, and the setup file will be saved in your Downloads folder.
- Install TallyPrime.
- Double-click the setup.exe file.
- Choose Install New or specify a different folder for TallyPrime Edit Log.
- Follow on-screen prompts and click I (Install) to complete the installation.
- To launch TallyPrime, click Start TallyPrime.
- Activate your TallyPrime license.
- Click Activate New License.
- Enter your Serial Number, Activation Key, and Administrator Email ID.
- Enter the Unlock Key sent to your e-mail ID.
- Press Enter to unlock your license.
Once your license is successfully activated, you can create your first Company and start using TallyPrime for your business transactions.
Create Company
A TallyPrime Company is a home to all your important business data. In TallyPrime, company creation doesn’t take more than a few minutes.
If you run more than one business, you can create multiple companies and maintain their data separately. For consolidated reporting of multiple companies, you can use a Group Company.
- In TallyPrime, press Alt+K (Company) > Create.
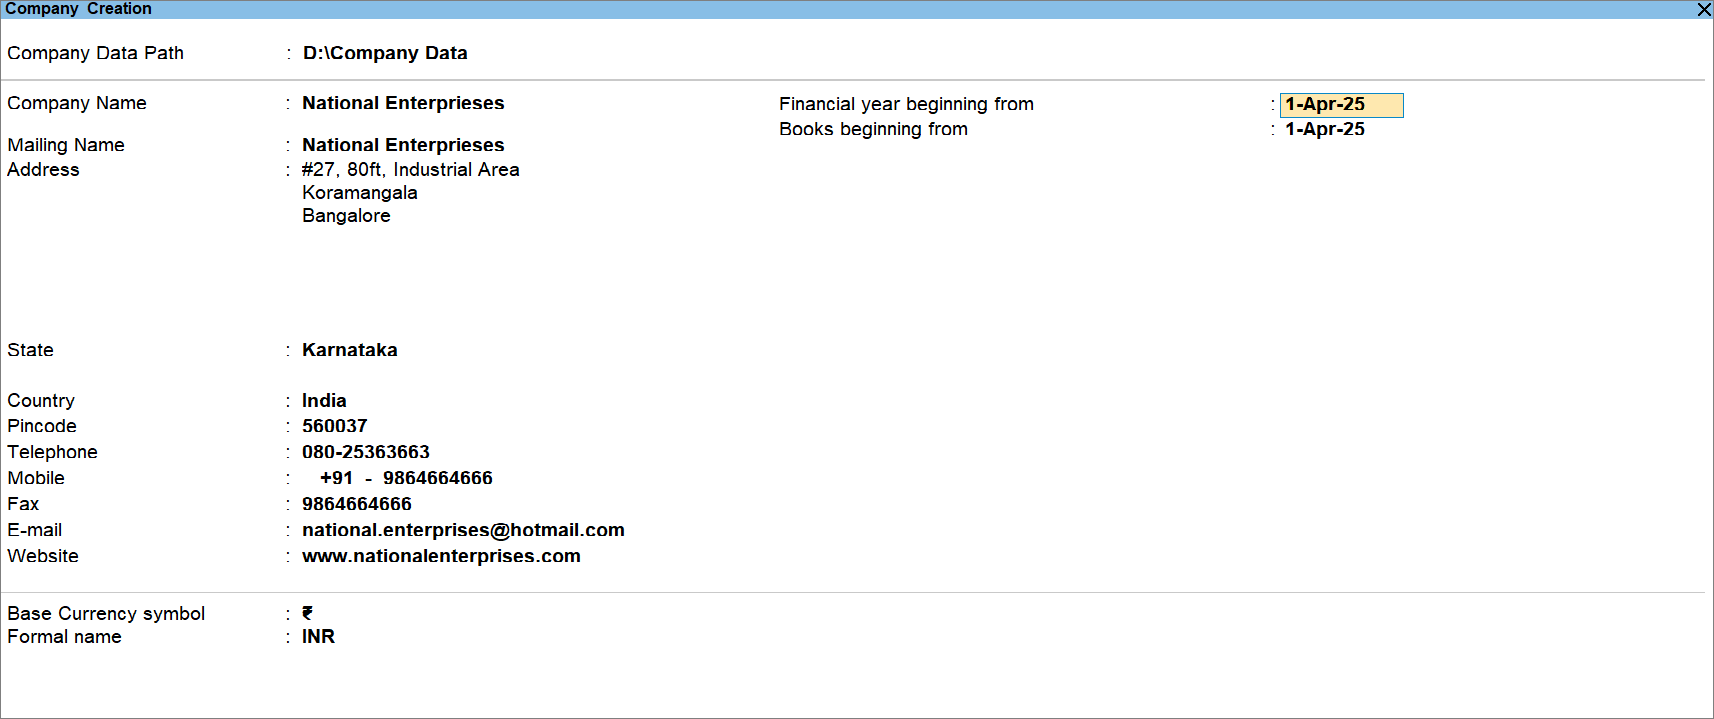
- Enter Company Name and Address.
You may add multiple addresses, if needed. - Select the Country and State, based on the place at which your business is based.
- Enter contact details such as telephone number, mobile number, fax, and e-mail address.
- Enter the currency-related details.
- Base Currency symbol: Based on the currency used in the country specified, enter the symbol of the currency.
- Formal name: Enter the formal name of the currency.
By default, the transactions get recorded in the currency you enter here.
However, you can also create the Currency masters to create multi-currency transactions.
- Financial Year beginning from: Enter the date from which the financial year starts.
- Books Beginning from: Enter the date from which you want to start recording transactions in this Company data.
-
Press Ctrl+A to save the company.At any point in time, if you want to change the company details, then press Alt+K (Company) > Alter, and make the necessary changes.
Configure Additional Company Details
- In the Company Creation screen, press F12 (Configure).
- Provide Contact Details: Allows to provide e-mail address and mobile number of the Company.
- Set Edit Log applicability: If you want to track the modifications in your vouchers and masters.
- Use TallyVault Password to encrypt Company Data: If you want to encrypt your data with TallyVault.
- Use User Access Control: Allows authorised access to Company data. You can control access to the company data for more than one users, as needed.
- Provide Additional Base Currency Details: If you want to add currency details in the Company.
Once the company is created, set up the required features – Accounting, Inventory, Taxation, Payroll, and others – in the flow or company creation or any time later.
After you set up your Company, you can start recording your transactions. However, for systematic accounting, creating masters is the recommended practice.
Create Masters
In TallyPrime, you can:
- Create single party or accounting ledger.
- Create multiple masters on the go from the Chart of Accounts.
- Import an MS Excel or JSON file containing masters.
TallyPrime offers various types of masters:
- Accounting masters such as Ledgers, Groups, and Cost Centres
- Inventory masters such as Units of Measurement, Stock items, Stock Groups, Stock Categories, and Godowns
- Payroll masters including Employees, Employee Groups, and Payroll Unit
- Statutory masters
Record Transactions
With a wide range of voucher types available in TallyPrime, you can record a diverse type of transactions.
- Only accounting transactions
- Inventory transactions
- Job Order Processing transactions
- Payroll transactions
- Compliance transactions
Now that you know how to get started with TallyPrime, you can start recording transactions and explore more features.
To ensure your data is compliant for taxation and filing purposes, refer to the following:
Questions & Answers
- I had been using another product for accounting and just switched to TallyPrime. How can I bring my data to TallyPrime?
You can export the masters and transactions from the product in the MS Excel or XML format. Thereafter, you can import masters and transactions to TallyPrime.
- How many Companies can I create in TallyPrime?
You can create as many Companies in TallyPrime as you want and maintain your data for specific branches.
You can also use a Group Company.
What’s more, if your business is based in India, then you can also create multiple GST registrations in your Company.
This helps you record transactions for specific GSTIN/UIN.
- I deal with a lot of parties in my business, and they are spread across the country. How can I account for transactions based on the party’s region?
To account for transactions with parties based on region and view reports for the regions, you can create groups in TallyPrime. When you view group vouchers reports, you get a bird’s-eye-view of business in all the regions.
- I have different types of products. How can I ensure that I can see my business growth as per the product type?
If you have a diverse set of products, then you can create stock groups and stock categories. For instance, if you are selling phones, computers, and televisions, then you can create stock groups for the respective product types. You might be selling products of different brands. You can create stock categories for the same. You can assign the specific stock group and category to the stock item. As a result, you will be able to view sales trend in the Dashboard for all the product types and brands for business analysis.


