Create a Facebook Page for Your Business
If you are not using your GST registration certificate for business verification, you can create a Facebook Business Page and submit its URL along with your business website URL during business verification.

- Open the Log in to Facebook page and log in using your credentials.
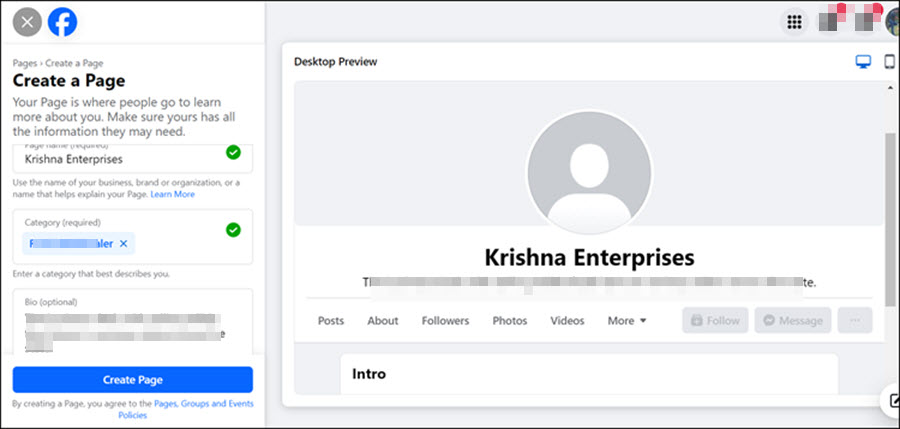
- In the Create a Page screen, ensure to fill in all the fields, and click Create the Page.
- Page name: Enter the full name of your company.
- Category: Select the appropriate category that accurately reflects your business.
- Page bio: Describe your business in a few lines.
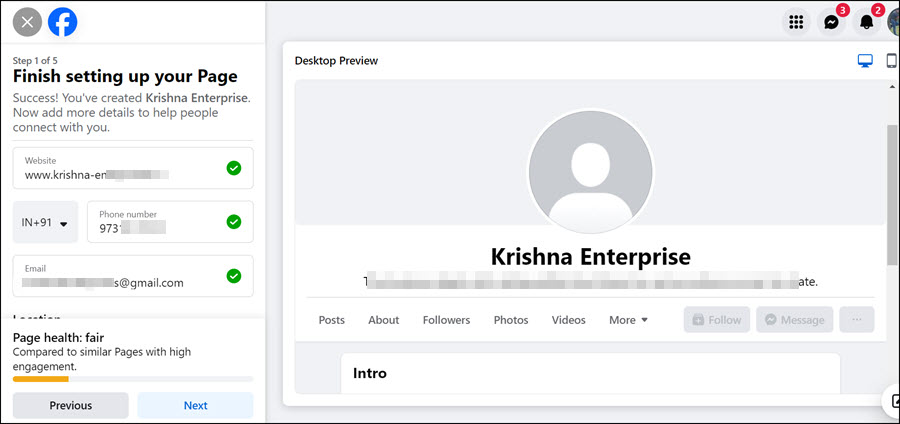
- In the Finish setting up your Page screen, enter details in all the fields, and click Next.
- Phone number: Enter a contact number where anyone can reach your business.
- Email: Enter the official e-mail address of your business.
- Location: Enter the complete official address of your business.
- Hours: Enter the business working hours when customers can reach out to your business.
- Customise your Page: Upload the relevant Profile Pic and Cover Pic that are related to your business, and click Next.
- Connect WhatsApp to your Page: Enter a WhatsApp No. if needed (optional, but recommended), and click Next.
- Build your page audience: Invite friends to your business (optional, but recommended), and click Next.
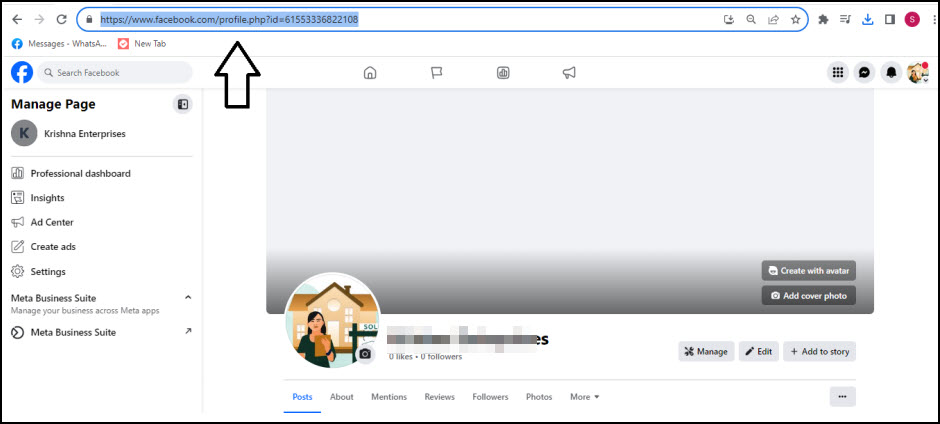
The Facebook page for your business gets created. The URL of the page appears in the browser, as shown in the following image.
- Select Done to complete the Facebook page creation.
After the Facebook page for your business is created, the URL of the page appears in the browser, and you can enter the same URL while creating your Meta Business Account to verify your business details.
Is this information useful?
YesNo