Record Credit Notes for Sales Returns and Increase in Sale Value
Sales return happens when a customer returns a product or service to the seller for a refund or exchange. These returns can be for an entire supply or for a portion of the supply, which may occur for a variety of reasons, including low-quality products, damage to the product, late delivery, surplus delivery, and more. Apart from sales return, there can be situations where the sale value is increased after the sales were made. Such a situation can arise if incorrect rates are considered at the time of sale or there is a fluctuation in the rates. In TallyPrime you can record all such transactions and view them in the Credit Note Register.
You can record sales returns using Credit Notes in TallyPrime, as it provides you with the option to mention the reason for such a return. The sales returns can be after or before receiving the payment, and the accounting method for both such cases is different. In TallyPrime, you can record both instances of sales returns. Once the sales return is recorded, you must share the Credit Note with your customer so they can adjust the amount on their next purchase. In case the customer wants to exchange the product, you can record the Credit Note and adjust it with the new sales invoice.
There can be scenarios where the price of the product increases after the sales were made. The price hike after supply can happen due to price fluctuations of certain goods. In some cases, you may also need to increase the price of the goods sold, if you have considered an incorrect rate for the goods. The price hike after supply can be recorded in TallyPrime, using Debit Note.
Sales Returns Transaction
In case of sales return of goods and services, you can record the same using Credit Notes. There can be a situation where your customer had already made the payment and then returned the goods. In such case, you need to issue a Credit Note which they can adjust in their next purchase. If the goods were returned before the payment was made then you can issue a Credit Note which they can adjust at the time of making the current payment.
For both instances, the accounting methods are different. But in TallyPrime, you can record both instances of sales return.
In this section
Sales returns before receiving the payment
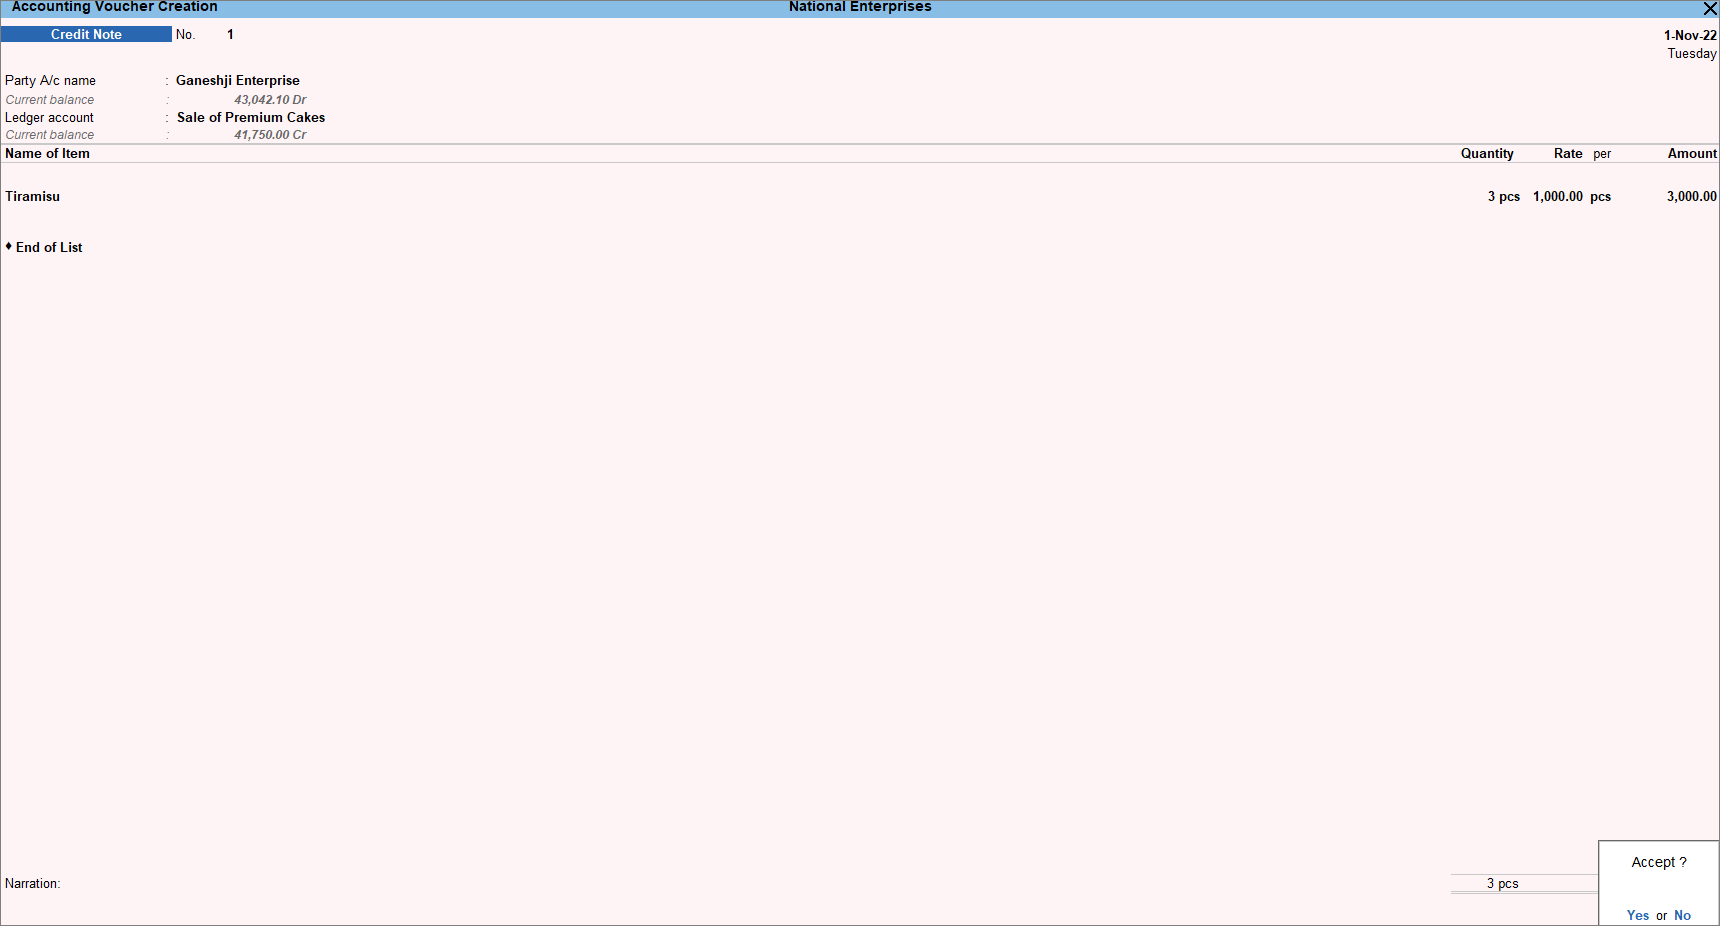
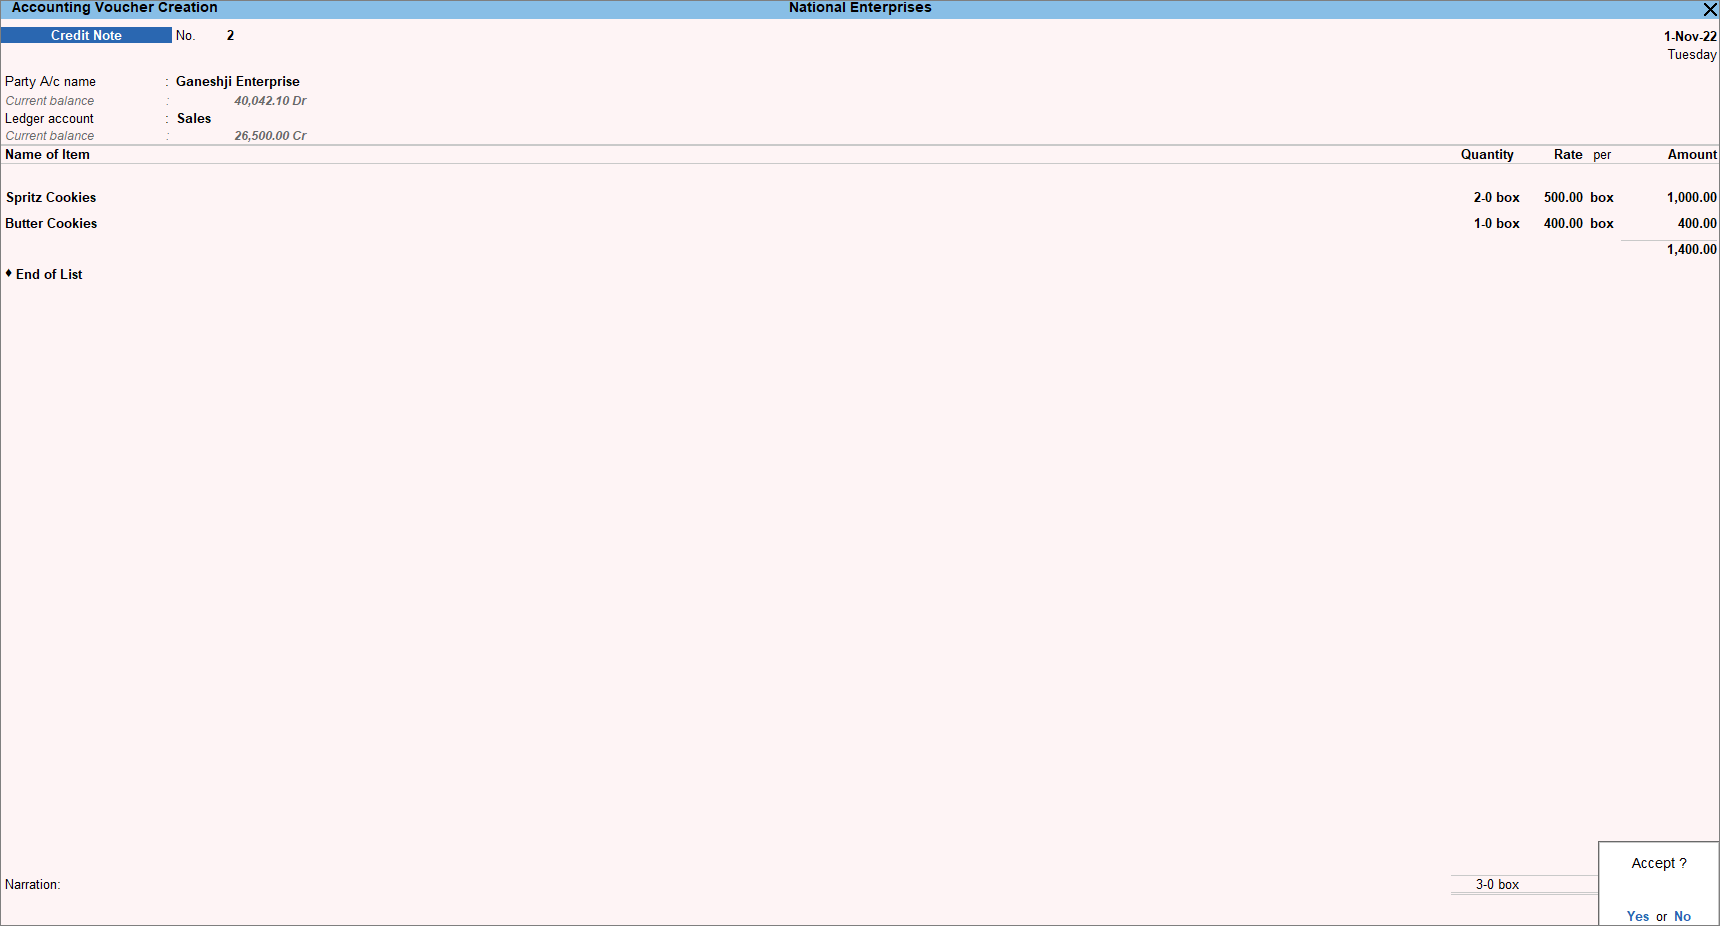
If you are recording the sales returns before receiving the payment, you need to select the Type of Ref as Agst Ref while linking the Credit Note to the sales invoice. After linking the Credit Note, the customer can pay after deducting the Credit Note value. Below is the procedure of sales return for goods using Item Invoice mode.
- Open the Credit Note in Item Invoice mode.
- Press Alt+G (Go To) > Create Voucher > F10 (Other Vouchers) > type or select Credit Note.
Alternatively, Gateway of Tally > Vouchers > F10 (Other Vouchers) > type or select Credit Note > press Enter. - Press Ctrl+H (Change Mode) > select Item Invoice.
- Press Alt+G (Go To) > Create Voucher > F10 (Other Vouchers) > type or select Credit Note.
- Specify the buyer details.
- Party A/c Name: Select the party to whom the goods were initially sold and press Enter.
The Receipt Details screen appears. - Receipt Details: Enter the Receipt Details, as needed.
Under Original Invoice Details, update the Original Invoice No. and Date of the original sales transaction against which you are recording a sales return and press Enter.
The Party Details screen appears. - Party Details: Update the original buyer details.
- Party A/c Name: Select the party to whom the goods were initially sold and press Enter.
- Select the Sales ledger to allocate the stock items.
- Provide the stock item details.
- Name of Item: Select the stock item that you have received as a sales return.
- Specify Quantity and Rate.
- Select the bill-wise details.
- Provide Narration, if needed. As always, press Ctrl+A to save.
You can view the Credit Note in the Credit Note Register. The sales return increases your stock. However, if the sales return is for damaged goods, it is recorded separately and does not become the part of the closing stock.
Sales returns after receiving the payment
If you are recording the sales returns after receiving the amount, you need to select the Type of Ref as New Ref while recording the Credit Note. You need to issue that Credit Note to the customer so that they can adjust the amount in the next purchase.
- Open the Credit Note in the Item Invoice mode.
- Press Alt+G (Go To) > Create Voucher > F10 (Other Vouchers) > type or select Credit Note.
Alternatively, Gateway of Tally > Vouchers > F10 (Other Vouchers) > type or select Credit Note > press Enter. - Press Ctrl+H (Change Mode) >select Item Invoice.
- Press Alt+G (Go To) > Create Voucher > F10 (Other Vouchers) > type or select Credit Note.
- Specify the buyer details.
- Party A/c Name: select the party to whom the goods were initially sold, and press Enter.
The Receipt Details screen appears. - Receipt Details: Enter the Receipt Details, as needed.
Under Original Invoice Details, update the Original Invoice No. and Date of the original sales transaction against which you are recording a sales return and press Enter.
The Party Details screen appears. - Party Details: update the original buyer details.
- Party A/c Name: select the party to whom the goods were initially sold, and press Enter.
- Select the Sales ledger to allocate the stock items.
- Provide the stock item details.
- Name of Item – Select the stock item that you have received as a sales return.
- Specify Quantity and Rate.
- Select the bill-wise details.
- Provide Narration, if needed. As always, press Ctrl+A to save.
You can settle this credit note by raising a sales invoice or payment voucher for the customer. The customer may want to exchange the product instead of returning the product. In such a case, you can record it in a similar way treating the Credit Note as a New Ref and adjusting it with the exchanged product.
Credit Note Register
All the credit notes recorded for the sales returns from your customers, you can see them in the Credit Note Register. The Credit Note Register displays a monthly break-up of Credit Notes. You can further drill down from the Credit Note Register and view the individual vouchers. Additionally, you can alter the voucher, if required.
- Press Alt+G (Go To) > type or select Credit Note Register.
Alternatively, Gateway of Tally > Display More Reports > Account Books > Credit Note Register.

- Select the required month and press Enter.
- If you want to view the Credit Note columnar register press F8 (Columnar).
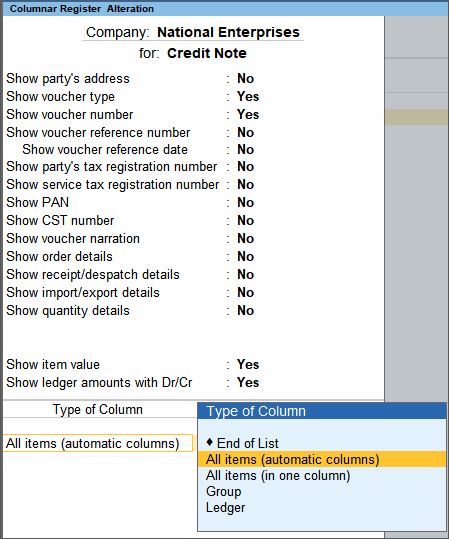
The columnar Voucher Register of credit notes appears as shown below.
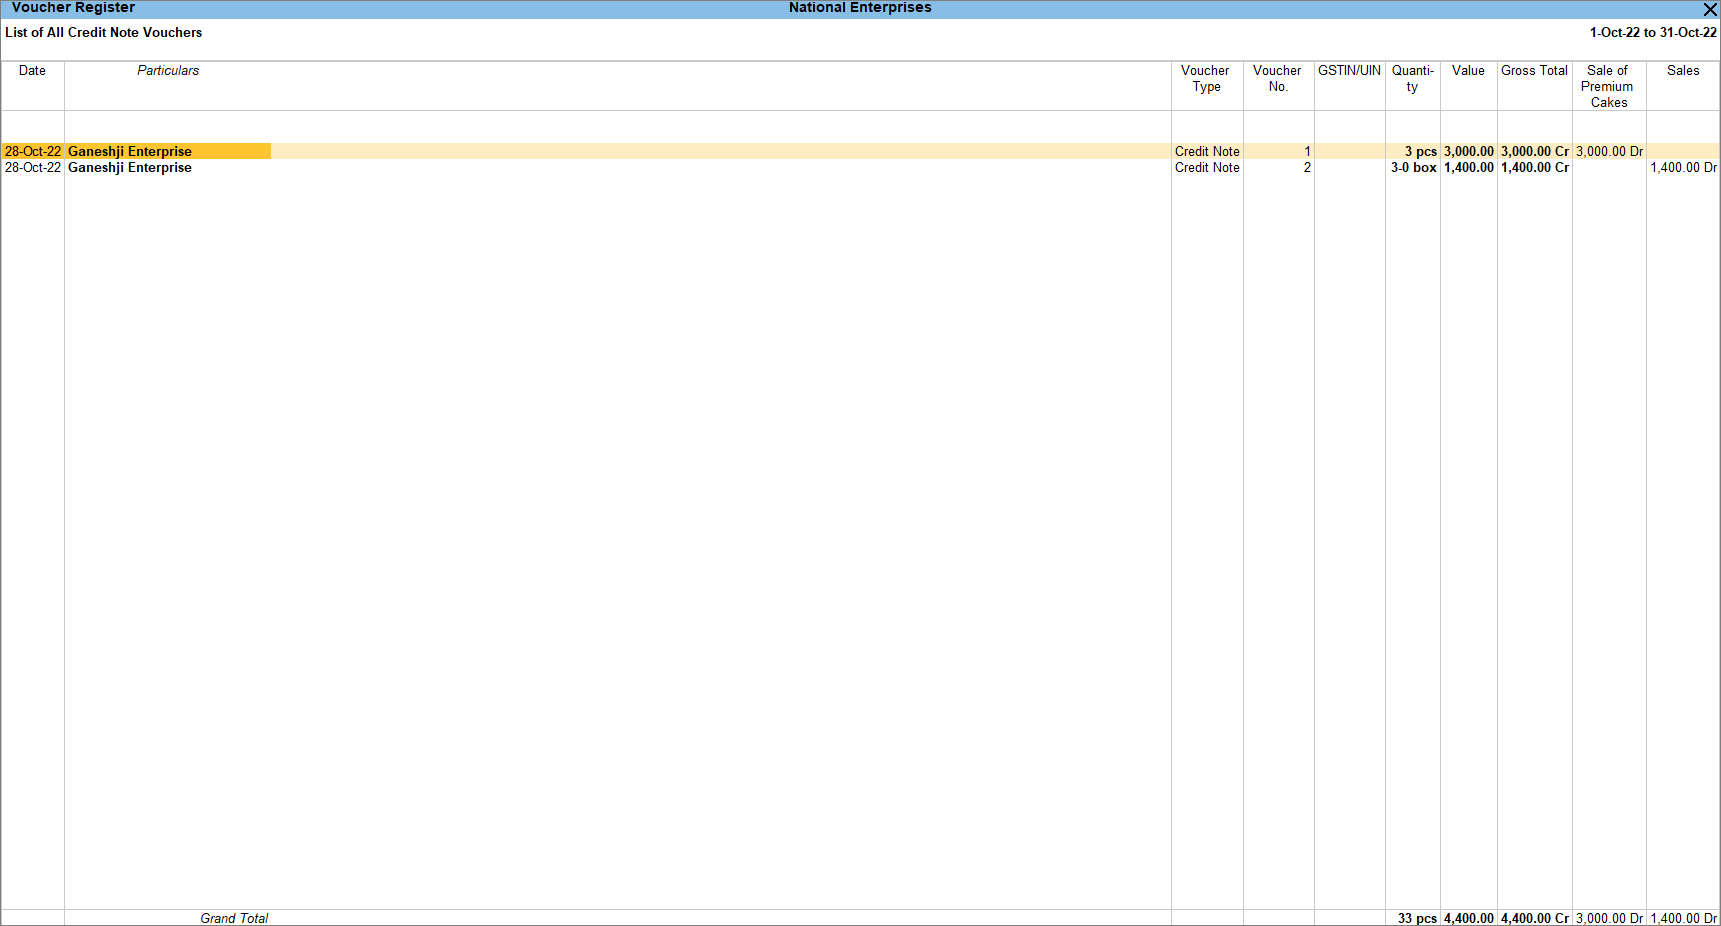
To change the voucher type, press F4 (Voucher Type) in the Voucher Register.
Click here to see the possible F12 configurations for Credit Note Register.
|
Configurations |
Descriptions of Monthly Configuration |
|
Show Optional Vouchers |
Displays the optional voucher count in a separate column. |
|
Periodicity |
You can select the Period for which the Credit Notes are displayed in the Credit Note Register. It can be Monthly, Fortnightly, Half Yearly and so on. |
|
Configurations |
Descriptions of Voucher Register Configuration |
|
Show Narrations |
Display the narration entered in the Credit Note. |
|
Format of Report |
Display the report in a detailed or condensed view. |
|
Show Bill-wise details |
Display the bill-wise details provided in the Credit Note. The bill-wise details help to track the Credit Note settlement. |
|
Show Inventory details |
Display the stock item quantity, rate, and value. |
|
Show Description of Stock Item |
Display the description entered for stock items in the Credit Note. |
|
Show Mode of Payment |
Display the Bank Allocation Details provided in the Credit Note when the bank ledger is selected in the Party A/c Name field. |
|
Show additional Bank details |
Display the details entered in Bank Allocation Details of the transaction (for example, Favouring Name). |
|
Show Cost Centre Details |
Display the cost centres selected for the sales ledgers. |
|
Display name for Ledgers |
You can select the display name for Ledgers from the Type of Display Name list. |
|
Display name for Stock items |
You can select the display name for Stock Items from the Type of Display Name list. |
|
Sorting Method |
You can select the sorting methods for stock items from the Sorting Methods list. |
Account for the Increase in Sale Value
You need to record the increase in sale value due to situations where you have recorded the sale with the incorrect rate or there is a fluctuation in the cost of the goods. Such increase in sale value you can record using Debit Notes in TallyPrime. Below is the procedure of increase in the sale value of goods using Item Invoice mode.
- Open the Debit Note in Item Invoice mode.
- Press Alt+G (Go To) > Create Voucher > press F10 (Other Vouchers) > type or select Debit Note > press Enter.
Alternatively, Gateway of Tally > Vouchers > F10 (Other Vouchers) > type or select Debit Note > press Enter. - Press Ctrl+H (Change Mode) > select Item Invoice.
- Press Alt+G (Go To) > Create Voucher > press F10 (Other Vouchers) > type or select Debit Note > press Enter.
- Specify the buyer details.
- Party A/c Name: select the party to whom the goods were initially sold, and press Enter.
The Receipt Details screen appears. - Receipt Details: Enter the Receipt Details, as needed.
Under Original Invoice Details, update the Original Invoice No. and Date of the original sales transaction against which you are recording a sales return and press Enter.
The Party Details screen appears. - Party Details: update the original buyer details.
- Party A/c Name: select the party to whom the goods were initially sold, and press Enter.
- In the Ledger account, select the sales ledger.

- Enter the stock item details.
- Name of Item – Select the stock item that you have sold initially.
- Do not specify Quantity and Rate.
- In the Amount column, enter the balance amount after the price hike.
- Select the Type of Ref as New Ref and record the increase in sale value.
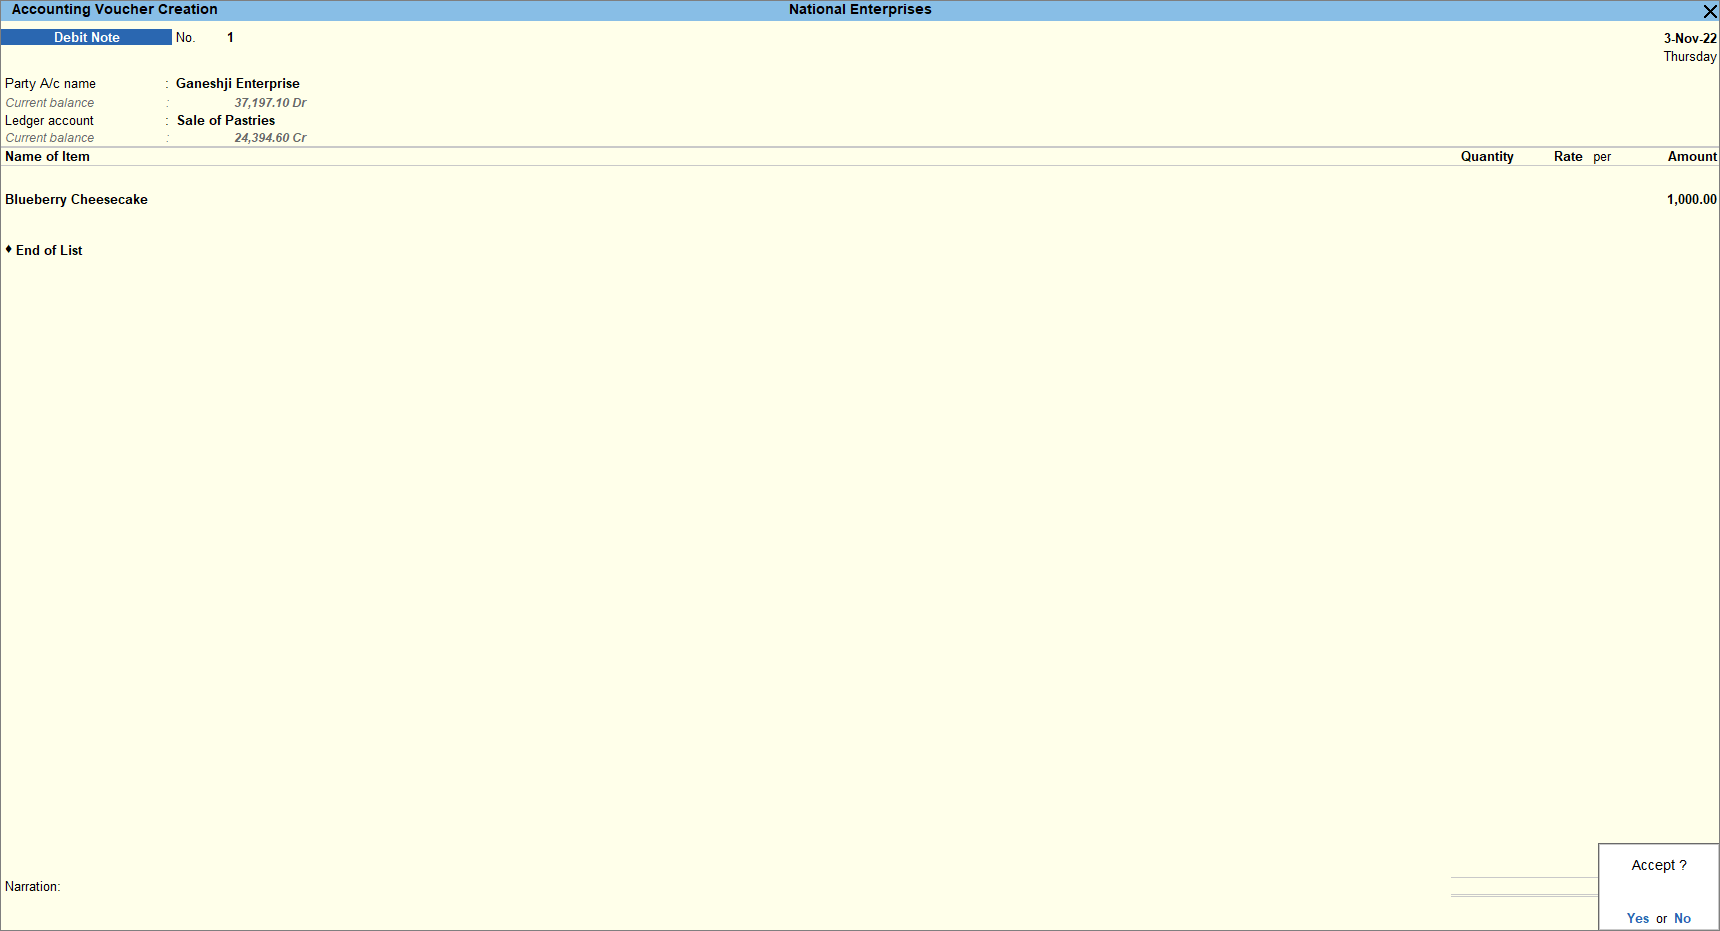
- As always, press Ctrl+A to save.
When you enter the amount into the purchasers’ record through a credit note, it signifies that there is a reduction in the amount payable by the customers or buyers, as they have already returned the items/services and are no more liable to pay for the same. Issued by the sellers to purchasers whenever they return goods or services, Credit Note keeps track of these activities and notifies the suppliers to update the accounts accordingly.


