E-mail Multiple Pay Slips Using TallyPrime
You print or email the Pay Slips for all the Employees with the click of a button.
View Multi Pay Slip
- Gateway of Tally > Display More Reports > Payroll Reports > Pay Slip.
Alternatively, press Alt+G (Go To) > type or select Multi Pay Slip > and press Enter. - Select the required Employee Category and Employee Group.
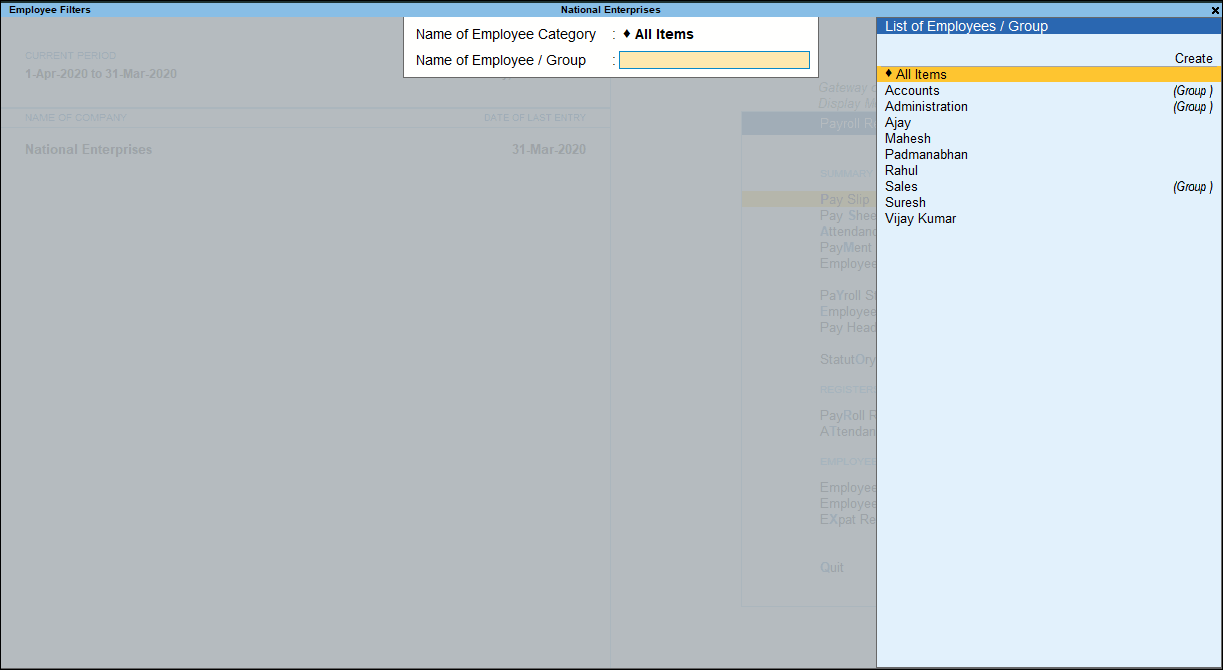
- Press Enter.
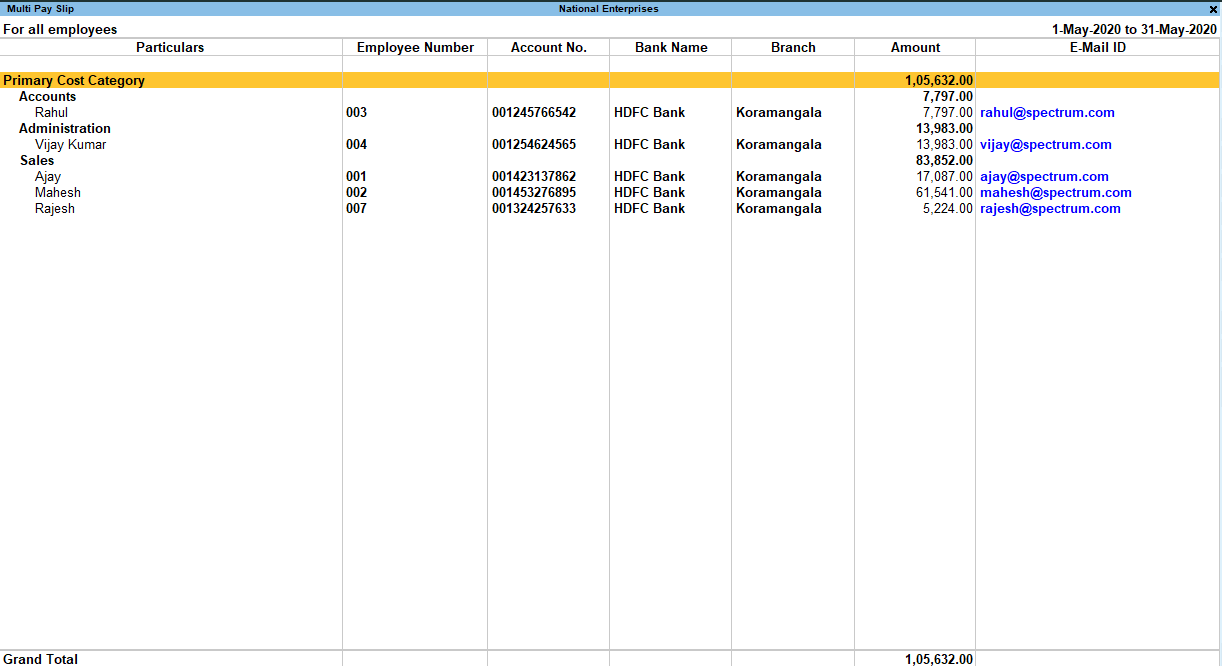
The Multi Pay Slip screen displays the Particulars, Employee Number, Account No., Bank Name & Branch, Amount and E-Mail ID for the Employees.
Press Enter on the Employee Names to view the Single Pay Slip for the selected Employee.
Button options in Multi Pay Slip screen
- F2 (Period): press F2 to change the selected Period.
- F4 (Employee): press F4 to view Employee Filters screen, this report to select Payroll Category and Employee/Employee Groups.
- F5 (Employee-wise): press F5 to view the report without the details of the Payroll Category and Employee Groups.
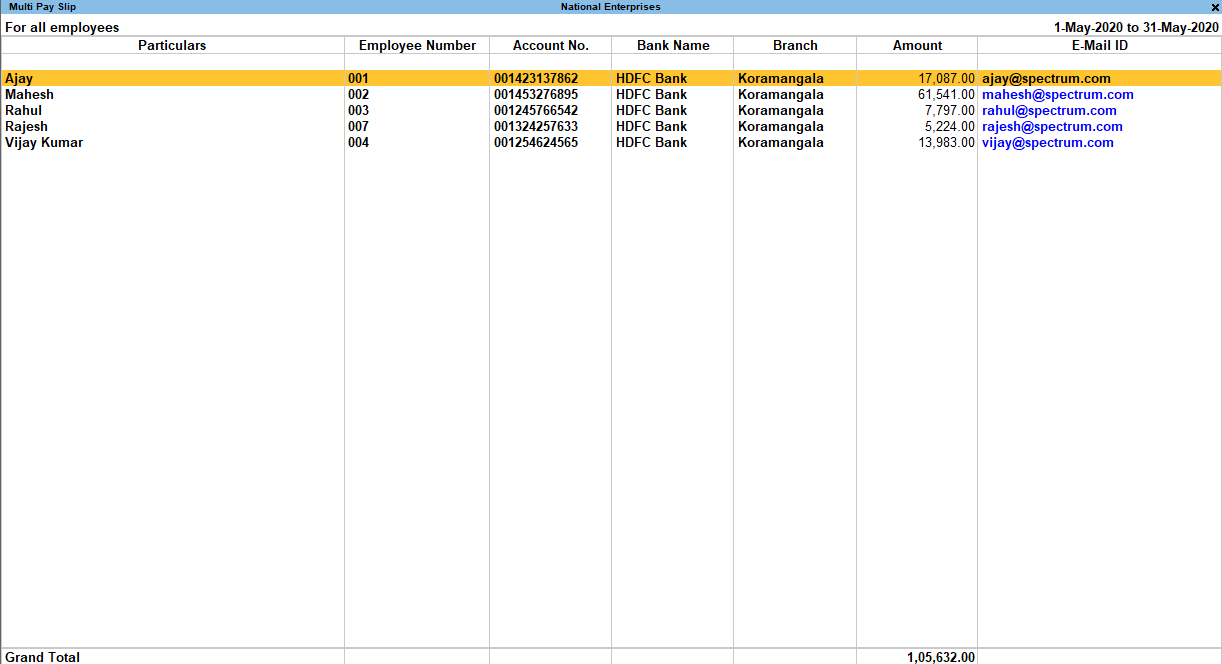
- Ctrl+H (Change View): You can display the details of a report in different views with additional details or for a specific period. You can also view other reports related to the current report.
To view the Pay Sheet for Multi Pay Slip, press Ctrl+H (Change View) > type or select Pay Sheet > press Enter. Press Esc to view the default report. - Ctrl+J (Exception Reports): You can view the exceptions related to the data displayed in the current report by pressing Ctrl+J (Exception Reports), without closing the report.
To view the Employees Without E-mail IDs, press Ctrl+J (Exception Reports) > type or select Employees Without E-mail IDs > and press Enter. Press Esc to view the default report. - F12 (Configure): press F12 to change default view for the Multi Pay Slip report.
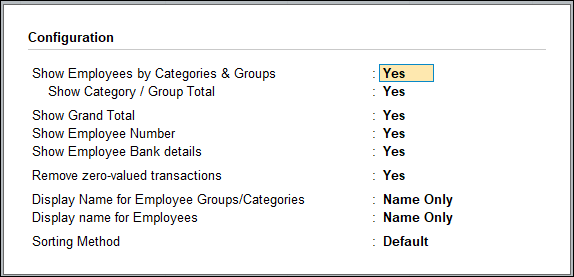
- Show Employee by Categories & Groups: Set this option to Yes to include rows related to Category and Groups. Set this to No to list only employee information.
- Show Category/Group Total: Set this option to Yes to display the totals for Category and Group.
- Show Grand Total: Set this option to Yes to display the Grand total at the bottom of the report.
- Show Employee Number: Set this option to Yes to display the employee number along with the Name.
- Show Employee Bank Details: Set this option to Yes to display the Name of Bank and Branch for each Employee.
- Remove zero-valued entries: Set this option to Yes to remove the Employees with Zero pay value from the Multi Pay Slip.
- Display Name for Employee Groups/Categories: From the Display Name Style list, select how you want names to appear..
- Display name for Employees: from the Display Employee
Name Style list, select an option to specify how employee need to appear. - Sorting Method: Select the appropriate sorting method from the list.
Print Multiple Pay Slips
- Press Ctrl+P from the above report.
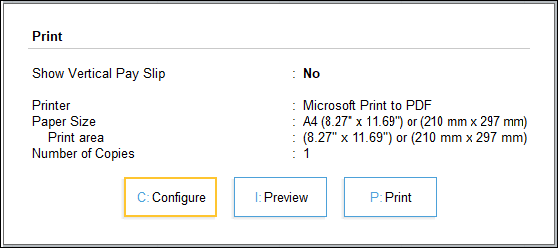
While printing all the pay slips from Multi Account Printing, you can print more than one pay slip in a single page. The option to print more than one pages in a sheet is available under Printer Properties. - Press C (Configure) to set the print configurations as required and press Esc and press P (Print)to print the Pay Slips for all Employees.
For more information on the Print Configuration options, refer to printing Single Pay Slips.
E-Mail Multiple Pay Slips
- Press Ctrl+M (E-Mail) from the Multi Pay Slip report.
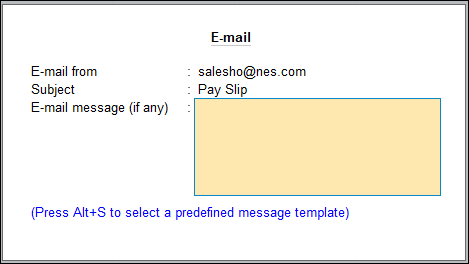
- Set the E-mail from address, Subject and E-mail message (if any) and press Enter.
- Press C (Configure) to set options as required and press Esc and press M (E-Mail) to E-Mail the Pay Slips for all Employees.
E-mail individual pay slip to the respective employee
- Gateway of Tally > Display More Reports > Payroll Reports > Pay Slip.
Alternatively, press Alt+G (Go To) > type or select Multi Pay Slip > and press Enter. - Select the Employee and press Enter.
- Press Ctrl+M (E-Mail) and enter the e-mail details. such as E-mail from, E-mail to, Subject and E-mail message (if any) and press Enter.
- Press C (Configure) to set options as required and press Esc and press M (E-Mail)to E-Mail the Pay Slips for all Employees.


