Generate e-Invoice (IRN) and Print QR Code
In TallyPrime, you can generate e-Invoice (IRN) and print QR code after passing a transaction. You can also send e-Way Bill along with e-Invoice details.
You also have the option to generate bulk IRN/e-Invoice.
As per the GSTN Advisory No. 661, effective August 1, 2026, the GSTN has mandated the entry of the Ship-To GSTIN for transactions where the Ship to address is different from the Bill to address. TallyPrime 7.1 onwards, you need to specify the GSTIN/UIN in transactions in which the Bill To and Ship To addresses are different. Thereafter, you can generate e-Invoice.

- Enable e-Invoicing in TallyPrime.
- Register your business on IRP.
- Create an API user profile by selecting Tally (India) Pvt Ltd as the GSP.
- Ensure that all the mandatory e-Invoice details are available.
If you’re already using an e-Way Bill profile in TallyPrime, you don’t need a separate API User Profile for e-Invoicing.
Generate e-Invoice (IRN) Online
While recording a GST sales transaction:
- Specify the required voucher details, such as the Party A/c name, Sales ledger, Name of Item, GST ledger, and so on.
Avoid starting invoice numbers with zero (0), a slash (/), or a hyphen (-), as these are rejected by the IRP. - Set Provide e-Invoice details to Yes.
- In the e-Invoice Details screen, specify the Bill to and Ship to places, if this is your first e-Invoice for the party. These details will be carried forward in subsequent transactions with the party.
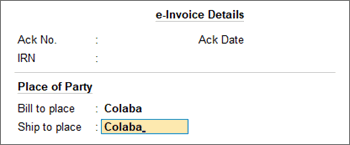
- Press Ctrl+A to save the details and to return to the voucher.
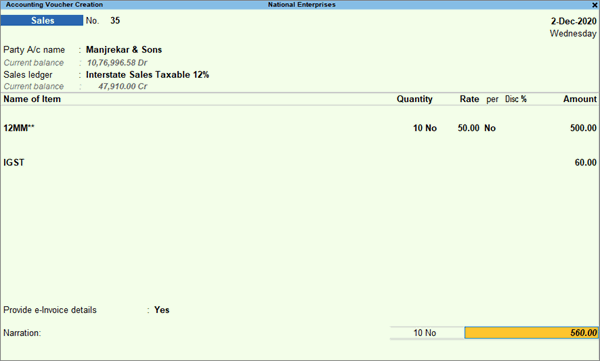
- In the e-Invoice Details screen, specify the Bill to and Ship to places, if this is your first e-Invoice for the party. These details will be carried forward in subsequent transactions with the party.
- As always, press Ctrl+A to save the voucher.
A message will appear, prompting you to generate the e-Invoice.
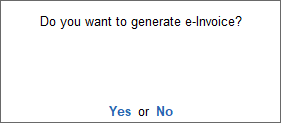
- Press Enter to continue.
- In the e-Invoice Login screen, enter valid Username & Password.
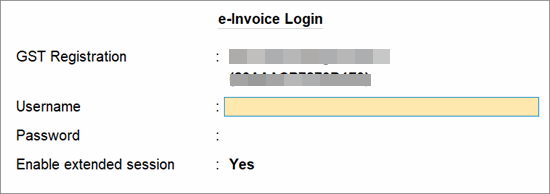
- Set Enable Extended Session to Yes to stay signed in for up to 30 days.
For TallyPrime 7.1 or earlier, the extended session option is not applicable.
Once you have logged in, if you want to disable the extended session, you have to reset your e-Invoice login and then set Enable Extended Session to No. - Press Enter.
The details of the invoice gets exchanged with the e-Invoice system.
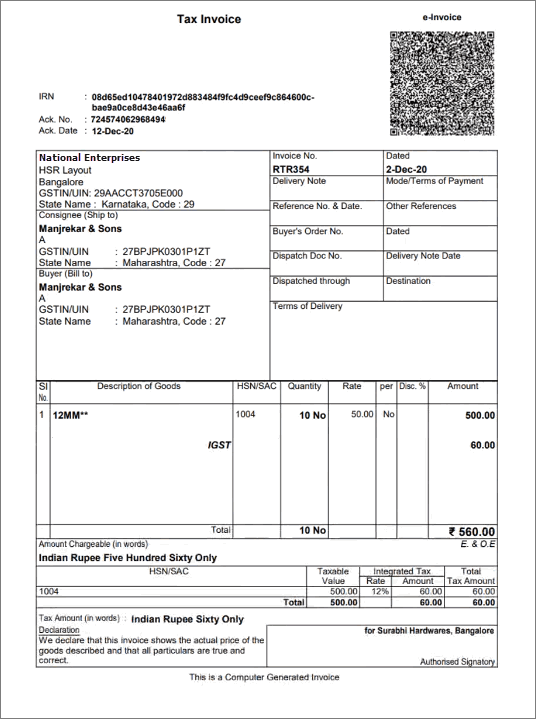
On successful upload to IRP, the IRN details will get updated in the voucher, and a message about the successful generation of e-invoices will appear.
The invoice will get printed with the IRN and QR code.
Send e-Way Bill Details with e-Invoice
While recording the sale transaction for generating e-Invoice:
- Specify the required voucher details, such as the Party A/c name, Sales ledger, Name of Item, GST ledger, and so on.
Avoid starting invoice numbers with zero (0), a slash (/), or a hyphen (-), as these are rejected by the IRP.- If the invoice has separate Bill to and Ship to addresses, then in the Party Details screen:
- Press F12 (Configure).
- Provide separate Buyer and Consignee Details: Yes.
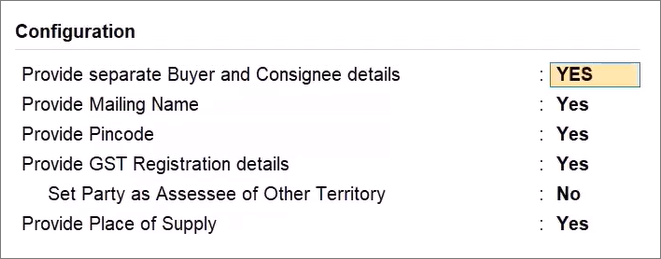
- Press Ctrl+A to save the configuration.
- In the Party Details screen, enter GSTIN/UIN under Consignee (Ship to) details.
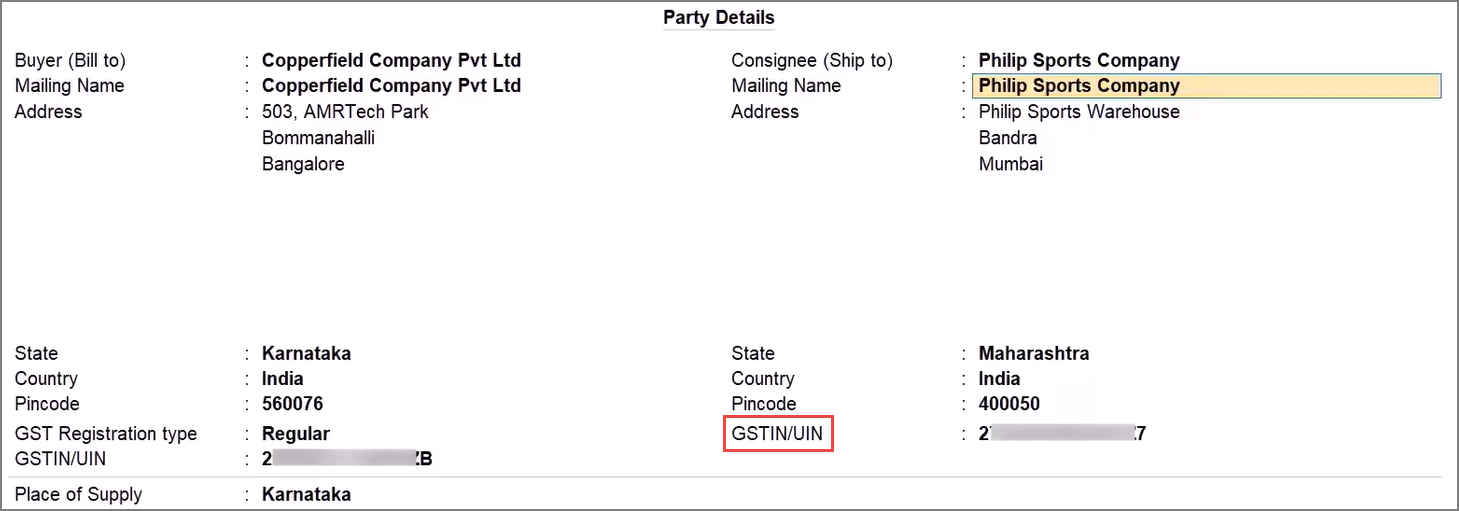
If the Consignee (Ship to) is an unregistered dealer, then leave the field as blank. It will be reported as Unregistered Person (URP). - Press Ctrl+A to save the screen.
- If the invoice has separate Bill to and Ship to addresses, then in the Party Details screen:
- Press F12 (Configure) > set Send e-Way Bill details with e-Invoice as Yes.
- Set Send e-Way Bill details after saving the Voucher as Yes, if needed.
- Enable Provide GST/e-Way Bill/e-Invoice details and enter all the mandatory e-Way Bill details.
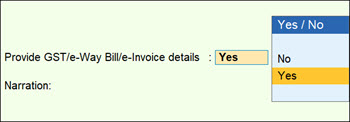
- If you the Bill to and Ship to details are different, then in the Additional Details screen, ensure that Consignee Details (To) are specified.
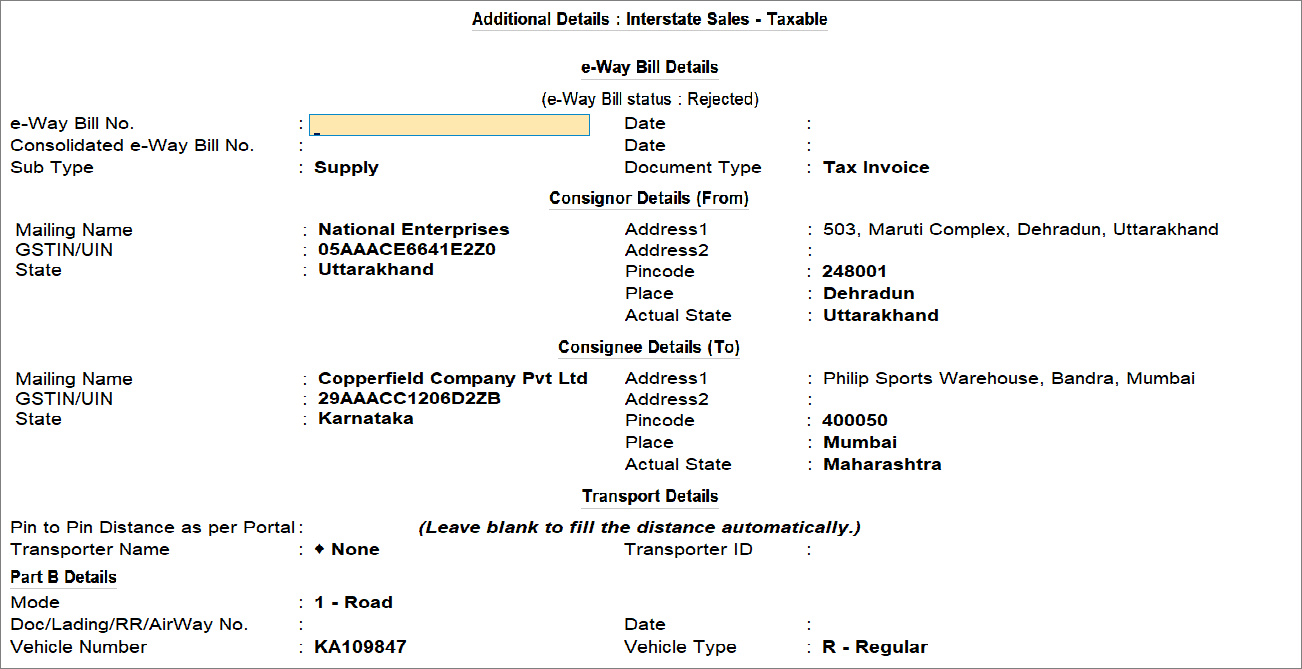
- If you the Bill to and Ship to details are different, then in the Additional Details screen, ensure that Consignee Details (To) are specified.
- Provide other necessary details, as needed, and press Ctrl+A to save the voucher.
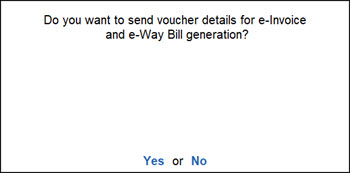
- Press Y or Enter to confirm.
If the Bill to and Ship to addresses are different and you are using TallyPrime 7.0 or earlier, generate the e-Invoice and e-Way Bill directly on the respective portals. While generating them, manually enter the Ship To GSTIN/UIN.
Questions & Answers
-
How can I disable the Extended Session for e-Invoice and revert to the 6-hour login session?
To disable the extended session and retain the session only for 6 hours:-
Press F1 (Help) > Troubleshooting > Reset Login > Reset e-Invoice Login and select Yes or press Y to reset the login credentials.
-
In the e-Invoice Login screen, set Enable Extended Session to No.
Users with access to generate e-Invoices can use the extended session capability.
-
- How to generate e-Way Bill with e-Invoice for Debit Note/Credit Note in TallyPrime?
For sales return/sales escalations (Credit/Debit Notes), NIC has not supported the generation of e-Way Bill with e-Invoice. - How to generate e-Invoice for Credit Note/Debit Note?
Similar to generating e-Invoice for sales, you can provide the same details while recording Debit Note/Credit Note. The steps for generating e-Invoice for Debit/Credit Note remain the same.