GST Classification in TallyPrime
GST Classification is a powerful tool for recording tax rates and other details for categories of goods and services that attract a common GST rate.
For example, you can create a GST Classification based on a particular HSN/SAC. When this classification is used in relevant masters and transactions, the tax details of the goods or services will be automatically captured. In the future, if the department changes the tax rate for any HSN, then you can simply alter the GST Classification and assign the new rate.
Moreover, you can create GST Classifications for an accounts-only company as well. Depending on the grouping used for GST Classification, you can tag them to Sales, Purchase, Services, and Income & Expense ledgers.
Create/Alter GST Classification Based on HSN/SAC
- Press Alt+G (Go To) > Create/Alter > GST Classification.
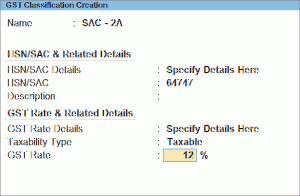
The GST Classification Creation/Alteration screen appears. - Specify the relevant details under the HSN/SAC & Related Details and GST Rate & Related Details sections.
- In the HSN/SAC & Related Details and GST Rate & Related Details fields, select the Specify Details Here option.
- Specify the applicable HSN/SAC and Description.
- Specify the applicable GST Rate.
- Press Ctrl+A to save the details.
Now you can use the created classification to update the rates in other masters, transactions, or reports, as needed. You also have the flexibility to apply the GST classification for multiple masters using the GST Rate Setup report.
If you are on a previous release of TallyPrime, then click here to know more about creating GST Classifications based on HSN/SAC.
- Gateway of Tally > Create > type or select GST Classification> and press Enter.
Alternatively, press Alt+G (Go To) > Create Master > GST Classification> and press Enter.
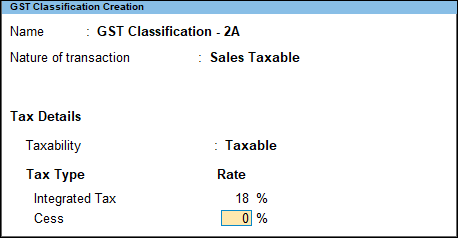
- Select the Nature of Transaction, if required.
The nature of transaction is identified based on Registration Type, State and Country of the party. Therefore, there is no specific requirement to select nature of transaction. You need to change the nature of transaction in case of branch transfers, consignment transfers, works contract, and so on, accordingly.
- Enter the rates applicable for Integrated Tax, and Cess, if any. The rate entered for integrated tax will be equally divided between central tax and state tax. You can specify further GST details for the GST classification by clicking F12 (Configure).
To use a GST classification for setting GST details
- Gateway of Tally > Display More Reports > Statutory Reports > GST Reports > GST Rate Setup.
Alternatively, press Alt+G (Go To) > type or select GST Rate Setup > and press Enter.
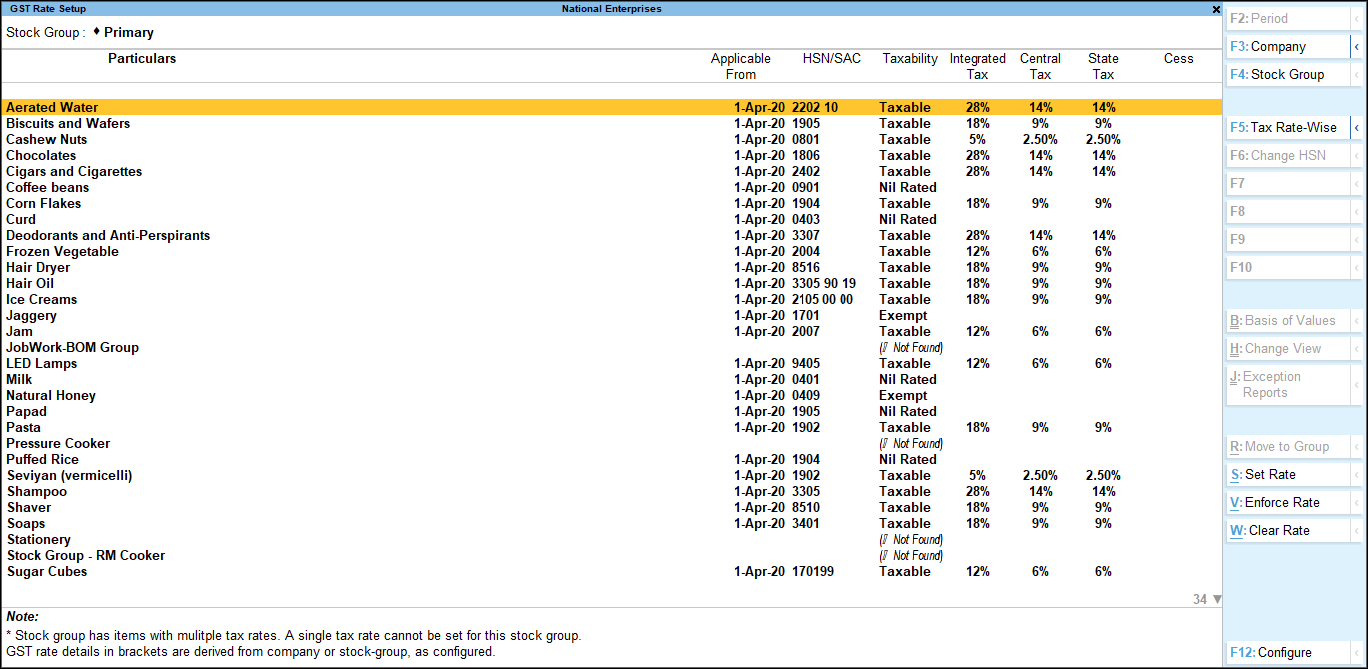
- Select the items that have the specified HSN Code.
- Press Alt+S (Set Rate), and select the GST Classification.
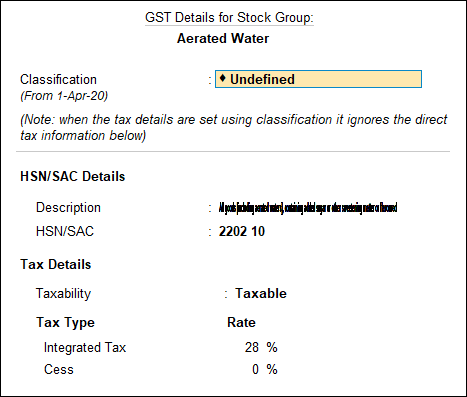
Notice that tax details disappear from the GST Details screen as the details are taken from the GST Classification.
Create different classifications for items falling under other HSNs, and assign the classification to the required items.
Alter a GST classification
- Gateway of Tally > Alter> type or select GST Classification> and press Enter.
Alternatively, press Alt+G (Go To) > Alter Master > GST Classification> and press Enter. - Specify the new rate, press Enter twice, provide the revised applicability from date, and save.

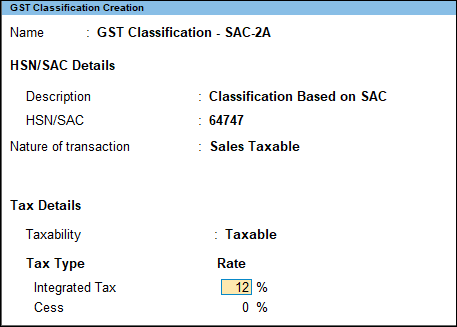
Create a GST Classification Based on SAC
Create/Alter GST Classification for Cess Based on Quantity or Value
- Press Alt+G (Go To) > Create/Alter > GST Classification.
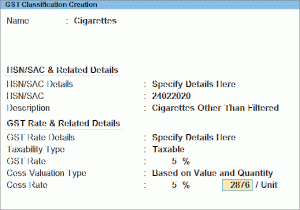
The GST Classification Creation/Alteration screen appears. - Specify the relevant details under the HSN/SAC & Related Details and GST Rate & Related Details sections.
- In the HSN/SAC & Related Details and GST Rate & Related Details fields, select the Specify Details Here option.
- Specify the applicable HSN/SAC and Description.
- Specify the applicable GST Rate.
- Specify the Cess Valuation Type, Cess Rate, and per Unit rate.
- Press Ctrl+A to save the details.
Now you can use the created classification to update the rates in other masters, transactions, or reports, as needed. You also have the flexibility to apply the GST classification for multiple masters using the GST Rate Setup report.
If you are on a previous release of TallyPrime, then click here to know more about creating GST Classifications for cess.
- Gateway of Tally > Create > type or select GST Classification> and press Enter.
Alternatively, press Alt+G (Go To) > Create Master > GST Classification> and press Enter. - Press F12 (Configure) > set Select Valuation Type and Show all GST Tax Types to Yes.
- Enter the percentage of Integrated Tax. The Central Tax and State Tax rates are displayed.
- For Cess, the cursor moves to the Rate column. Press Backspace to select the Valuation Type as Based on Value and Quantity. Enter the Cess Rate and Cess Rate per Unit.
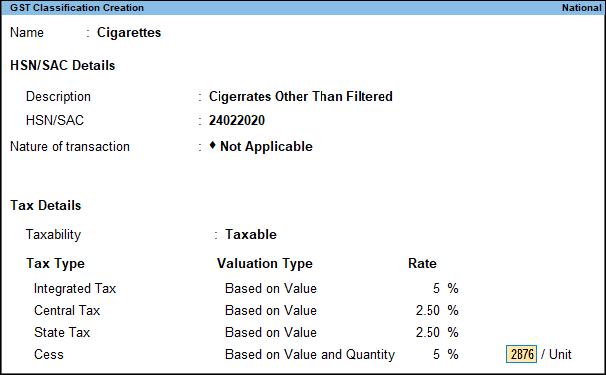
You can also select the Valuation Type of cess as Based on Value and Quantity in the GST Rate Details screen of Tax Rate History.
- Accept the screen. As always, you can press Ctrl+A to save.

