View Bank Status During Voucher Entry
For TallyPrime 6.0 & later
While recording or altering vouchers, you can view the bank status of transactions directly in the Bank Allocations screen. You can track individual or consolidated bank statuses for vouchers with multiple allocations, set transaction statuses such as On Hold, Processed, or Reconciled, view reconciliation details, and manage bank reconciliation links when modifying reconciled vouchers. This helps you monitor the progress of bank transactions and maintain accurate reconciliation records.
View Bank Status of Voucher
- In the Bank Allocations screen, press F12 (Configure).
- Show Bank Date: Yes.
- Show Bank Status: Yes.
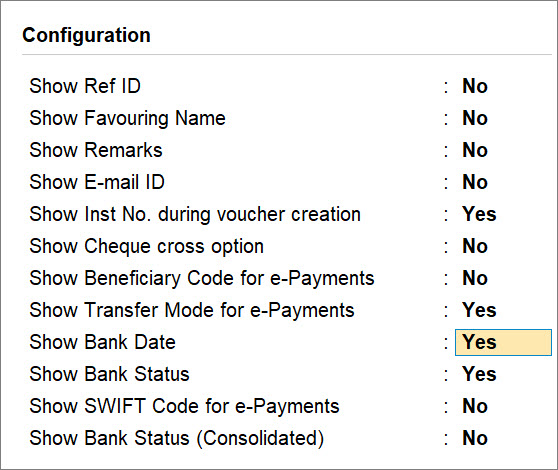
- Press Ctrl+A to save.
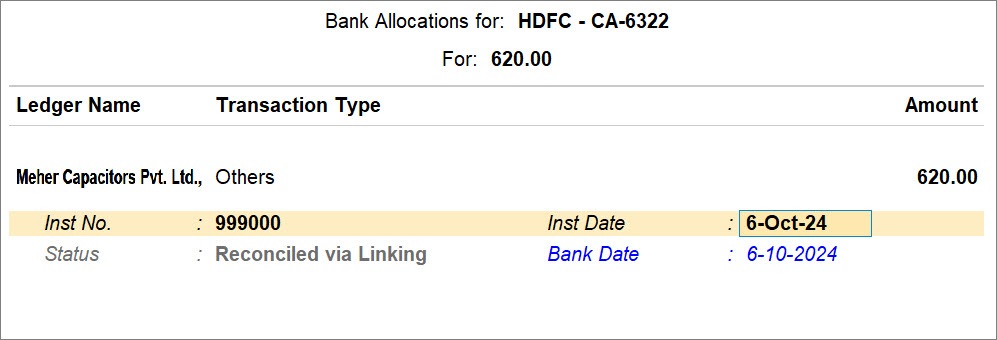
The Bank Date and Status get displayed in the Bank Allocations screen.
View Consolidated Bank Status
If you have multiple bank allocations in a voucher, then you can also view a consolidated bank status.
- In the Bank Allocations screen, press F12 (Configure).
- Show Bank Status (Consolidated): Yes.

- Press Ctrl+A to save.
The Status (Consolidated) gets displayed, based on the action you need to take on the voucher. If one of the transactions is On Hold, then the consolidated status will be On Hold, even if the other transaction is Processed.
In the following screen, the status of a transaction is Reconciled via Linking, while the status of the other transaction is Available Only in Books. So, the Status (Consolidated) is Available Only in Books, because you need to reconcile the other transaction.

Set Bank Status of Voucher
- In the Bank Allocations screen, press Alt+S (Set Status).
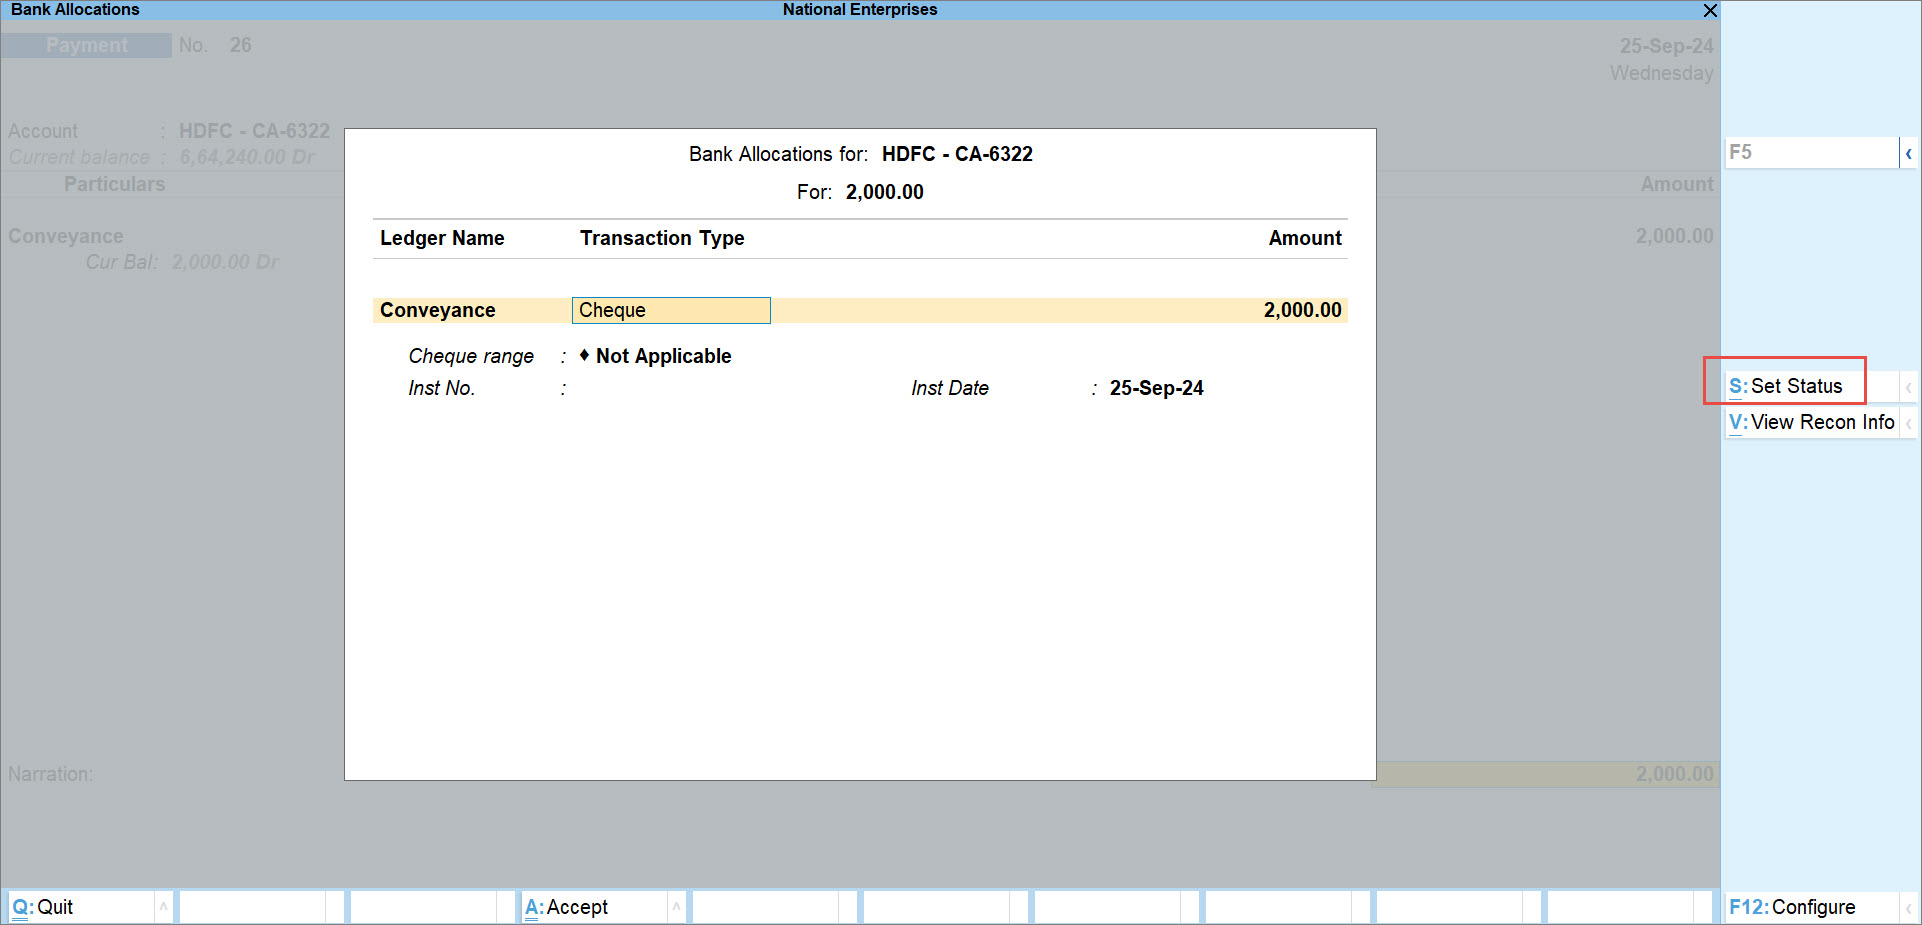
- Set the Transaction Status, as applicable.
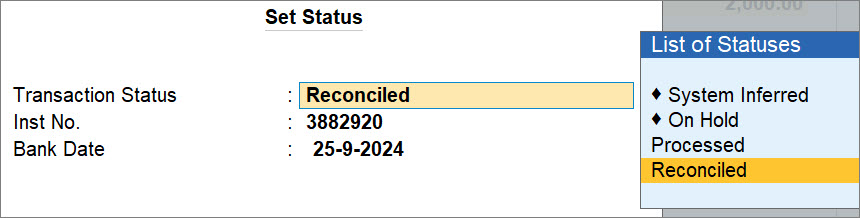
- On Hold: A data entry operator might be recording the voucher, after which the accountant might want to review the information entered.
Enter an appropriate comment and press Ctrl+A to save. - Processed: You might be creating or altering the voucher after the transaction is processed on the bank portal.
Enter the Inst No. and press Ctrl+A to save. - Reconciled: You can mark the transaction as reconciled.
Enter the Inst No. and press Ctrl+A to save.
- On Hold: A data entry operator might be recording the voucher, after which the accountant might want to review the information entered.
As a result, the Bank Status gets displayed, as per the Transaction Status.

View Transaction Reconciliation Info
- In the Bank Allocations screen, press Alt+V (View Recon Info).
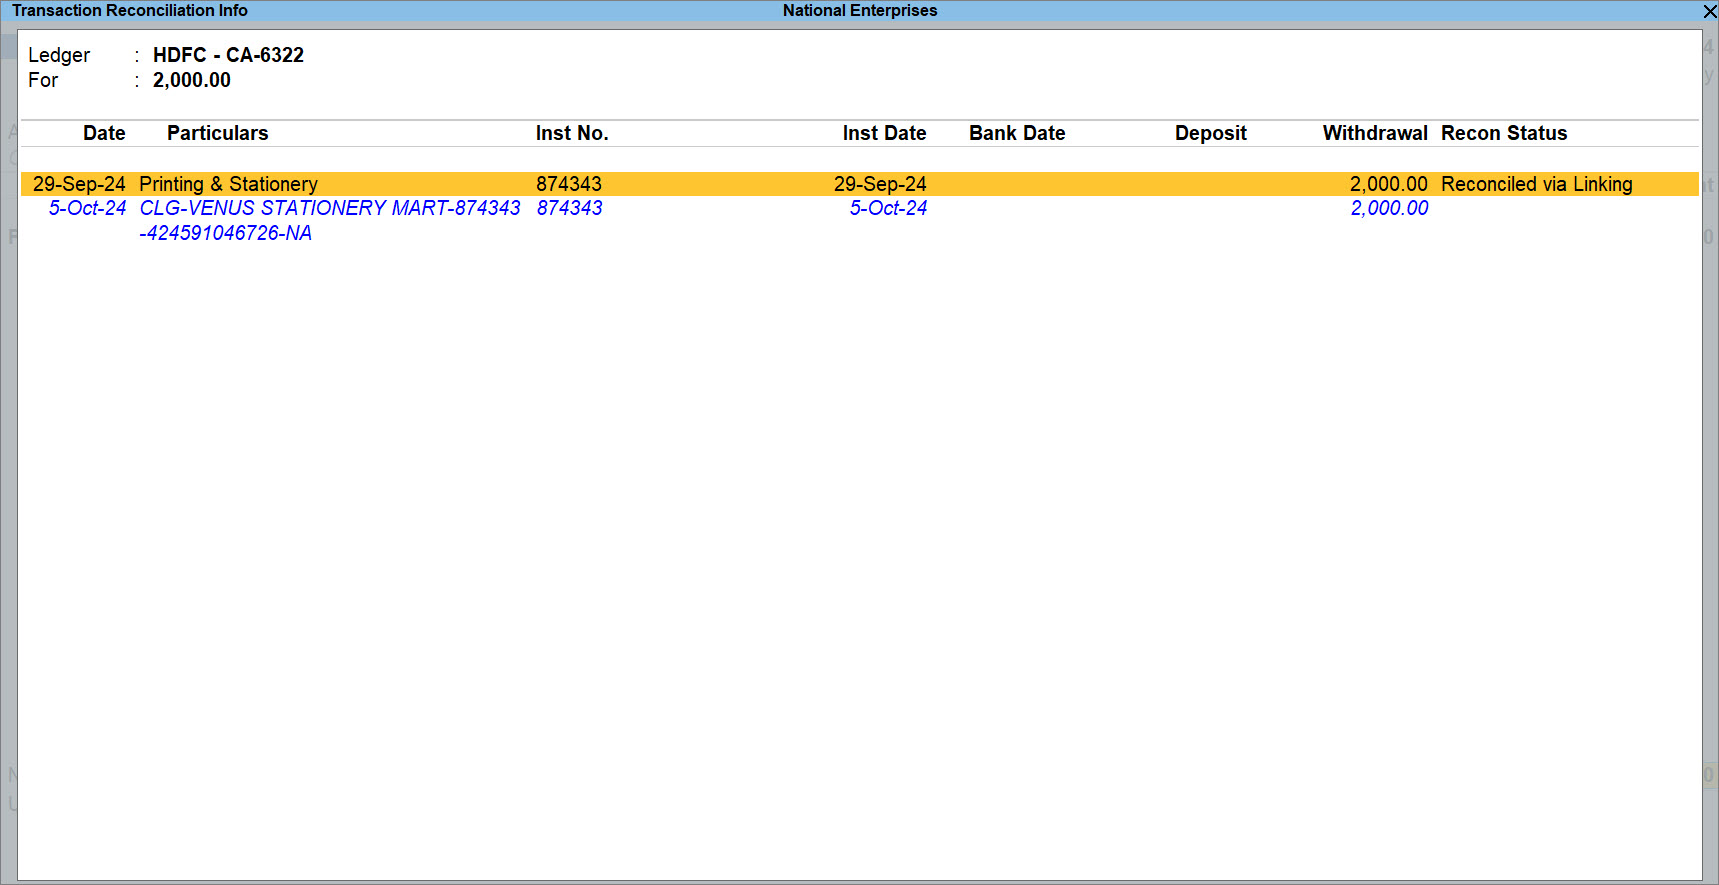
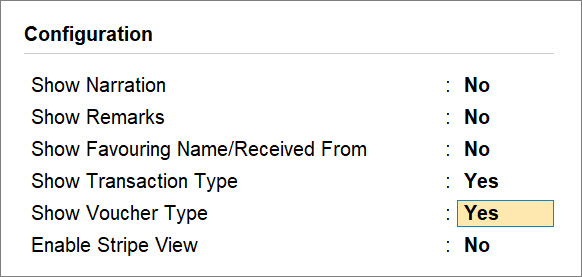
You can view the Favouring Name, Transaction Type, and other relevant options.
- Press F12 (Configure).
- Show Favoring Name/Received From: Yes.
- Show Transaction Type: Yes.
Retain or Remove Bank Reconciliation Details while Altering a Voucher
You might alter the Amount or Instrument No. in a reconciled voucher. In such a case, you can choose to remove or retain the Bank Date or other details of the linked transaction.
- In the Voucher Alteration screen, press F12 (Configure).
- Remove Bank Date/Recon Link while altering Reconciled Vouchers: Yes.
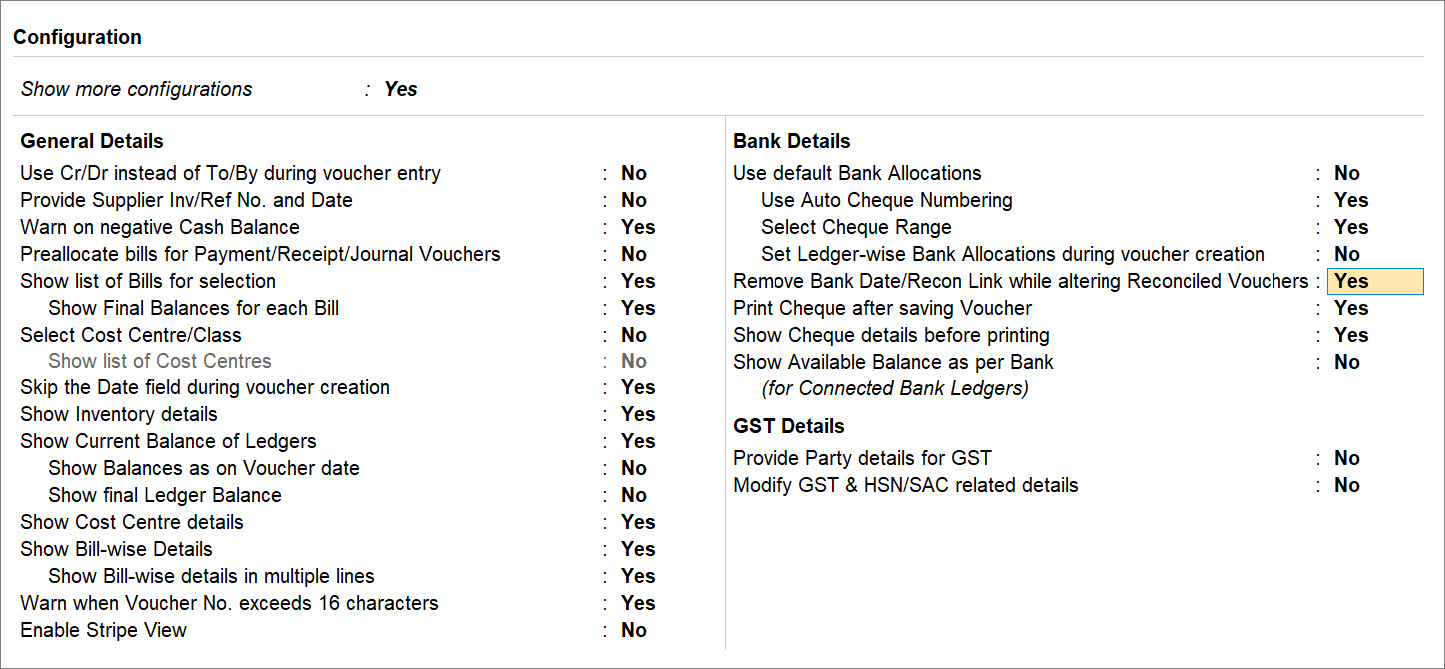
The Bank Date gets removed if the voucher is manually reconciled. If the voucher is reconciled via linking, then the reconciliation link with the bank transaction gets removed from the voucher.
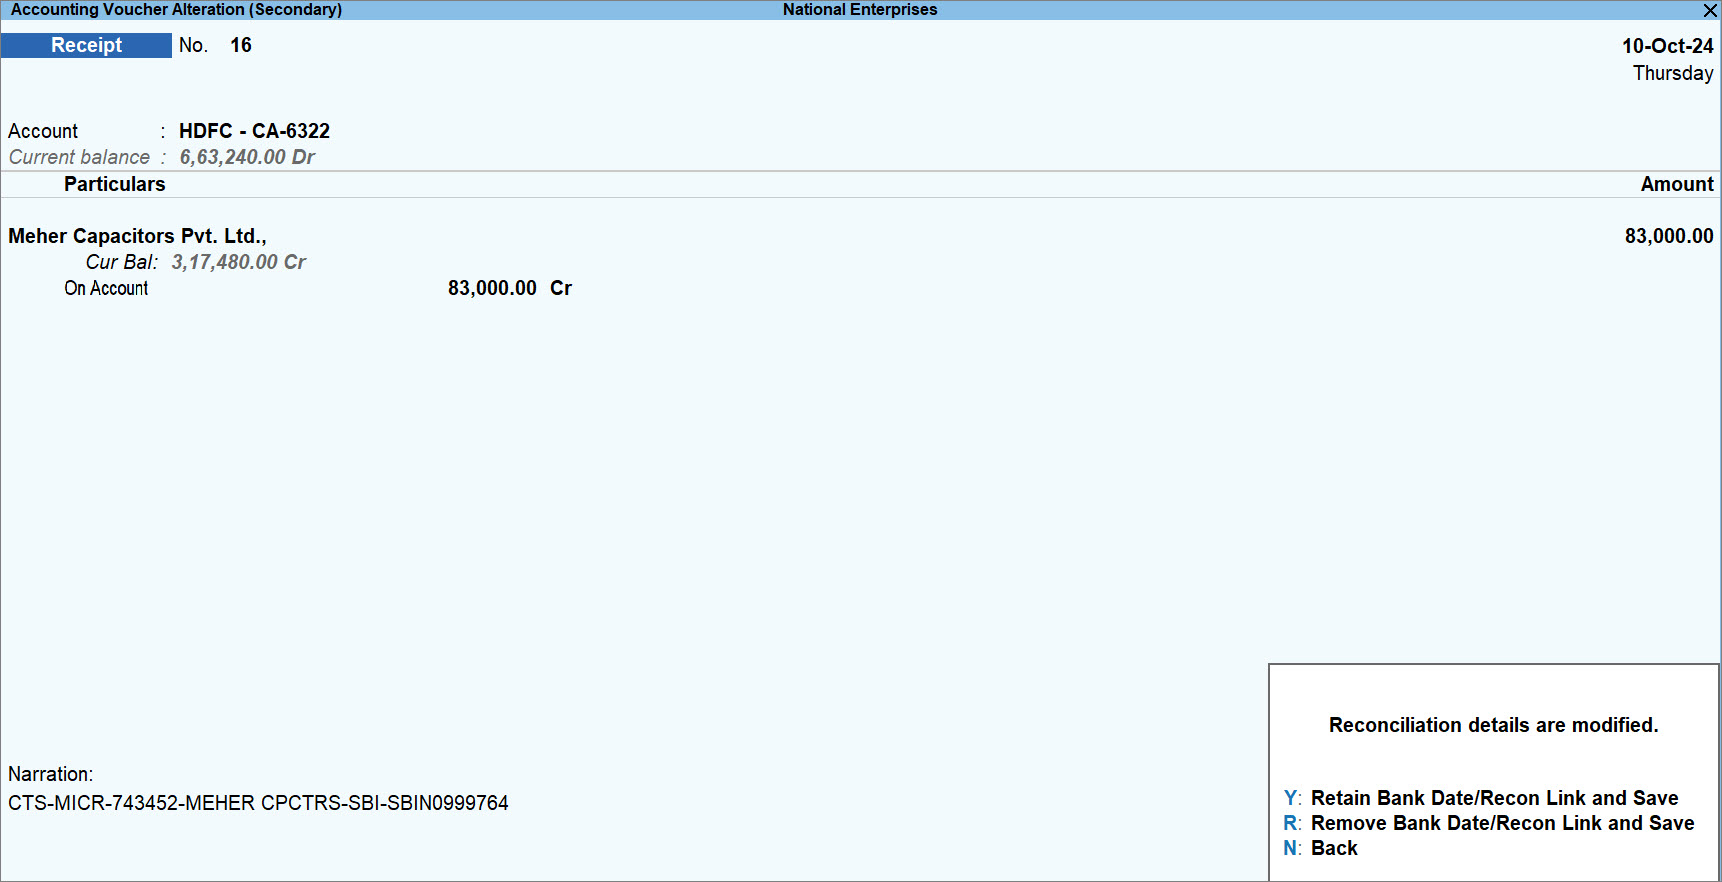
When you save the voucher, you will get the following options to retain or remove the Bank Date/Recon Link. - Press A to retain the Bank Date/Recon Link.
- Press R to remove the Bank Date/Recon Link.
- Press B to go back to the Voucher Alteration screen.
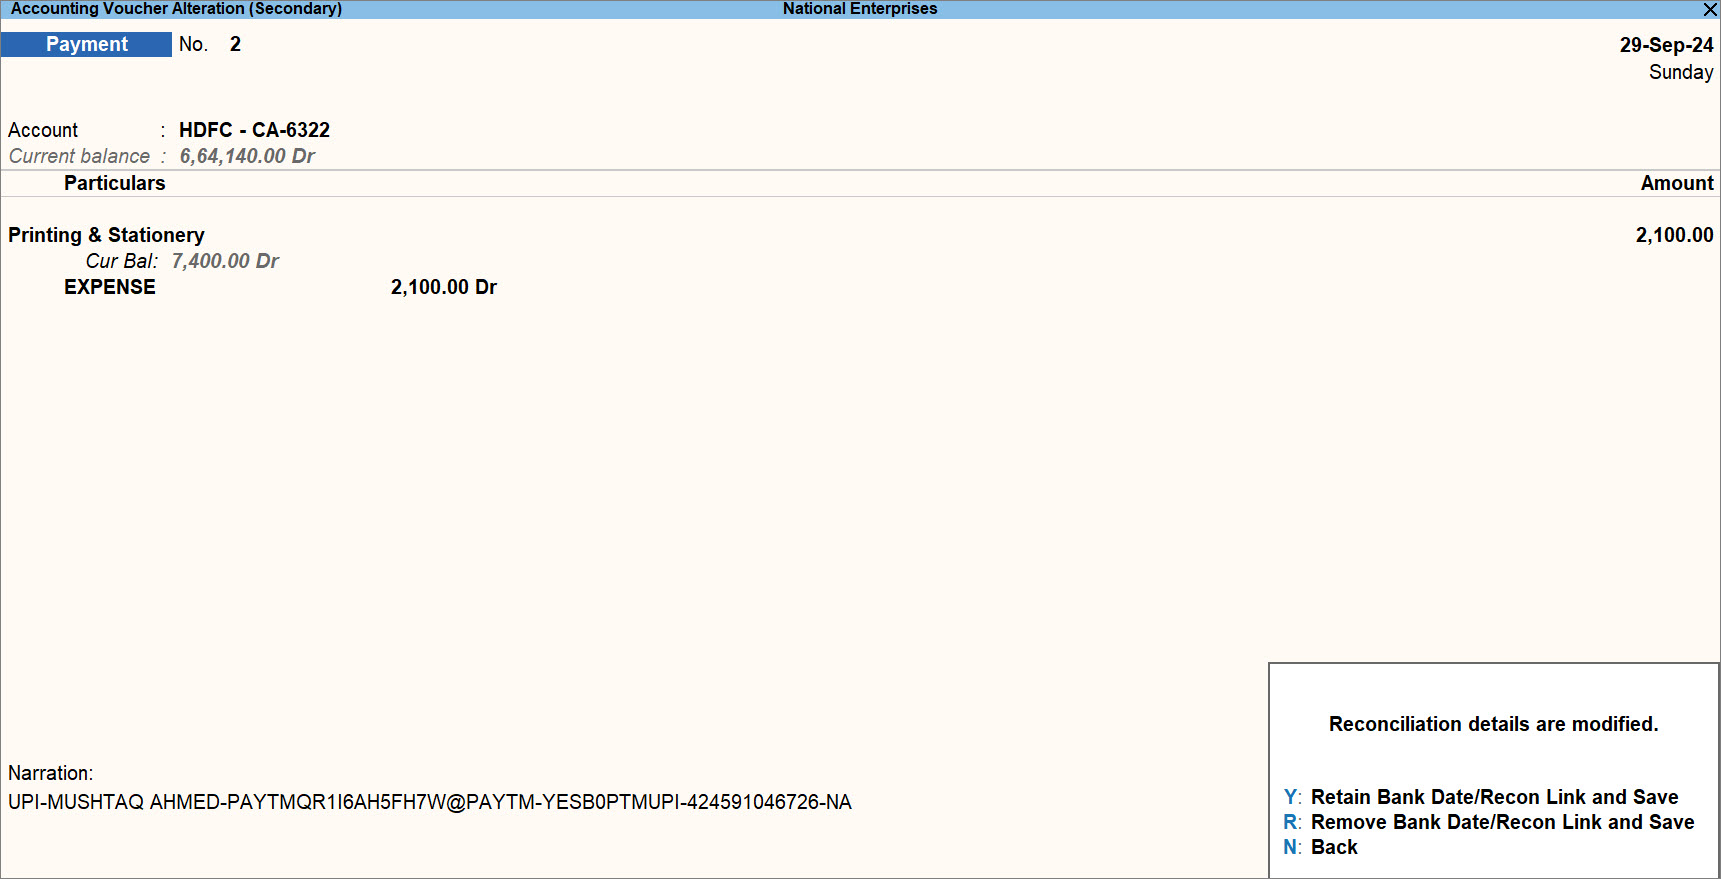
For a receipt transaction, the following message appears: