
Print Invoices/Reports in TallyPrime
In TallyPrime, you can print different documents, like your invoices, financial reports, payment reminder letters, dashboard tiles, Multi-Account reports, and more. You can also add payment links and QR codes to your party details and share a printout with them, so they can easily make payments.
Set Up Printer
- Alt+P (Print) > Configuration.
- In the Print Configuration screen, select Printer.
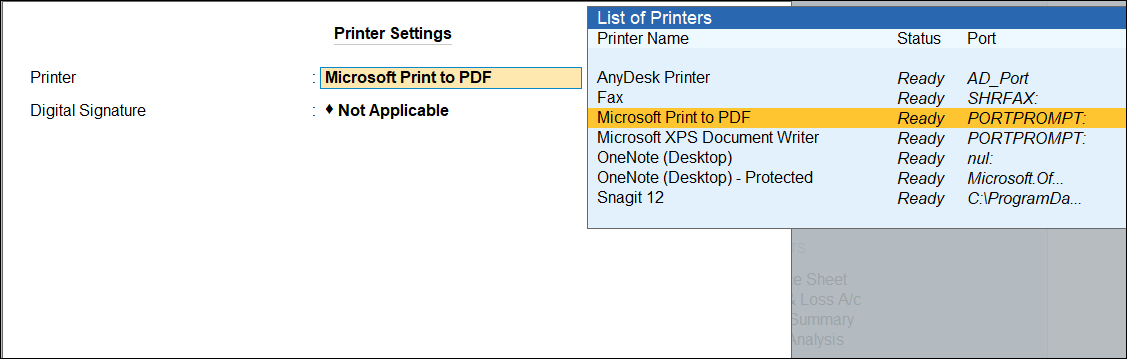
- In the Printer Settings screen, select the required printer.
- In the Printer Properties window, set the Paper Size, if needed.
- Click OK to save.
If you want to add digital signature to your invoices, you must select Microsoft Print to PDF as the Printer and provide the Digital Signature details.
Print Invoices & Reports
- Open the invoice or report you want to print and press Ctrl+P (Current).
- Press C (Configure) to configure for printing, as needed.
- Press I (Preview) to verify, if needed.
- Press P (Print) to print the invoice.
If the voucher is marked as optional, then it will get printed as a Proforma Invoice.
Print Invoice with Payment Link/QR code
- Ensure that you have recorded vouchers by including payment link/QR code generation.
- Open the sales invoice containing the payment link/QR code, and press Ctrl+P (Current) > C (Configure).
- In the Print Configuration screen, set the Method of Payment Request as Link, QR Code, or Link & QR Code, as per your business needs.
For example, for UPI-based payments, set the Method of Payment Request as QR Code. - Press I (Preview) to verify, if needed, and press P (Print) to print the invoice.
Print Reminder Letters
- Press Alt+G (Go To) > Bills Receivable > Ctrl+P (Current) > C (Configure).
- Specify the Report Type and enter the ageing range for which the bills have been overdue.
- Set Report Type as Reminder Letter.
- In the Company Ageing Alteration screen, select the age range of the outstanding amount for which you want to send the reminder letter.

- Select Reminder Letter information and press Enter to update the information related to the bill or amount details for reference, if needed.
- Enable Show Due on and Show Over Due Days/Bill age in Days, if needed.
- Enable Post-dated Vouchers to print post-dated in the reminder letter, if needed.
- Press Ctrl+A to save.
Print Dashboard Tiles
- To print a specific tile in Dashboard, press Ctrl+P (Current).
To print all the tiles, press Alt+P (Print) > All Tiles and press Enter. - Configure, as needed, and print the tile.
Print Multi-Account Reports
In TallyPrime, you can print multi-account reports to analyse, and print details across multiple accounts at once.
Let’s consider All Ledger Accounts and Confirmation of Accounts.
Print All Ledger Accounts
- Press Alt+P (Print) > Others.
- In the list of Multi Account Reports, select any report, say All Ledger Accounts > Enter.
- In the Print sub-screen, press C to configure the Multi-Account report, as needed.

- Change the report period to update the beginning and end date, if needed.
- Enable Show Narrations, Show Bill-wise details, Show Inventory details, if needed.
- Change the report period to update the beginning and end date, if needed.
- Press I (Preview), if needed, and press P (Print).
Print Confirmation of Accounts
- Press Alt+P (Print) > Others.
- In the list of Multi Account Reports, select any report, say Group of Accounts and press Enter.
- Select a group from the List of Groups and press Enter.
- In the Print sub-screen, press C to configure for Confirmation of Accounts.
- Select Report Type and press Enter.
- Set Report Type as Confirmation of Accounts and save.

- Press Ctrl+A to save.
Is this information useful?
YesNo


