
Set Up TallyPrime for Job Work Orders
You can set up TallyPrime for Job Work Orders, as a principal manufacturer or job worker. As a one-time setup for job work in TallyPrime, you need to:
- Enable job work orders under F11 (Features).
- Set up your stock items.
- Set Up Material Out Voucher Type
- Set Up Material In Voucher Type
Enable Job Work in TallyPrime
- In TallyPrime, open Company Features.
- Press F11 (Company Features).
Alternatively, press Alt+K (Company) > Features.
- Show More Features: Yes.
- Show All Features: Yes.
- Press F11 (Company Features).
- Enable Job Order Processing: Yes.
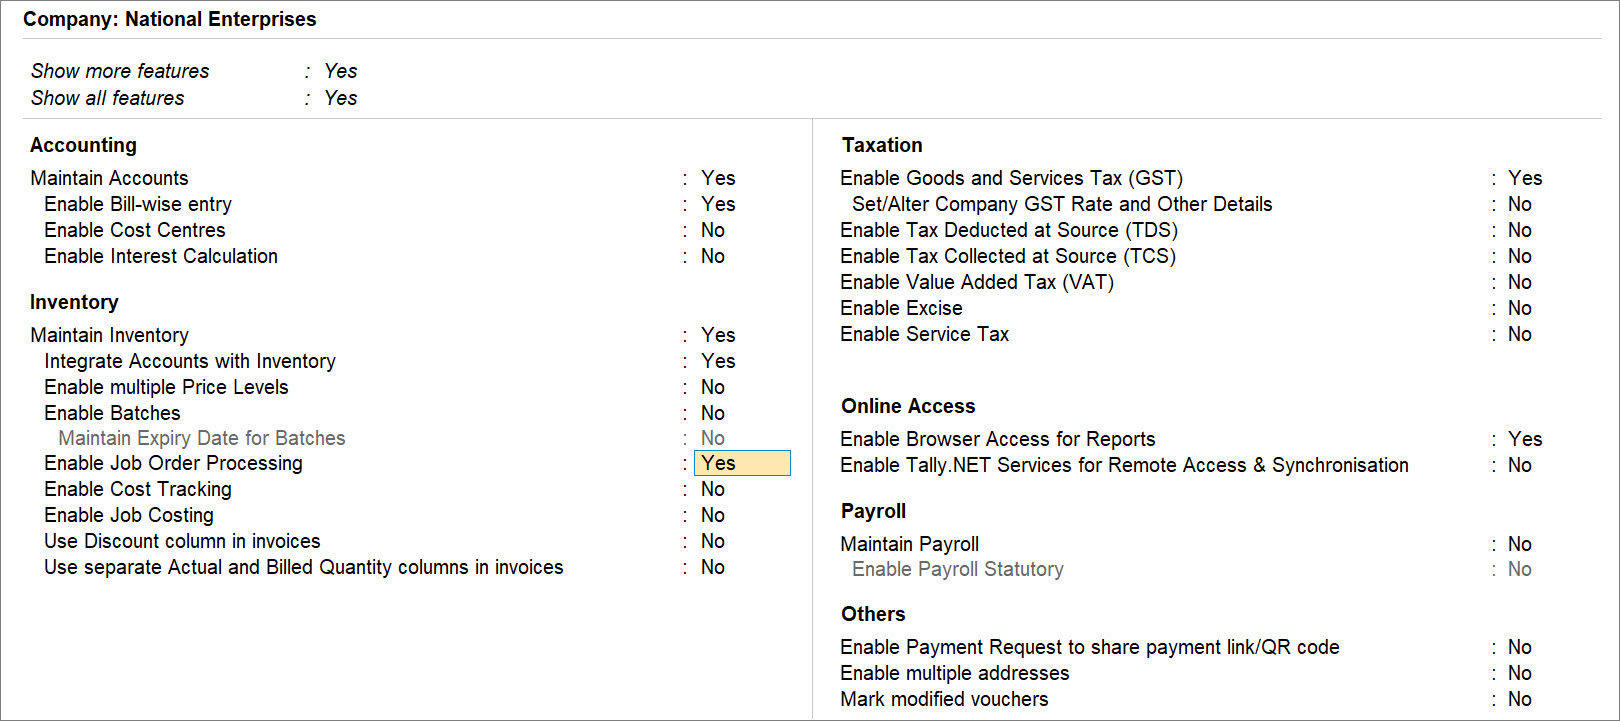
- Press Ctrl+A to save, as always.
At any point in time, if your business does not involve job order processing, then you can disable job work in TallyPrime under F11 (Company Features).
Set Up Stock Items for Job Work Orders
Based on the nature of the stock item, you can:
- Create/Alter Stock Item for raw material
- Create/Alter Stock Item for finished goods without Bill of Materials
- Create/Alter Stock Item for finished goods with Bill of Materials
- Create/Alter Stock Item for scrap, by-product, or co-product
Create/Alter Stock Item for raw material
You can create stock items for raw materials like body handle, cooker base, cooker screw, cooker top, gasket, safety valve, and whistle.
- In the Stock Item Creation/Alteration screen, enter the stock item Name.
For example, Handle. - Under: Select the Stock Group.
You can also create a Stock Group for pressure cooker and create stock items under it. - Units: Select the applicable unit of measurement.
- Opening Balance: Enter the Quantity and Rate.
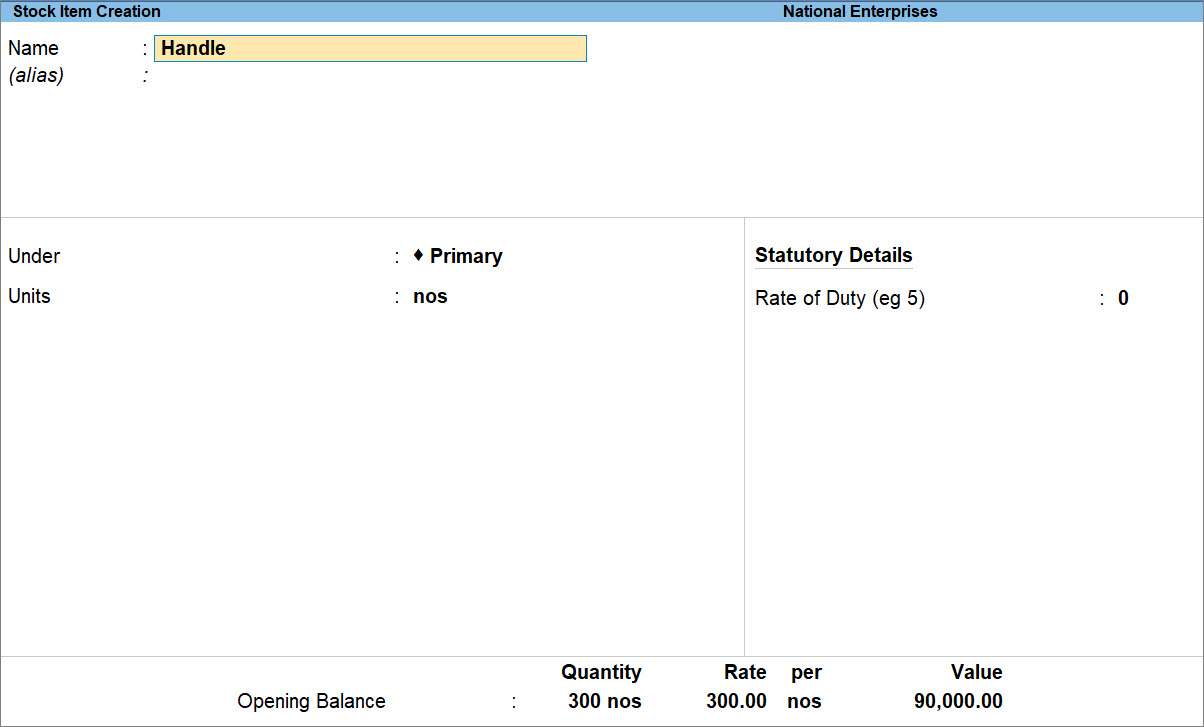
- As always, press Ctrl+A to save the Stock Item.
Create/Alter Stock Item for finished goods without Bill of Materials
Tasks like painting a rod do not involve components. So, you do not need Bill of Materials.
- In the Stock Item Creation/Alteration screen, enter the stock item name.
- Under: Select the Stock Group.
- Units: Select the applicable unit of measurement.
- Opening Balance: Enter the Quantity and Rate.
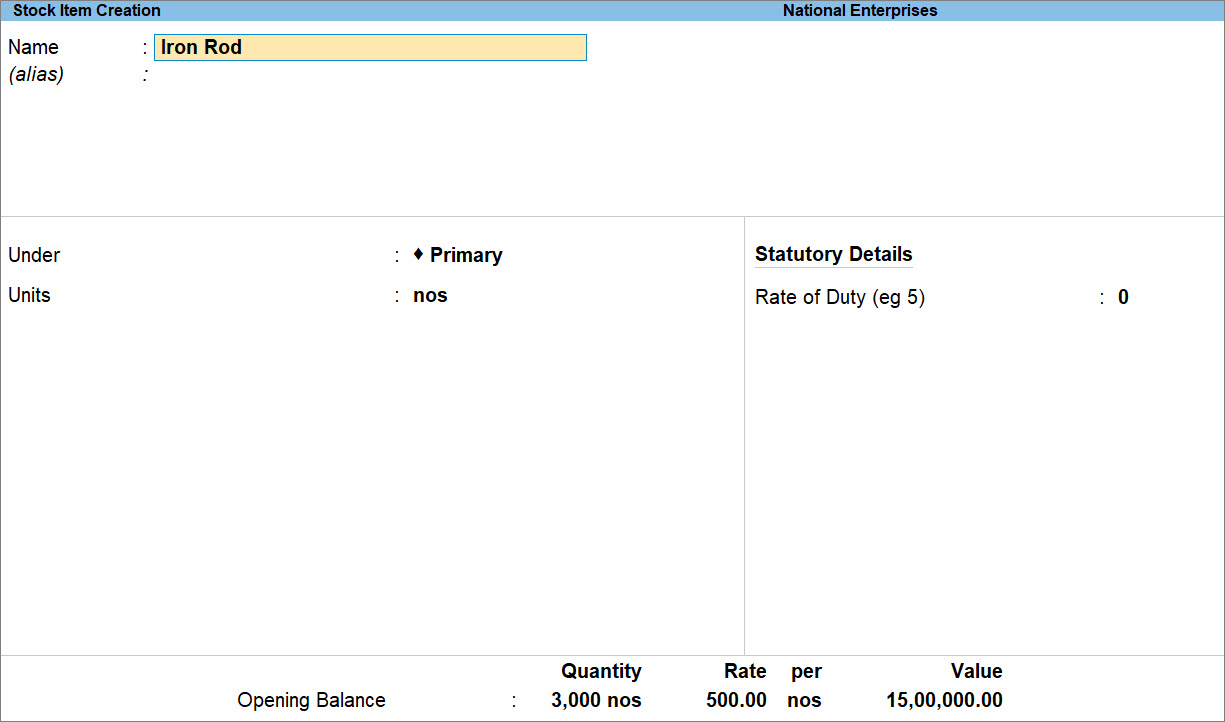
- As always, press Ctrl+A to save the Stock Item.
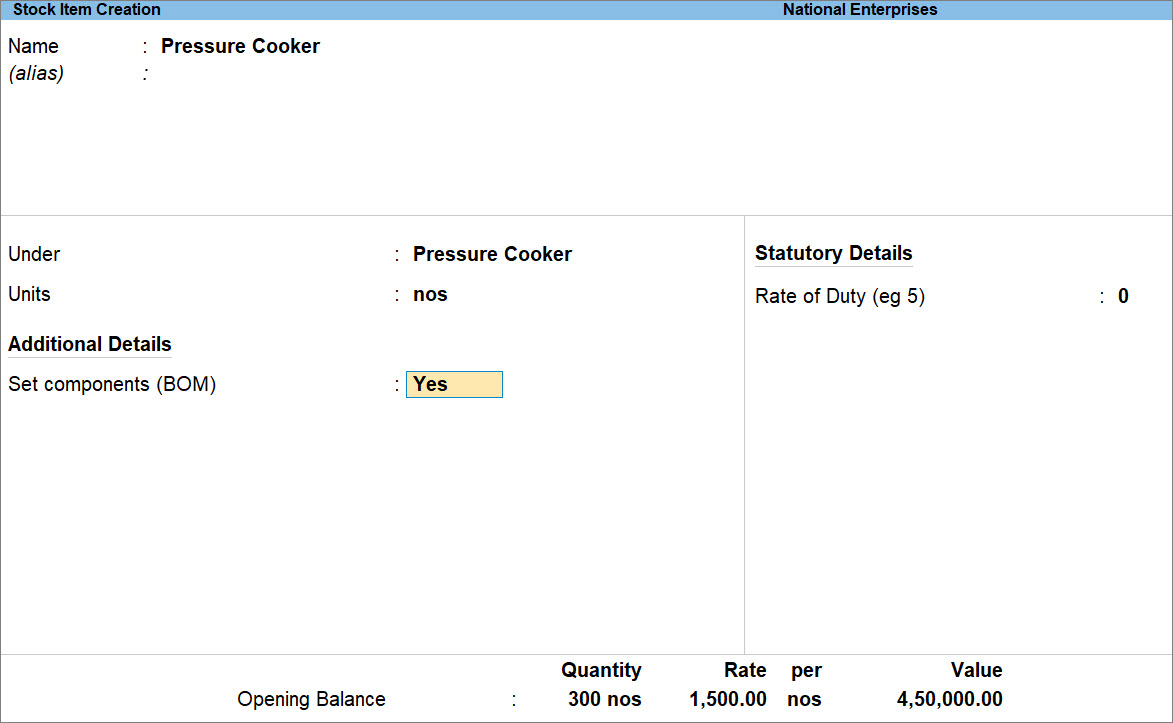
Create/Alter Stock Item for finished goods with Bill of Materials
Tasks like assembling a pressure cooker involves components like body handle, cooker base, cooker screw, cooker top, gasket, safety valve, and whistle.
- In the Stock Item Creation/Alteration screen, enter the stock item name.
- Under: Select the Stock Group.
- Units: Select the applicable unit of measurement.
- Enable Bill of Materials.
- Press F12 (Configure).
- Show More Configure and Show All Configuration: Yes.
- Set Components List (Bill of Materials) in Stock Items: Yes.
- Press Ctrl+A to save.
- Provide the details of components (BOM).
- Set components: Yes.
- Name of BOM: Enter the name.
For example, 5L Pressure Cooker. - Unit of manufacture: Enter the number of finished goods that will produced using the components.
- Enter the Item and Quantity.
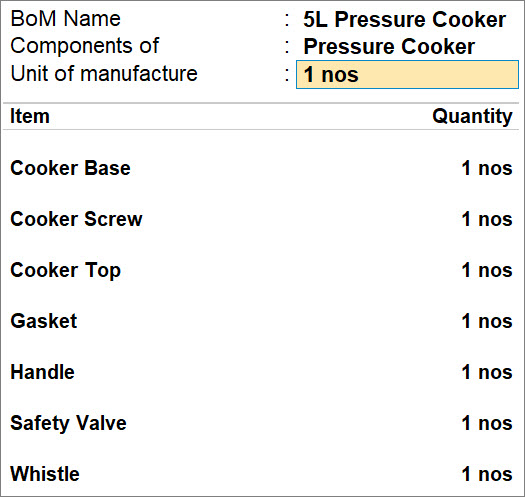
- Press Ctrl+A to save the Bill of Materials.
- Opening Balance: Enter the Quantity and Rate.
- As always, press Ctrl+A to save the Stock Item.
Having Bill of Materials significantly reduces data entry during job work order processing in TallyPrime.
Create/Alter Stock Item for scrap, by-product, or co-product
If you produce cheese, then you get whey as a by-product.
- In the Stock Item Creation/Alteration screen, enter the stock item name.
- Under: Select the Stock Group.
- Units: Select the applicable unit of measurement.
- Opening Balance: Enter the Quantity and Rate.
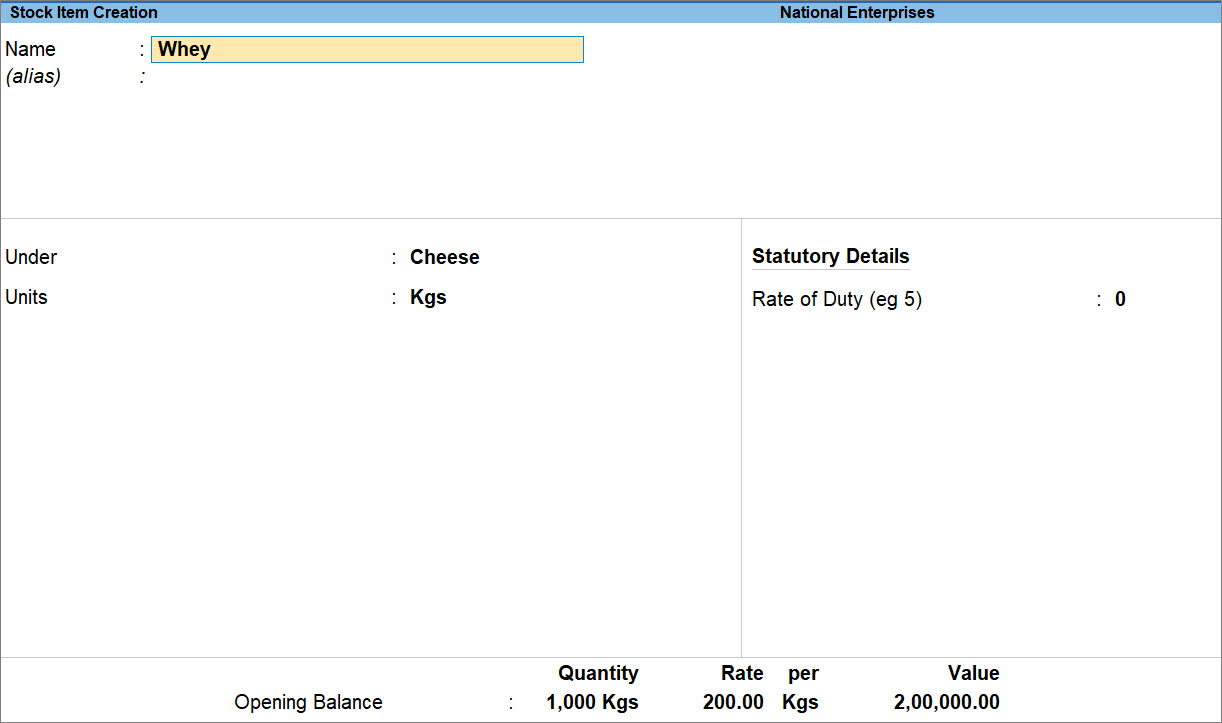
- As always, press Ctrl+A to save the Stock Item.
Set Up Material Out Voucher Type
You will need to set up the voucher types, because:
- As a principal manufacturer, you create a Material Out voucher for the delivery of raw materials to the job worker.
- As a job worker, you create a Material Out voucher for the delivery of the finished goods to the principal manufacturer.
Based on how you set up the voucher type, TallyPrime identifies you as a principal manufacturer or a job worker, so that you can record vouchers accordingly.
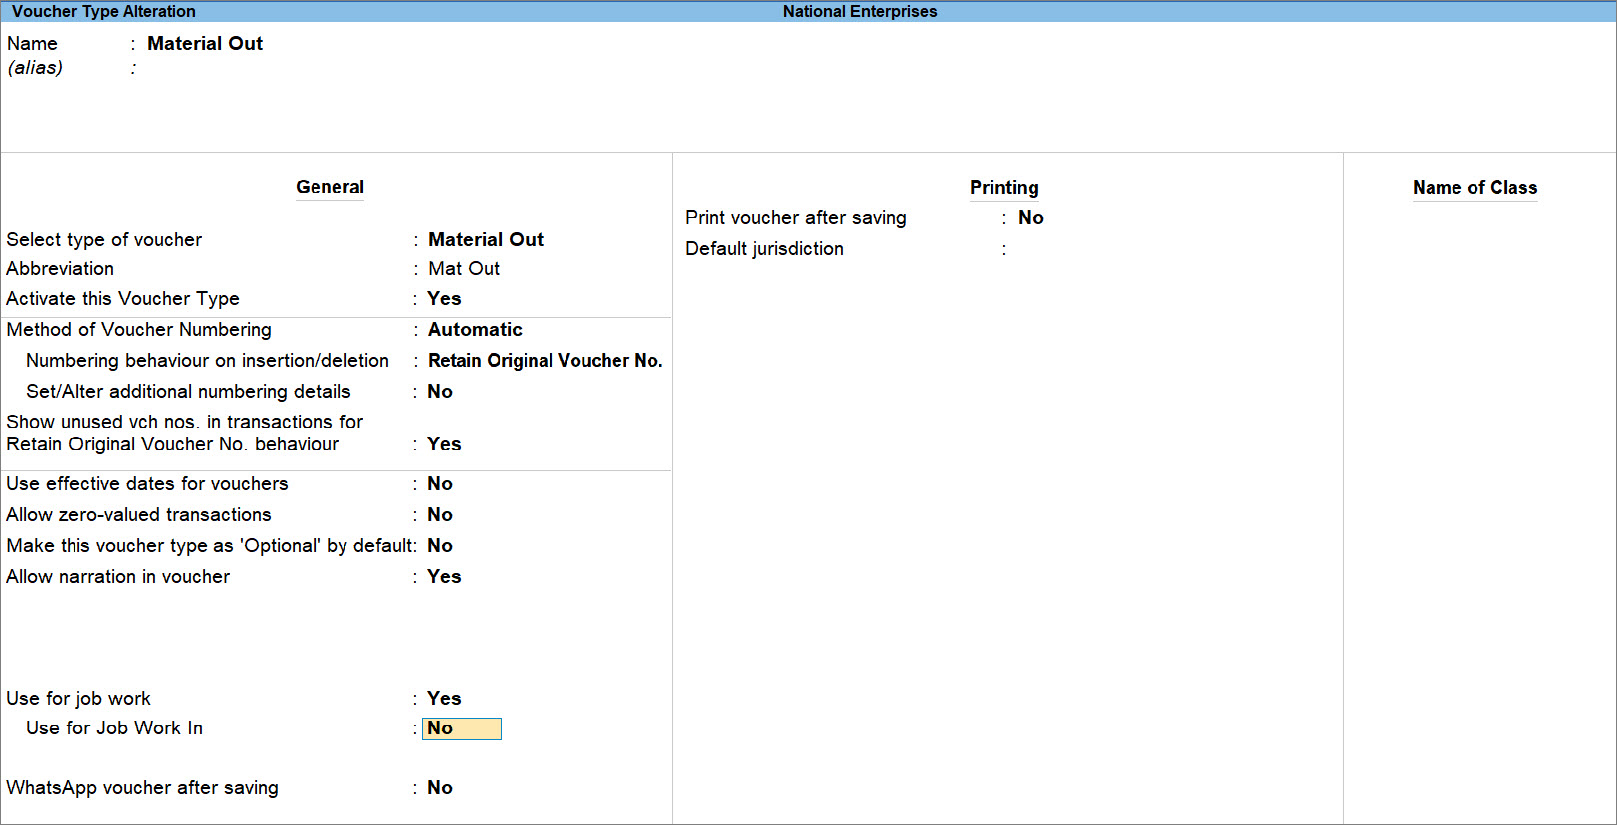
- Press Alt+G (Go To) > Alter Master > Voucher Type > type or select Material Out and press Enter.
Alternatively, Gateway of Tally > Alter > Master > Voucher Type > type or select Material Out and press Enter. - Activate this Voucher Type: Yes.
- Use Voucher Type for Job Work.
- User for Job Work: Yes, if you are a job worker.
Use for Job Work In: No, if you are a principal manufacturer.
- User for Job Work: Yes, if you are a job worker.
- Allow zero-valued transactions, if you are a principal manufacturer and do not want to show the amount chargeable for the raw materials.
- Configure Voucher Types for allowing zero-valued transactions.
- Press F12 (Configure) > Show More Configurations: Yes.
- Use zero-valued transactions in Voucher Types: Yes.
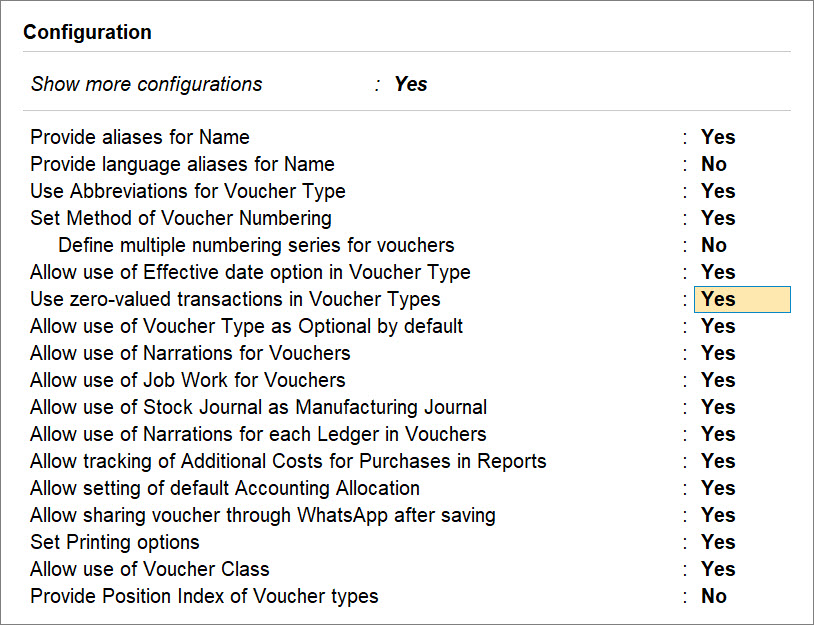
- Press Ctrl+A to save.
- Allow zero-valued transactions: Yes.
- Configure Voucher Types for allowing zero-valued transactions.
- Specify other necessary details, as needed.
- Press Ctrl+A to save.
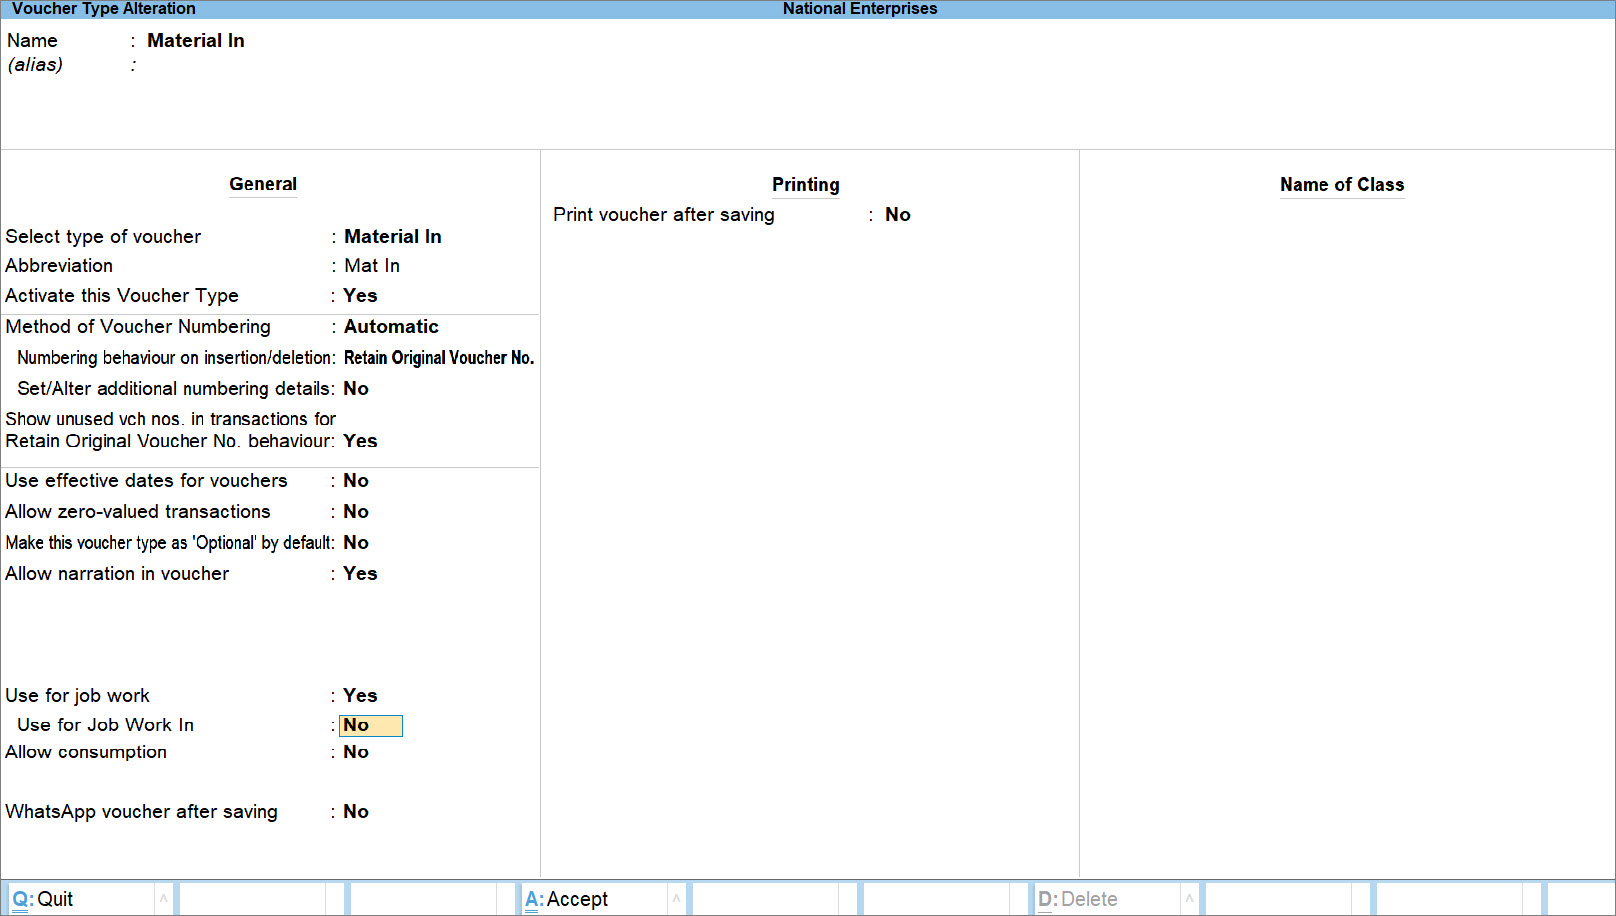
Set Up Material In Voucher Type
You will need to set up the voucher types, because:
- As a principal manufacturer, you create a Material In voucher for the receipt of finished goods from the job worker.
- As a job worker, you create a Material In voucher for the receipt of raw materials from the principal manufacturer.
Based on how you set up the voucher type, TallyPrime identifies you as a principal manufacturer or a job worker, so that you can record vouchers accordingly.
- Press Alt+G (Go To) > Alter Master > Voucher Type > type or select Material In and press Enter.
Alternatively, Gateway of Tally > Alter > Master > Voucher Type > type or select Material In and press Enter. - Activate this Voucher Type: Yes.
- Use for Job Work as a principal manufacturer.
- User for Job Work: Yes, if you are a job worker.
- Use for Job Work In: No, if you are a principal manufacturer
- If you are principal manufacturer, then you can enable consumption of raw materials, if needed.
- Allow consumption: Yes.
When you select Yes, you will not need to record the consumption of raw materials separately. The moment you record a material in voucher for the receipt of finished goods, your raw materials get consumed. - Allow consumption: No.
When you select No, you will need to keep a record for the consumption of raw materials separately. Fir instance, you can do so using Stock Journal, Journal Voucher, or any other process followed in your business.
- Allow consumption: Yes.
- Specify other necessary details, as needed.
- Press Ctrl+A to save.


