
Record Advance Payments Under GST in TallyPrime
|For TallyPrime Release 3.0 & Later|
|For TallyPrime Release 2.1 & Earlier|
In TallyPrime, you can record advances paid with or without impacting GST, as required. If the advance and the corresponding purchase invoice are recorded in the same return period, GST need not be accounted for separately on the advance. Otherwise, you can account for GST on the advance and adjust it later when the purchase invoice is recorded.
- Press Alt+G (Go To) > Create Voucher > F5 (Payment).
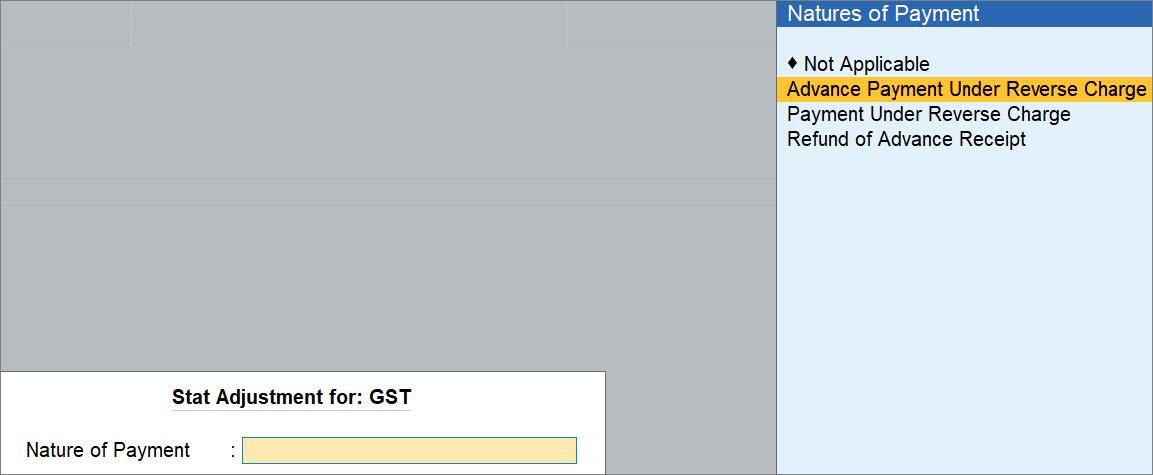
- Press Alt+J (Stat Adjustment) > select Nature of Payment as Advance Payment Under Reverse Charge.
- Under Account, select the cash or bank account.
- Under Particulars, select the party to whom you are making the advance payment.
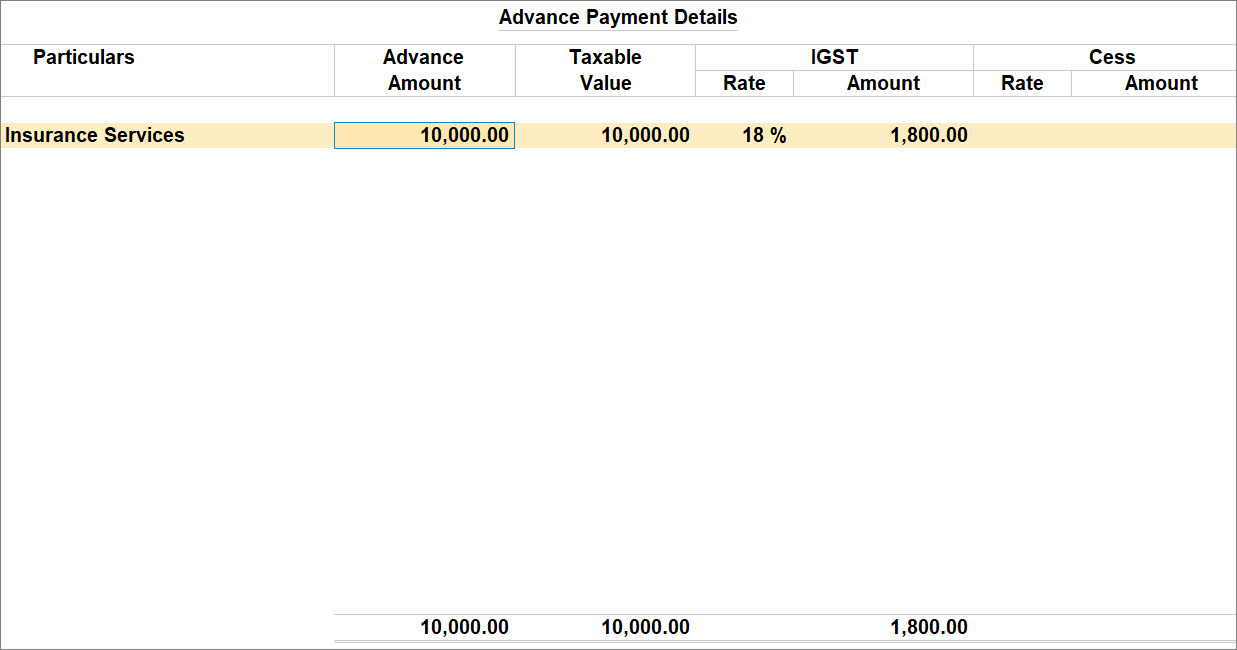
- In the Advance Payment Details screen, enter the required details.
- Particulars: Select the applicable purchase ledger.
- Advance Amount: Enter the amount paid to the vendor.
Taxable Value is calculated based on the tax details in the ledger.
- Press Ctrl+A to save the Advance Payment Details screen.
- Provide other necessary details in the voucher and press Ctrl+A to save.
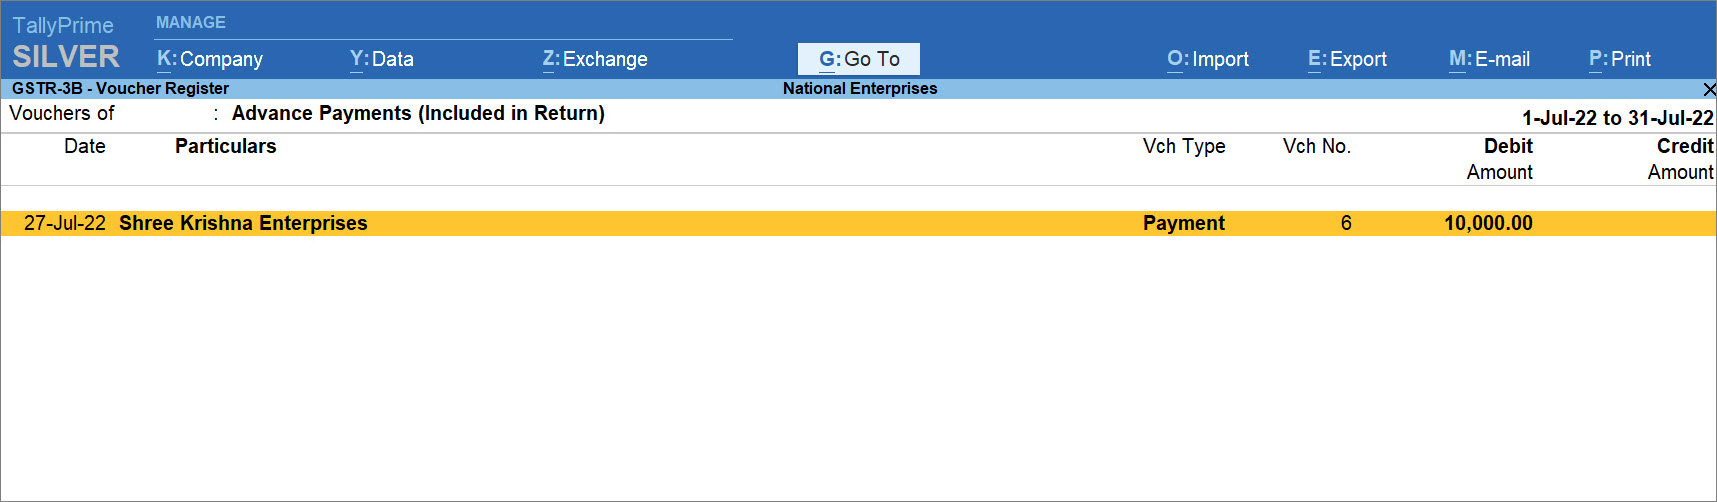
The voucher is included in GSTR-3B under Advance Payments (Included in Returns).
Questions & Answers
- How can I record an advance paid without impacting my GST?
While recording the advanced paid in the payment voucher, enter the amount in the Advance Amount field without selecting tax ledgers.
TallyPrime calculates the tax only as an indicative value, and it is not included in the GSTR-3B computation.- If the purchase invoice is recorded in the same return period, GST impact is accounted for through the invoice itself.
- If the purchase invoice is recorded in a later return period, GST impact is accounted for when the invoice is recorded in that later period.
Is this information useful?
YesNo


