Configure TallyPrime Gold License & Data Location in TallyPrime Server
TallyPrime Server enables you to centrally manage multiple TallyPrime Gold licenses, data locations, and user access. You can configure licenses, define data locations, create user or system groups, assign permissions, and monitor server activity to ensure secure and efficient access to shared business data.

- Install TallyPrime Server & TallyPrime Gold
Configure TallyPrime Gold License
To manage your TallyPrime data sources through TallyPrime Server, you must configure at least one TallyPrime Gold license.
You can configure multiple TallyPrime Gold licenses, provided they are all connected to the same network.
- Press Alt+K (TallyPrime Server) > Data Server > TallyPrime Gold License.
- In the TallyPrime Gold License Configuration screen, enter the IP Address and Port of the Tally Gateway Server used by TallyPrime Gold.
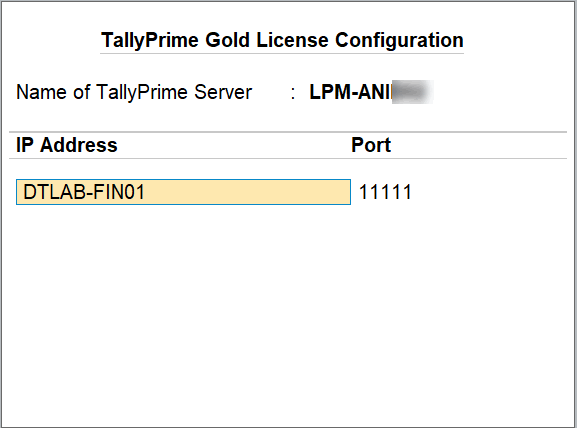
If you do not know the IP address and port, check on TallyPrime.- Select IP Address and Port, go to the installed TallyPrime Gold > F1 (Help) > Settings > License > Manage License.
For example, IP Address – DTLAB-FIN01 and Port – 11111.
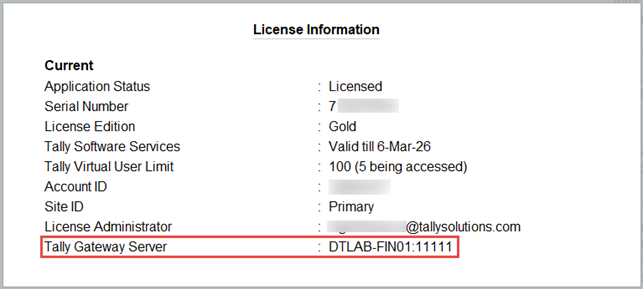
- Select IP Address and Port, go to the installed TallyPrime Gold > F1 (Help) > Settings > License > Manage License.
- Press Ctrl+A to save the changes.
In case you want to configure another TallyPrime Gold license, repeat the steps with the respective IP Address and Port details.
Now that your TallyPrime Gold license is successfully configured, you can set data locations and allow users to access the same.
Set Data Location
Use this option to restrict access to specific data locations. It allows you to define data paths and control access by permitting or restricting selected users or user groups based on your requirements.
- Press Alt+K (TallyPrime Server) > Data Location.
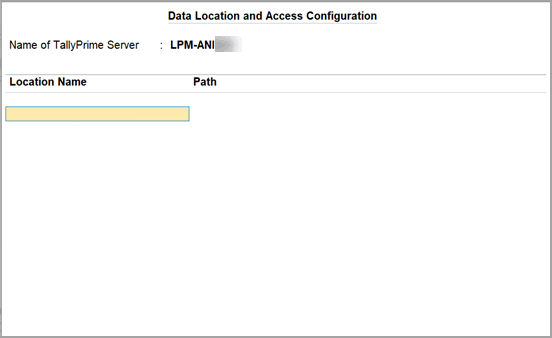
- Enter the Location Name and select the Path.
- To provide access to the selected path for users or system groups, in the Data Location and Access Configuration screen, press F12 (Configure) and enable the required data access settings.
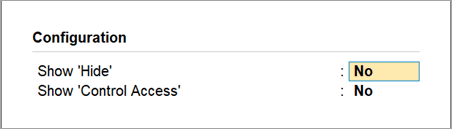
- Set Show ‘Hide’ and Show ‘Control Access’ to Yes.
- Set the Control Access options to Yes.
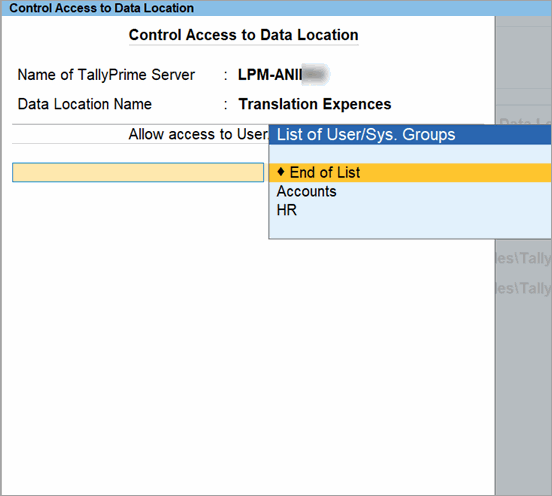
- Choose the user group from List of User/Sys. Groups.
If no groups are available under the list, press Alt+L (User/System Group).
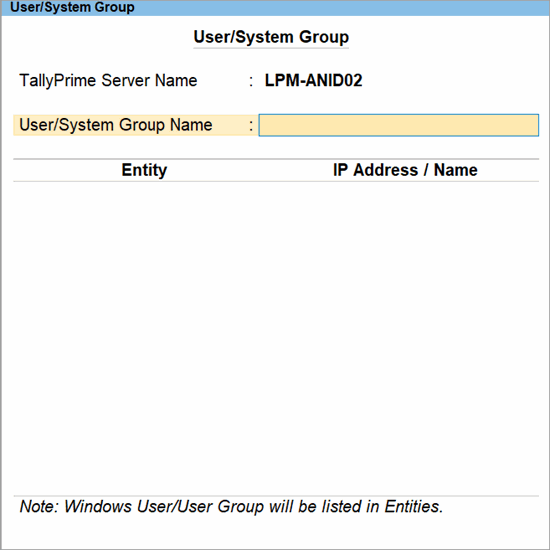
- Select User from List of Entries.
- Enter the name in the IP Address/Name field, and select the required user from the List of User Names to add them to the user group.
- Select End of List to save the access settings and return to the Data Location and Access Configuration sub-screen.
- Press Ctrl+A to save.
The newly added data locations appear in the TallyPrime Server Information screen, with Control set to Yes. Additionally, you can manage access to this data location.
View TallyPrime Server Information | Manage Server
- To view TallyPrime Server Information report, press Alt+K (TallyPrime Server) > Manage Server.
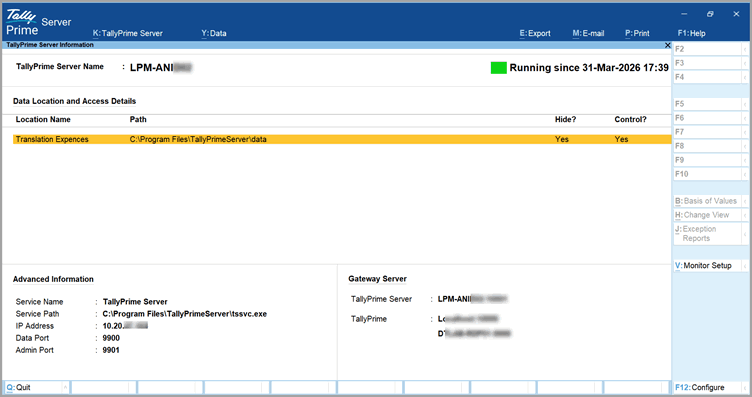
- TallyPrime Server Name & installed location (Service Name, Service Path, IP Address, Data Port and Admin Port)
- The admin defines data locations with their corresponding storage paths, and specifies whether each location is hidden and if access control is enabled.
- Gateway Server: Displays the configured TallyPrime Gold license along with the TallyPrime Server IP address and port.
- In case you have configured multiple data locations and want to improve readability, press F12 (Configuration) and set Enable Stripe View to Yes.
Monitor Data Locations on TallyPrime Server | Monitor Setup
If you manage multiple TallyPrime Servers, as an admin, you can switch to another Gateway Server and monitor its configured data locations and connected users.
- Press F1 (Help) > Settings > Monitor Setup.
- Select any license from the List of Licenses, or configure the license manually by specifying the required IP and port number, and press Enter.
Create User/System Groups
As an administrator, create user or system groups to organise Windows users, user groups, or systems and assign them access to specific data locations.
Once created, these groups can be linked to data locations to provide appropriate access and ensure secure, structured data usage.
- Press Alt+K > Data Server > User/System Groups.
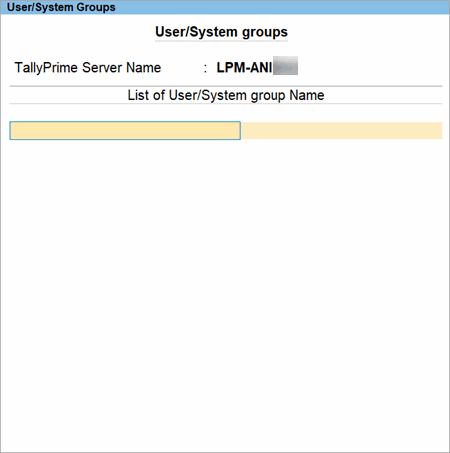
- Type the group name that you want to create and press Enter.
- Select User as Entity from List of Entries.
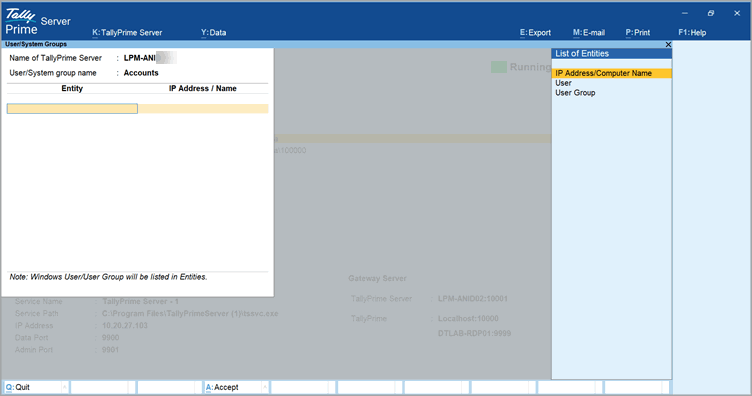
- IP Address/Computer Name: Select IP or computers available within the organisation
- User: Select an individual Windows user within the organisation
- User Group: Select an existing Windows user group.
- Enter the Windows User name in the IP Address/Name field.
- Select the required user from the List of User Names to add them to the user group.
This list consists of the windows users within your organisation. - Press Ctrl+A to save the User/System Group.