
Upgrade to TallyPrime & TallyPrime Edit Log
If you are using an earlier version of Tally, then upgrade to TallyPrime or TallyPrime Edit Log, as applicable. Thereafter, you can continue your business as usual.
The process of upgrading to TallyPrime and TallyPrime Edit Log is the same. However, you can easily differentiate between them—from the setup file and application appearance to the screen when you launch the application.
Existing TallyPrime User? Upgrade to Latest Release
For the best experience, it is recommended that you use the latest version of TallyPrime. You can either upgrade directly from your existing application or download and install TallyPrime using the latest set.exe file.
If you are an existing user, you do not need to activate the license separately. However, if you are installing TallyPrime on a different system, you must surrender and reactivate your existing license.
Upgrade via the Product
TallyPrime notifies you when a new release is available. You will see:
- The Upgrade to Latest Release button on the Gateway of Tally.
- A red dot near F1 (Help), indicating an available update.
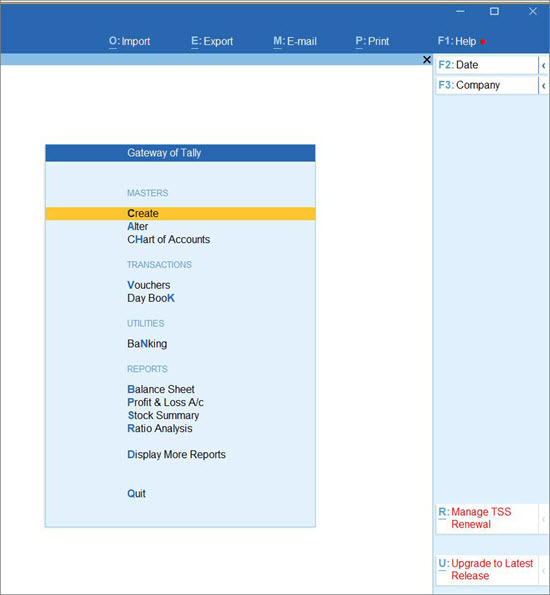
To upgrade your TallyPrime:
- Click Upgrade to Latest Release.
- Follow the on-screen steps to complete the update.
- Once the upgrade completes, click Start TallyPrime.
Your existing license and configurations will carry forward. - If prompted, re-enter license details and activate.
By following these steps, you can install, upgrade, or maintain multiple instances of TallyPrime effortlessly.
Download and Install the Latest Version
- Download the latest version of TallyPrime from the Tally Solutions Website.
- Run the setup file and enter your existing license details.
- Alter configurations, as required after installing the application.
You can install TallyPrime in a different folder to maintain multiple releases on the same system for testing or compliance purposes. Once installed, you can migrate your existing data to the latest release.
Install New
- Double-click the setup.exe file to start the installation.
- Select Install New for a new installation.
- Configure Application Path, if required.
By default, the application is installed at:- C:\Program Files\TallyPrime (for TallyPrime)
- C:\ Program Files\TallyPrimeEditLog (for TallyPrime Edit Log)
- Click Install to complete the installation.
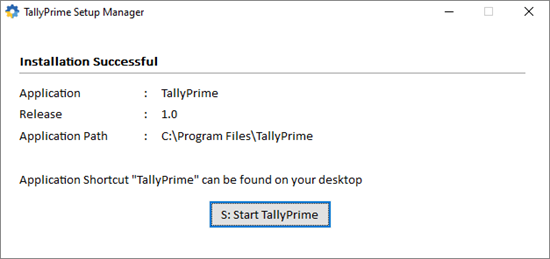
The application gets installed, and the following window opens.
If you are already using TallyPrime, then it is recommended that you install TallyPrime Edit Log in a different folder. This will allow you to use both the products simultaneously, if needed.
- Click Start TallyPrime to launch the application.
Install by Upgrading Existing Version
- Download the latest version of TallyPrime from the Tally Solutions Website.
- Run the setup file and press O (More Actions) > Select Application from Drive > browse the application folder you want to replace.
- Click I (Update).
- Start TallyPrime and ensure your data and configurations are intact.
Once installed, you can migrate your existing data to the latest release.
Existing Tally.ERP9 User? Download & Install
If you are an existing user of Tally.ERP 9 and if your TSS is active, then you can upgrade to TallyPrime or TallyPrime Edit Log, as per your business requirement. Install TallyPrime in a new folder. Once the license is configured, you can continue to use both TallyPrime or TallyPrime Edit Log and Tally.ERP 9 as well.
- Download and Install the latest version of TallyPrime.
- Start your TallyPrime.
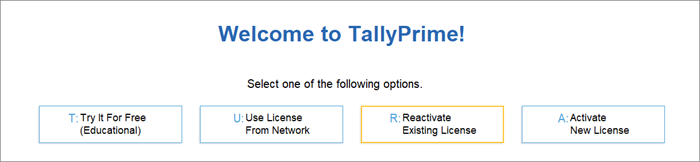
- Click Reactivate Existing License.
- Enter the Tally.NET ID and password.
The List of Licenses screen appears. - Select the required Tally.ERP 9 license.
Once the license is configured to the Tally Gateway Server, you will receive the following message. - Select Yes to activate.
The List of Companies screen appears. - Select the required Company to continue.
Your TallyPrime application is now licensed. Migrate your Company Data, as required.
Manage TallyPrime Installations
In addition to installation and upgrades, you can perform the following actions on your existing TallyPrime setup when needed:
- Repair Installation – If TallyPrime isn’t functioning correctly, run the installer and select Repair to fix any issues.
- Re-install – If required, uninstall the current version and perform a fresh installation.
- Install in a Different Folder – Ideal for keeping multiple releases on the same system for testing or compliance purposes.


