Prepare Financial Statements for Non-Corporate Entities (NCE) Using TallyPrime Data and Excel Template
For TallyPrime 6.0 & 6.2
TallyPrime allows you to export financial data in XML format to help you prepare structured Financial Statements for Non-Corporate Entities (NCE). This data can be easily mapped into a smart Excel template, enabling you to meet regulatory compliance and generate professional financial statements outside TallyPrime.
ICAI’s Guidance Note is designed to improve the quality and comprehensiveness of financial reporting by non-corporates. This guidance applies to financial statements for periods starting on or after April 1, 2024.
This Add-on is available for both single Indian companies and group companies, provided that all member companies in the group and the group company itself are Indian companies. Access also depends on user rights.

- You’re using TallyPrime Release 6.0 and above.
- You have MS-Excel installed on Windows 2016 or higher versions.
- You have full access rights to view Balance Sheet, Profit & Loss A/c, and Trial Balance.
- The company’s Country is set to India.
- Selected years (Current Year or Previous Year) are on or after the Books Beginning From date.
Step 1: Enable the Add-on for your license

You can enable the add-on from the webpage and update your license in TallyPrime. This links your serial number to the add-on feature and places the smart Excel template in your TallyPrime installation folder.
- Go to the webpage for enabling the Add-on for your TallyPrime license.
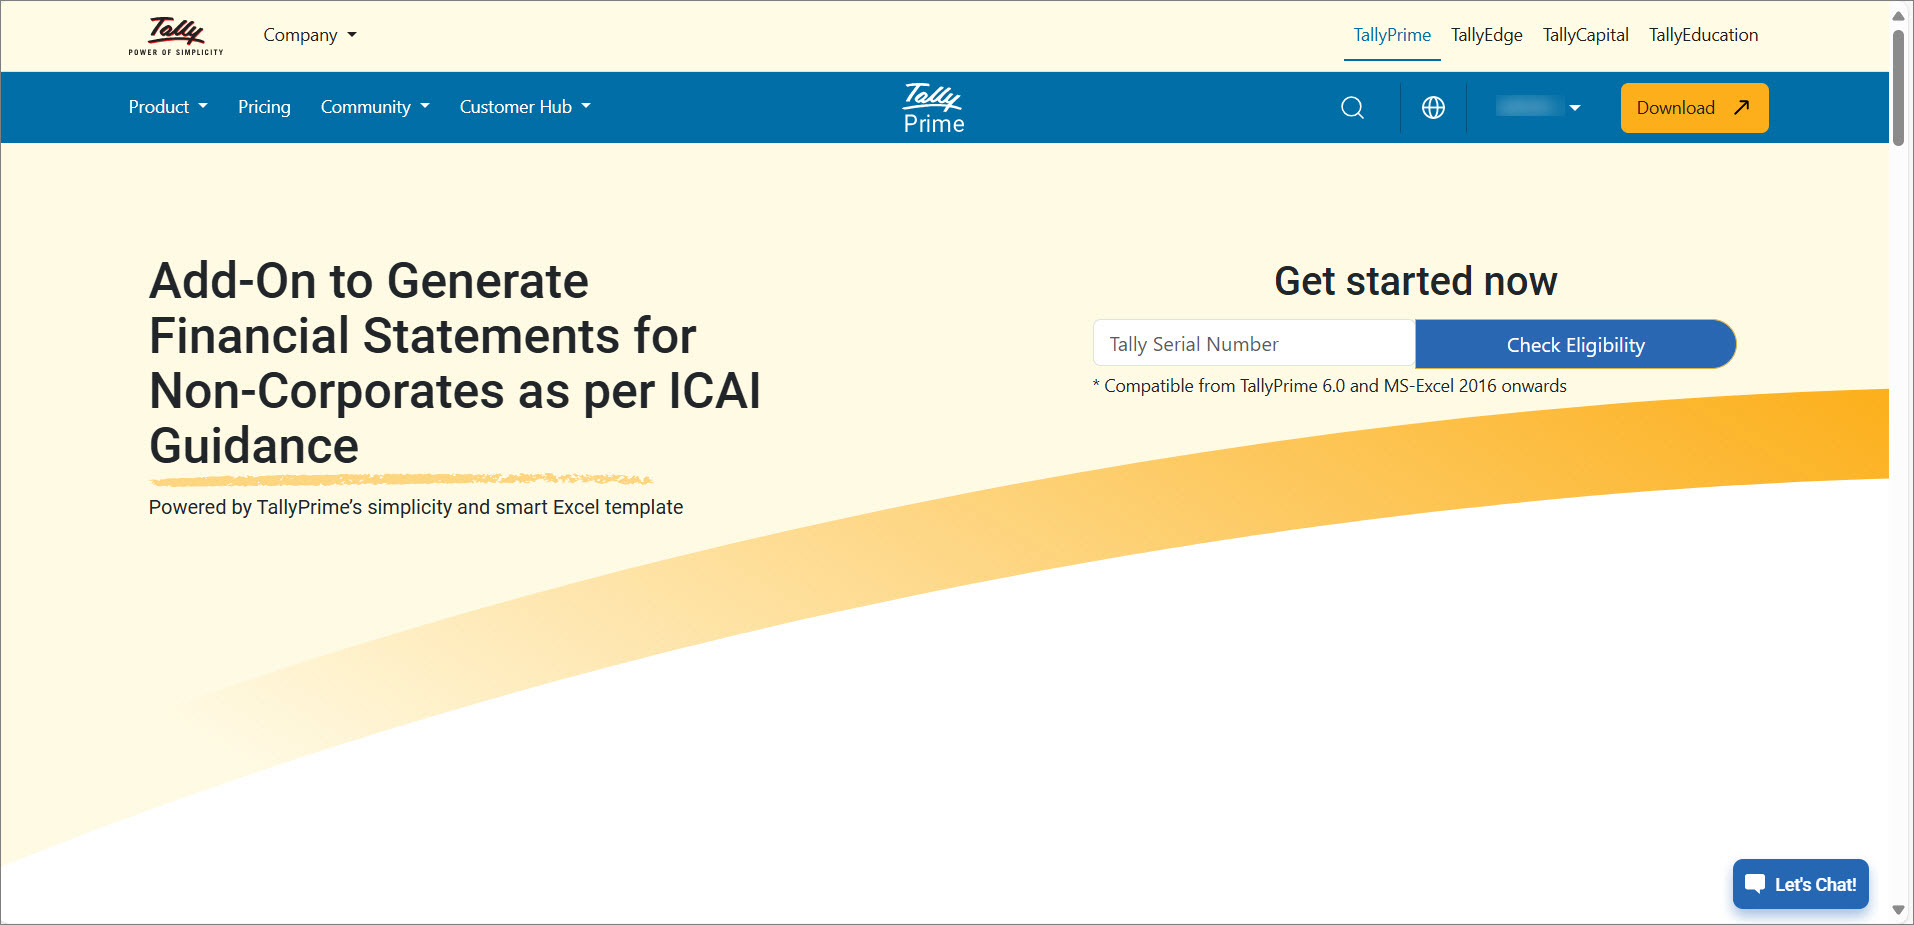
- Enter your Tally Serial Number and click Check Eligibility.
An OTP will be sent to your License Administrator e-mail ID.
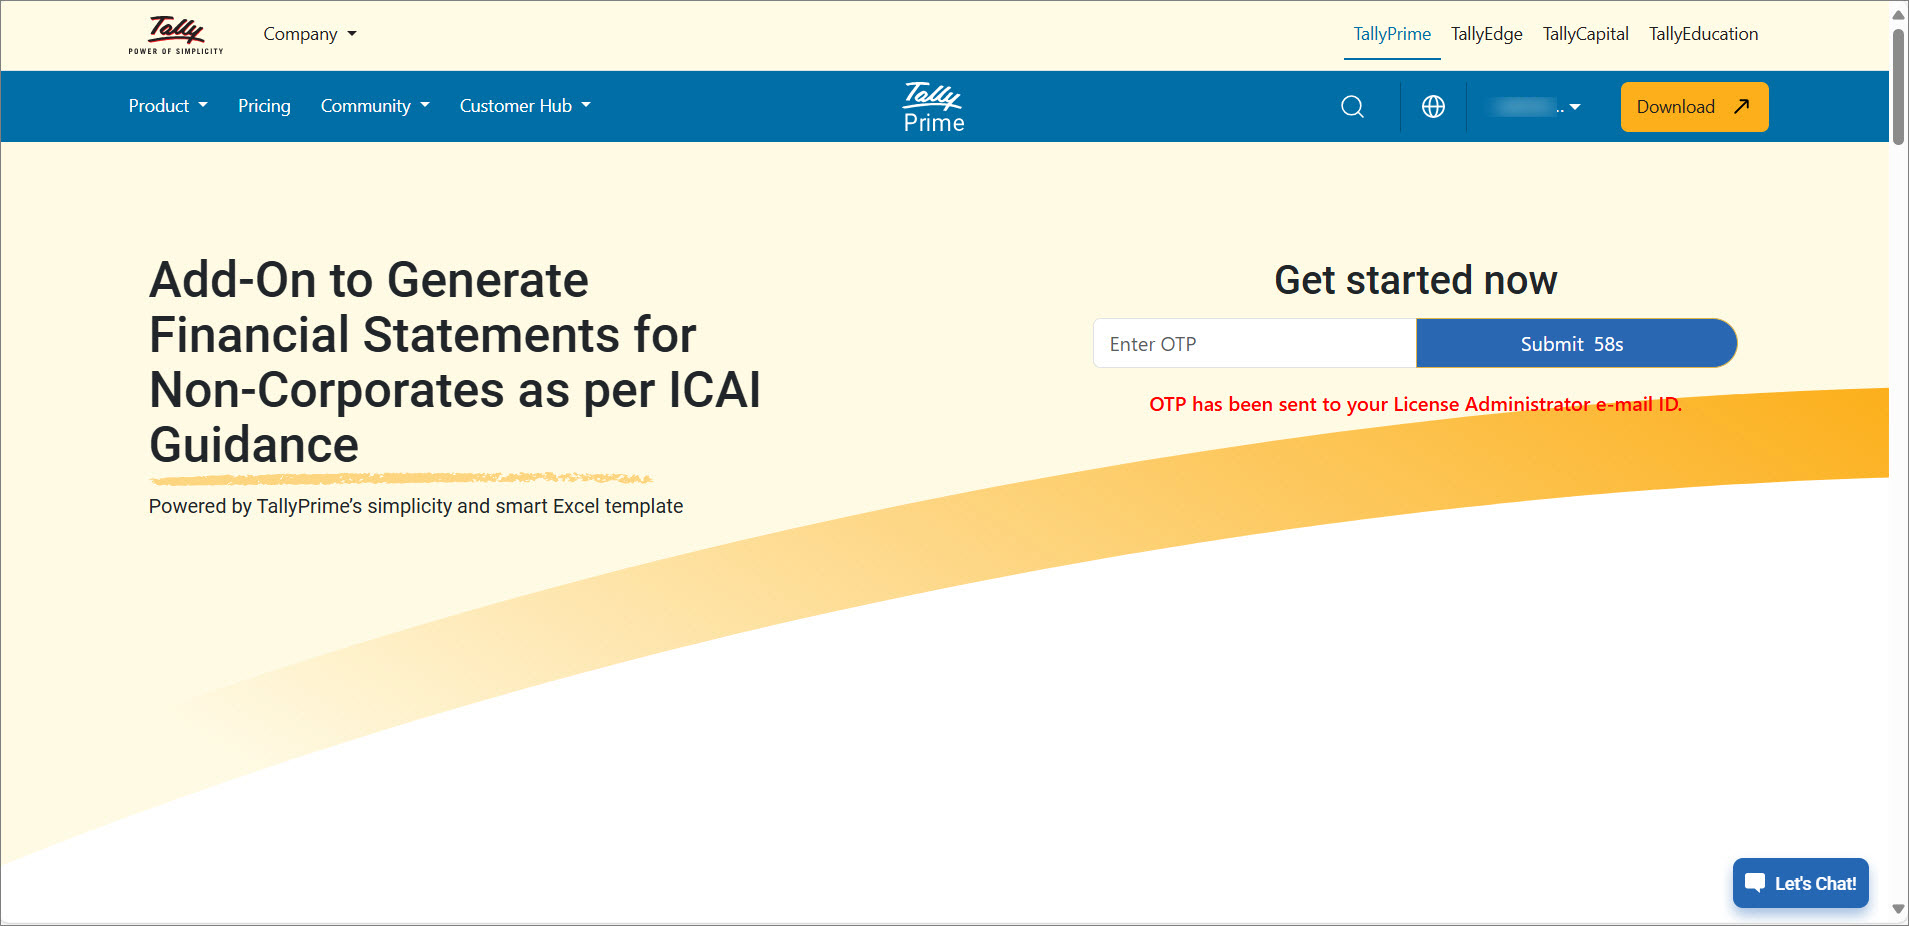
- Enter the OTP and click Submit to enable Financial Statements for NCE.
A success message is displayed confirming the linking of your Tally Serial Number. A confirmation e-mail will also be sent to your registered e-mail ID. - Update your TallyPrime license.
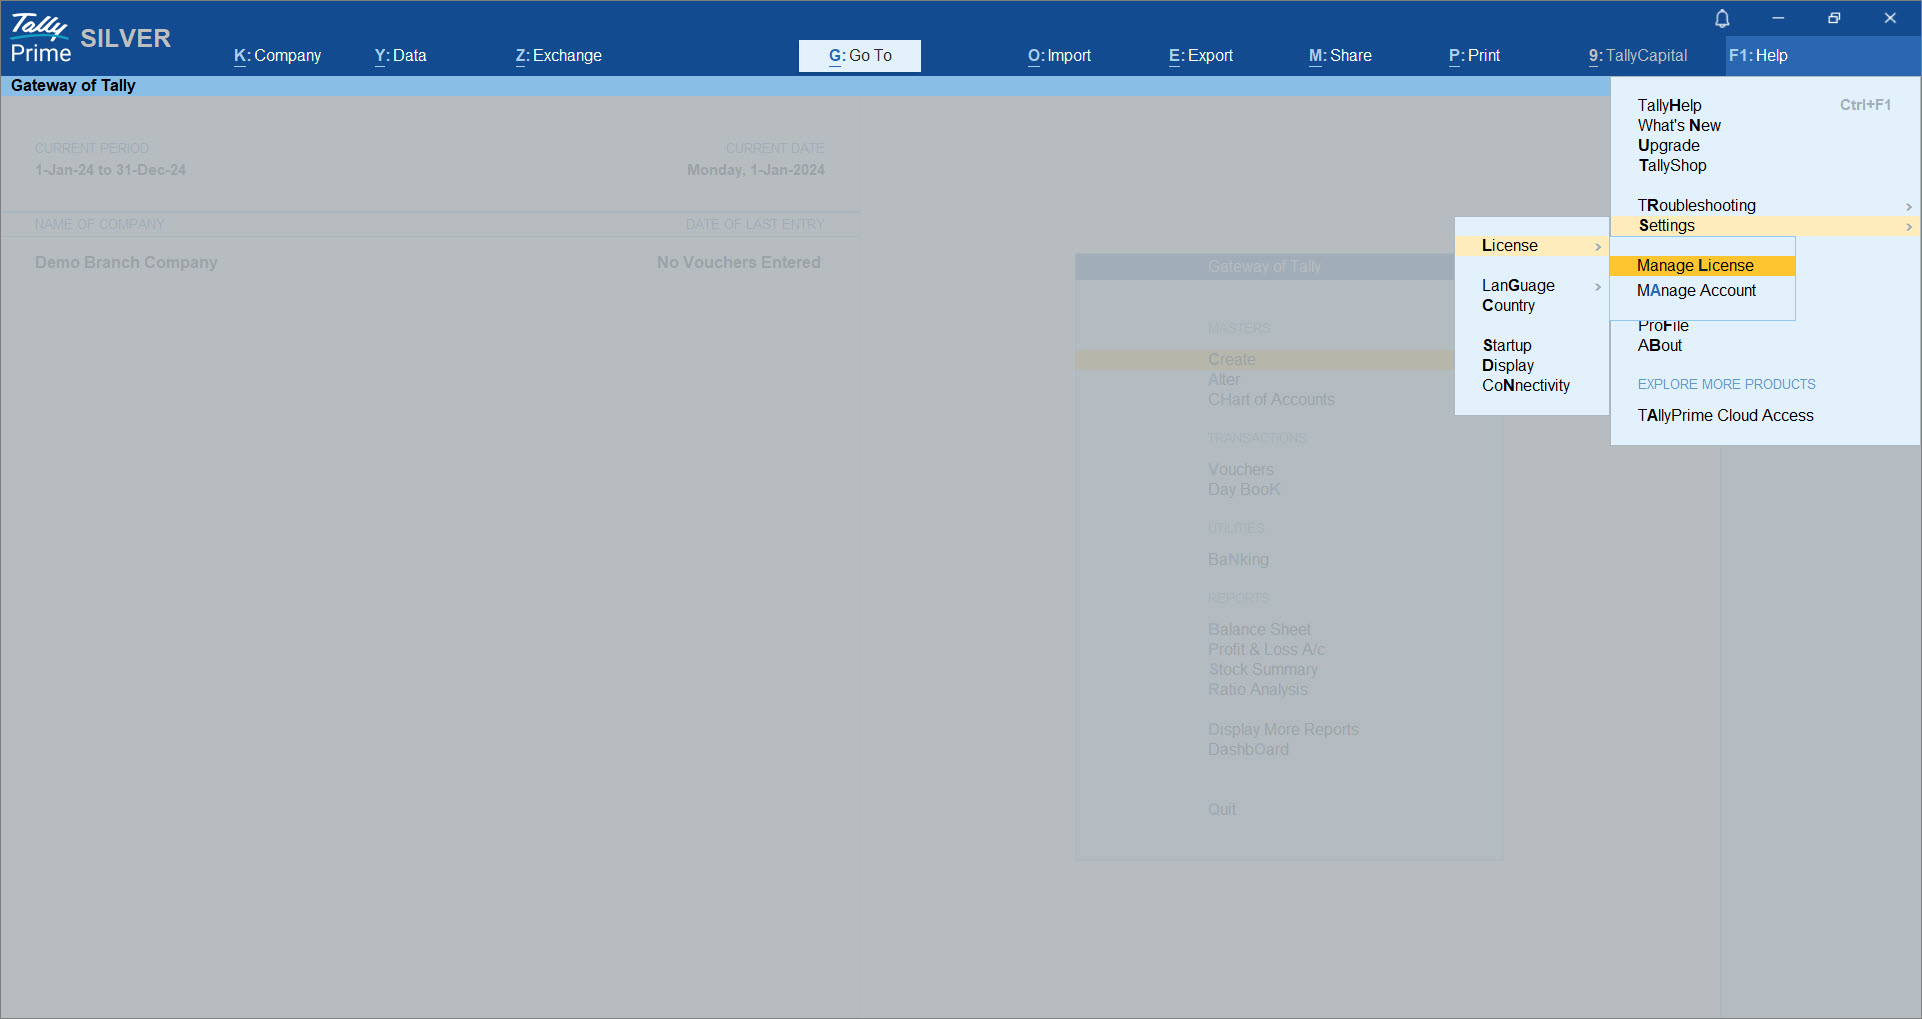
- Press F1 (Help) > Settings > License > Manage License.
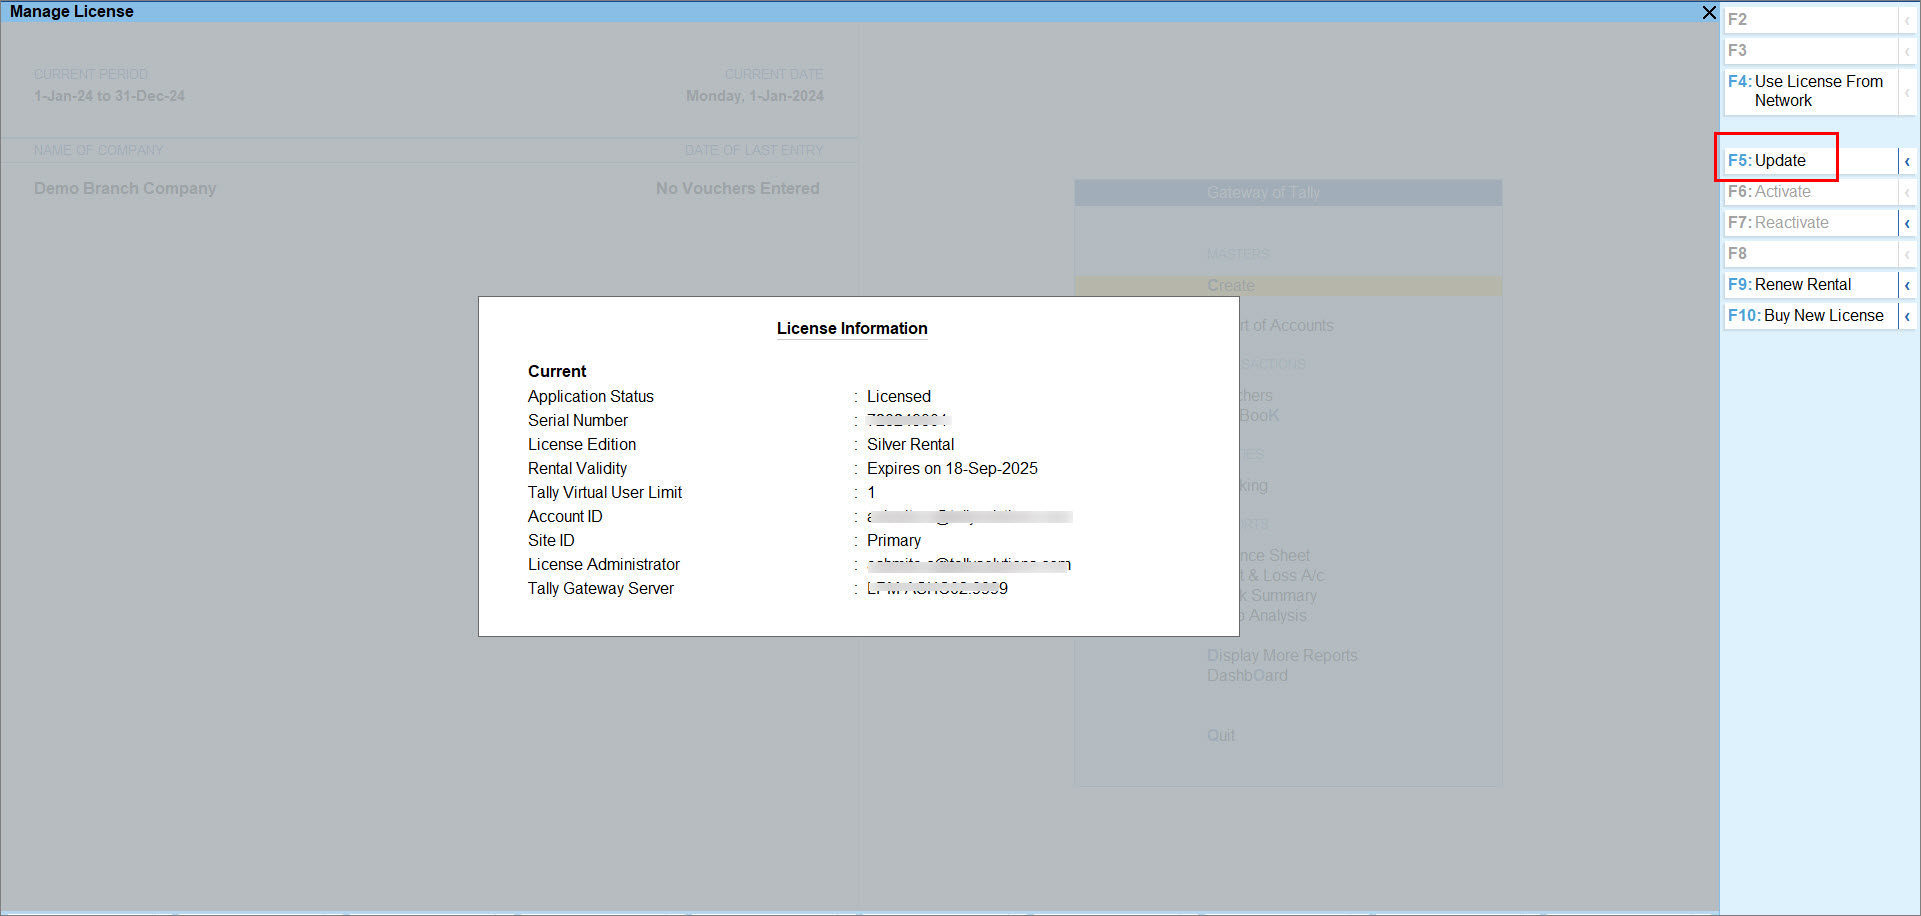
- Press F5 (Update).
- In the Update License screen, enter your Tally.NET ID and Password.
- Press F1 (Help) > Settings > License > Manage License.
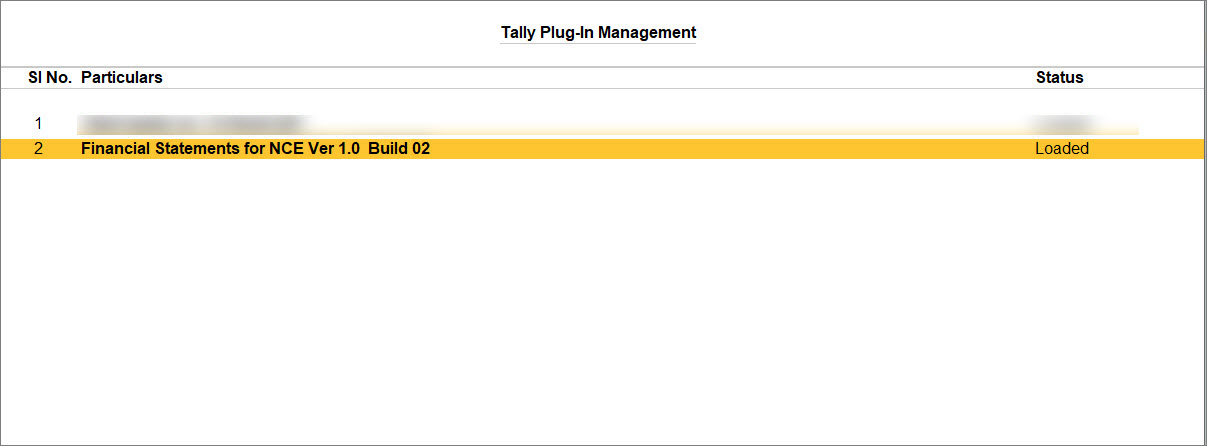
- Press F1 (Help) > Tally Plug-Ins and view the Add-on for Financial Statements for NCE.
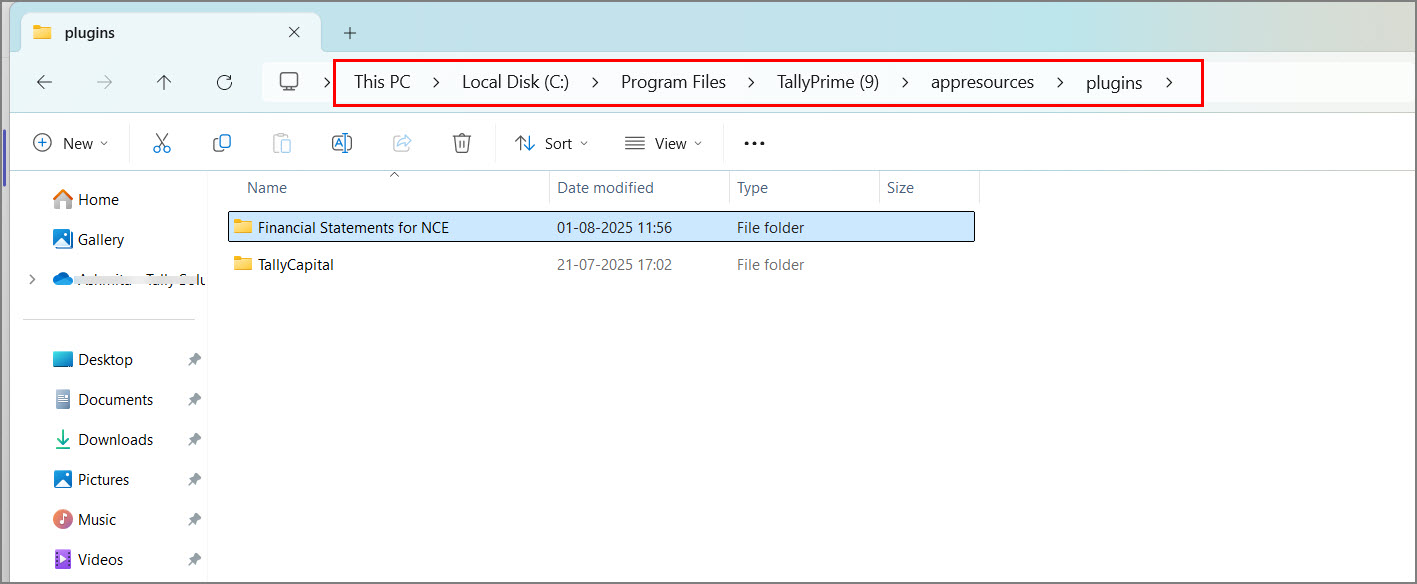
The Excel template will be automatically downloaded as a zipped file in your TallyPrime folder. - To view the template, open TallyPrime installation folder > Appresources > Plugins.
Step 2: Extract the Excel Template
The Excel template for preparing financial statements for NCE is downloaded as a zipped file and stored in your default TallyPrime folder.
To extract the template:
- Go to your TallyPrime installation folder > Appresources > Plugins.
- Locate the zipped file for the Excel template, right-click on it, and select Extract All.
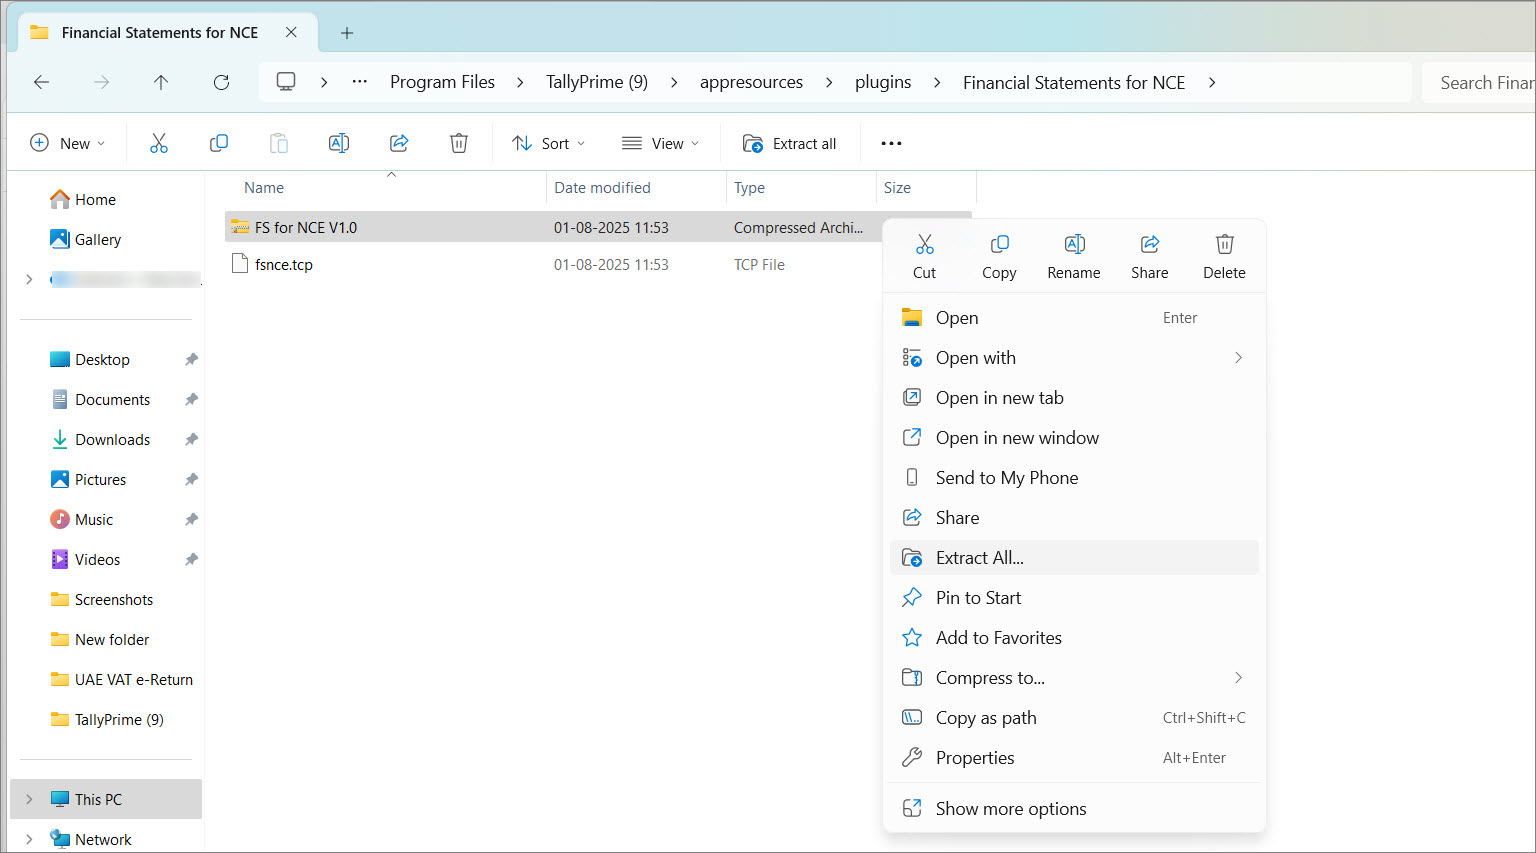
- Choose a different folder if needed and complete the extraction.
If the template is not available in the TallyPrime installation folder, download the latest version from the TallySolutions website.
Step 3: Export Financial Data from TallyPrime
The Export option is available in the following reports:
- Balance Sheet
- Profit & Loss A/c
- Trial Balance
For Group Companies:
- Ensure that in F11, the options Maintain Inventory and Integrate Accounts with Inventory match between the member companies of a group. Else, the option Export > Financial Statement for NCE will not be available for the Group Company.
- The Chart of Accounts and Inventory of all member companies must also be the same otherwise, the exported data for the Group Company may be inaccurate.
To export:
- Open any of the above reports.
- Press Alt+E (Export) > Financial Statements for NCE.
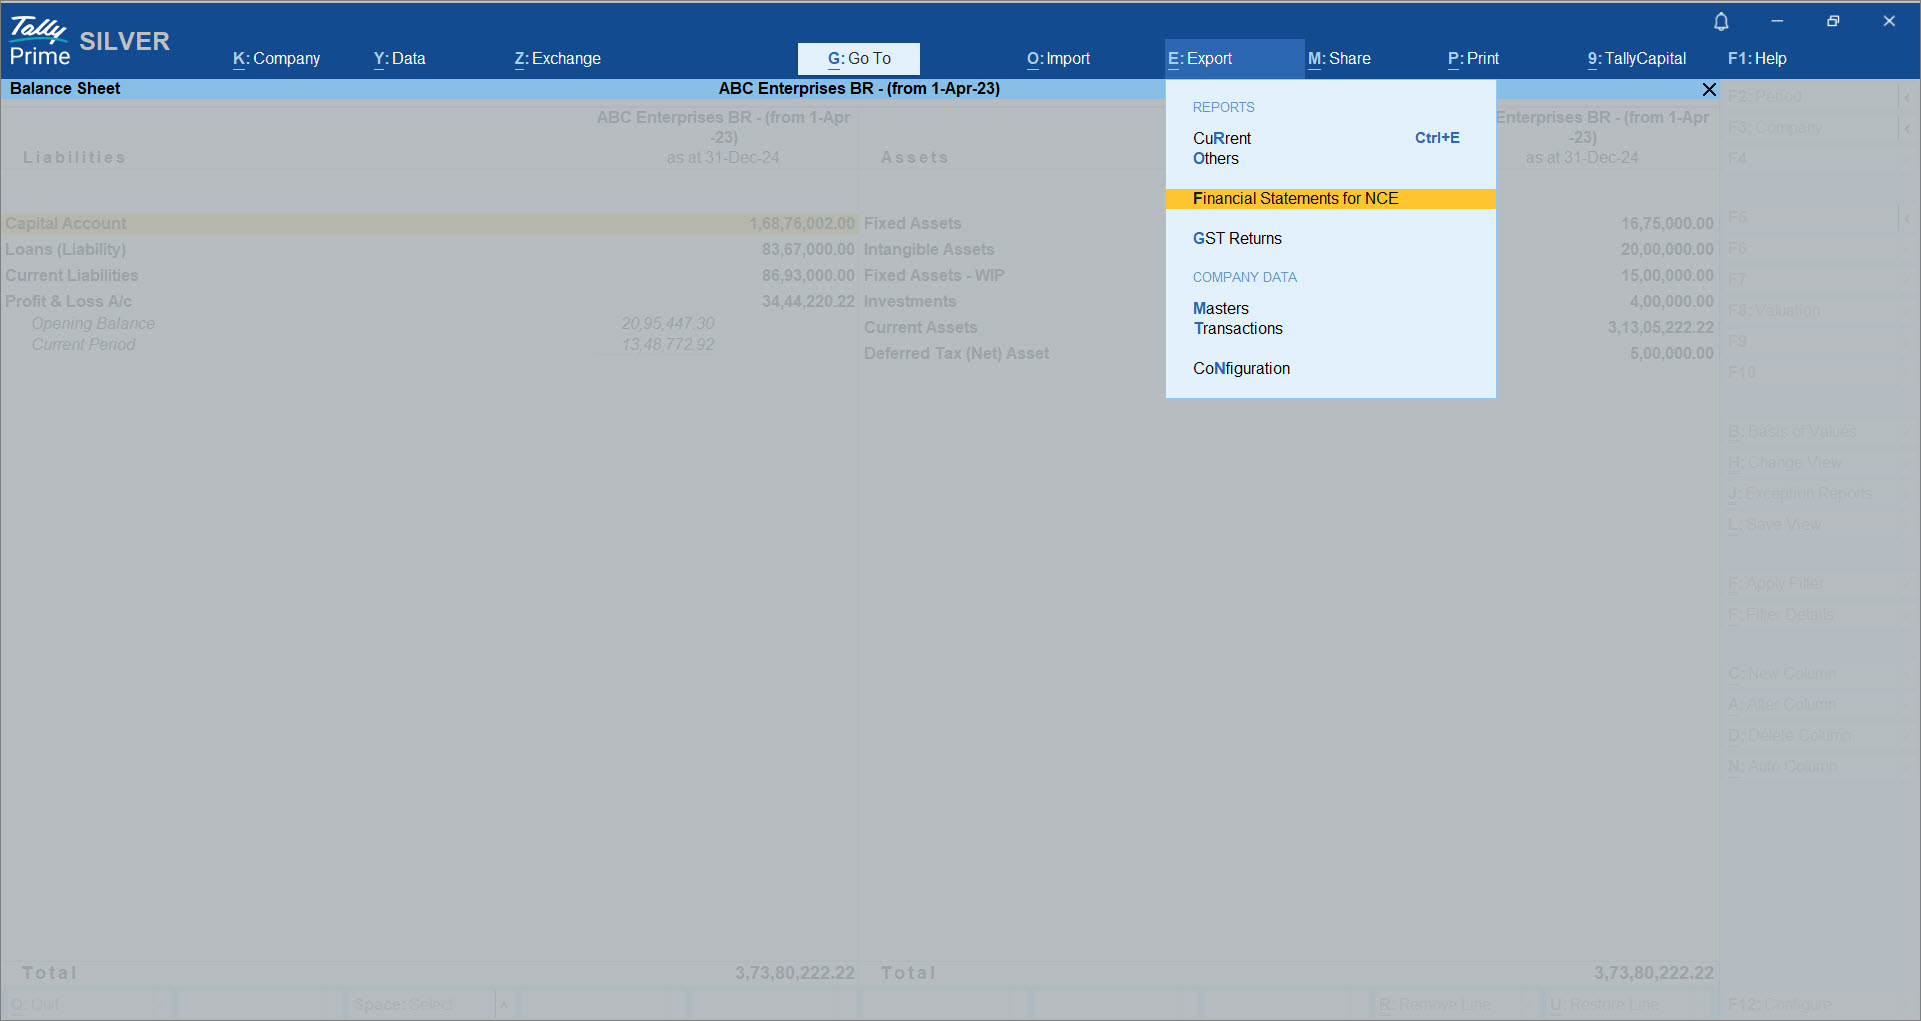
- Press C to configure export settings as needed.
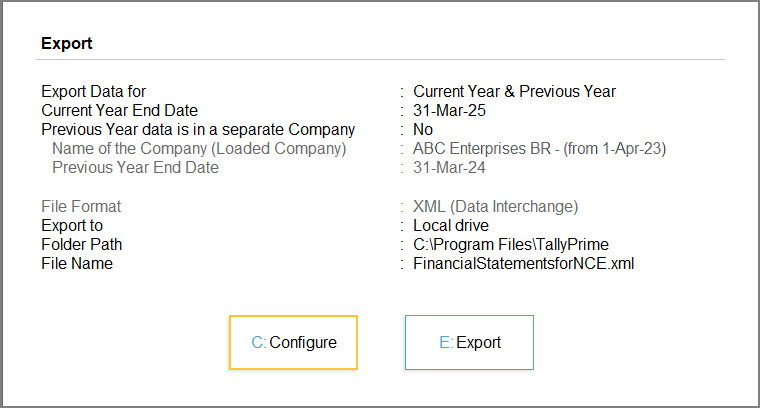
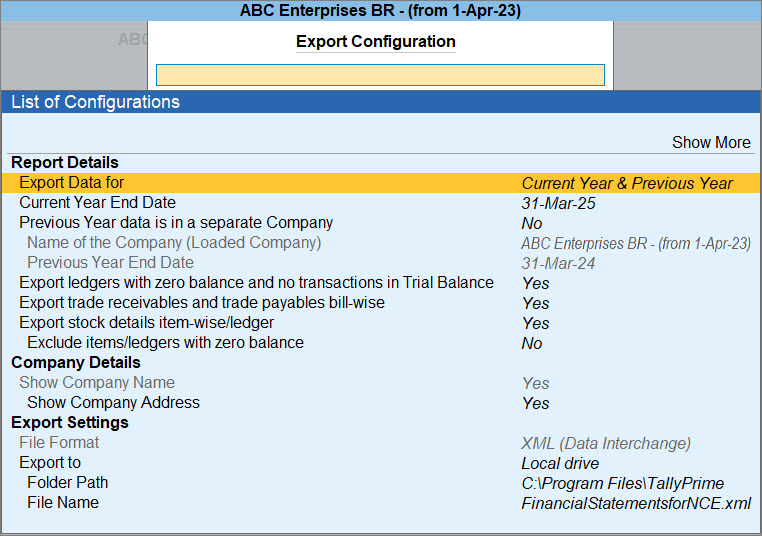
- Export Data for: Select the required Current Year (CY) and/or Previous Year (PY).
Ensure that the companies containing data for the selected years are loaded in TallyPrime before configuring these details. Data can be exported for the Current Year if it is a single company and for the Previous Year if it is a Group Company, and vice versa.
- Current Year End Date: Change the date, as required.
If the selected year is before the company’s Books Beginning From date, the exported data will be blank. For Group companies, the Books Beginning From date must be equal to or later than the Period Beginning date of the member companies. If it is earlier, data will not be exported.
- Previous Year data is in a separate Company: This option is set to No, by default.
Set this to Yes, if you have the previous year’s data in a separate or split company. - By default, these options are set to Yes.
- Export ledgers with zero balance and no transactions in Trial Balance
- Export trade receivables and trade payables bill-wise
- Export stock details item-wise/ledger
Set these to No to ensure faster imports and prevent unnecessary mapping of ledgers or items in the Excel template.
- Name of the Company (Loaded Company): From the List of Companies, select the company that has the previous year’s data.
- Previous Year End Date: This option gets auto-updated when Current Year End Date is changed.
Data from the selected company will be imported into the PY worksheets, while data for the current year will be imported into the CY worksheets.
- Press E (Export).
The XML file will be saved in the default TallyPrime folder.
By default, the file is saved as FinancialStatementsforNCE.xml. It is recommended to change the file name to prevent any potential confusion.
Step 4: Import the XML File into the Excel Template
-
Open the extracted Excel template and go to the Basic Info sheet.
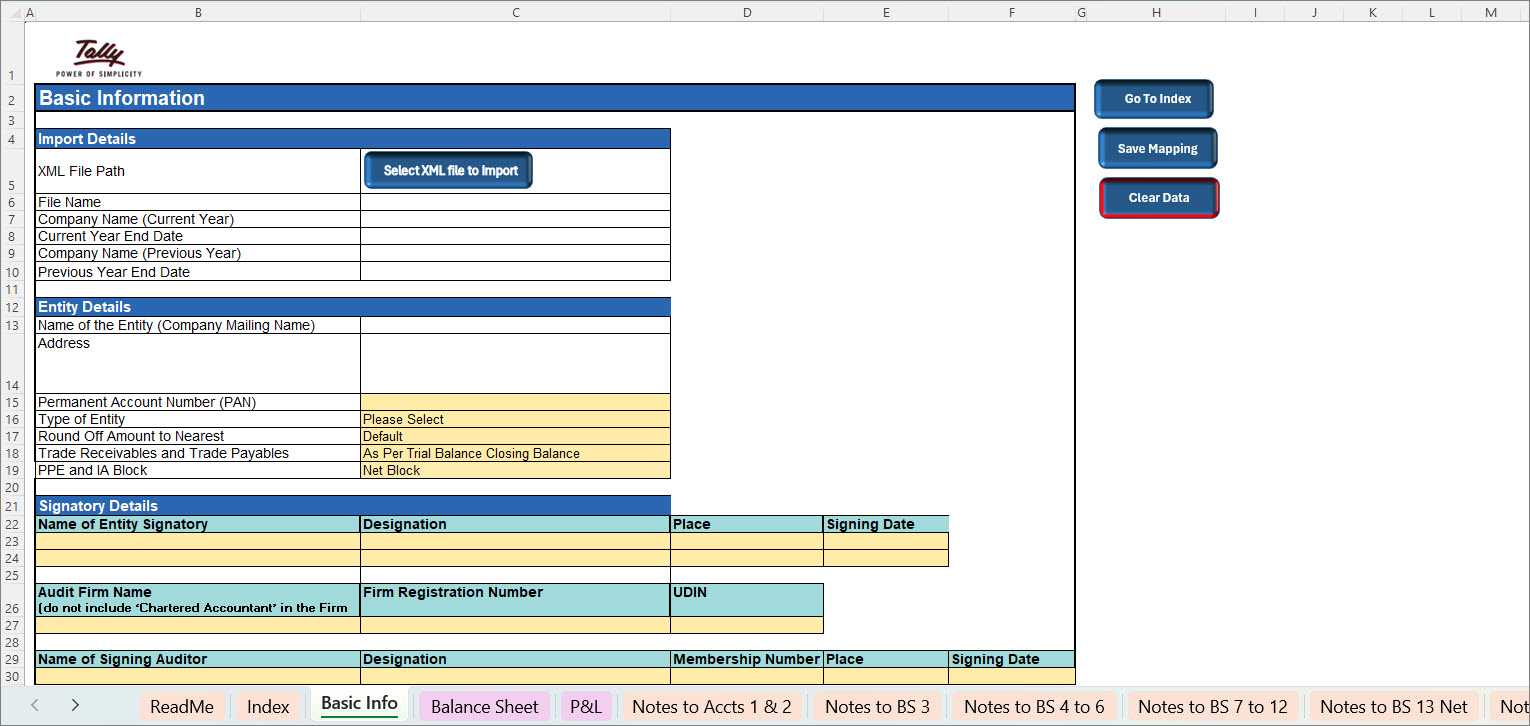
- In the Basic Information sheet, follow these steps:
- Under Import Details, click Select XML file to Import and choose the file from its saved location.
The data exported from TallyPrime will be imported into the relevant worksheets. The fields highlighted in yellow require manual entry or selection. - In the Entity Details section, the following fields will be auto-filled: Name of the Entity, Address, and PAN.
If the PAN is not entered in TallyPrime, you will need to input it manually here. - Type of Entity: Auto-filled if PAN is available. Else, you will have to manually select it.
- Round Off Amount to Nearest: The rounding-off scale is set to Default (Amount in full figures), but you can change it as needed based on how you want to present the financial statement.
While manually entering values in any worksheet, make sure they align with the rounding-off scale selected here.
- Trade Receivables and Trade Payables: The As Per Trial Balance Closing Balance option is selected by default, but you can modify it according to your needs. Manually select this option if you wish to use the data for notes related to bill-wise or party-wise Trade Payables and Trade Receivables worksheets.
- PPE and IA block (Property, Plant and Equipment and Intangible Assets): Manually select an option for the PPE and IA block. Net Block is selected by default. You can change it to Gross Block, if required.
When you choose Gross Block in the Basic Info worksheet, make sure to select PPE & IA (Gross) under Classification 3 in the TB CY/PY worksheets.
In the Notes to BS 13 Net worksheet, when you enter a value in the Deletion column, the Depreciation column will be auto-adjusted accordingly.
- Under Signatory Details, all fields must be entered manually.
- Enter the Name of the Owner/Partners and their Share of Profit/(Loss).
- Click Update Details in Note 3.These details will automatically reflect in Note 3 of the financial statements. The names will also appear in Classification 4 only after you click update.
- Under Import Details, click Select XML file to Import and choose the file from its saved location.
- To clear data and mappings, including saved mappings from multiple sheets—especially if you’ve selected the wrong XML file—click Clear Data.
- Click Go to Index for easy navigation within the Excel Template.
Accounting Policies for reference have been added for Note 2. You can refer to it and draft disclosures based on your specific requirements.
To know more about using the Excel Template, refer to the ReadMe worksheet in the Excel Template.
Step 5: Map Data in the Excel Template
Once the XML file is imported, data for the current year (CY) and/or previous year (PY) is auto-populated into the following worksheets, as applicable—based on the data exported.
-
Trial Balance: Contains the Trial Balance details for the current and previous years.
-
Stock Summary: Displays item-wise Stock Summary along with Opening and Closing Balances for both years.
-
Trade Payables: Includes party-wise and bill-wise outstanding payables.
-
Trade Receivables: Includes party-wise and bill-wise outstanding receivables.
For Group Companies, only Trial Balance and Stock Summary reports will be exported.
- Select TB CY to open the worksheet for trial balance for the current year.
Positive values indicate Credit balances, while negative values indicate Debit balances.
The columns under the Data Imported from TallyPrime section will be auto-filled based on the imported data.
- Start the mapping process by manually selecting the options in the fields highlighted in yellow.
- Under Bifurcate Balance, you may need to split values based on two possible categories:
- Current and Non-Current – Values are added under the Current column by default. You must manually enter the Non-Current portion, as applicable.
- Trade Receivables (More than 6 months and less than 6 months) – By default, closing balances are added under Less than 6 months. If applicable, enter the relevant amounts under More than 6 months based on ageing.
Ensure that positive amounts are entered against positive values, and the same applies for negative values.
- Under Mapping Details, map Classifications 3, 4, and 5.
- Map each ledger row sequentially, starting from Classification 3, then Classification 4, and finally Classification 5, if applicable.
Mappings completed up to Classification 4 will be automatically updated in the corresponding Notes worksheets.
-
If you select the specify nature option in Classification 4, you can proceed to map Classification 5.
Classification 5 allows you to add custom descriptions to further categorise financial data as per your reporting or disclosure requirements.
- Map each ledger row sequentially, starting from Classification 3, then Classification 4, and finally Classification 5, if applicable.
- Under Bifurcate Balance, you may need to split values based on two possible categories:
- After entering the details in Classification 5, click Update Notes with Classification 5 to apply the custom descriptions across relevant Notes sections. Not clicking this will result in a mismatch in the Balance Sheet.
Ensure that you do not add a new category under Classification 5 using the same name as an existing category under Classification 4
- If you have already mapped the current year (CY) data and want to reuse the same mapping for the previous year (PY):
-
Go to the TB PY sheet.
-
Click Copy Mapping from Current Year to apply the same classifications/mappings.
After the mapping is complete, check for any amber-highlighted fields in the Balance Sheet and Profit & Loss worksheets. These highlight issues like unmapped ledgers, imbalance in Trial Balance, or opening balance mismatches that may prevent your Balance Sheet from tallying.
-
-
Similarly, if you have mapped the previous year (PY) and want to reuse that mapping for the current year:
-
Go to the TB CY sheet.
-
Click Copy Mapping from Previous Year to apply the same classification.
-
- After completing the mapping for all worksheets in the Excel Template, go to the Basic Info worksheet and click Save Mapping.
This saved mapping can be reused if you import an updated Trial Balance for the same company.
You can always refer to the ReadMe sheet for more help.
Now that mapping is done, you can proceed with printing or exporting the financial statements.
Step 6: Print or Export the Financial Statements
You can easily print or export your financial data—whether it’s a single sheet or detailed notes.
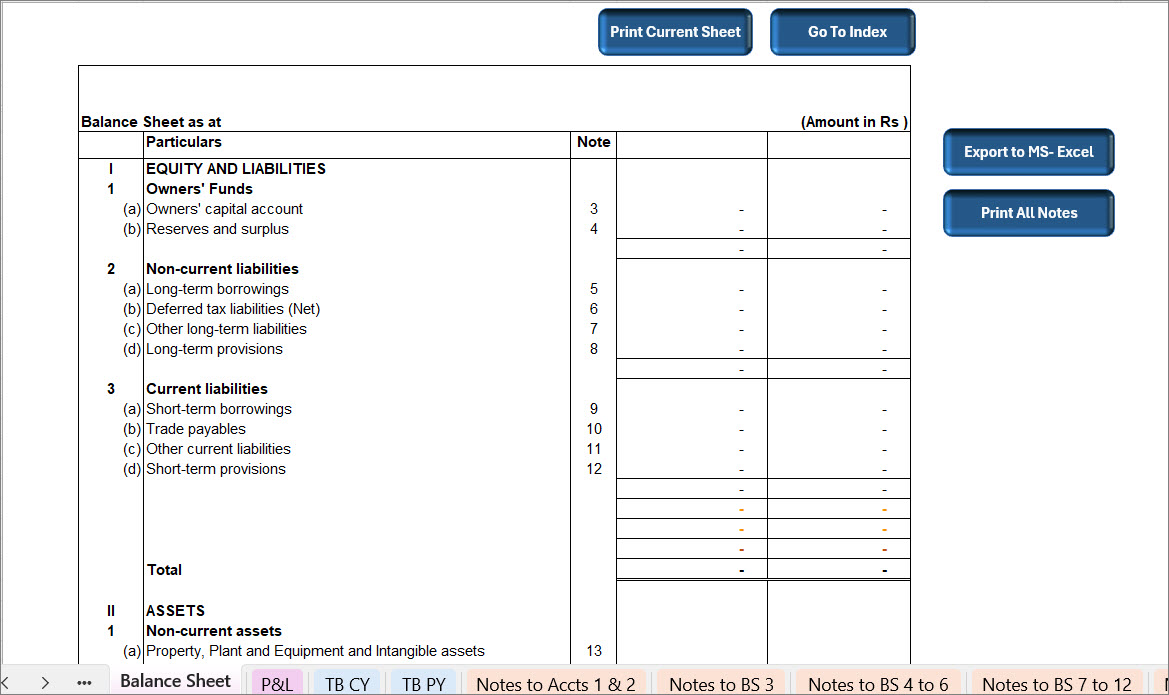
- Print Current Sheet: Click this button to export the current worksheet as a PDF or view its print preview. This option is available on every worksheet.
- Print All Notes: Click this button to export as a PDF or preview the print version of all the Notes worksheets.
When you click any Print button, a message will appear asking if you want to export to PDF or preview the sheets.
- Click Yes to export to PDF.
- Click No to view a print preview.
- In the print preview screen, click Print or press Ctrl+P to print the sheets.
- Click Cancel to exit the print flow.
While generating the PDF or viewing the print preview, rows where both Current Year and Previous Year have nil balances will be excluded automatically, and the row numbers will be adjusted accordingly.
- Export to MS-Excel: Click this button to export the file to Excel in your current template location.
A confirmation message will appear showing the file name and location.- Click OK to close the message.
The exported Excel file will be saved in your current template folder.
The Excel sheet will not include formulas or linked worksheets.