Get answers to all the frequently asked questions regarding cost centres in TallyPrime. Know how to view cost centre details in TallyPrime reports and understand the reason and solution for errors related to cost centres that occur while importing data. Moreover, find answers to questions regarding transactions containing cost centre details recorded in TallyPrime.
You can disable Cost Centres in TallyPrime when you do not need to use the feature anymore. You can refer to the section Disable Cost Centre in TallyPrime in the topic Cost Centre or Profit Centre in TallyPrime.
You cannot import the pre-defined cost centres to a particular Company.
You need to create the cost centres under the same cost centre categories in the Company to which you want to import the data.
No, it is not possible to create a Sub Cost Category under a Cost Category.
You can create a Delivery Note with Cost Centre allocations.
However, you cannot use cost centres in a Receipt Note in TallyPrime.
No, it is not possible to view Cost Centre details in Balance Sheet and Profit & Loss A/c reports of TallyPrime.
Currently, TallyPrime does not have an option to provide the breakup of opening balance to the cost centres. However, you can provide the opening balance as per the example demonstrated below.
Consider that Salary Advance ledger has an Opening Balance of Rs. 5,000 and has Cost Centres namely Employee A (Rs 3,000) and Employee B (Rs. 2,000).
- Alter the Salary Advance ledger to remove the Opening Balance.
- Press Alt+G (Go To) > Alter Master > Ledger > type of select ledger name and press Enter.
- Bring the cursor to Opening Balance and press spacebar to remove it.
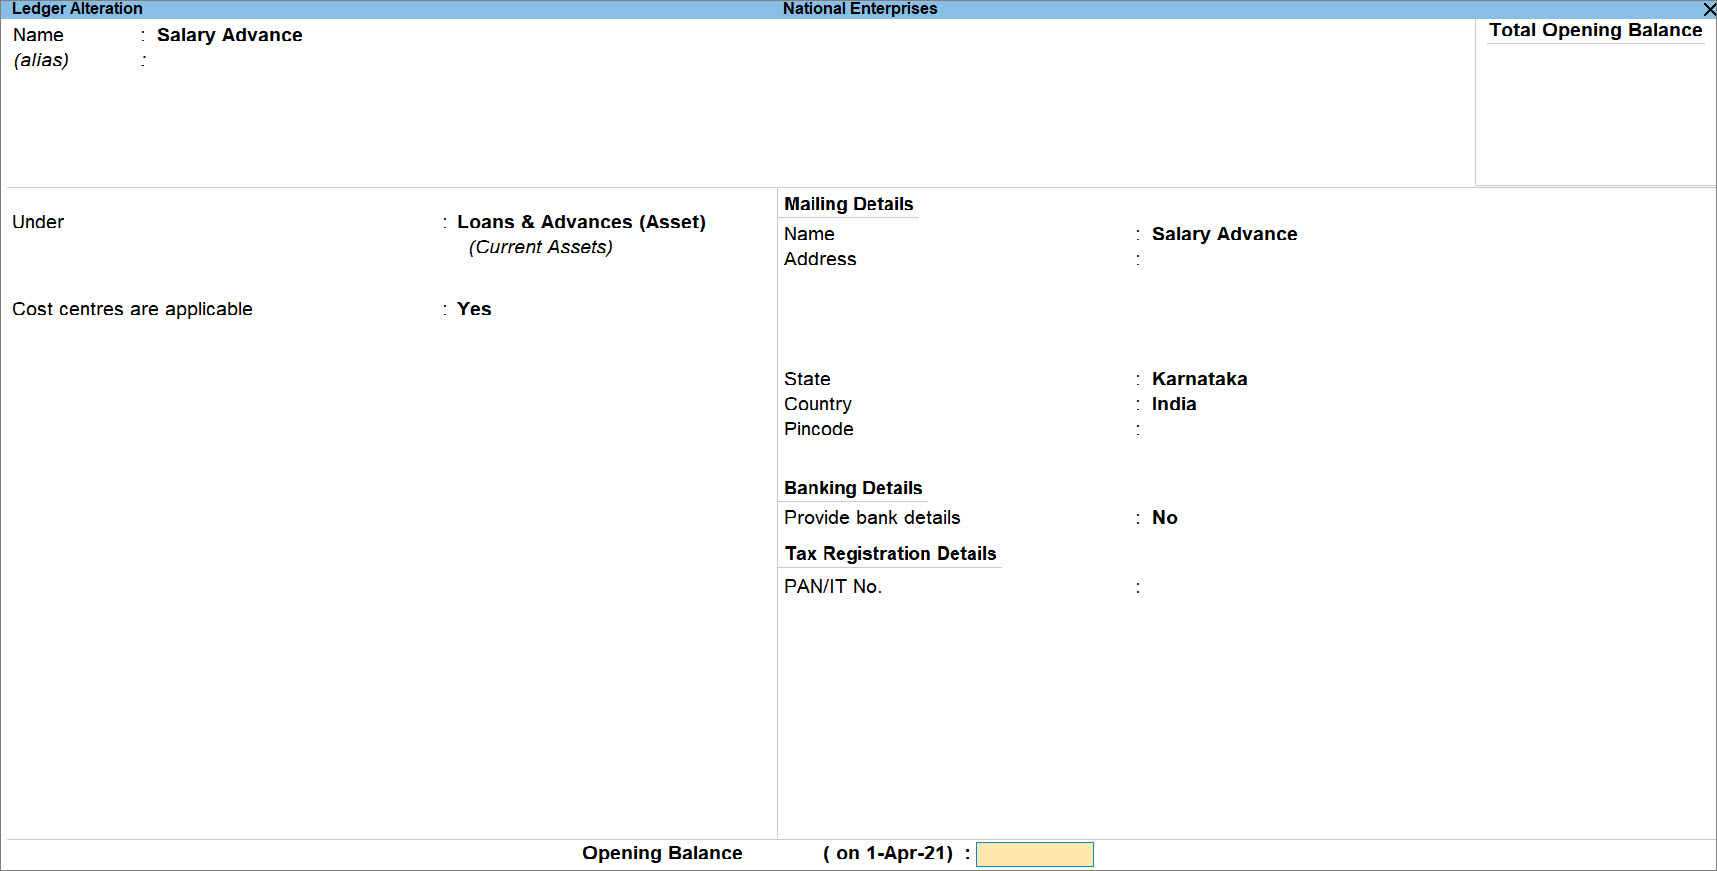
- Press Ctrl+A to save the ledger.
- Create a ledger for salary advance adjustment under Loans and Advances (Assets) with an opening balance of Rs. 5,000 and cost centres not applicable.
- Press Alt+G (Go To) > Create Master > type or select ledger and press Enter.
- Enter Name.
- Under : Loans and Advances (Assets).
- Cost Centres are applicable : No.
- Opening Balance : 5,000.
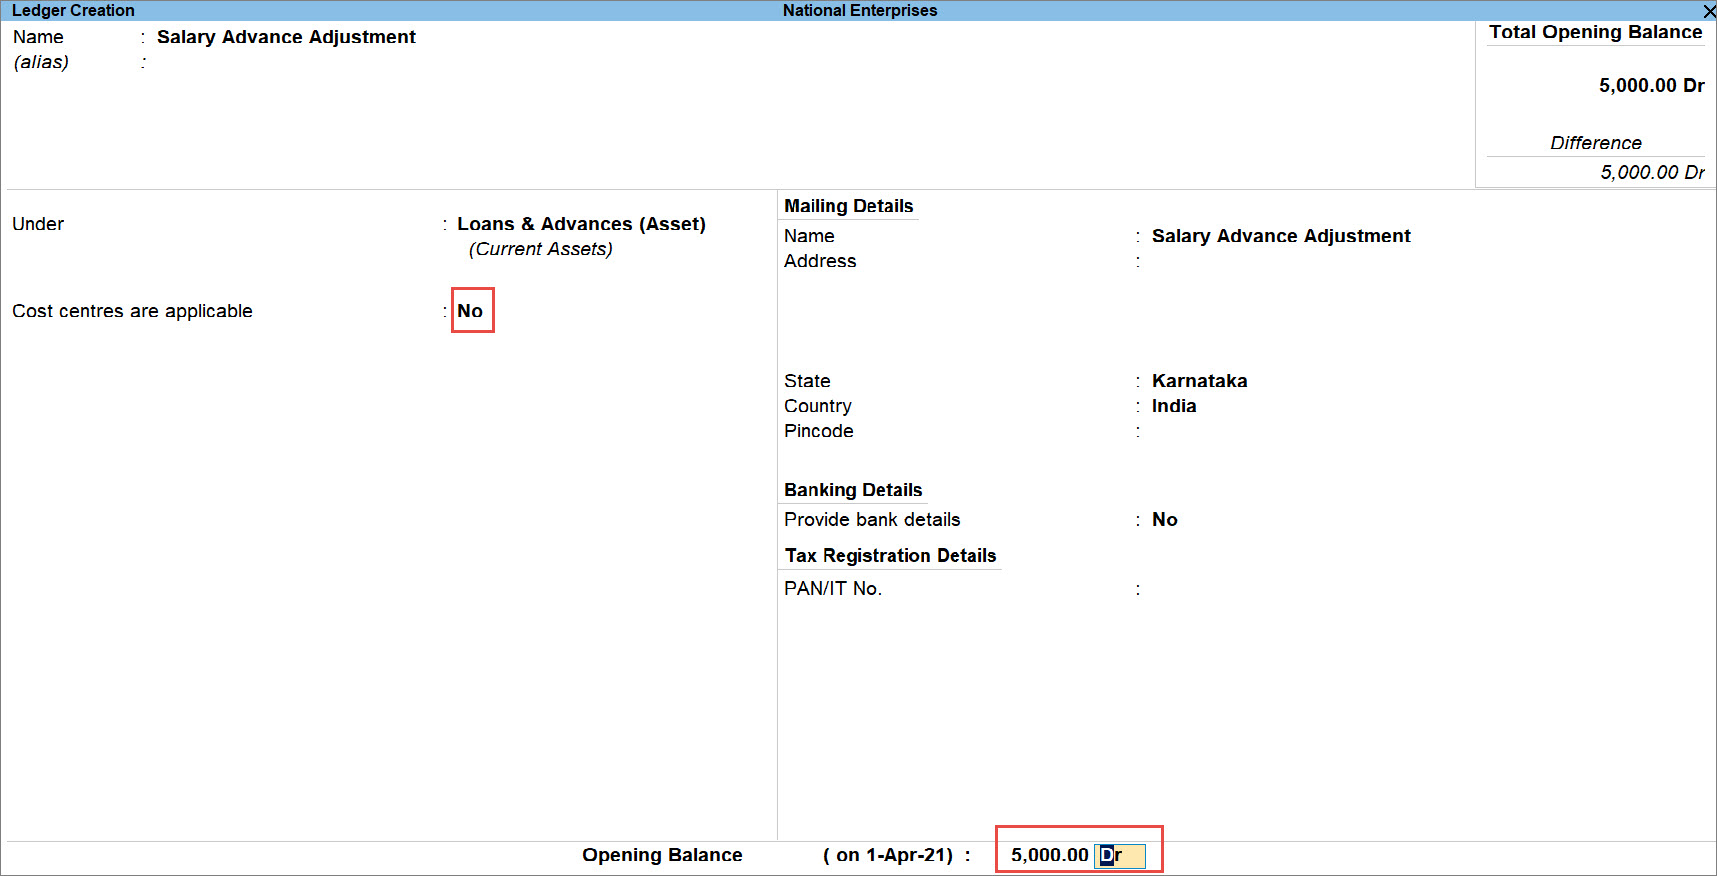
- Press Ctrl+A to save the ledger.
- Record a Journal Voucher with Salary Advance and Salary Advance Adjustment ledgers.
- Press Alt+G (Go To) > Create Voucher > press F7.
- Under By (Debit), select the Salary Advance ledger.
The Cost Allocations for the ledger screen appears. - In the Cost Allocations screen, select:
- Employee A and enter Rs. 3,000.
- Employee B and enter Rs. 2,000.
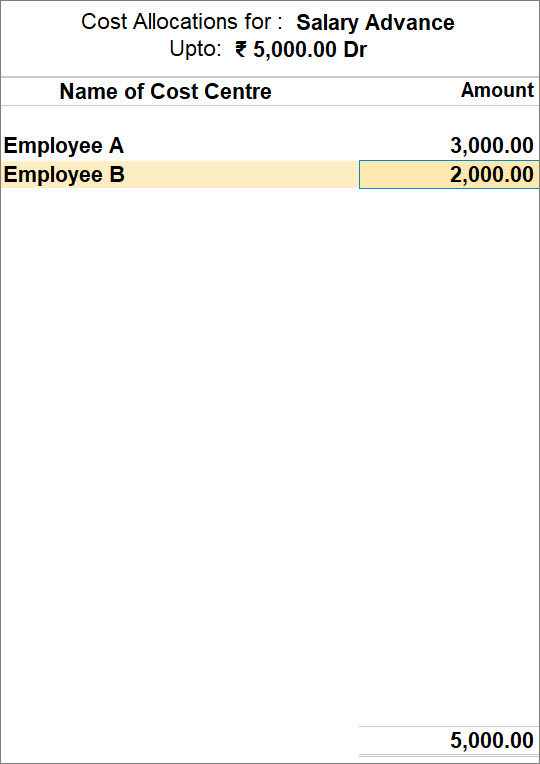
Press Ctrl+A to accept the screen.
- Under To (Credit), select the Salary Advance Adjustment ledger.
- Enter the narration, if needed.
The Journal Voucher appears as shown below.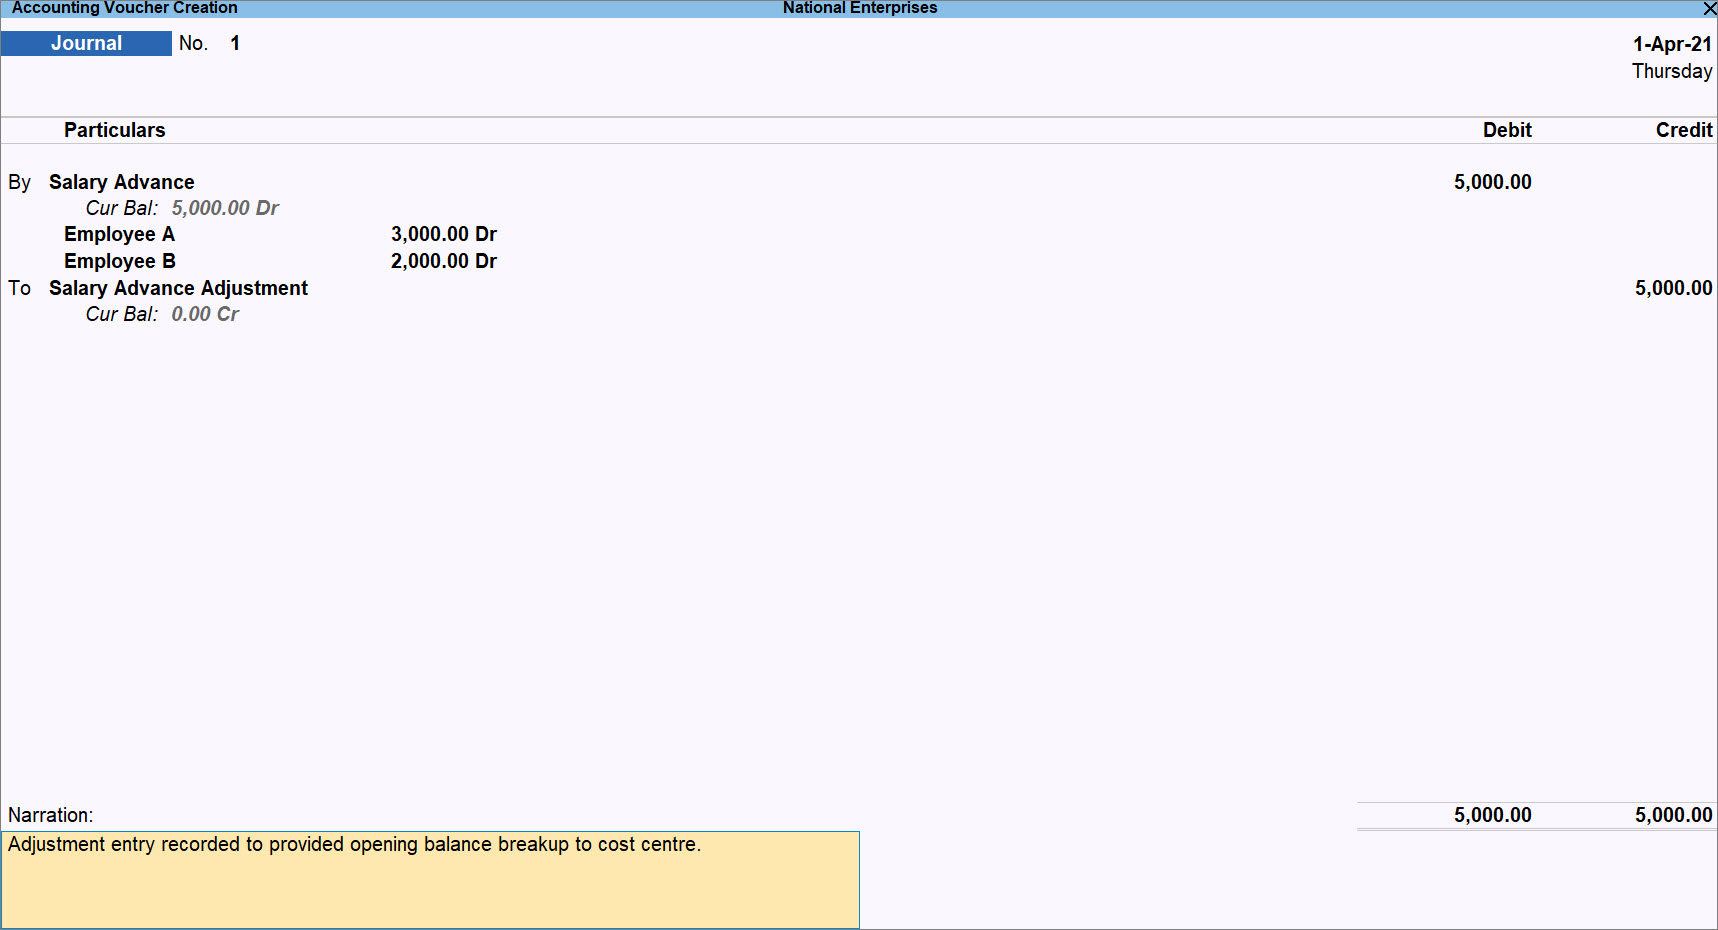
- Press Ctrl+A to save.
- Press Alt+G (Go To) > type or select Cost Centre Summary and press Enter.
The Cost Centre Summary with opening balance breakup for cost centres appears as shown below.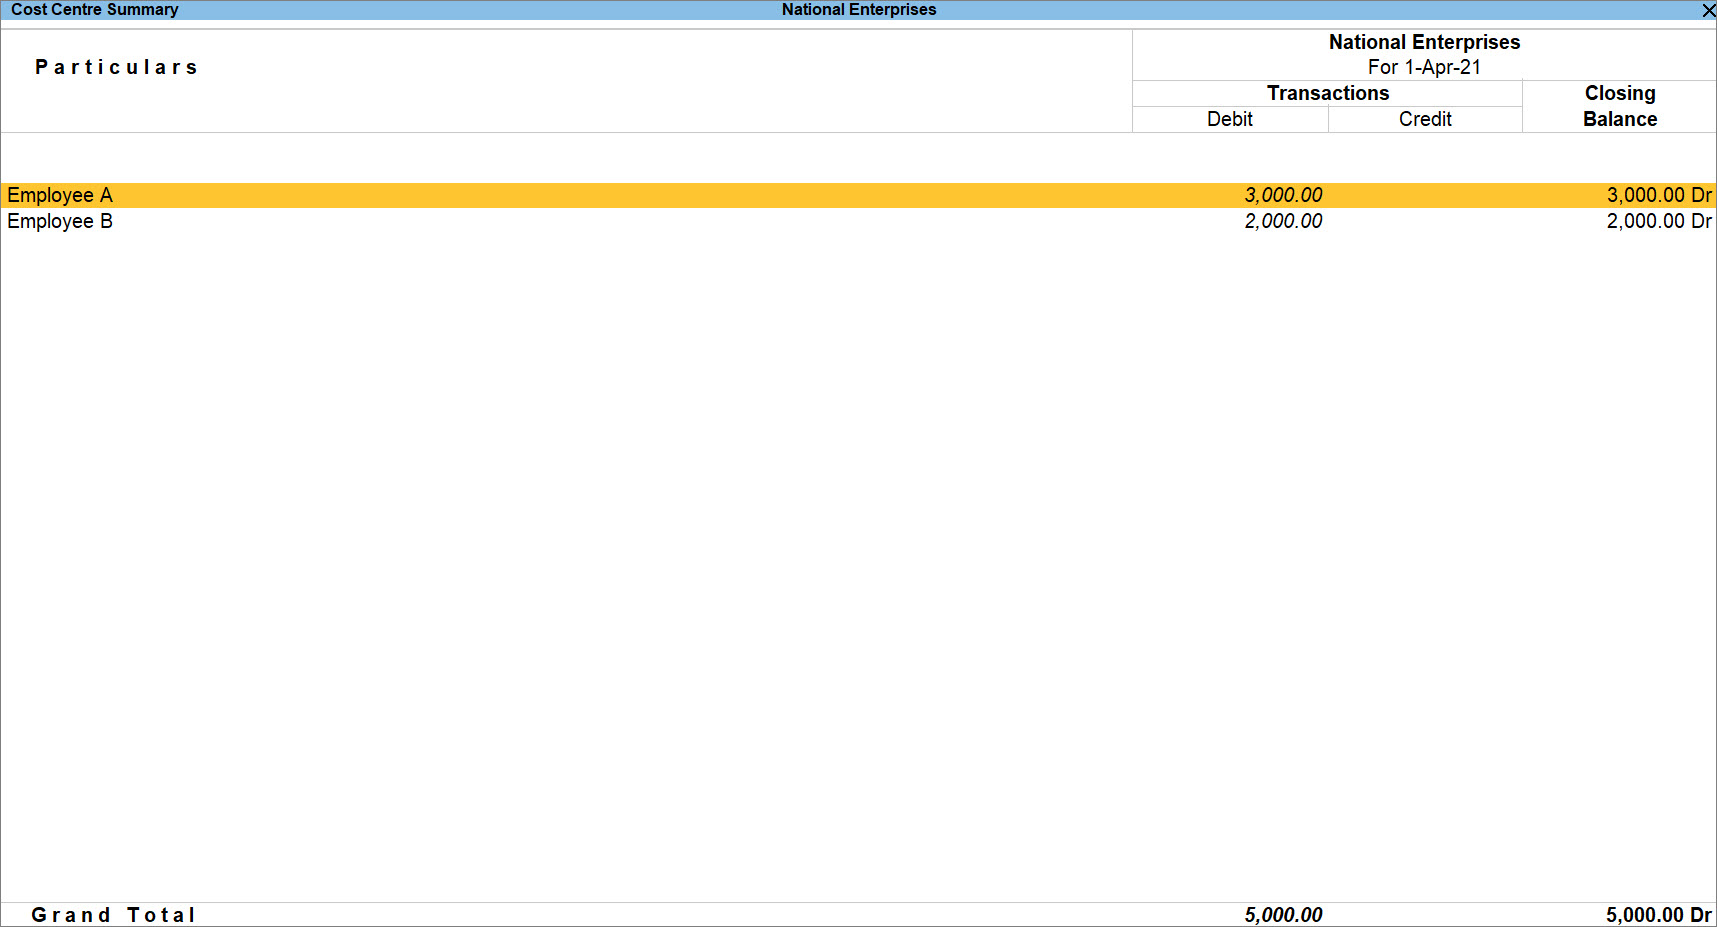
To view the Cost Centre details for Payment Voucher in reports, follow the step given below.
- Press Alt+G (Go To) > type or select Ledger Vouchers and press Enter
- Select the ledger from the List of Ledgers.
If you want to view vouchers created for:- Cash or Bank payment, then select the respective Cash or Bank ledger.
- Purchase of goods or services, then select the respective Purchase ledger.
The Ledger Vouchers report opens.
- Press F2 (Period) and enter From and To dates, if needed.
- Press F12 (Configure) > Show Cost Centre details : Yes.
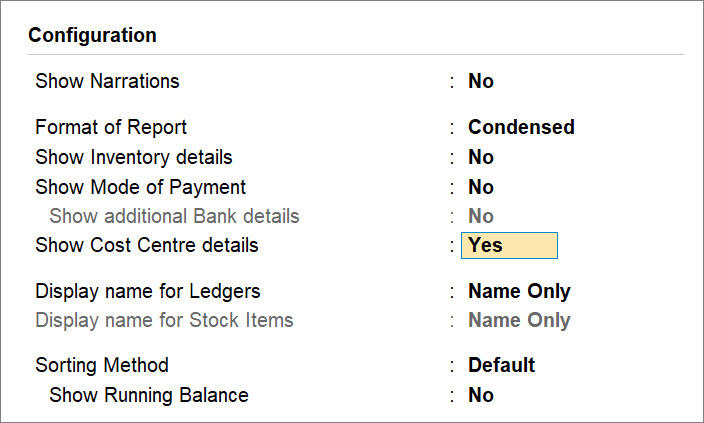
- Press Ctrl+A to save the setting.
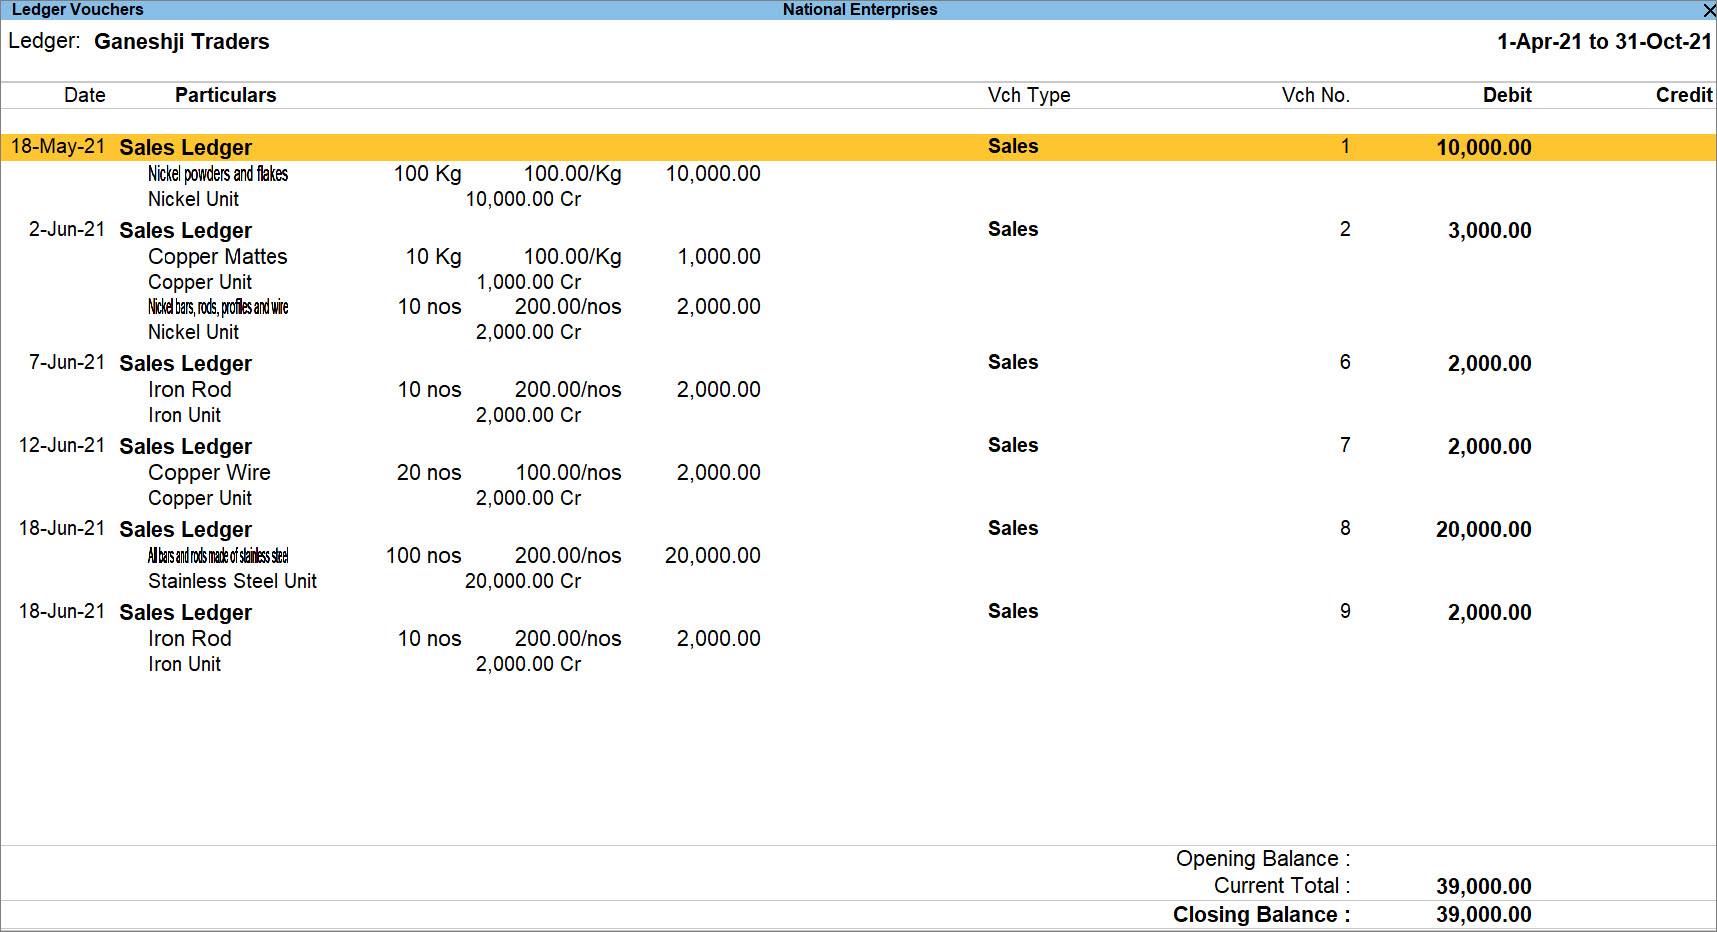
The Ledger Vouchers report appears as shown below.
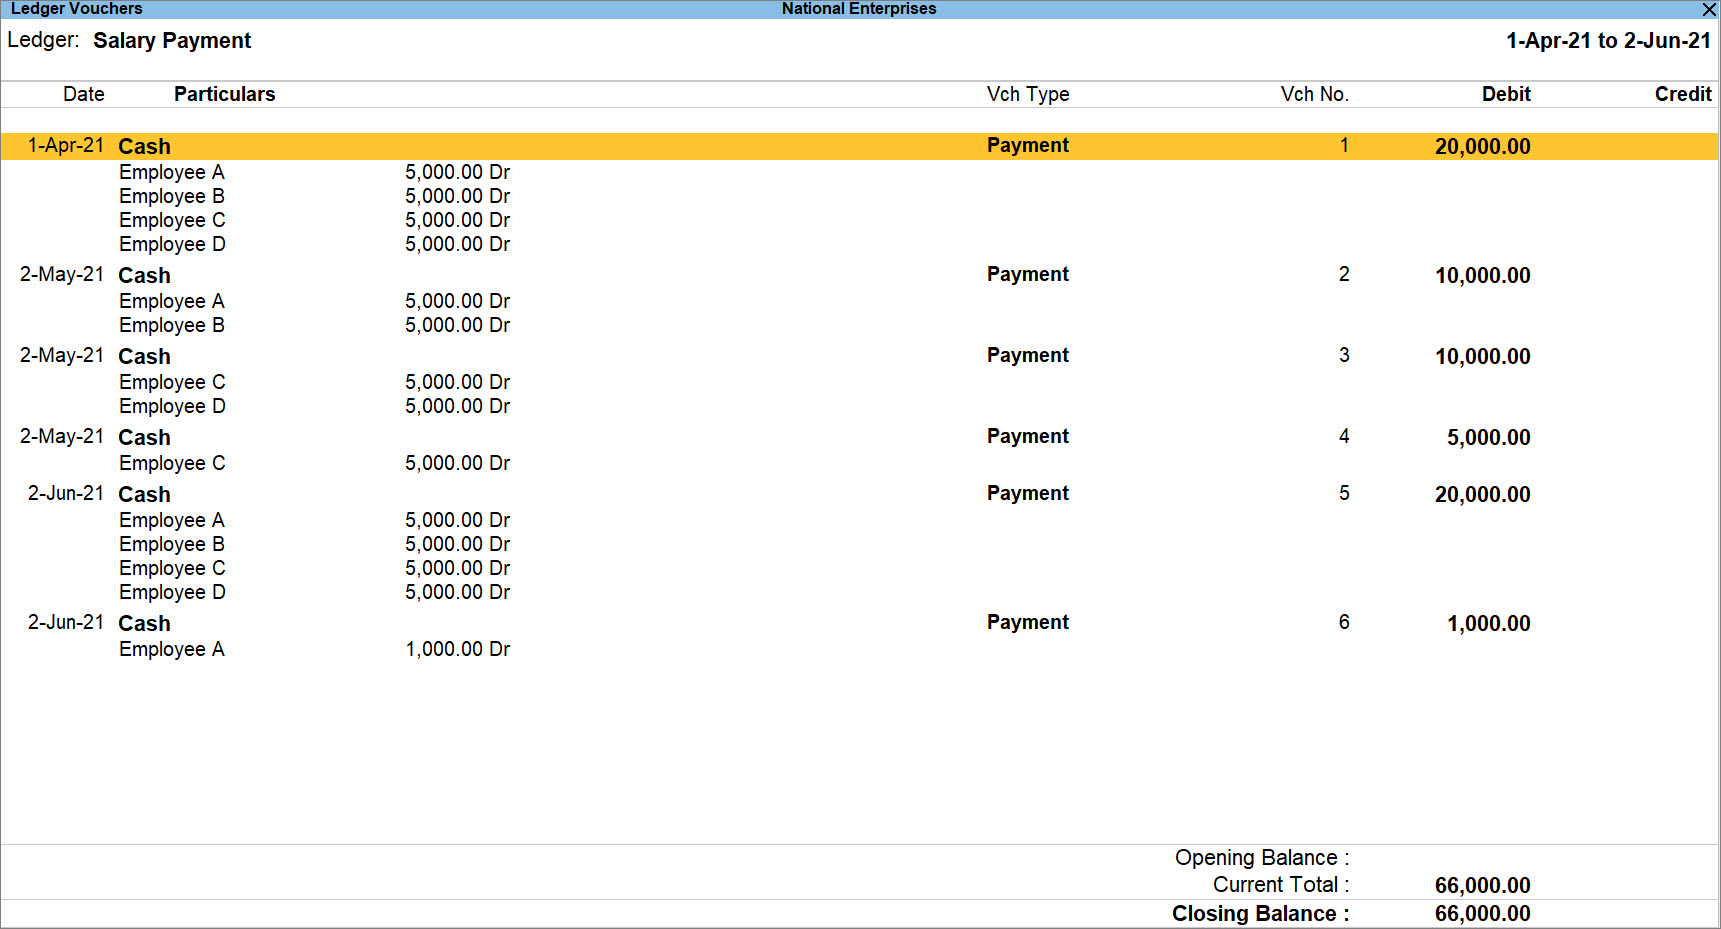
Yes, you can view Cost Centre details in a report in TallyPrime. Follow the steps given below.
- Press Alt+G (Go To) > Ledger Vouchers > type or select ledger name and press Enter.
- Press F2 (Period) > enter From and To
The Ledger Voucher report for the selected report will be displayed. - Press F12 (Configure) and set the following:
- Format of Report : Detailed.
- Show Inventory details : Yes.
Note: You need to set this only if Inventory values are affected and Cost Centre are applicable are set to Yes in the ledger.
- Show Cost Centre details : Yes.
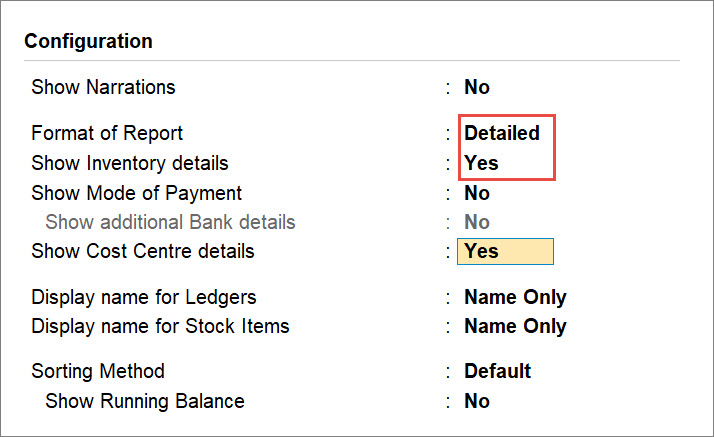
Press Ctrl+A to save the setting.
The Ledger Voucher report with Cost Centre details appears as shown below.
Reason:
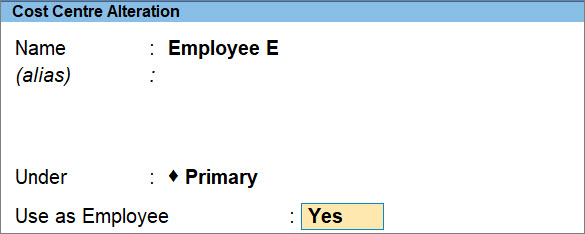
You will not be able to use Cost Centres while recording Journal, Receipts, and Payment vouchers in TallyPrime, if the option Use as Employee is set to Yes in the Cost Centre master as shown in the screen below.
As shown in the Payment Voucher below, the Cost Centre Employee E does not appear while selecting in the Cost Centre/Classes.

Solution:
In the Payment Voucher:
- Press F12 (Configure) and set Show List of Employees as Yes.

- Press Ctrl+A to save the setting.
Now, the option to select the employee will appear while select in the Cost Centre/Classes field.

Reason:
This message is displayed when the number of decimals for Rate of Exchange is different at locations (Server/Client).
Solution:
To synchronise the data, you need to maintain the same number of currencies in both the Company data.
For instance, the Rate of Exchange for UAE Dirhams is entered as 5.4751 in the Company data for the main office from which the data is exported. And in the Company data of the branch office, you have entered it as 5.4751 to which data is being imported.
In such a case, TallyPrime will show this message.
You need to enter either 5.4751 or 5.47 in the Company data of both the offices.
This message appears when you have created the same cost centre under different cost categories in the exported data and the Company data to which you are importing it.
For instance, the exported data has a cost centre named C under the Primary Cost Category. And the Company data to which the data is imported also has a cost centre named C under the Secondary Cost Category.
In such a case, the message will appear.
You can alter the cost centre at the importing end and re-categorize it as Primary Cost Category.
You can then import the transactions.
Reason:
This happens when the name of Cost Category is not the same in the exported data and the data to which it is being imported.
Solution:
You can either:
- Create a new category of the same name in the Company data to which you are importing the data.
- Have cost categories of the same name in both the Company data.
If one of the two conditions are met, then you can import the data with cost categories seamlessly.


