
Download and Install TallyPrime & TallyPrime Edit Log
Getting started with TallyPrime for the first time? Installing it is quick and hassle-free! In just a few steps, you’ll have TallyPrime up and running, ready to manage your business effortlessly.
The process of downloading and installing is same for both TallyPrime and TallyPrime Edit Log. However, you can easily differentiate between them—from the setup file and application appearance to the screen when you launch the application.
If you are already using an earlier version of Tally, then upgrade to TallyPrime or TallyPrime Edit Log, as applicable. Thereafter, you can continue your business as usual.
- TallyPrime is perfect if you need a simple yet powerful business management solution for accounting, inventory, and compliance.
- TallyPrime Edit Log is recommended for businesses that require a detailed audit trail of all transactions to meet statutory compliance.
- Generate and verify the SHA-256 checksum to ensure the setup files are secure and haven’t been altered or damaged during download.
Click ![]() to watch our short video on how to download and install TallyPrime.
to watch our short video on how to download and install TallyPrime.
Step 1: Check Recommended System Configurations
Before installing, it is recommended that your system meets the following requirements:
- Administrator Rights – You must have admin privileges on your computer.
- Operating System – Microsoft Windows 7 or above.
- Bit – 64-bit (for the OS and applications like MS Excel, Adobe Acrobat, etc.).
- Memory (RAM) – Minimum 512 MB.
- Storage – At least 512 MB of available space on your hard disk or cloud storage.
Step 2: Download the Setup File
- Visit the Tally Solutions Website.
- Click Download to get the latest setup file.
The .exe file will be saved in your Downloads folder. - Move the file to another folder, if needed.
Step 3: Install the Application
- Double-click the setup.exe file to start the installation.
- Select Install New for a new installation.
- Configure Application Path, if required.
By default, the application is installed at:- C:Program FilesTallyPrime (for TallyPrime)
- C:Program FilesTallyPrimeEditLog (for TallyPrime Edit Log)
- Click Install to complete the installation.
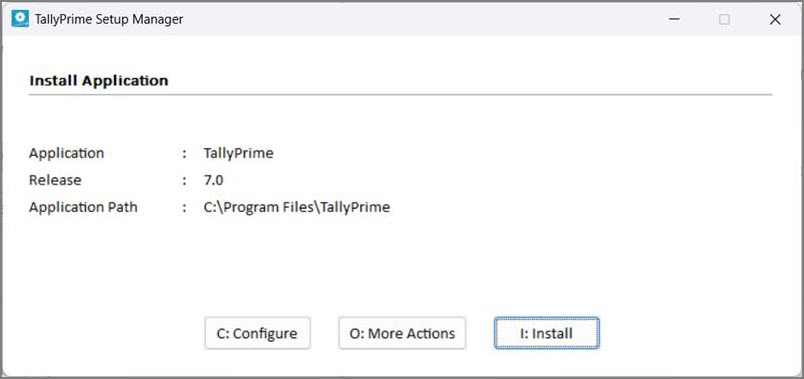
The application and Tally Scheduler are installed, and the following window opens.

If you are already using TallyPrime, then it is recommended that you install TallyPrime Edit Log in a different folder. This will allow you to use both the products simultaneously, if needed.
- Click Start TallyPrime to launch the application.
What’s Next: Activate your license to start using TallyPrime.
Step 4: Activate License
If you’re a new user, activate your license before you begin using TallyPrime.
- Single-User License: Activate on one computer.
- Multi-User License: Activate on one system and configure other installations over LAN.
You can activate your license now or any time later.


