Creating a TCP File: Step by Step Process
This document will help you understand how to compile your TDL code into a TCP file that can be uploaded on Tally Marketplace.
This guide takes you through the full process in TallyPrime Developer. You will set up a project, add your files, configure the build settings, write your code, build the TCP file and then check the output to make sure everything compiled correctly.
Go through the steps in order the first time. If you already have a project, Step 1 also shows you how to open it so you can pick up from there. By the end, you will have a TCP file in the Inscribed V2 format, ready for testing and distribution.
Prerequisite
Note: A valid TPD license is required to create a TCP file.
Step 1: Create a New Project
- Open TallyPrime Developer
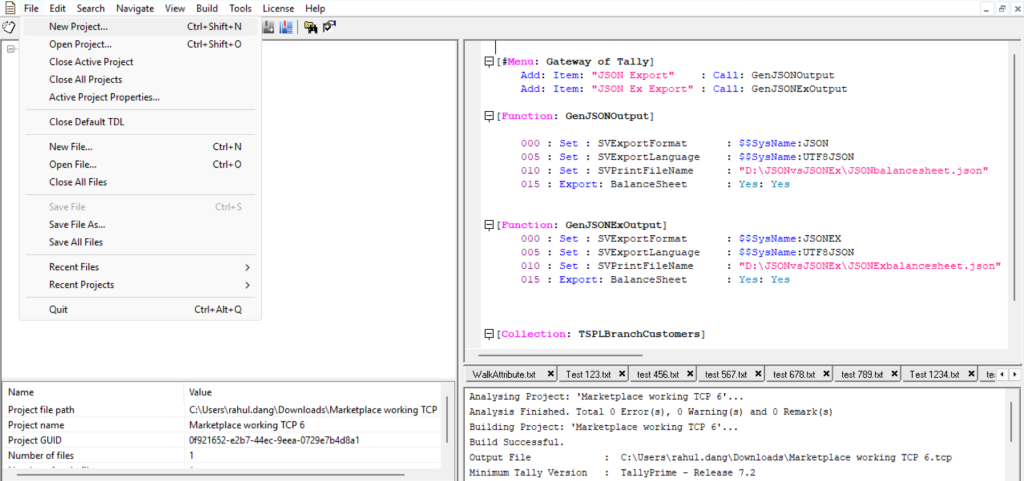
- Go to File → New Project (Shortcut: Ctrl + Shift + N).
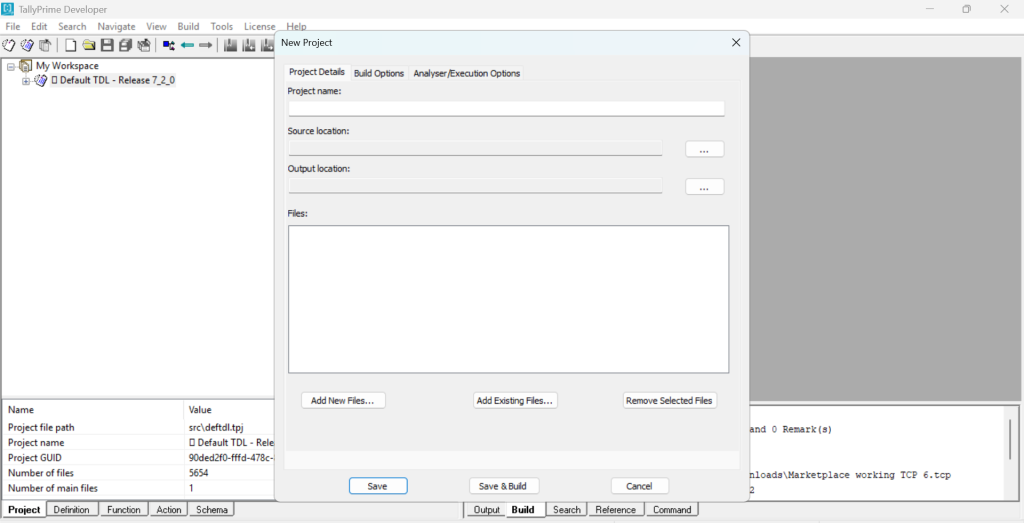
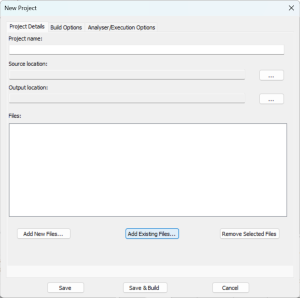
- In the Project Details window, provide the following:
- Project Name
- Source Location (where the project will be saved)
- To set the source location:
- Click the three-dot (…)
- Create or select a folder where the project will be stored.
- Save the project as TDL Project Files (*.tpj).
When the project is saved, the default output location for the TCP file is also set. You can change the TCP output location or name using the three-dot (…) button next to the output location field.
If you have an existing project
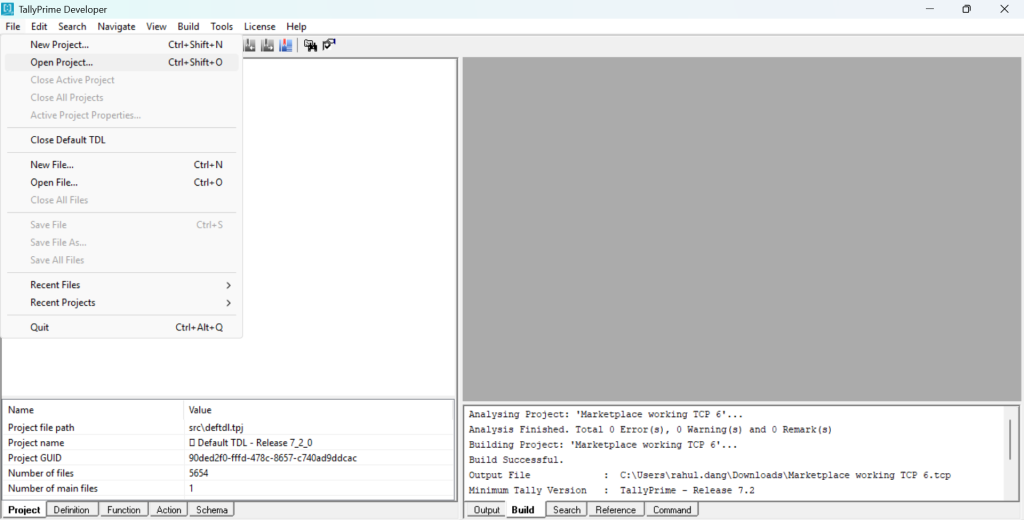
- Go to File → Open Project (Shortcut: Ctrl + Shift + O).
- Select the desired file.
Step 2: Add Files to the Project
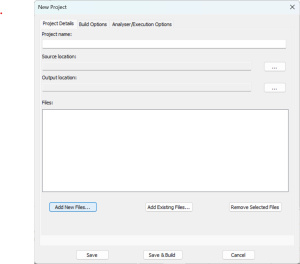
- From the New Project window, you have two options to add files to your project:
- Add New Files – to create a new file for writing fresh code
- Add Existing Files – to include existing text files in the project
Choose the appropriate option based on whether you are creating new code or using existing files.
Step 3: Configure Build Settings
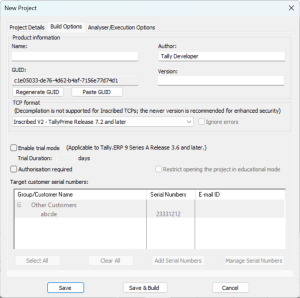
Go to the Build options and provide the following details:
- Name
- Enter a name similar to your solution name.
- Author Details
- Enter your organization name.
- Version (Optional)
- Example: 1.0, 1.1, etc.
- GUID
- Automatically generated.
- If you are updating an existing solution, make sure the GUID remains the same.
- TCP Format
- Ensure this is set to Inscribed V2.
- Ignore Errors (Optional)
- Enable this if your project contains unused code.
- This allows compilation by ignoring such errors.
- Trial Period (Optional)
- Enable if required and specify the trial duration.
- Authorization Required
- Do not select this option.
Step 4: Write the Code
- Once the project is loaded, all added files appear in the project window. Select the file where you want to write or modify code, and it will open in the editor window.
- Write or modify the TDL code as per your requirements.
Step 5: Build the TCP File
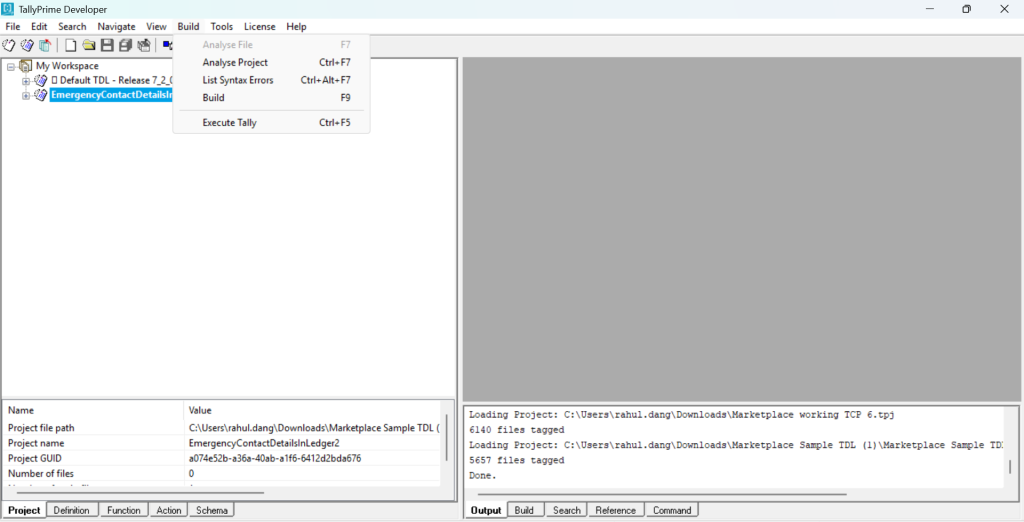
- Select the project you want to build.
- From the top menu, go to Build.
- Click Build or press F9.
Note: To select the project to be built, the project needs to be ‘set active’, if not already active (shows in bold) with right click on project and selecting set active
Step 6: Verify Build Output
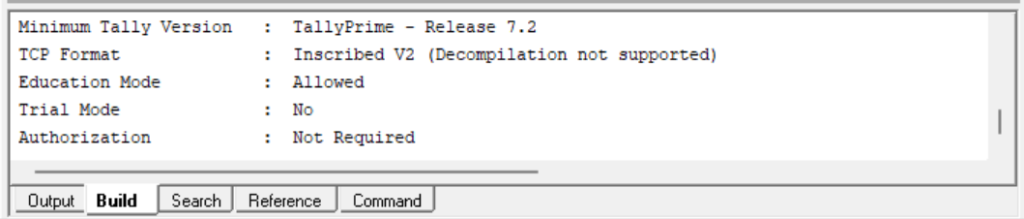
- After building, check the output screen:
- A success message confirms successful compilation.
- Trial period details (if configured) will be shown.
- Any compilation errors will also be listed.
Tips
Author Details
- Use your company or registered developer name
- Keep it consistent across releases
- Example: ABC Solutions Pvt Ltd
Avoid: nicknames or changing names.