Carry Forward the Balance of Loans and Advances of Payroll from Previous Year
Depending on your business policy, you might have provided loans and advances to your employees for certain purposes. However, loans are advances are cleared based on regular deductions from the employees salary, or other modes. It is possible that not all such amounts get cleared on close of a financial year. Therefore, it is important that you carry forward the balance loan and advance amounts from previous year to the current financial year for tracking. You can create specific ledgers for such balance amounts, update the pay heads and make necessary adjustments in your transactions to capture the opening balance for loans and advances. Such amount can then be tracked and monitored in your reports.
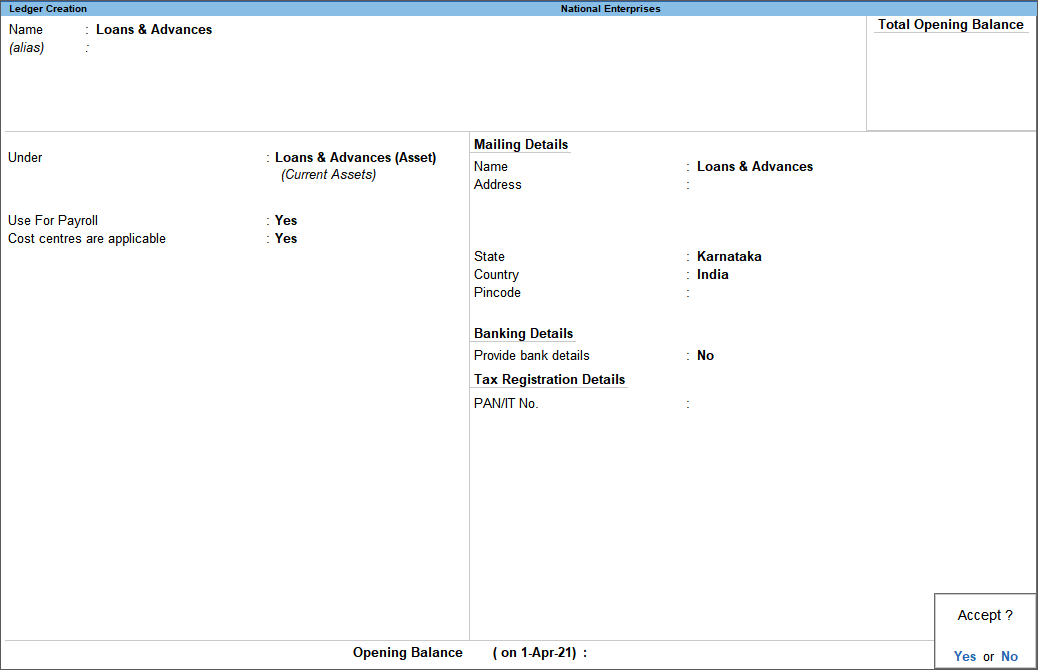
Create Ledger for Loans & Advances
- Gateway of Tally > Create > Ledger.
Alternatively, press Alt+G (Go To) > Create Master > Ledger. - Set the option Use For Payroll to Yes.
If you do not see this option, press F12 (Configure) and set the option Use Ledgers as Payheads in Payroll to Yes. - Set the option Cost centres are applicable to Yes.
- Accept the ledger. As always, press Ctrl+A to save.
Modify Loans & Advances Pay Head
- Gateway of Tally > Alter > type or select Loans & Advances pay head.
Alternatively, press Alt+G (Go To) > Alter Maser > type or select Loans & Advances pay head. - Set the option Affect net salary to Yes.
- Set the Calculation type as required. For example, you can select Flat Rate.
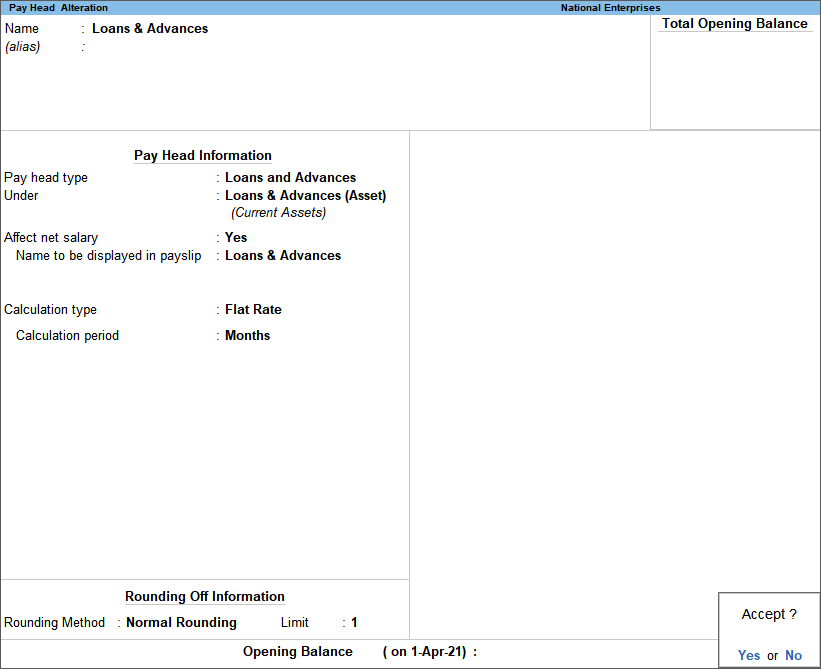
- Accept the pay head. As always, you can press Ctrl+A to save.
Create/Alter Salary Details for Employees
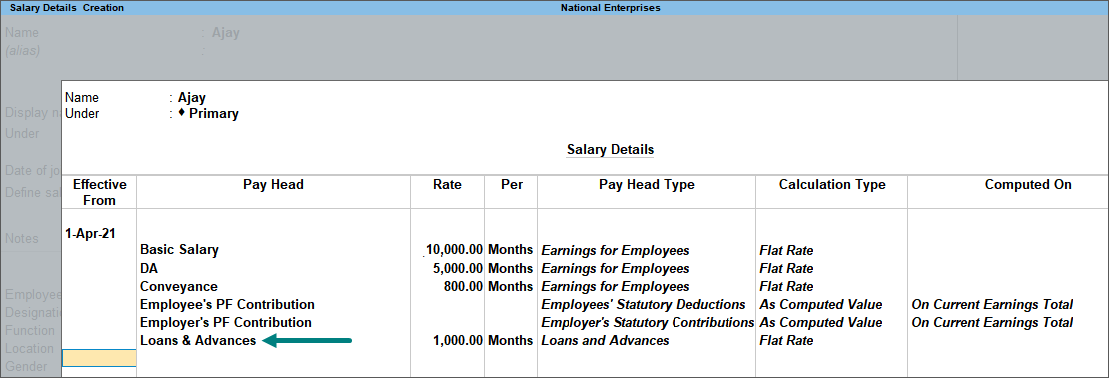
While creating salary structure with Pay Heads for Basic Pay, Conveyance, ESI, and so on, include the pay head ‘Loans & Advances’. Manually specify the amount that needs to be deducted from the employees’ monthly salary.
View Trial Balance
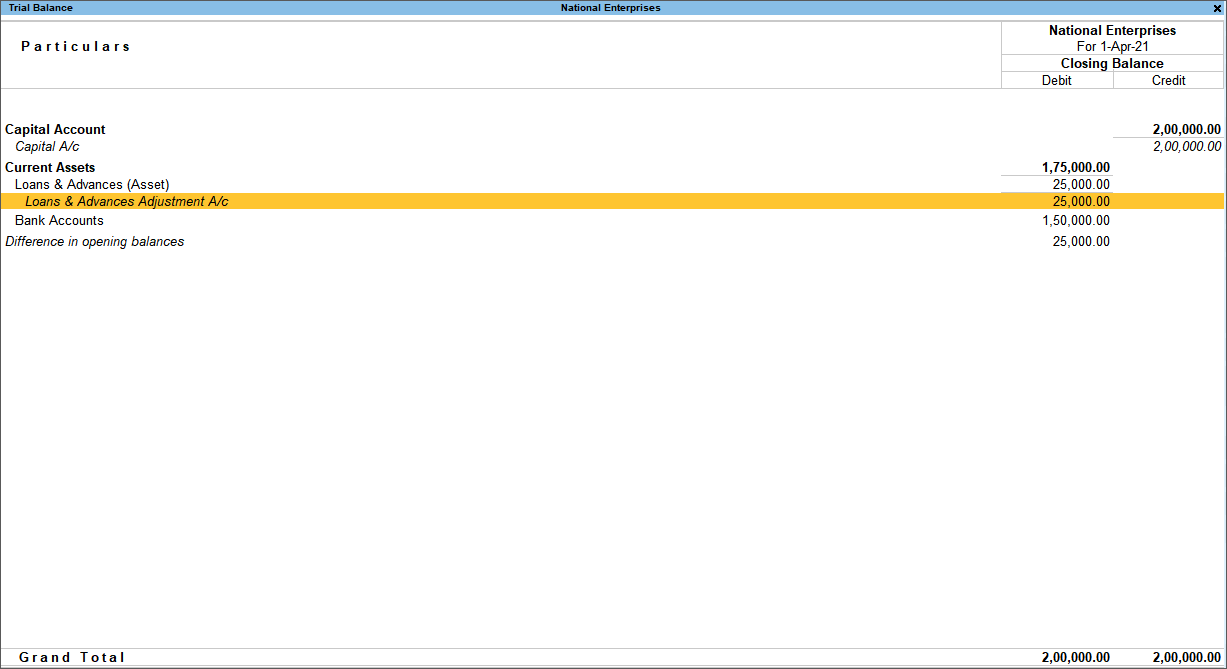
The Trial Balance will display the closing balance of Rs. 25,000/- for ‘Loans & Advances Adjustment’ account (ledger) which was used for maintaining employee loan account before implementing Payroll in TallyPrime. This must be transferred to the Loans & Advances ledger (Pay Head) by allocating the amount to the respective employees.
Create Journal Voucher for Adjustment Entry
Now allocate the amount taken by Mr. Ajay by recording an adjustment entry in a journal voucher. This is to transfer the opening balance to Loans & Advances pay head of Mr. Ajay, from the Loans & Advances Adjustment ledger.
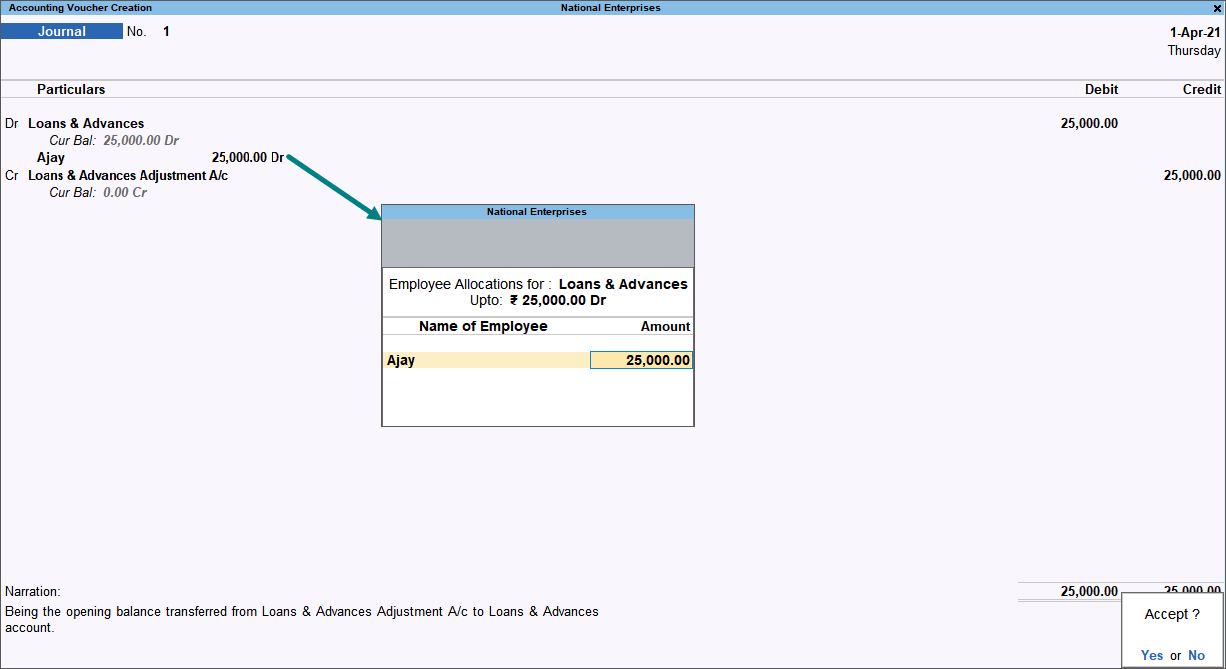
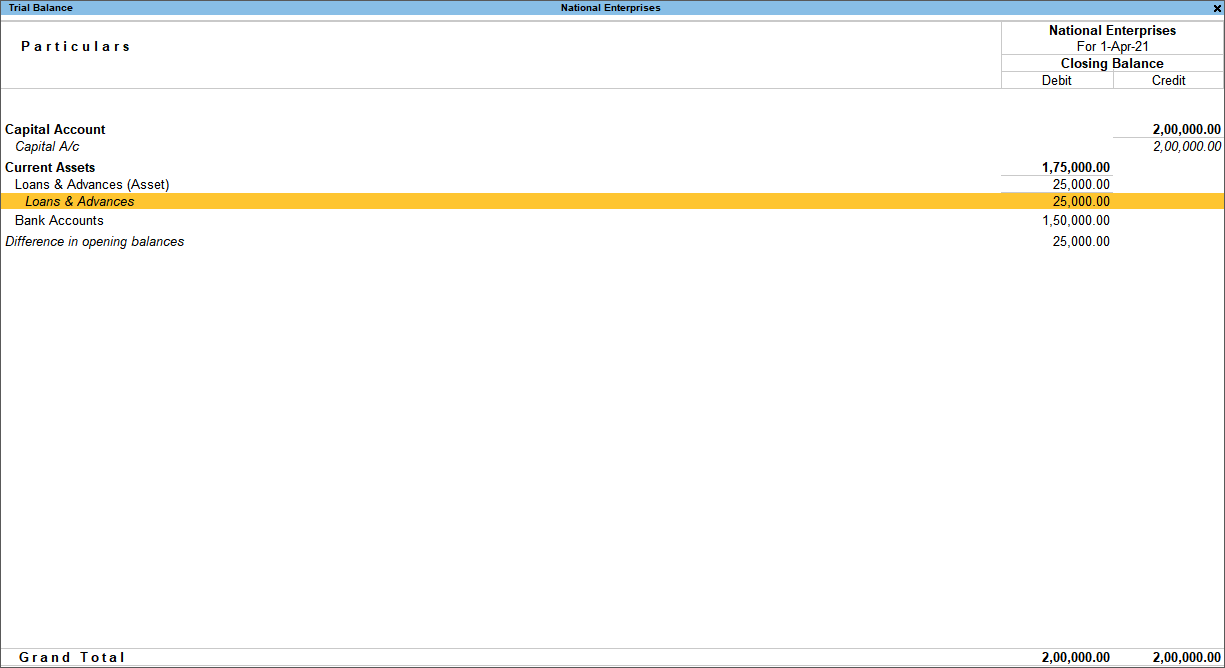
The Trial Balance will now show a debit balance of Rs. 25,000 in the Loans & Advances account (Pay Head).
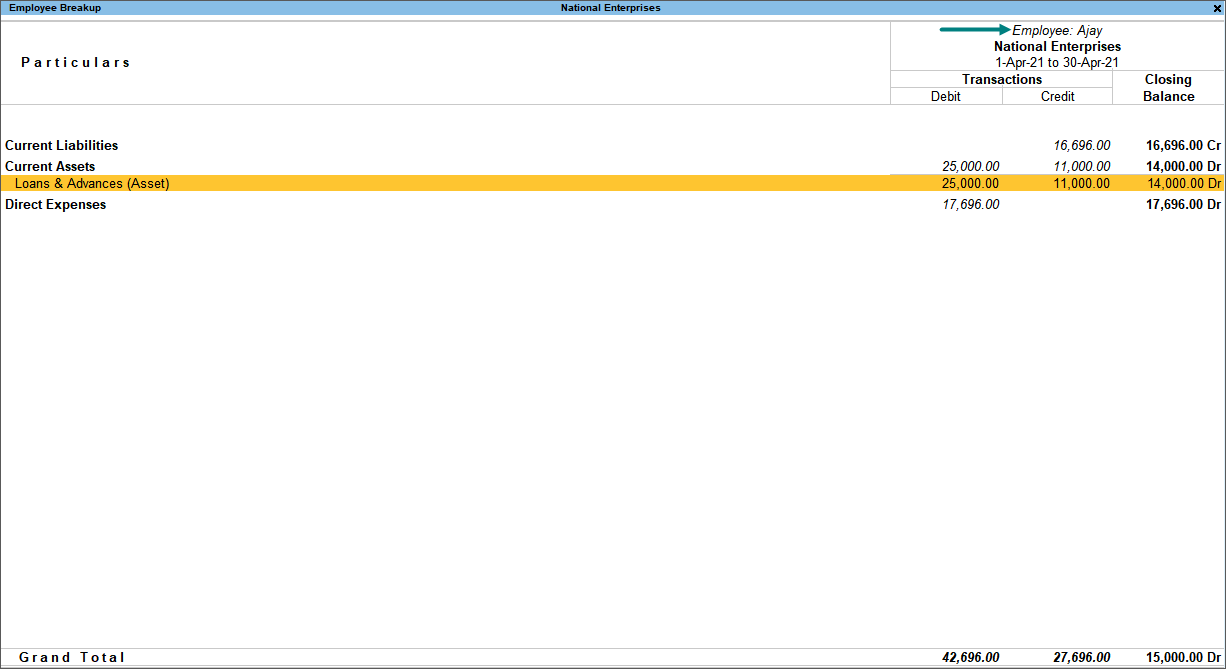
Now when you press Alt+G (Go To) > type or select Employee Pay Head Breakup > Loans & Advances, the debit balance of Rs. 25,000 will appear for the employee, as shown below.
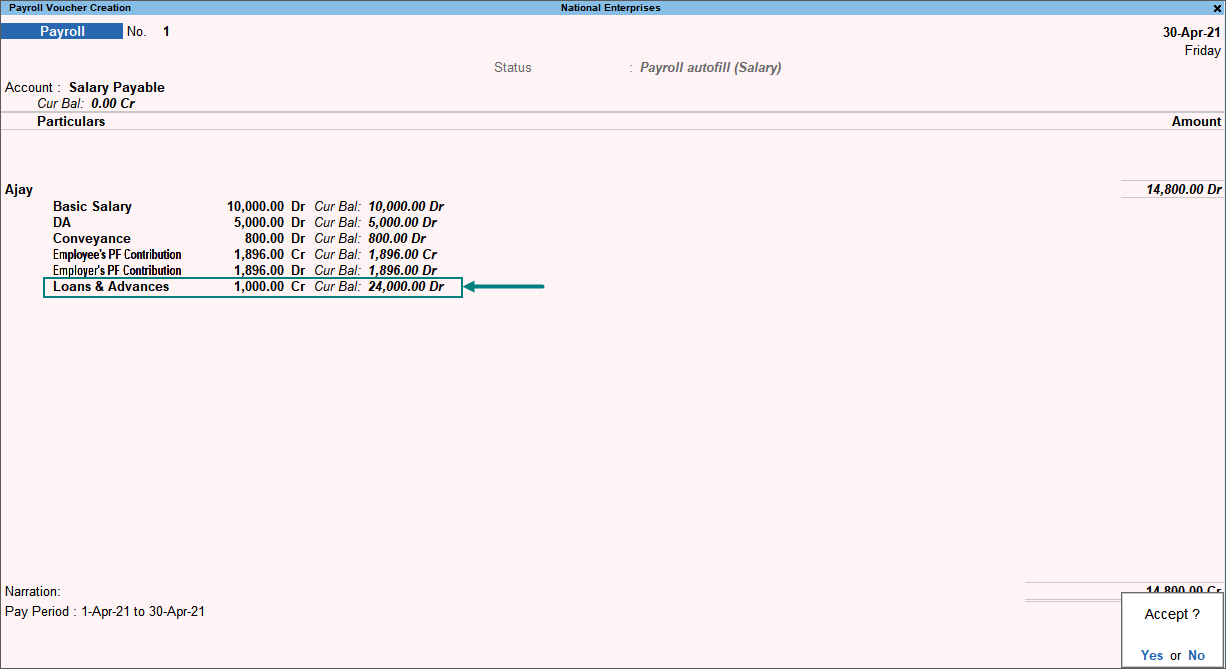
While recording the payroll voucher for Mr. Ajay, you will notice the opening balance of Loans & Advances being reduced from Rs. 25,000 to Rs. 24,000. This is due to the monthly deduction of Rs. 1,000 which is defined in the salary details of Mr. Ajay.
Check Pay Slip Breakup and Other Reports
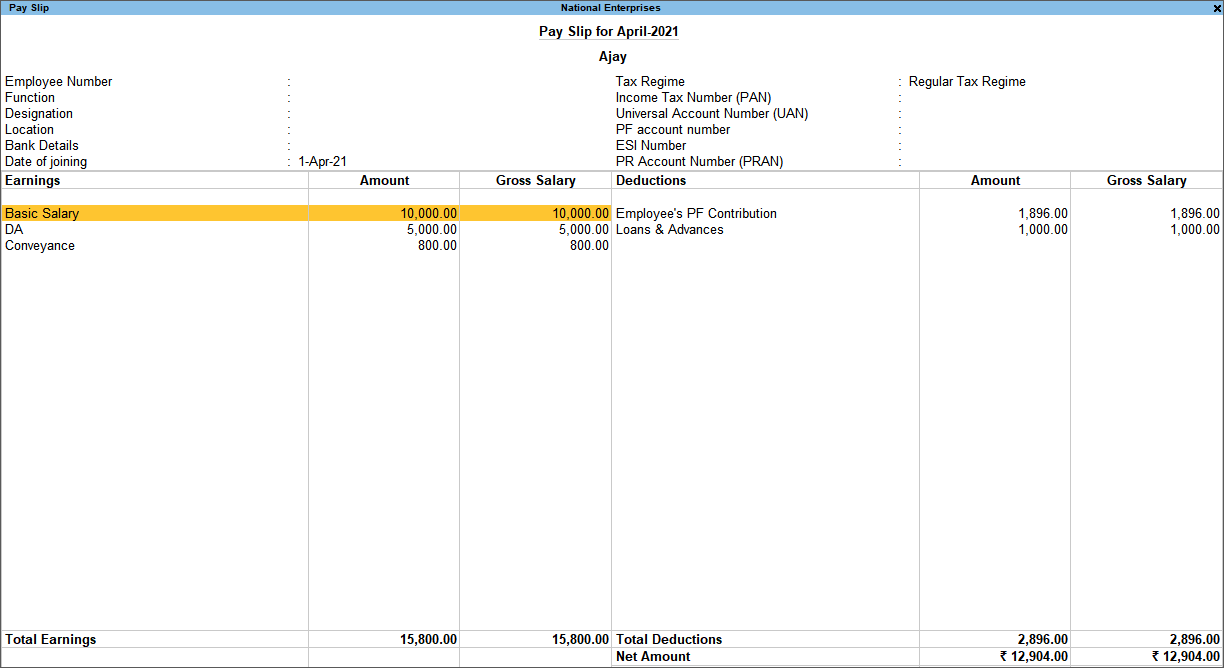
Now when you check the Pay Slip for the month of ‘April’, it will show you the amount deducted from Mr. Ajay’s Salary.
The ‘Employee Pay Head Breakup’ will show you the report as shown below.
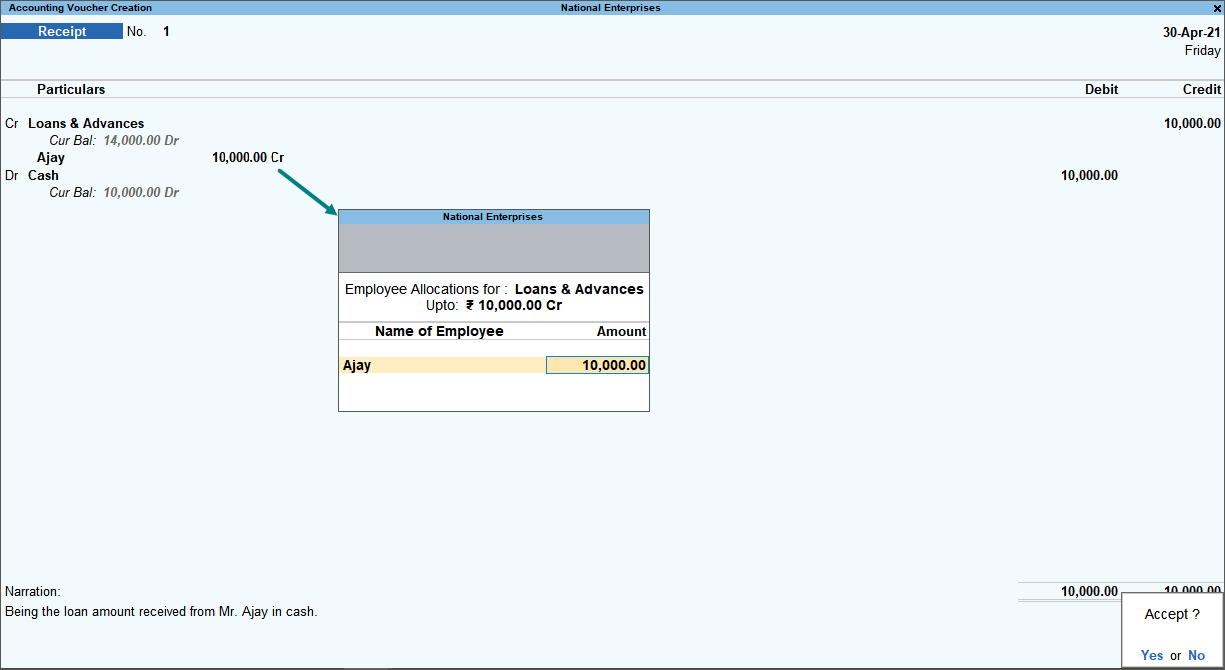
Consider a scenario where an employee is repaying a loan by paying the Employer in cash. The receipt entry for the same in the Employer’s book will be as follows:
Now press Alt+G (Go To) > type or select Pay Head Employee Breakup, to view the balance amount due from Mr. Ajay.
Record a payroll voucher for the month of May. You can check the difference by following the steps given below:
- Press Alt+A (Alter Column) > enter the period as 01-04-2021 to 30-04-2021.
- Select the name as Mr. Ajay with the group, Loans & Advances (Asset).
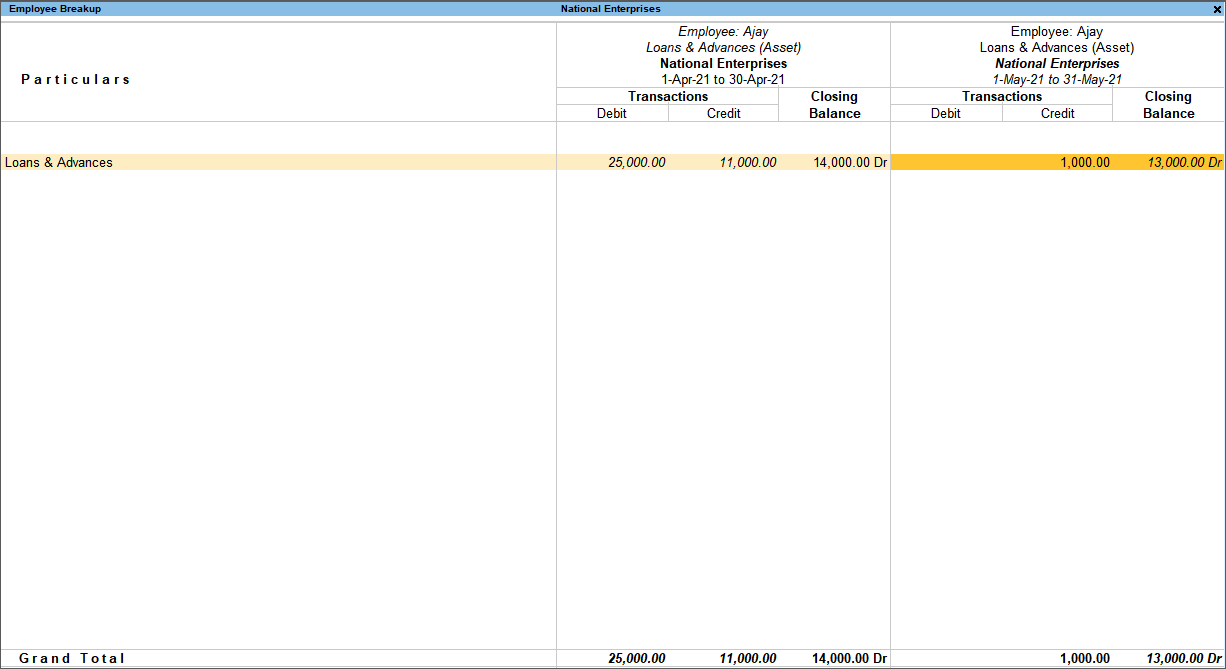
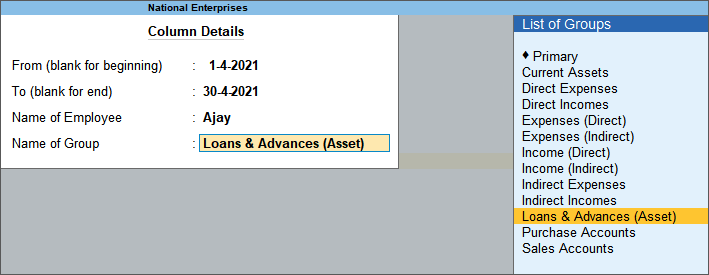 This will display the details of Loans & Advances of Mr. Ajay for the month of April.
- Press Alt+C (New Column) > enter the period as 01-05-2021 to 31-05-2021.
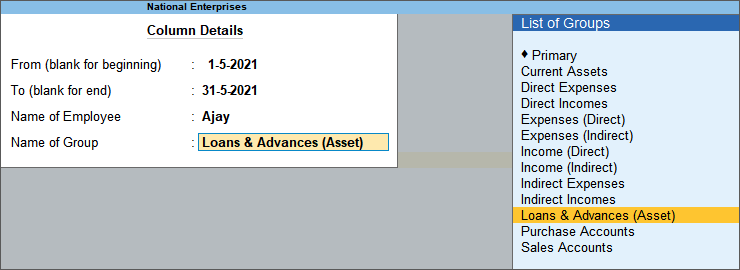 You will see the deductions of Rs. 1,000 made in the month of April and May in two different columns.