
Excise Credit Note – Linked to Original Supplier (Excise for Dealer)
Excise credit note can be recorded by linking it to the original supplier details.
The reference number of excise sales invoice is entered in the excise credit note, but linked to original purchase reference details. Hence the goods being returned, are not considered as new excise purchase. The same purchase reference will be used for subsequent sales of goods selected in credit note.
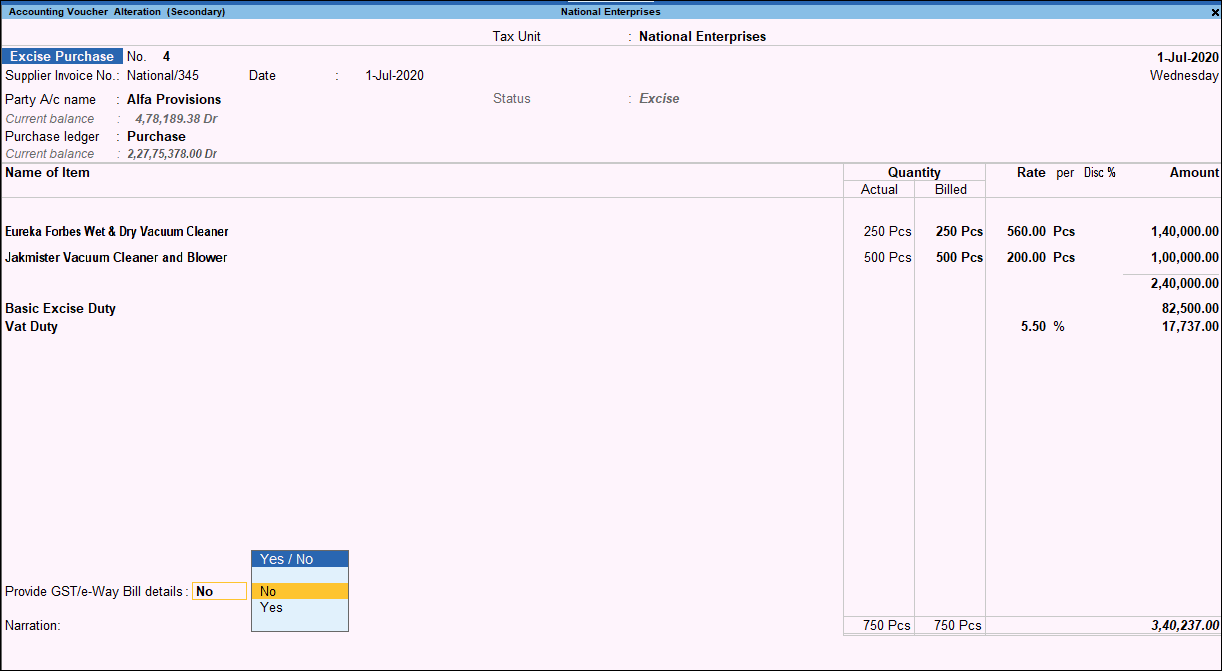
Purchase Invoice
Record an excise invoice for purchase from manufacturer as shown below:
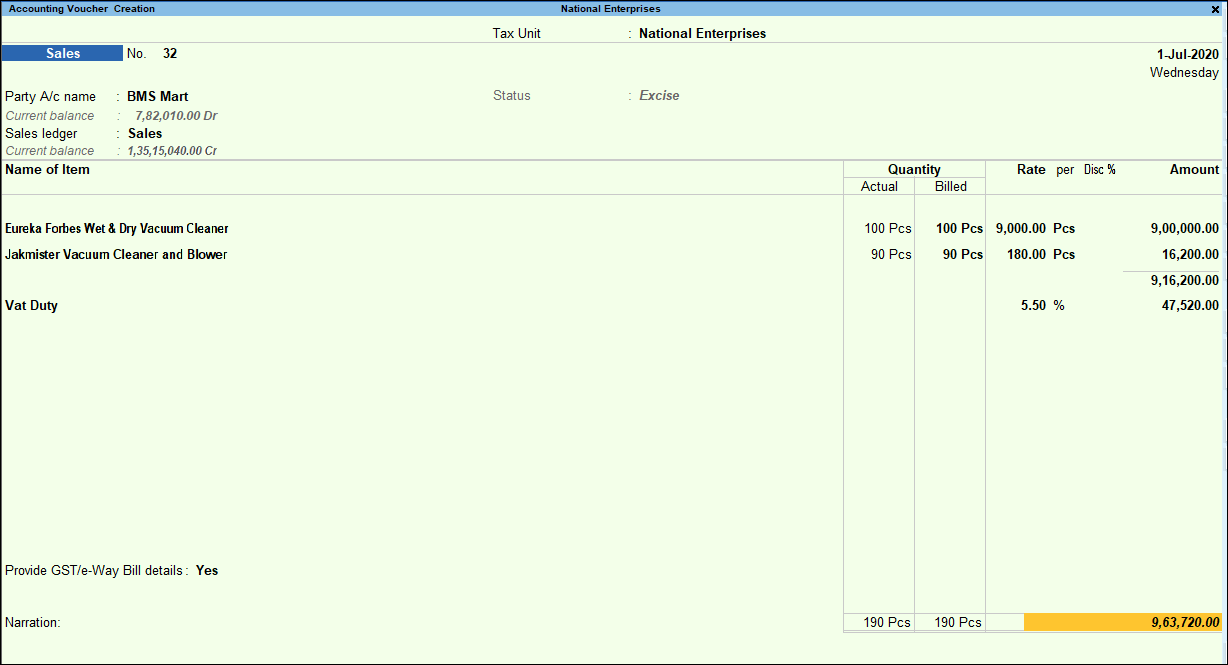
Sales Invoice
Record an excise sales invoice as shown below:
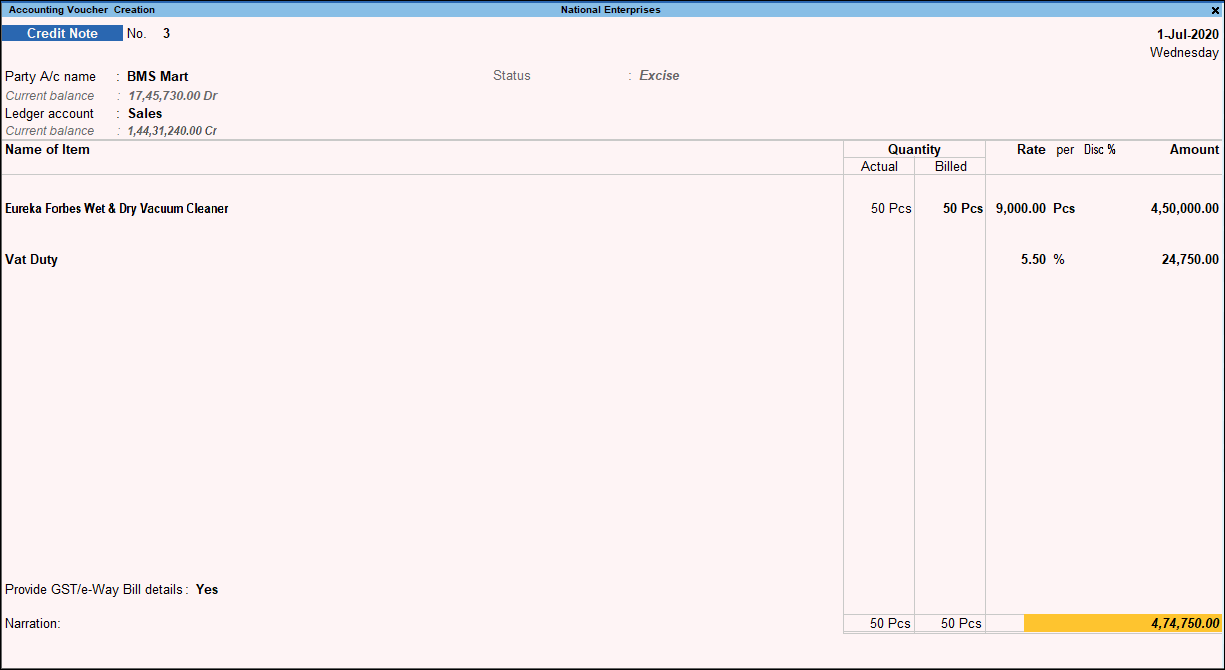
Credit Note
To record an excise credit note
- Gateway of Tally > Vouchers > press F10 (Other Vouchers) > type or select Credit Note.
Alternatively, press Alt+G (Go To) > Create Voucher > press F10 (Other Vouchers) > type or select Credit Note. - Press F12 (Configure).
- Set the option Allow selection of supplier reference for quantity returned to Yes.
- Press Ctrl+A to accept.
- Enter Original Invoice No. and Original Invoice Dt. of sales invoice against which the credit note is being recorded.
- Select the required Tax Unit.
- Tax Unit option appears only when the option Allow selection of Tax Unit for Credit Note/Debit Note is enabled in F12 Voucher Configuration of credit note.
- In the data, if more than one Tax Unit is created, then the relevant Tax Unit has to be selected in the invoice. If this option is disabled, the transaction count will appear in the exception, Unable to determine Excise Applicability of Summary of Uncertain Vouchers report, as it cannot be identified with any tax unit.
- Select the Party’s A/c Name from the List of Ledger Accounts.
- Select the Nature of Sales Return in the Party Details screen.
- Select the Sales Ledger grouped under Sales Accounts. Ensure the options Is VAT/CST Applicable and Is Excise Applicable are set to Applicable.
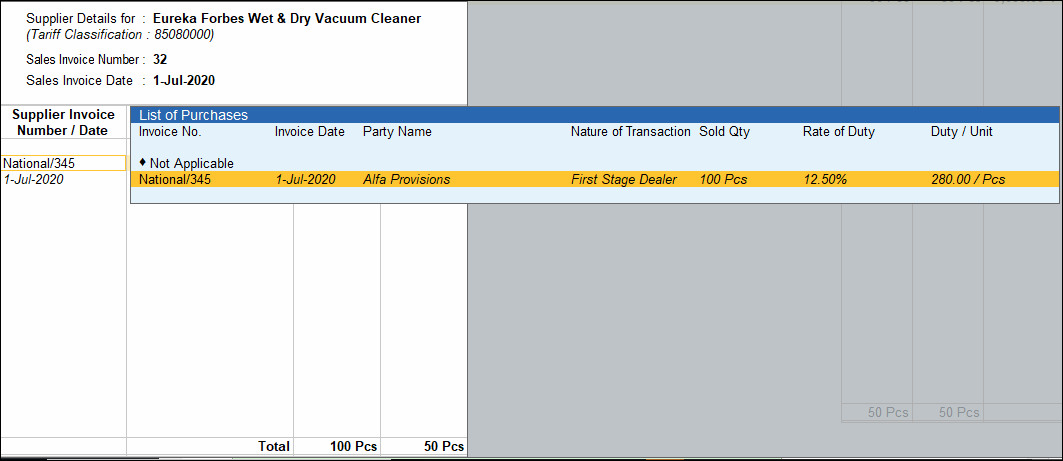
- Select the required stock item and press Enter. The Supplier Details screen appears. In the Supplier Details screen.
If the tariff details are not defined in the stock item master, it will be picked from:- Stock group, if user-defined stock group in which tariff details are defined is linked to the item.
- Tariff details defined at the company level.
- Enter the Sales Invoice Number. The Sales Invoice Date appears automatically.
- Select the reference details of original purchase invoice from the List of Purchases.
- Enter the quantity in the field Quantity Return. The Supplier Details screen appears as shown below:
- Press Ctrl+A to accept.
- Select the Godown in the Stock Item Allocation screen. The Quantity, Rate and Amount appears automatically.
- Select the VAT ledger.
- Set Provide VAT Details to Yes/No as per requirement.
- Enter the Inspection Document No. and Date. The credit note appears as shown below:
- Accept the screen. As always, you can press Ctrl+A to save.
Is this information useful?
YesNo


