Verify and Split Company Data – Errors and Resolutions
This page lists all the errors that appear either during the verification process or during the split process.
Verify Company Data
This section lists all the errors that appear in the List of Errors screen, after data verification. Many of these errors can be resolved using Auto Fix or Auto Correct, where TallyPrime will resolve the issue, after you confirm.
Resolution:
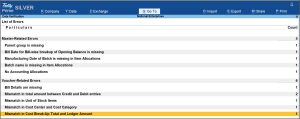
You can resolve this error by selecting the Auto Fix option or by entering the correct amount for the Cost Centre or Cost Centres in the Voucher Alteration screen.
Solution Method-1
- In the List of Errors screen, select the error Mismatch in Cost Break-up Total and Ledger Amount and press Enter to drill down to the List of Vouchers screen.
- Select the required voucher and press Alt+A (Auto Fix) to adjust the mismatch amount.
Solution Method-2
- In the List of Errors screen, select the error Mismatch in Cost Break-up Total and Ledger Amount and press Enter to drill down to the List of Vouchers screen.
- Select the required voucher and press Enter to open the voucher in the alteration mode.
- Enter the correct amount for the Cost Centre or Cost Centres to match the amount mentioned against the ledger.
- Press Ctrl+A to save the voucher.
You can follow either of the solution methods for other vouchers with this error.
Resolution:
You can resolve this error by either using Helper or without using Helper.
Solution Method-1
To resolve the error using Helper:
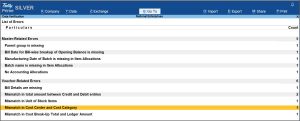
- In the List of Errors screen, select Mismatch in Cost Center and Cost Category, and press Enter to drill down to the List of Vouchers screen.
- Press L to access Helper.
- In the Replace Existing Cost Centre sub-screen, press Alt+A (Auto Fill) to automatically fill the New Cost Centre.
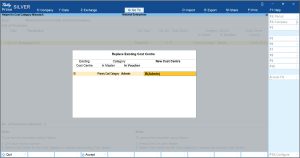
- Press Ctrl+A to save.
Solution Method-2
To resolve the error without using Helper:
- In the List of Errors screen, select Mismatch in Cost Center and Cost Category, and press Enter to drill down to the Data Verification screen.
- Under the List of Vouchers, select the required voucher and press Enter to open the Voucher Alteration screen.
- Select the correct Cost Centre for the Cost Category and press Ctrl+A to save the voucher.
You can follow either of the solution methods for other vouchers with this error.
Resolution:
You can resolve this error by selecting the Auto Correct option or by assigning the correct ledger in the Voucher Alteration screen.
Solution Method-1
- In the List of Errors screen, select Incorrect Bank Allocations in Vouchers and press Enter.
- Select Incorrect Ledger selected In Bank Allocation Details, and drill down to the List of Vouchers screen.
- Press Alt+A (Auto Correct) to assign the correct ledger for the Bank Allocation details and the voucher.
Solution Method-2
- In the List of Errors screen, select Incorrect Bank Allocations in Vouchers and press Enter.
- Select Incorrect Ledger selected In Bank Allocation Details, and drill down to the List of Vouchers screen.
- Select the required voucher and press Enter to open the Voucher Alteration screen.
- Re-accept the voucher, so that TallyPrime assigns the correct ledger for the Bank Allocation details.
You can follow either of the solution methods for other vouchers with this error.
Resolution:
You can resolve this error by enabling the Inventory values are affected option in the Ledger Alteration screen.
- In the List of Errors screen, select No Accounting Allocations, and press Enter to drill down to the List of Masters screen.
- Select the required ledger, and press Enter to open the Ledger Alteration screen.
- Press F12 (Configure) > Use Inventory Allocation for Ledgers to Yes.
- In the Ledger Alteration screen, set the option Inventory values are affected to Yes and press Ctrl+A to save.
You can follow the same procedure for other masters appearing with this error.
Resolution:
You can resolve this error either by changing the Group of the ledger to a Banking Group or by selecting the Auto Correct option to remove the Bank Reconciliation details.
Solution Method-1
To change the Group of the ledger:
- In the List of Errors screen, select Non-Banking Ledgers with Bank Reconciliation Details, and press Enter to drill down to the List of Masters screen.
- Select the required ledger, and press Enter to open the Ledger Alteration screen.
- In the Ledger Alteration screen, select the correct Group with banking details and save the ledger.
Solution Method-2
To remove Bank Reconciliation details using Auto Correct:
- In the List of Errors screen, select Non-Banking Ledgers with Bank Reconciliation Details, and press Enter to drill down to the List of Masters screen.
- Press Alt+A (Auto Correct) to remove the Bank Reconciliation details.
You can follow either of the solution methods for other masters with this error.
Resolution:
You can resolve this error by selecting the Auto Correct option.
- In the List of Errors screen, select Service Tax Category with Incomplete Details, and press Enter to drill down to the List of Masters screen.
- Press Alt+A (Auto Correct) to update the Service Tax Category.
You can follow the same procedure for other masters appearing with this error.
Resolution:
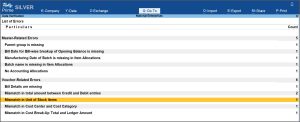
You can resolve this error either by altering the voucher and updating a different stock item or by correcting the unit of measurement for the stock item.
- In the List of Errors screen, select Mismatch in Unit of Stock Items, and press Enter to drill down to the List of Vouchers screen.
- Select the required voucher and press Enter to open the voucher in the alteration mode.
- Select End of List.
- Re-enter the stock item, or enter a different stock item, and mention the Quantity.
- Press Ctrl+A to save.
You can follow the same procedure for other vouchers appearing with this error.
Resolution:
You can resolve this error either by assigning the correct Group to the ledger to retain the Bank Allocation or by selecting Auto Correct to remove the Bank Allocation.
Solution Method-1
To resolve the issue by removing the bank allocation details:
- In the List of Errors screen, select Incorrect Bank Allocations in Vouchers and press Enter.
- Select Vouchers with Bank Allocation Details in Non-Banking Ledgers, and press Enter to drill down to the List of Vouchers screen.
- Press Alt+A (Auto Correct) to remove the bank allocation details.
Solution Method-2
To retain the Bank Allocation by assigning correct Group to the ledger:
- In the List of Errors screen, select Incorrect Bank Allocations in Vouchers and press Enter.
- Select Vouchers with Bank Allocation Details in Non-Banking Ledgers, and press Enter to drill down to the List of Vouchers screen.
- Select the required voucher and press Alt+L (Correct Ledger) to open the list of Non-Banking ledgers along with their current groups.
- Press Enter to open the ledger in the alteration mode and select the correct Group.
- Press Ctrl+A to save the ledger.
- In the List of Vouchers screen, select the voucher and press Enter to open it in the alteration mode.
- Press Ctrl+A to save the voucher.
You can follow either of the solution methods for other vouchers appearing with this error.
Resolution:
You can resolve this error to selecting Auto Correct to update the Bank Allocation details in the voucher.
- In the List of Errors screen, select Vouchers with Duplicate Bank Allocation Details, and press Enter to drill down to the List of Vouchers screen.
- Press Alt+A (Auto Correct) to update the bank allocation details in the voucher.
You can follow the same procedure for other vouchers appearing with this error.
Resolution:
You can resolve this error by re-accepting the voucher to match the total credit amount with the total debit amount in a transaction.
- In the List of Errors screen, select Mismatch in total amount between Credit and Debit entries, and press Enter to drill down to the List of Vouchers screen.
- Select the required voucher and press Enter to open the voucher in alteration mode.
- Check the details and re-accept the voucher, so that TallyPrime can match the total credit amount with the total debit amount.
You can follow the same procedure for other vouchers appearing with this error.
Resolution:
You can resolve this error by assigning the correct parent group to the master.
To assign correct parent group to the master:
- In the List of Errors screen, select Parent group is missing, and press Enter to drill down to open the List of Masters screen.
- Select the master that you wish to assign to a parent group and press Enter to open the Ledger Alteration screen.
- Click Under, and the List of Groups appears.
- Select the group that you want to set as the parent group for the master.
You can also select the Create option in the List of Groups to create a new parent group for the master. - Press Ctrl+A to save.
Alternatively, you can also assign a parent group to the master directly from the List of Masters screen.
- In the List of Errors screen, select Parent group is missing, and press Enter to drill down to open the List of Masters screen.
- Select the master that you wish to assign to a parent group and press Alt+U.
- In the Change Parent Group sub-screen, click Under to open List of Groups.
- Select the group from the List of Groups.
- Press Ctrl+A to save.
You can also assign a single parent to multiple masters as well.
- In the List of Errors screen, select Parent group is missing, and press Enter to drill down to open the List of Masters screen.
- Press Space bar to select the masters that you wish to assign to a parent group and press Alt+U.
- In the Change Parent Group sub-screen, click Under to open List of Groups.
- Select the group from the List of Groups.
- Press Ctrl+A to save.
You can follow the same procedure for other masters appearing with this error.
Resolution:
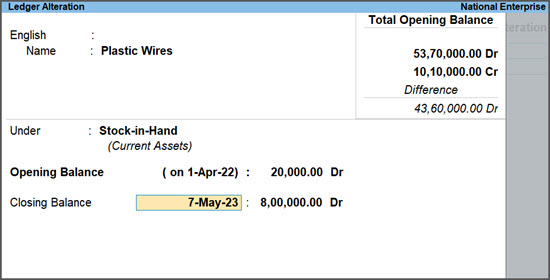
You can resolve this error by updating the date for closing balance for the ledger.
- In the List of Errors screen, select Date of Closing Balance is earlier than the Books beginning from date, and press Enter to drill down to the List of Masters screen.
- Select the required ledger, and press Enter to open the Ledger Alteration screen.
- In the Ledger Alteration screen, update the date for Closing Balance and press Ctrl+A to save.
You can follow the same procedure for other masters appearing under this error.
Resolution:
You can resolve this error by opening the correct Bill date in the Bill-wise Details screen.
- In the List of Errors screen, select Bill Date for Bill-wise breakup of Opening Balance is missing, and press Enter to drill down to the List of Masters screen.
- Select the required ledger, and press Enter to open the Ledger Alteration screen.
- In the Bill-wise Details screen, you can accept the pre-filled date or enter a correct date, as per your business requirement.
The date field is prefilled with the day before your Books beginning from date.
- Press Ctrl+A to save.
You can follow the same procedure for other masters appearing with this error.
Resolution:
You can resolve this error by setting the correct due date which is a later date than the bill date in the Bill-wise Details screen.
- In the List of Errors screen, select Due Date is earlier than Bill Date in Bill-wise details, and press Enter to drill down to the List of Masters screen.
- Select the required ledger, and press Enter to open the Ledger Alteration screen.
- In the Opening Balance field, select Dr and press Enter to open the Bill-wise Details screen.
- In the Bill-wise Details screen, enter the correct due date and press Ctrl+A to save.
You can follow the same procedure for other masters appearing with this error.
Resolution:
You can resolve this error by updating the manufacturing date of the stock item in the Stock Item Alteration screen.
- In the List of Errors screen, select Manufacturing Date of Batch is missing in Item Allocations, and press Enter to drill down to the List of Masters screen.
- Select the required stock item, and press Enter to open the Stock Item Alteration screen.
- In the Opening Balance field, select Quantity and press Enter to open the Stock Item Allocation screen.
- In the Mfg Dt. column, enter the date and press Ctrl+A to save.
You can follow the same procedure for other masters appearing with this error.
Resolution:
To resolve this error update the Bill Reference.
- In the List of Errors screen, select Bill Details are missing, and press Enter to drill down to the List of Vouchers screen.
- Select the required voucher, and press Enter to open the Voucher Alteration screen.
- Update the Method of Adj. and press Ctrl+A to save.
You can follow the same procedure for other vouchers appearing with this error.
Resolution:
You can resolve this error by updating the correct godown in the Voucher Alteration screen or by enabling the storage of materials for one or more godowns.
Solution Method-1
To update the correct godown in the voucher:
- In the List of Errors screen, select Godown in Item Allocation does not allow storage of materials, and press Enter to drill down to the List of Vouchers screen.
- Select the required voucher, and press Enter to open the Voucher Alteration screen.
- Select the correct Godown.
Alternatively, you can create a new godown and configure to allow the storage of materials using F12 configuration. - Press Ctrl+A to save.
Solution Method-2
To update the Godown configuration:
- In the List of Errors screen, select Godown in Item Allocation does not allow storage of materials, and press Enter to drill down to the List of Vouchers screen.
- Select the required voucher and press Alt+L (Correct Godown).
- In the Godown column, select the required godown and press Enter to open the Godown Alteration screen.
- Set Allow storage of materials to Yes and press Ctrl+A to save.
Alternatively, you can allow the storage of materials for multiple godowns as well.
- In the List of Errors screen, select Godown in Item Allocation does not allow storage of materials, and press Enter to drill down to the Data Verification screen.
- Press Alt+L (Correct Godown).
- In the Godown column, select multiple godowns by pressing Spacebar and press Alt+U (Update Details) to allow the storage of materials.
- Set Allow storage of materials to Yes and press Ctrl+A to save.
You can follow either of the solution methods for other vouchers appearing with this error.
Resolution:
You can resolve this error by updating the Batch name in the Stock Item Alteration screen.
- In the List of Errors screen, select Batch name is missing in Item Allocations, and press Enter to drill down to the List of Masters screen.
- Select the required stock item, and press Enter to open the Stock Item Alteration screen.
- In the Opening Balance field, select Quantity and press Enter to open the Stock Item Allocation screen.
- In the Batch column, update the Batch name and press Ctrl+A to save.
You can follow the same procedure for other masters appearing with this error.
Resolution:
You can resolve this error by selecting or creating a different Parent group, that has the same Cost Category as the Cost Centre.

- In the List of Errors screen, select Parent Belongs to Different Category, and press Enter to drill down to the List of Masters screen.
- Select the required Cost Centre, and press Enter to open the Cost Centre Alteration screen.
- In the Category field, change the Cost Category to match it with the Cost Category of the Parent.
Alternatively, you can also change the Parent of the Cost Centre to match the Cost Category. - Press Ctrl+A to save.
You can follow the same procedure for other masters appearing with this error.
Split Company Data
This section lists all the errors that appear during the split process.
Cause: This error occurs when the Series Name is duplicate in any Voucher Type.
Resolution:
- Check and identify the voucher type containing duplicate series name.
- Alter the voucher type.
- Set Define multiple numbering Series for Vouchers to Yes.
- Select the duplicate Series Name and press Enter.
- Change the Series Name and save.

Cause: This error occurs when the Formal name of any of your units or currencies in TallyPrime contains a special character.
Resolution:
Let’s consider Unit masters for resolution.
- Check and identify the unit where the Formal name contains a special character.
- Alter the unit.
- Update the Formal name and save.
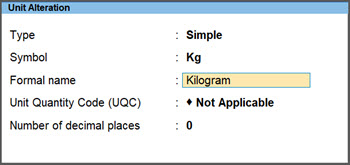
Follow the same steps for currencies, if needed.
Cause: This error occurs when the value in the Number of decimal places field for any of your units or currencies in TallyPrime is greater than four.
Resolution:
Let’s consider Unit masters for resolution.
- Check and identify the unit where the value in the Number of decimal places field is greater than four.
- Alter the unit.
- In the Number of decimal places field, enter a value less than four and save.
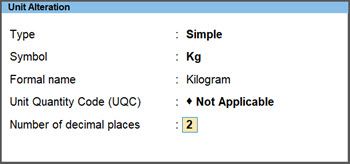
Follow the same steps for currencies, if needed.
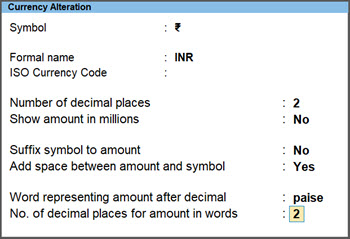
Cause: This error occurs when the value mentioned in the No. of decimal places for amount in words field is greater than the value in the Number of decimal places field for any of your currencies in TallyPrime.
Resolution:
- Check and identify the currency where the value in the No. of decimal places for amount in words field is greater than the value in the Number of decimal places field.
- Alter the currency.
- Update the value in the No. of decimal places for amount in words field and save.
Cause: This error occurs when the First unit and Second unit are same for any of your compound units in TallyPrime.
Resolution:
- Check and identify the compound unit where the First unit and Second unit are same.
- Alter the compound unit.
- Update the First unit or Second unit, accordingly and save.

Cause: This error occurs when the date mentioned in the From field is a later date than the date mentioned in the To field in any of your budgets in TallyPrime.
Resolution:
- Check and identify the budget where the date mentioned in the From field is a later date than the date mentioned in the To field.
- Alter the budget.
- Update the dates in the From and To field, accordingly and save.

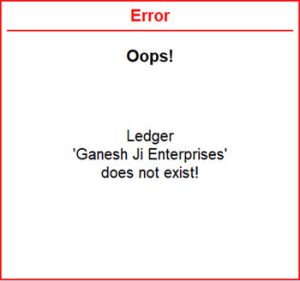
Cause: This error occurs when you have a particular ledger mentioned across various transactions but the ledger is currently not available in TallyPrime.
Resolution: You have to create the ledger again in TallyPrime.
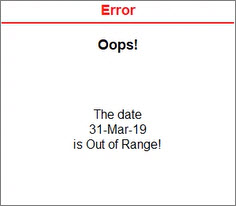
Cause: This error occurs when the date of Closing Balance of a ledger is not within the current Period of the Company.
Resolution:
- Open the TallyPrime installation folder and search for Tally.SPL file in your data folder.
- Open the Tally.SPL file in Notepad.
You can see the ledger in which the Closing Balance date is not within the current Period of the Company. - Alter the ledger.
- Update the Closing Balance date within the range of current period and save.
