
Create Employee Master in TallyPrime
You can create employees individually or in bulk, based on your requirements. Create a single employee master for individual hires, such as off-campus or lateral recruitment. For bulk hiring, like campus recruitment, create multiple employee masters.
- Ensure you have enabled Payroll in TallyPrime.
- Create the groups under which you want to create employees.
- Create earning pay heads, deduction pay heads, and Variable pay and bonus pay head to define employee salary structures.
Create Single Employee Master
- Press Alt+G (Go To) > Create Master > Employee and press Enter.
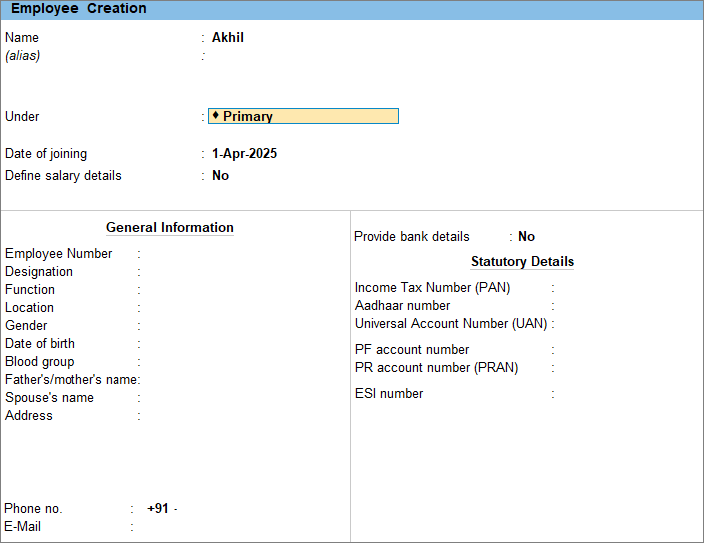
- Enter the employee details.
- Name: Enter the employee’s name to appear on the payslip.
- Under: By default, the employee is created under Primary.
If you want to create a new group and add employees under it, for example, Sales, Marketing, and so on, you can do so on the fly. - Date of joining: Enter the employee’s date of joining the company.
- Define salary details: Enable this option to enter the employee’s salary details.
- Enter the Employee Number, Designation, Location, Gender, Blood Group, Date of Birth, Address and so on under General Information.
- Enable Provide bank details to enter employee’s bank account information for salary processing.
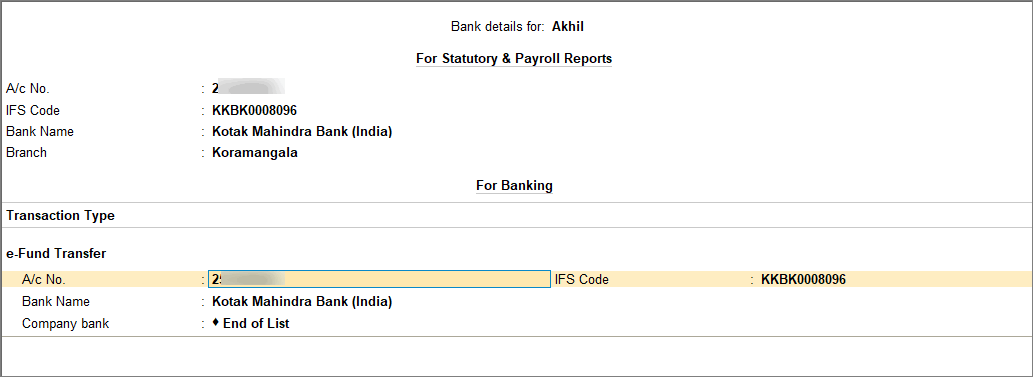
- On the Bank Details screen, under For Statutory & Payroll Reports section, enter the A/c No., IFS Code, Bank Name, and Branch.
These details appear on the employee’s payslip. - Under For Banking section, select the Transaction Type (for example, e-Fund Transfer).
The A/c No., IFS Code, and Bank Name are auto-filled based on the details entered under For Statutory & Payroll Reports section. These details are used to process salary transactions and can be modified if required.
- On the Bank Details screen, under For Statutory & Payroll Reports section, enter the A/c No., IFS Code, Bank Name, and Branch.
- Enter the statutory details of your employee, such as PAN, Aadhaar, UAN, PF number, ESI number, and PRAN to maintain records.
To skip this, disable the option from F12 (Configure). - Press Ctrl+A to save the master.
Create Multiple Employees Master
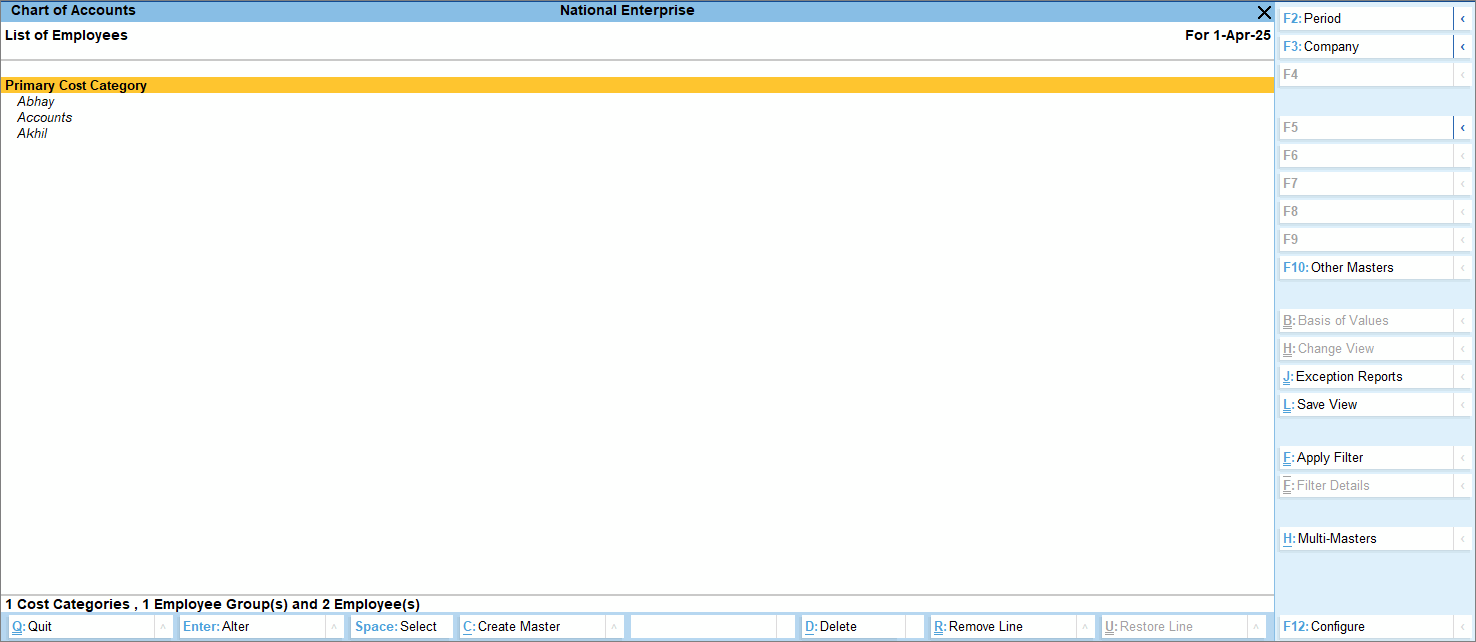
- Press Alt+G (Go To) > type or select Chart of Accounts > Employees and press Enter.
- Press Alt+H (Multi Masters) > select Multi Create and press Enter.
- Enter the employee details.

- Under Employee Group: Select All Items if you are creating multiple employees across different employee groups.
If you want to create all employees under a specific group, such as Sales, Marketing, and so on, you can create the group on the fly. - Employee Name: Enter the employee’s name to appear on the payslip.
- Under: If you have selected All Items in Under Employee Group, then you can select Primary, create a new group, or select an existing group.
- Date of joining: Enter the employee’s date of joining the company.
- Under Employee Group: Select All Items if you are creating multiple employees across different employee groups.
- Press Ctrl+A to save the master.
You can add the employee details by altering the individual employee master. Once the employees are created, you can create the attendance master.
If your organisation follows statutory compliance and the statutory feature is enabled, you will need to enter the relevant details while creating the employee master. To know more, click here.
Is this information useful?
YesNo


