
Set Up Party Ledgers for GST
To ensure your invoices are GST compliance ready, you need to set up your party ledgers with the required GST details updated. TallyPrime enables you to create party ledgers and enter the party’s tax registration details appropriately. You can also create one or more party ledgers in one go by fetching the registration details from the portal into TallyPrime with the use of parties’ GSTIN/UIN.
Before you begin | Prerequisites
- Enable GST for your company.
- Ensure that you have the party’s tax registration details/GSTIN/UIN.
Create a Party Ledger with Tax Registration Details
- Create a Party Ledger, as Sundry Creditor or Sundry Debtor as per your business needs.
- Enter the mailing details of the Party.
- Provide the required Tax Registrations Details of the party.
- Enter the valid PAN of the party.
- Select the Registration Type: for example, Composite, Regular, Unregistered Delarr and so on, as applicable.
- Enter the valid GSTIN/UIN of the party. This is important for a smooth filing experience.
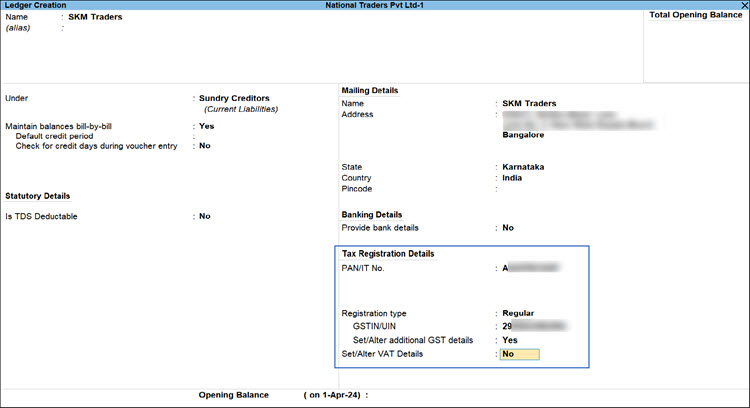
- Set/Alter additional GST details, if needed.
- Place of Supply (for Outwards): Select from the List of States.
- If your party is a transporter, set Is the Party a Transporter to Yes.
- Press Ctrl+A to save.
Create Party Ledger by Fetching Tax Registration Details from Portal
TallyPrime enables you to use the GSTIN/UIN of one or more parties to fetch the tax registration details directly from the Portal and create the ledgers, as needed.
Create a single party ledger
- Create a Party Ledger, as Sundry Creditor or Sundry Debtor as per your business needs.
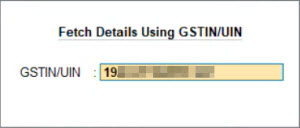
- Press Alt+L (Fetch Details Using GSTIN/UIN).
- In the Fetch Details Using GSTIN/UIN screen, enter the party’s GSTIN/UIN.
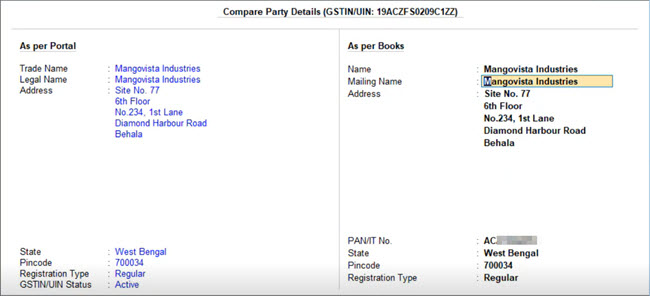
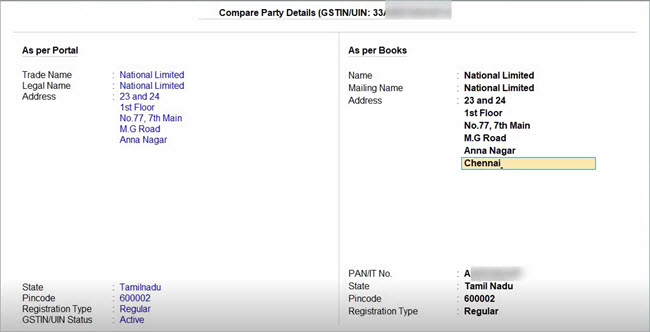
TallyPrime fetches the party’s registration details from the portal allowing you to validate the details instantly. - In the Compare Party Details screen appears, compare and verify the details in your ledger.
If needed, press Alt+S (Filing History) to view the filing history of the party.
The filing history will be fetched based on the party’s registration type. For example, if the party is a Regular dealer, then you can see the filing details for GSTR-1 and GSTR-3B. On the other hand, if the party is a Composition dealer, then you can see the filing details for CMP-08. - Make any necessary changes in the details under As per Books and save the details.
Create multiple party ledgers
- Press Alt+G (Go To) > Create Party Using GSTIN/UIN.
Alternatively, Chart of Accounts > Alt+H (Create Party Using GSTIN/UIN) > Create Party Using GSTIN/UIN. - Enter the GSTIN/UIN of the parties for which you want to create ledgers.
Alternatively, import them from your Excel file, if available.
- Press Alt+L (Import GSTIN/UIN from Excel).
For TallyPrime 6.2 or earlier, press Alt+F (Import GSTIN/UIN from Excel). - Specify the File Path, File to Import, Worksheet Name, and Column that contains the GSTINs/UINs.
- Press Alt+L (Import GSTIN/UIN from Excel).
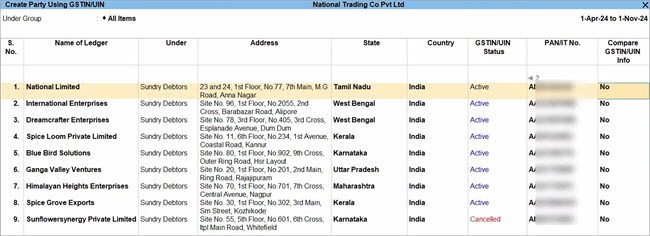
- Press Ctrl+A to save and fetch the details.
You can view all the relevant details of the parties, such as Address, GSTIN/UIN Status, and Registration Type.
If you want to delete any of the fetched entries, then select the ledger and press Ctrl+D.
- If you had already created some of the parties, set Compare GSTIN/UIN Info to Yes for the required party, and make necessary changes.
You can validate the GSTIN/UIN of one or more parties anytime, as needed. - Press Ctrl+A to save the details of all the party ledgers in one go.
You can view the newly created ledgers in Chart of Accounts, under Sundry Debtors/Creditors.
Is this information useful?
YesNo


