
Use Digital Signature in Invoices and Reports
Digital signature in TallyPrime helps you digitally sign and authenticate your documents. You can add digital signatures to the PDF format of the invoices and reports for Print, E-mail, Export, or WhatsApp in TallyPrime. Once you or the recipients have the digitally signed PDF, they will need to validate the digital signature to ensure the document is authentic.
Before you begin
- Obtain a Digital Signature Certificate (DSC) token or dongle issued from a Certifying Authority.
(eMudhra, Capricon, Verasys, Safescrypt, Pantasign CA, (n)Code Solutions, and IDSign CA) - Keep the Digital Signature PIN handy if you are using the digital signature for the first time.
You will get this PIN along with the token or dongle. You need to enter this PIN one time for generating the PDF with digital signature. - Ensure that your digital signature dongle is connected to your system.
Add Digital Signature to Invoices or Reports
Let us consider exporting an invoice or report in PDF format with digital signature. In case of E-mail and WhatsApp, all the steps for adding digital signature to invoices and reports remains the same. In case of printing, you can set up the print configuration for digital signature at the application level or for each invoice or report.
- Open any invoice and report and press Ctrl+E (Current).
- Under Export Settings > File Format, select PDF.
(If you are printing the document, you can set the Printer as Microsoft Print to PDF at this stage. The rest of the steps remain the same.) - Under Digital Signature, configure the necessary options.
- Select the required digital signature from the list.
- Set Ask before signing to Yes, if needed.
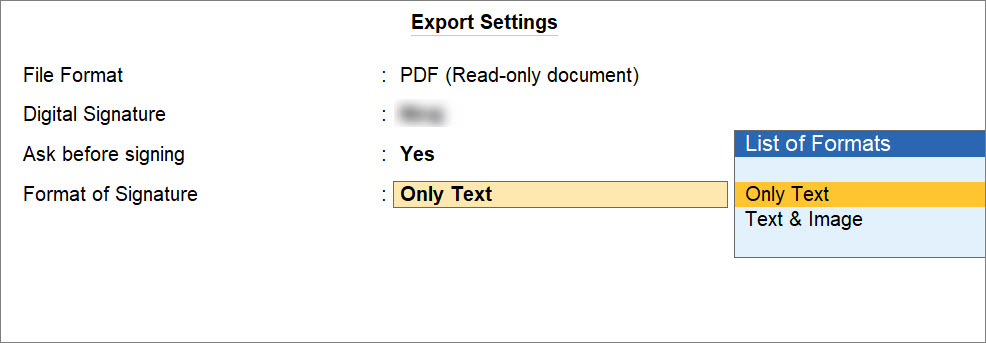
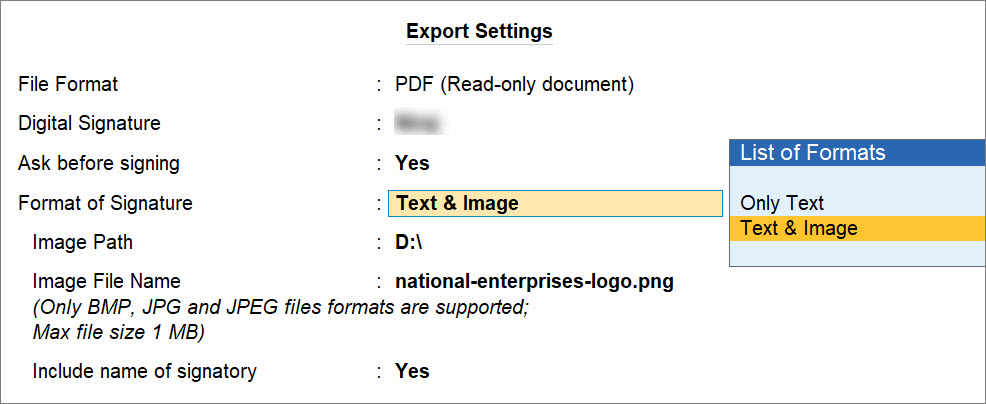
- Configure the Format of Signature.
- Choose Only Text or Text & Image as the signature.
- For Text & Image, select the Image Path and Image File Name to add.
- Set the option Include name of Signatory to Yes or No as needed.
- Set any other export configurations – such as Export to location, File Name and so on – for the invoice or report and save.
- Press E (Export).
If you had set Ask before signing to Yes, TallyPrime prompts for confirmation. Select Yes to confirm. - When prompted, enter the User PIN provided by the Certifying Authority, and click OK.
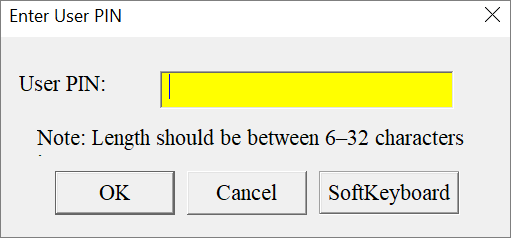
This is a one-time activity required to authenticate the digital signature certificate.
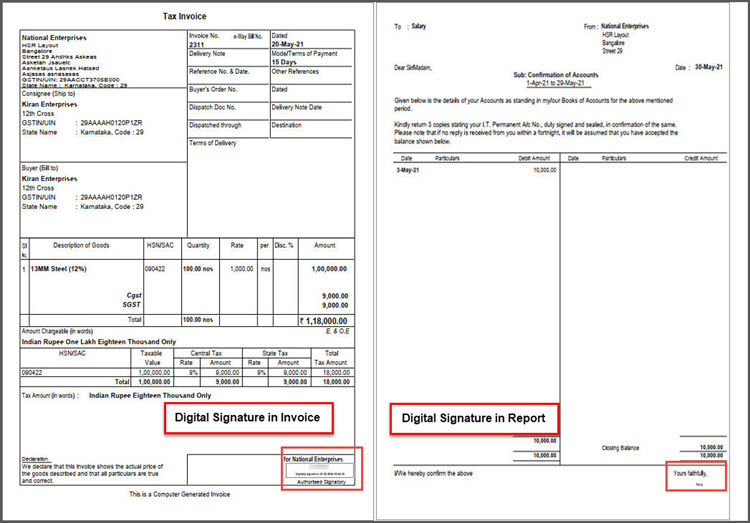
The invoice gets exported in PDF format with the digital signature.
You can follow the same steps for adding digital signature in the PDF format of each voucher under Multi Accounts Report.
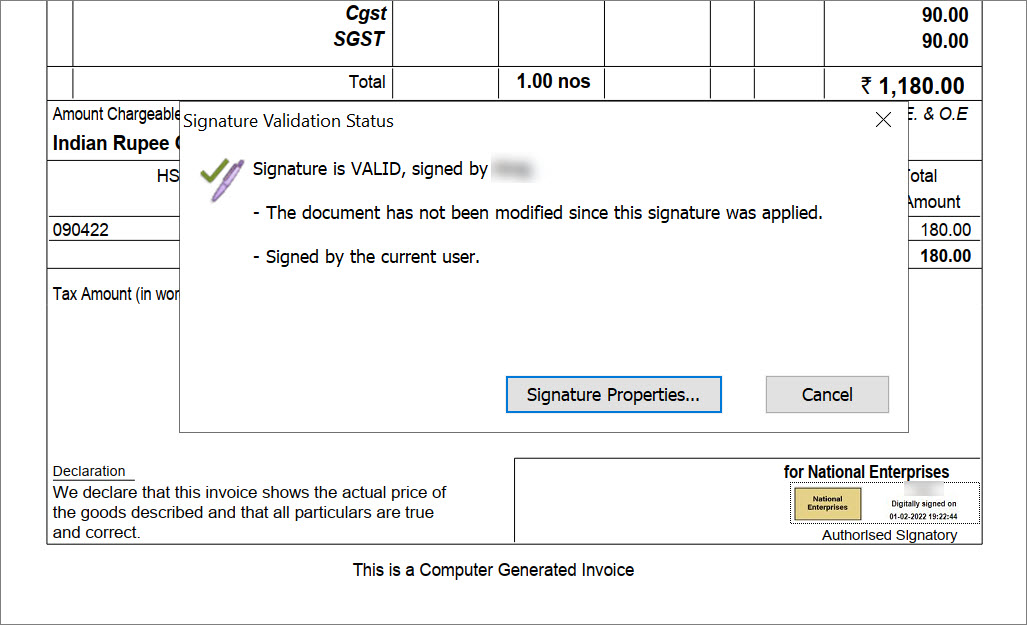
In case of invoices, the digital signature gets added with the date and timestamp above the label Authorised Signatory. In reports, the digital signature appears along with the Yours Faithfully sign-off.
Validate Digital Signature
If you have received an invoice or report with a digital signature, you can authenticate it using the appropriate digital signature certificate. The process of verifying digital signature may vary based on the PDF reader you are using.
- Open the PDF document and click the digital signature.
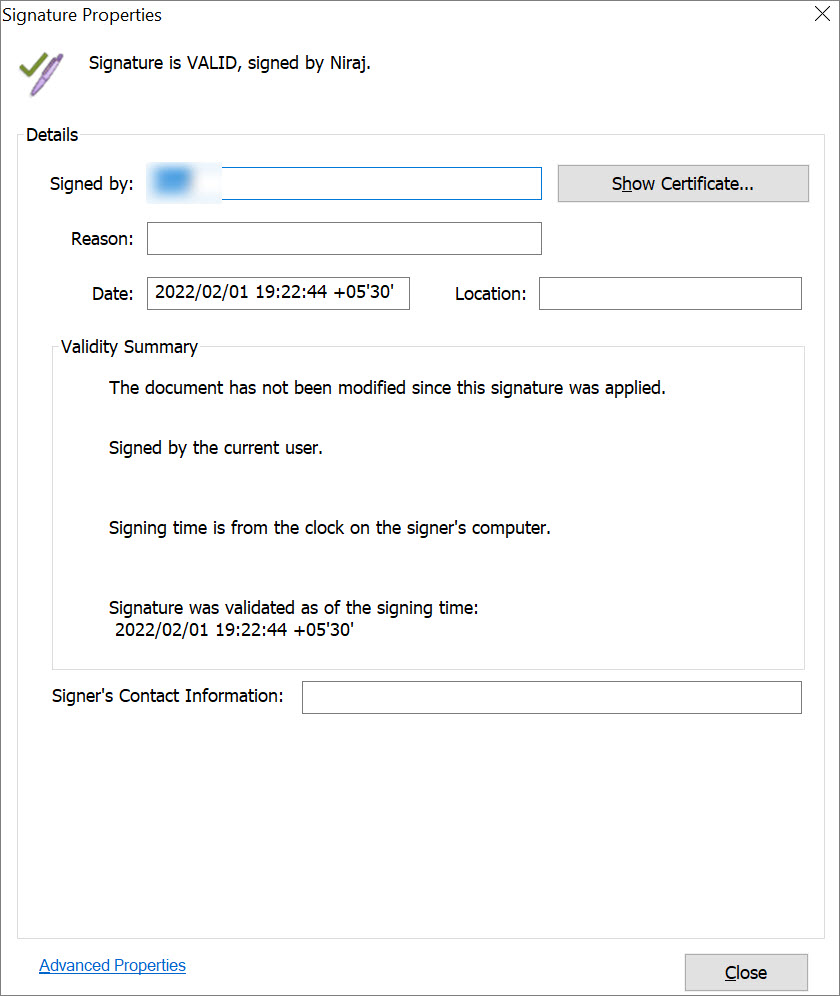
You can see the Signature Validation Status. If the document was tampered, then the signature would show INVALID. - Click Signature Properties.
- In the Signature Properties window, verify the information, and click Close.
It is recommended to validate documents with digital signature to ensure that they are authentic and from a trusted source.


