
Print Cash and Cheque Deposit Slips in TallyPrime
In your business, you might be receiving payments from your buyers in the form of cash or cheque. In such cases, you need to deposit the cash or cheque in the bank so that the respective amounts can be transferred to your bank account.
Printing cash and cheque deposit prints helps you in the following ways:
Easy Bank Submission: Deposit slips are required by banks when depositing cash or cheques. Printing them directly from TallyPrime ensures the format is correct and includes all necessary details. Automating the generation of deposit slips saves time compared to manually filling out forms, especially when handling multiple transactions.
Accuracy and Consistency: Since the data comes directly from recorded transactions in TallyPrime, it reduces manual errors and ensures consistency between accounting records and bank deposits.
Reference for Audit: Printed deposit slips serve as a physical record that can be filed and referred to during audits or reconciliations.
Better Presentation: A printed slip from TallyPrime looks more professional and organized, which can be useful for businesses dealing with multiple clients or banks.
Integration with Accounting: Since the deposit slip is linked to the voucher in TallyPrime, it helps maintain a clear connection between the transaction and the deposit, thereby making reconciliation easier.
In TallyPrime, you can print cash and cheque deposit slips, as needed. With the configurations for printing cash and deposit slips, you can print:
- Bank or branch name.
- Date, Telephone No., Mobile No., PAN/Income Tax No., and other details.
Print Cash Deposit Slips
The Cash Deposit Slip in TallyPrime includes all essential details, including Account Number, Account Holder Name, Bank Name, Branch Name (as available in the bank ledger), Company’s Telephone Number (based on the mobile number entered in the Company), and Cash Denomination Details.
![]()
- Open the Cash Deposit Slip.
- Press Alt+G (Go To) > type or select Cash Deposit Slip, and press Enter.
- Select the required Bank account from the list for whose transaction you want to print Cash Deposit Slip and press Enter.
- Press F5 (Cash) to view the Cash Deposit Slip.

- Print the Cash Deposit Slip.
- To include selected receipts in the Cash Deposit Slip, press Spacebar on the required receipt rows, and press Ctrl+P to print.
- To include all the receipts in the Cash Deposit Slip, press Ctrl+P to Print.
- Select the options to print the Cash Deposit Slip separately or consolidated.
- Print Cash Deposit Slip: Set this option to Yes to print the Cash Deposit Slip for the selected transaction.
- Show consolidated Cash Deposit Slip: Enable this option, to print one consolidated Cash Deposit Slip for all selected transactions. By default, this is set to No.
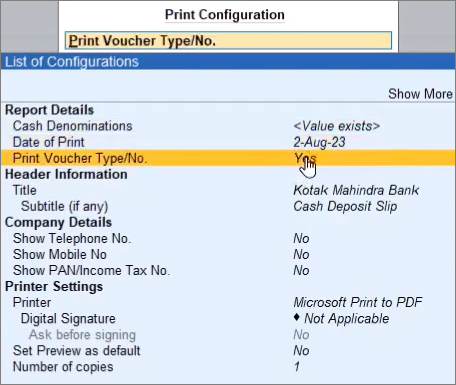
- In the Cash Deposit Slip Details screen, press C (Configure) to configure the report before printing.
- Date of Print: The date that has to be printed on the Cash Deposit Slip has to be specified in this field. By default, the current system date is displayed. Usually, this date will be the date on which the actual deposit of the cash into the bank will be made.
- Print Voucher Type/No.: Enable to print the voucher type and number.
- Press P (Print) to print the Cash Deposit Slip.
Print Cheque Deposit Slips
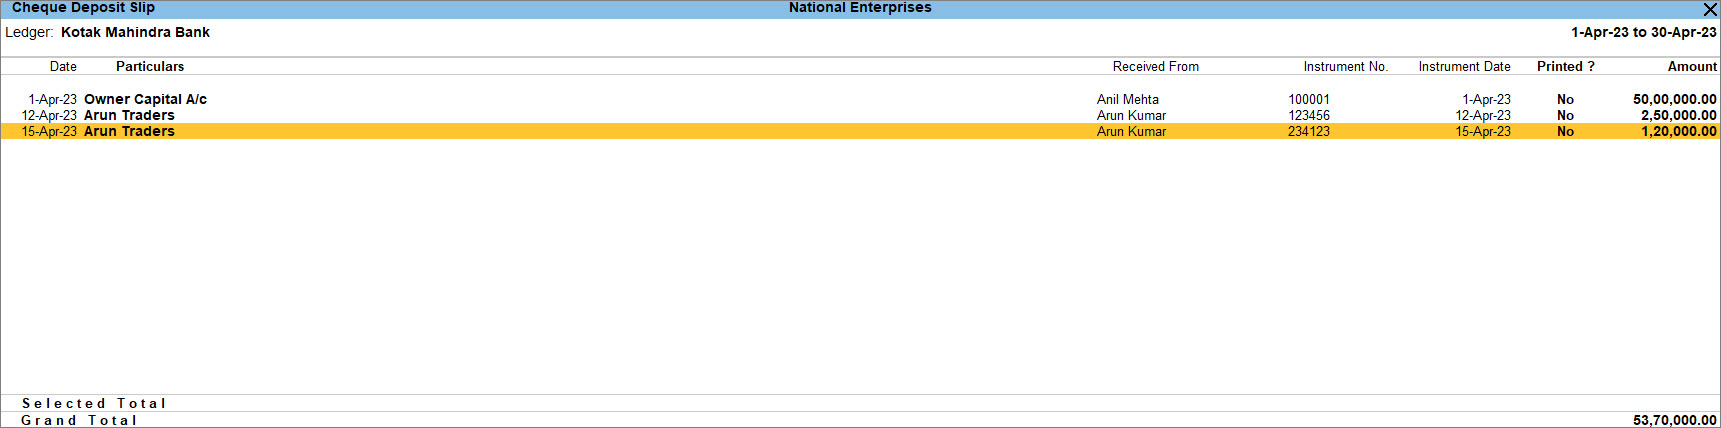
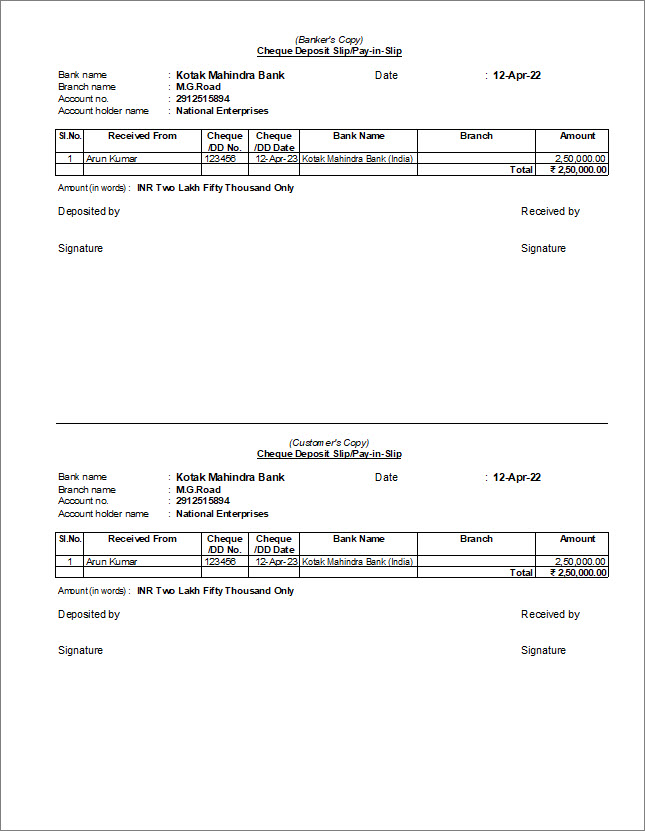
The Cheque Deposit Slip contains the name of the company or person from whom you have received the cheque along with other details such as Account Holder’s Name, Bank Name, Branch Name (as available in the bank ledger), Cheque Date, Cheque No., and Amount.
![]()
- Open the Cheque Deposit Slip.
- Press Alt+G (Go To) > type or select Cheque Deposit Slip, and press Enter.
- Select the required Bank account from the list for whose transaction you want to print Cheque Deposit Slip and press Enter.
- Print the Cash Deposit Slip.
- To include all the receipts in the Cheque Deposit Slip, press Ctrl+P to Print.
- To include selected receipts in the Cheque Deposit Slip, press Spacebar on the required receipt rows, and press Ctrl+P (Print) to print.
- Press C (Configure) to configure the report before printing.
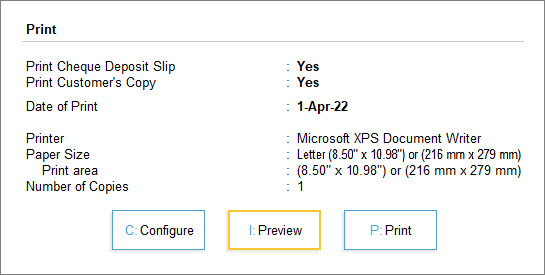
- Print Cheque Deposit Slip: By default, this option is set to Yes.
- Date of Print: By default, the system displays the current date. Specify the required date to be printed in the Cheque Deposit Slip.
- Top Margin (in Inches): Set the required space.
- Show Received From: Set this option to Yes to print the Received From details in the deposit slip.
- Show Telephone No.: Set this option to Yes to print the company’s telephone number.
- Show Mobile No: Set this option to Yes to print the company’s mobile number.
- Show PAN/Income Tax No.: By default, this option is set to Yes.
- Press P (Print) to print the Cheque Deposit Slip.
Configure Cash and Cheque Deposit Slips Reports
You can further apply settings to view the Cash or Cheque Deposit Slip report.
Change Bank Ledger: Press F4 (Bank), select the bank, and press Enter.
Switch to Cheque Deposit Slip: Press F5 (Cheque/Cash). Alternatively, press Ctrl+H (Change View) and select Cheque Deposit Slip/Cash Deposit Slip, as needed.
View Printed Slips: Press F8 (Incl Printed). Alternatively, press Ctrl+B (Basis of Values) and Include Printed Slips.
View Optional and Post-Dated Vouchers: Press Ctrl+J (Exception Reports) and choose to view Optional and Post-Date vouchers.
Mark Slips as Printed: When data is migrated from an earlier release, some transactions with printed payment advice may appear as not printed. You can use this option to mark them as printed. To do this, select the transaction by pressing the Spacebar.
Alter Cheque Details: In case of Cheque Deposit Slip, you can alter cheque details. Press Alt+H (Alter Chq Details) and alter the Instrument No. and Received From fields, as needed.
You can also make necessary changes in the configuration from F12 (Configure) or view the Cash Deposit Slip with different range filters from Alt+F12 (Range).


