Collection
A Collection is one of the most fundamental building blocks in TDL and serves as the primary mechanism for retrieving, organising, and processing data in TallyPrime. Think of a collection as a logical group of objects that TDL gathers for a specific purpose. These objects may belong to the same type, such as Ledgers, Vouchers, Stock Items, Cost Centres, or Employees, or they may be a combination of different object types, depending on the application’s requirement. Collections are extensively used to fetch data from the TallyPrime database, filter records, sort them, aggregate information, and make the processed data available for reports, forms, printing, and data exchange.
Every object within a collection can itself contain sub-objects, creating a hierarchical structure. For example, a Voucher object contains Ledger Entries, Inventory Entries, Bill Allocations, Cost Centre Allocations, and other nested objects. This hierarchy enables developers to access and process data at multiple levels, making collections extremely powerful for building complex reports and business applications.
A collection is created using a Collection Definition, which specifies what data should be collected, where it should be collected from, and how it should be processed. The definition can identify the object type to be gathered, apply filters, perform sorting, compute values, aggregate data, or even derive information from other collections. Since almost every report, form, menu, or integration in TallyPrime depends on data retrieved through collections, they are often regarded as the backbone of data handling in TDL. A good understanding of collections is therefore essential for building efficient, scalable, and high-performance TDL applications.
Collection Evaluation Sequence
When a collection is evaluated, its attributes are not executed randomly. TDL evaluates them in a predefined sequence, with the output of one stage becoming the input for the next. Understanding this sequence is important because the behaviour of attributes such as Compute Var, By, Aggr Compute, and so on depends on when they are evaluated.
| Sequence of evaluation | Purpose |
| Type / Data Source | Identifies the source of objects for the collection. |
| Source Collection | Uses another collection as the input. |
| Source Var | Supplies variables required during collection processing. |
| Walk | Traverses child objects. |
| Compute Var | Creates temporary variables used during grouping and computation. |
| By | Defines grouping keys. |
| Aggr Compute | Performs aggregation for each group. |
| Compute | Creates computed methods on the resulting objects. |
| Filter Var | Creates variables used while filtering. |
| Filter | Removes unwanted objects from the final collection. |
Syntax
[Collection: <Collection Name>]
Attributes
In many business scenarios, a collection may contain hundreds or even thousands of objects, but only a small subset is used regularly. For example, a stock item list may contain several zero-balance or inactive stock items, a ledger list may include obsolete ledgers, or a table may contain advanced configuration options that are rarely selected. Displaying all these objects in the default list makes it unnecessarily long, increases scrolling, and can confuse users while selecting the required item.
The Advanced attribute helps address this situation by allowing such less frequently used objects to remain hidden from the initial list while still making them available through the search facility. When an object satisfies the condition specified in this attribute, it is excluded from the default display, resulting in a cleaner and more focused list that highlights only the commonly used objects. However, the object is not removed from the collection. If the user enters a relevant search string, the hidden object automatically appears in the search results and can be selected. This ensures that rarely used or advanced objects remain easily accessible without cluttering the interface.
Syntax
[Collection : <Collection Name>]
Advanced : <Logical Expression>
Example
[Collection : TSPL All Batch of All Stock Items]
Type : Stock Item
Format : $Name, 25
Format : $ClosingBalance, 10
Fetch : Name, ClosingBalance
Sub Title : $$LocaleString:”Name”, $$LocaleString:”Closing Balance”
Advanced : $ClosingBalance =< 0
In this example, the collection retrieves all Stock Items and displays two columns in the table—the Name of the stock item and its Closing Balance. The Advanced attribute evaluates the condition $ClosingBalance <= 0. Any stock item whose closing balance is zero or negative is treated as an advanced object and is hidden from the default list displayed to the user. Consequently, when the table is opened, users see only stock items that currently have a positive closing balance, making the list shorter and easier to browse. The hidden stock items are not removed from the collection; they remain available in the background and automatically appear if the user searches for them using the search facility.
Consider a scenario where you want to prepare a report showing the total sales made to each customer. Since a customer may have multiple sales vouchers, displaying every voucher individually would make the report lengthy and difficult to analyse. Instead, you may want the report to display one record for each customer along with the total sales amount. This is where the Aggr Compute attribute becomes useful.
The Aggr Compute attribute is used to calculate aggregated values such as Sum, Maximum, Minimum, or Last for groups of objects in a summary collection. It is applicable only when the collection is created from another collection using the Source Collection attribute and the objects are grouped using the By attribute. The By attribute determines how the source objects are grouped, and Aggr Compute performs the specified aggregation for each of these groups. The computed value is stored as an aggregate method, which can then be used in reports, tables, or further processing. Since Aggr Compute operates on the grouped data created by the summary collection, it always works in conjunction with attributes such as Source Collection, By, Compute, Walk, and Keep Source. By performing aggregation at the collection level, it enables developers to generate concise summaries and analytical reports without manually processing individual records.
Syntax
[Collection : <Collection Name>]
Aggr Compute : <Method Name> : <Aggr Type> : <Method Formula>
Where,
Method Name specifies the name of the aggregate method that stores the computed result. This method can be referenced later in reports, fields, or other collection attributes.
Aggr Type are the permissible values as below
| Aggr Type | Alias | Description |
| Add | Sum | Calculates the total of all values in each group. Commonly used to compute totals such as total sales, quantity, or amount. |
| High | Max | Returns the highest (maximum) value from all objects in each group. Useful for identifying the largest sales amount, quantity, or balance. |
| Low | Min | Returns the lowest (minimum) value from all objects in each group. Useful for identifying the smallest amount, quantity, or balance. |
| Last | — | Returns the value from the last object in each group after the collection has been processed. Useful when the latest or final value in a grouped set is required. |
Method Formula specifies the method or expression whose values are aggregated for each group. This can be an object method, formula, or any expression that evaluates to a value for every object in the collection. The result of the aggregation is stored in the method specified by <Method Name>.
Example
[Collection : TSPL Sales Voucher Collection]
Type : Vouchers : VoucherType
Child of : $$VchTypeSales
Belongs To : Yes
[Collection : TSPL Itemwise Sold Qty]
Source Collection : TSPL Sales Voucher Collection
Walk : Inventory Entries
By : StockItem : $StockItemName
Aggr Compute : TotBilledQty : Sum : $BilledQty
Aggr Compute : TotAmount : Sum : $Amount
In this example, the collection TSPL Itemwise Sold Qty is a summary collection created from the TSPL Sales Voucher Collection using the Source Collection attribute. The Walk attribute traverses the Inventory Entries of each sales voucher so that every inventory line becomes available for processing. The By attribute groups all inventory entries based on the Stock Item Name, ensuring that all occurrences of the same stock item across different sales vouchers are treated as a single group.
The Aggr Compute attributes then perform aggregation for each of these groups. Aggr Compute : TotBilledQty : Sum : $BilledQty calculates the total billed quantity for each stock item by adding the BilledQty values of all inventory entries belonging to that item. Similarly, Aggr Compute : TotAmount : Sum : $Amount calculates the total sales amount for each stock item by summing the corresponding Amount values. As a result, instead of returning every inventory entry from every sales voucher, the summary collection produces one record for each stock item, containing its total billed quantity and total sales amount.
Many businesses maintain both a descriptive name and a short code (alias) for masters such as Groups, Ledgers, or Stock Items. For example, a group may have the name “Sundry Debtors” and the alias “SD”. While the full name provides clarity, many users identify records more quickly using their aliases. Displaying both the name and its alias in reports, tables, or selection lists makes it easier for users to locate and select the required object.
The Alias attribute is used to display the alias or aliases of an object along with its primary name whenever the collection is displayed. This attribute can also be specified using its aliases With Alias, Aliases, or With Aliases, all of which produce the same behaviour. If an object has one or more aliases defined, they are displayed together with the object name, improving readability and searchability. The attribute is commonly used in Collection definitions and works in conjunction with attributes such as Type, Child Of, Belongs To, and Search Key, which determine the objects included in the collection and how users search for them. It is particularly useful in organisations where abbreviations, short codes, or legacy names are commonly used alongside descriptive names.
Syntax
[Collection : <Collection Name>]
Alias : <Logical Value>
Example
[Collection : Ledger Collection]
Type : Ledger
Fetch: Name
Format: $Name,25
With Alias : Yes
In this example, the collection retrieves all Ledger masters and displays their names in the table. By specifying With Alias : Yes, the collection is configured to display the alias of each ledger along with its primary name whenever an alias is defined. For instance, if a ledger is named “Cash Account” and has the alias “Cash”, both the name and its alias are displayed in the collection. Ledgers that do not have an alias continue to display only their primary name. This makes the collection more informative and helps users quickly identify ledgers using either their descriptive name or their commonly used short name or code.
When a field displays a table, the position of that table on the screen can significantly affect the user experience. For example, a lookup table or selection list may need to appear at the top, bottom, left, right, or centre of the screen depending on the available space or the desired layout. The Align attribute is used to control this positioning, allowing developers to specify where the table should be displayed relative to the screen.
The Align attribute is applicable only when a table is associated with a field using the Table attribute. It works in conjunction with attributes such as Table, Width, Height, and Max, which together determine the appearance and behaviour of the displayed table.
The following table lists the supported values for the Align attribute:
| Value | Description |
| Top | Displays the table at the top of the screen. |
| Bottom | Displays the table at the bottom of the screen. |
| Left | Displays the table towards the left side of the screen. |
| Right | Displays the table towards the right side of the screen. |
| Centre | Displays the table at the centre of the screen. |
Syntax
Align : <Value>
Where, <Value> specifies the position where the table should be displayed. Supported values are Top, Bottom, Left, Right, and Centre.
Example
[Collection : Ledger Collection]
Type : Ledger
Fetch : Name
Format : $$Name, 25
Align : Right
In this example, the collection displays the list of Ledger masters. By specifying Align : Right, the table generated from this collection is positioned towards the right side of the screen whenever it is displayed through a field using the Table attribute. This allows developers to control the placement of the table to suit the screen layout and improve the overall user experience.
It is common for files, folders, stock items, or other objects to have names that differ only by special characters such as underscores (_), hyphens (-), or periods (.). For example, a folder may contain files named Image1 and Image_1. Although these are distinct names, Tally, by default, treats the underscore as a noise character and ignores it while processing the collection. As a result, both names are considered identical, and only one of them appears in the table.
The Allow Noise Chars attribute controls whether such noise characters should be considered while processing a collection. This attribute can also be specified using its alias Table Has Path, and both names provide the same behaviour. By default, Tally ignores noise characters, which is equivalent to Allow Noise Chars : No. When Allow Noise Chars : Yes is specified, Tally treats noise characters as part of the object name. Consequently, objects whose names differ only because of these characters are recognised as distinct and are all included in the collection. This attribute is specified in a Collection definition and becomes effective only when the collection is displayed through a Field using the Table attribute. This is particularly useful when working with file names or paths where special characters are significant and should not be ignored.
Syntax
[Collection : <Collection Name>]
Allow Noise Chars : <Logical Expression>
Example
[Collection : Image Collection]
Data Source : File Selection List : ##PVCurrentPath
Format : $Name, 30
Allow Noise Chars : Yes
In this example, the collection retrieves the list of files available in the directory specified by ##PVCurrentPath using the File Selection List data source. By specifying Allow Noise Chars : Yes, Tally treats noise characters such as underscores (_), hyphens (-), and periods (.) as part of the file name while building the collection.
For instance, if the selected folder contains two files named Image1 and Image_1, Tally normally ignores the underscore and treats both names as identical. Consequently, only one of the files appears in the table. With Allow Noise Chars : Yes, the underscore is treated as a valid character, allowing Image1 and Image_1 to be recognised as distinct file names. As a result, both files are included in the collection and are displayed when the collection is used in a Field through the Table attribute.
Many business applications retrieve data from remote web services over HTTP or HTTPS. To ensure uninterrupted communication, organisations often maintain a secondary (backup) server that provides the same service as the primary server. If the primary server becomes unavailable due to network issues, maintenance, or hardware failures, the application can continue to retrieve data from the backup server.
The Alternate URL attribute is used to specify the alternate HTTP or HTTPS URL from which a collection can retrieve data. It works in conjunction with the Remote URL attribute, which specifies the primary server. If TallyPrime is unable to retrieve data from the URL specified in Remote URL, it automatically attempts to connect to the URL specified in Alternate URL. This provides a simple failover mechanism and improves the reliability of integrations. The attribute is applicable to collections that retrieve data from remote HTTP/HTTPS services and can be used for both XML and JSON data exchange.
Syntax
[Collection : <Collection Name>]
Alternate URL : <HTTP URL Formula>
Example
[Collection : Customer Collection]
Remote URL : “https://api.company.com/customers”
Alternate URL : “https://backup.company.com/customers”
In this example, the collection retrieves customer data from the primary endpoint https://api.company.com/customers. If this endpoint is unavailable because of a network failure or server outage, TallyPrime automatically attempts to retrieve the same data from https://backup.company.com/customers, specified using the Alternate URL attribute. This ensures that the collection can continue to retrieve XML or JSON data from an alternate server without requiring any changes to the application configuration, thereby improving the availability and resilience of the integration.
Imagine you’re building a solution where TallyPrime needs to retrieve information—such as customer details, stock availability, price lists, or sales orders—from another business application. Instead of reading data from a local source, TallyPrime can request it directly from the external application through a web API.
The API attribute, whose alias is Remote URL, is used to specify the URL of the HTTP or HTTPS endpoint that provides this data. When the collection is evaluated, TallyPrime sends a request to the specified endpoint and retrieves the response from the external application. Depending on how the web service is implemented, the response can be in XML or JSON format. This attribute is commonly used to integrate TallyPrime with CRM, ERP, e-commerce, payroll, or other business applications that expose web APIs.
Syntax
[Collection : <Collection Name>]
API : <URL Expression>
Example
[Collection : Customer Collection]
API : “https://api.company.com/customers”
In this example, the Customer Collection retrieves customer information from the web API available at https://api.company.com/customers. When the collection is evaluated, TallyPrime sends a request to the specified endpoint and retrieves the data returned by the external application. The response can be in XML or JSON format, depending on how the API is implemented. This enables TallyPrime to seamlessly fetch business data from external systems such as CRM, ERP, e-commerce, or other enterprise applications.
Suppose you want to create a collection of all the ledgers belonging to the Sundry Debtors group. Depending on your requirement, you may want to retrieve only the ledgers that are directly under Sundry Debtors or all the ledgers that belong to its sub-groups as well. The Belongs To attribute helps you control this behaviour.
The Belongs To attribute is used along with the Child Of attribute in a Collection definition. While Child Of specifies the parent object from which the collection should begin, Belongs To determines whether the collection should include only the immediate child objects or all descendant objects under the specified parent.
When Belongs To is set to No (default), the collection retrieves only the objects that are directly under the parent specified in Child Of. When it is set to Yes, the collection recursively traverses the hierarchy and includes objects belonging to all the sub-groups or descendant levels under the specified parent. This attribute is particularly useful when working with hierarchical data such as Groups, Stock Groups, Cost Categories, Cost Centres, or other parent-child structures, where you may need to retrieve data from an entire branch instead of just one level.
Syntax
[Collection : <Collection Name>]
Belongs To : <Logical Expression>
Example
[Collection : Debtor Ledgers]
Type : Ledger
Child Of : “Sundry Debtors”
Belongs To : Yes
In this example, the collection retrieves ledgers that belong to the Sundry Debtors group. Since Belongs To is set to Yes, TallyPrime includes not only the ledgers directly under Sundry Debtors but also the ledgers present in any sub-groups within the Sundry Debtors hierarchy. If Belongs To were set to No or omitted, the collection would retrieve only the ledgers that are immediate children of the Sundry Debtors group. This provides flexibility when working with hierarchical business data, allowing developers to retrieve data from a specific level or from an entire hierarchy based on the application’s requirement.
Think of a collection that retrieves data from an external application through a DLL function. The external application returns the response in XML or JSON format. In some situations, instead of returning the expected business data, the application may return an error message such as “Invalid Session”, “Authentication Failed”, or “Access Denied”.
The BreakOn attribute is used to validate the data received from the DLL function before it is processed by the collection. It allows you to specify one or more error strings or error codes that indicate an invalid response. During collection processing, TallyPrime scans the received XML or JSON data for the specified values. If any of the specified strings are found, TallyPrime immediately stops processing the collection, and no objects are created from the received data. This prevents invalid or erroneous data from being processed further and enables the application to handle error responses gracefully.
Syntax
[Collection : <Collection Name>]
BreakOn : <String Expression> [, <String Expression> …]
Example
[Collection : Customer Collection]
Data Source : DLL : GetCustomerDetails
BreakOn : “Invalid Session”, “Access Denied”, “Error”
In this example, the Customer Collection retrieves customer data by invoking the GetCustomerDetails DLL function. Before processing the returned XML or JSON data, TallyPrime checks whether the response contains any of the specified strings—”Invalid Session”, “Access Denied”, or “Error”. If any of these values are found, the collection processing is terminated immediately, and no customer objects are created. This ensures that only valid data is processed and prevents the application from working with incomplete or erroneous responses returned by the external system.
Suppose your business has thousands of sales transactions recorded in TallyPrime, and you want to generate a report showing the total sales made to each customer. Since multiple transactions can belong to the same customer, TallyPrime must first organise the transactions customer-wise before it can calculate the total sales for each customer.
This is achieved using a summary collection. A summary collection groups objects from a source collection based on one or more common values and then performs aggregate operations on each group. The By attribute defines the grouping criterion by specifying the method or expression whose value is used to create these groups. All objects having the same value for the specified method are placed into the same group, and a single summary object is created for that group.
Once the groups are formed, attributes such as Aggr Compute can perform aggregate operations like Sum, Count, Maximum, Minimum, or Last on each group. For example, if the collection is grouped using the customer name, all transactions belonging to a customer are combined into one group, after which Aggr Compute can calculate the customer’s total sales amount. Similarly, the collection can be grouped by stock item, voucher type, cost centre, voucher date, or any other business attribute to generate different types of summary reports.
A summary collection can contain multiple By attributes. Each By attribute defines a grouping level, allowing data to be summarised hierarchically. For example, a collection can first group transactions by Customer Name and then, within each customer, further group them by Voucher Date. This enables developers to build multi-level analytical reports using a single summary collection.
In simple terms, the By attribute determines how the objects in a source collection are grouped before any aggregate calculations are performed. It serves as the foundation of a summary collection, while attributes such as Aggr Compute perform the actual calculations on each group.
Syntax
[Collection : <Summary Collection Name>]
By : <Grouping Method Name> : <Method / Formula>
Example
[Collection : TSPL Sales Voucher Collection]
Type : Vouchers : VoucherType
Child of : $$VchTypeSales
Belongs To : Yes
[Collection : TSPL Sales Inventory Collection]
Source Collection : TSPL Sales Voucher Collection
Walk : Inventory Entries
By : StockItem : $StockItemName
Aggr Compute : TotBilledQty : Sum : $BilledQty
Aggr Compute : TotAmount : Sum : $Amount
In this example, the TSPL Sales Voucher Collection retrieves all Sales vouchers along with their inventory entries. The TSPL Sales Inventory Collection uses this as its Source Collection and walks through each Inventory Entry present in the vouchers.
The By attribute creates a grouping method named StockItem using the value of the $StockItemName method. As TallyPrime processes the inventory entries, all entries having the same stock item name are grouped together into a single summary object. Once these groups are formed, the Aggr Compute attributes perform aggregate calculations on each group. TotBilledQty calculates the total billed quantity by summing the values of $BilledQty, while TotAmount calculates the total sales amount by summing $Amount.
As a result, the summary collection contains one object for each stock item, with its corresponding total billed quantity and total sales amount. This approach is commonly used to generate item-wise sales summaries, inventory analysis reports, and business dashboards where data from multiple transactions needs to be consolidated into meaningful summaries.
The By attribute does not perform the calculations. Its role is to group similar objects together. The actual aggregation is performed by the Aggr Compute attributes on each group.
Suppose you want to create a collection of customer ledgers in TallyPrime. Simply specifying that you need Ledger objects is not enough because TallyPrime contains many different types of ledgers, such as Sundry Debtors, Sundry Creditors, Sales, Purchase, and Capital Account. You need a way to tell TallyPrime exactly where to retrieve the required ledger objects from. This is where the Child Of attribute comes into play.
The Child Of attribute is always used together with the Type attribute in a Collection definition. The Type attribute specifies the type of business object that the collection should retrieve, such as Ledger, Stock Item, Voucher, Group, or Cost Centre. Once the object type is known, the Child Of attribute specifies the parent object within that type from which the collection should begin retrieving data.
For example, if the collection specifies Type : Ledger, TallyPrime knows that the collection will contain ledger objects. When Child Of : “Sundry Debtors” is specified, TallyPrime retrieves only the ledgers that belong to the Sundry Debtors group. Similarly, if the type is Stock Item, the Child Of attribute can specify a stock group, and if the type is Voucher, it can specify a voucher type such as Sales or Purchase.
The value of the Child Of attribute can be specified in multiple ways. It can be a literal object name, such as “Sundry Debtors”; a platform function, such as $$GroupSundryDebtors; or any formula or variable that evaluates to a valid parent object at runtime. This provides the flexibility to create both static and dynamic collections.
The Child Of attribute retrieves only the immediate child objects of the specified parent. If the collection must include objects belonging to all descendant levels under the parent, it should be used together with the Belongs To attribute.
In simple terms, Type tells TallyPrime what kind of objects to retrieve, while Child Of tells it where to retrieve those objects from within that type. Together, these attributes define the scope of the collection and are fundamental to building efficient collections in TDL.
Although a similar result can sometimes be achieved using a Filter, the Child Of attribute is specifically designed for working with hierarchical data. It limits the collection to the child objects of a specified parent during data retrieval, thereby reducing the number of objects that need to be processed. In contrast, a Filter evaluates each object only after it has been retrieved from the collection. Consequently, Child Of is well suited for navigating parent-child relationships, whereas Filter is intended for applying business conditions based on object attributes, such as balances, voucher dates, amounts, or statuses. Using the appropriate attribute not only improves collection performance but also makes the collection definition easier to understand and maintain.
Syntax
[Collection : <Collection Name>]
Type : <Object Type>
Child Of : <String Formula>
Example
[Collection : TSPL Sales Voucher Type Collection]
Type : VoucherType
Child Of : $$VchTypeSales
Fetch : Name, Parent, Total Vouchers
In this example, the collection retrieves objects of type VoucherType because the Type attribute is set to VoucherType. The Child Of attribute uses the system formula $$VchTypeSales to identify the Sales voucher type as the parent object. As a result, TallyPrime retrieves only the voucher types that are immediate children of the Sales voucher type. The Fetch attribute then retrieves the Name, Parent, and Total Vouchers methods for each voucher type in the collection.
This example also illustrates that the value specified in the Child Of attribute need not always be a literal object name. It can be a function, such as $$VchTypeSales, or any expression that evaluates to a valid parent object at runtime.
Suppose your business records transactions such as sales invoices, purchase invoices, sales orders, purchase orders, or inventory movements using Inward and Outward Tracking Numbers. As these transactions are fulfilled or settled over time, some references become cleared, while others remain uncleared or pending.
When creating a collection of these references, you may not always want to retrieve every object. For example, you might want to generate a report showing only the outstanding sales orders, pending tracking numbers, or settled bill references. The Cleared attribute enables you to filter the collection based on the settlement or fulfilment status of these objects.
The Cleared attribute is applicable to collections containing Bill, Order, and Tracking Number objects. When Cleared : Yes is specified, the collection retrieves only the objects that have been completely settled, fulfilled, or adjusted. When Cleared : No is specified, it retrieves only the objects that are still outstanding or pending settlement. If the Cleared attribute is not specified, no filtering is applied based on the cleared status, and the collection includes both cleared and uncleared objects.
In simple terms, the Cleared attribute determines whether a collection should include only settled references, only outstanding references, or all references, depending on how it is configured. It is commonly used while developing reports such as Outstanding Receivables, Outstanding Payables, Pending Sales Orders, Pending Purchase Orders, Inward and Outward Tracking Reports, and Payment or Order Reconciliation reports, where the settlement or fulfilment status of the business reference is an important selection criterion.
Syntax
[Collection : <Collection Name>
Cleared : <Logical Value>
Example
[Collection: List of Cleared Bills]
Title: “Cleared Bills”
Type : Bills
Cleared: Yes
The above collection retrieves Bills objects whose cleared status is Yes. By specifying Cleared : Yes, the collection includes only those bills that have been completely settled through bill-wise adjustments. Bills that are still outstanding are excluded from the collection.
Imagine a library application that displays a list of books. The application can either retrieve the complete list of books from the library’s central database (server) or use the books that have already been downloaded and stored on the phone (client).
Now, suppose the user only wants to organise the downloaded books by filtering them by genre or sorting them by author. Since the required books are already available on the phone, contacting the library’s central database again is unnecessary. The application can simply work with the locally available data, making the operation faster and eliminating unnecessary network communication.
The Client Only attribute works in a similar way. In a client-server (multi-user) or remote access environment, TallyPrime can retrieve objects either from the server or from the objects already available on the client. When the required objects have already been downloaded and the application only needs to filter, sort, group, or process them, fetching the same data from the server again is unnecessary.
By specifying Client Only : Yes, TallyPrime evaluates the collection using only the objects available on the client, without requesting additional objects from the server. This reduces network traffic, improves response time, and minimises unnecessary communication with the server.
The Client Only attribute is particularly useful when developing solutions for client-server (multi-user) or remote company environments, where collections are repeatedly evaluated on the same set of locally available objects. Typical scenarios include generating reports, filtering collections, sorting data, or performing calculations on objects that have already been retrieved from the server. In a standalone installation, where the client and server are the same TallyPrime instance, this attribute generally has no practical effect because all objects are already available locally.
In simple terms, think of Client Only as using your own notebook of notes instead of asking your teacher for the same information every time. If the required information is already available, there is no need to retrieve it again. Similarly, the Client Only attribute tells TallyPrime to use only the data available on the client and not fetch additional objects from the server, resulting in faster and more efficient collection evaluation.
Syntax
[Collection : <Collection Name>]
Client Only : <Logical Value>
Example
[Collection: Additional Computations]
Title : $$LocaleString:”List of Formulae”
List Name : $$SysName:AddHead
List Name : $$SysName:SubtractHead
List Name : $$SysName:MultiplyAttd
List Name : $$SysName:DividebyAttd
Format : $$Name, 20
ClientOnly : Yes
The above collection creates a list of predefined system formulae using the List Name attribute. Since these objects are already available on the client, there is no requirement to retrieve additional information from the server. By specifying Client Only : Yes, TallyPrime evaluates the collection entirely on the client and does not attempt to communicate with the server. This makes the collection more efficient, particularly in client-server (multi-user) or remote company environments, where unnecessary network communication can impact performance.
The above collection creates a list of predefined system formulae using the List Name attribute. Since these objects are already available on the client, there is no requirement to retrieve additional information from the server. By specifying Client Only : Yes, TallyPrime evaluates the collection entirely on the client and does not attempt to communicate with the server. This makes the collection more efficient, particularly in client-server (multi-user) or remote company environments, where unnecessary network communication can impact performance.
Imagine you’re organising baskets of fruits. The baskets are kept separately:
- One basket contains apples.
- One basket contains oranges.
- One basket contains bananas.
Now, instead of looking at each basket individually, you want one large basket that contains all the fruits from every basket. You are not changing or emptying the original baskets; you are simply gathering their contents into one place so that everything can be viewed and managed together. The Collection attribute works in a similar way.
In TDL, information is often organised into multiple collections, each containing a specific set of objects. There are situations where a solution needs to work with objects from several collections at the same time. Rather than processing each collection separately, the Collection attribute enables TallyPrime to combine the objects from one or more collections into a single logical collection.
By specifying the Collection attribute, TallyPrime retrieves the objects from each of the specified collections and makes them available through the current collection. The source collections are not modified and continue to exist independently; only their objects are combined for further processing. If multiple collections are specified, TallyPrime evaluates them in the order they are listed and appends their objects to the resulting collection.
The Collection attribute is particularly useful when developing reports or applications that need to consolidate data from multiple sources. For example, a solution may need to display information from different voucher collections, combine multiple ledger collections, or process data from several collections through a single collection definition. Instead of handling each collection individually, the Collection attribute provides a unified view of all the required objects.
Syntax
[Collection : <Collection Name>]
Collection: <Collection Name 1> , <Collection Name 2> ,…
Example
[Collection : TSPL Combine Collection]
Collection : TSPL Ledger Collection, TSPL Group Collection
[Collection : TSPL Ledger Collection]
Type : Ledger
[Collection : TSPL Group Collection]
Type : Group
The example defines three collections. The TSPL Ledger Collection retrieves all Ledger objects, while the TSPL Group Collection retrieves all Group objects.
The TSPL Combine Collection uses the Collection attribute to combine these two collections into a single collection. When this collection is evaluated, TallyPrime first evaluates the TSPL Ledger Collection and TSPL Group Collection and then makes the objects from both collections available through TSPL Combine Collection. The original collections remain unchanged and can still be used independently.
As a result, any operation performed on TSPL Combine Collection, such as filtering, sorting, or iterating over its objects, works on the combined set of Ledger and Group objects instead of requiring each source collection to be processed separately.
Imagine you’re selecting a product from a pop-up list in an application. The list contains hundreds of products, making it difficult to quickly identify which ones are new, trending, or discontinued. Wouldn’t it be much easier if discontinued products appeared in red, premium products in blue, and newly introduced products in green? The products themselves have not changed only the way they are displayed. By using different colours, you can instantly recognise the type or status of each product, making the selection process much faster and more intuitive. This is why we have the Color attribute alias Shade introduced at the collection.
When a Collection is displayed as a Table, TallyPrime presents the collection as a pop-up list from which the user can select an item. The Color attribute allows you to specify the foreground (font) colour in which the values of a column are displayed. It changes only the appearance of the text and does not modify the underlying data or the objects in the collection. The Color attribute is applicable only when a Collection is invoked as a Table. It has no effect when the collection is used solely for retrieving, processing, or iterating over objects.
The Color attribute can be specified multiple times within the same collection, each with a different logical condition. During evaluation, TallyPrime evaluates these conditions sequentially and applies the colour associated with the condition that evaluates to True. This enables different entries in the same table to appear in different colours based on their values or status, making the list more informative and easier to navigate.
Syntax
[Collection : <Collection Name>]
Color : <Color Definition Name> [:<Logical Expression>]
Example
[Collection: TSPL Master Template]
Color : Deep Cobalt Blue : $IsHierarchyLabel
Color : Deep Grey : NOT ($IsHierarchyLabel OR $FeatEnabled)
The above collection specifies the Color attribute twice, with each occurrence associated with a different logical condition.
The first Color attribute displays the text in Deep Cobalt Blue when the method $IsHierarchyLabel evaluates to True.
The second Color attribute displays the text in Deep Grey when the object is neither a hierarchy label nor feature enabled, that is, when the condition NOT ($IsHierarchyLabel OR $FeatEnabled) evaluates to True.
During evaluation, TallyPrime evaluates the conditions specified with each Color attribute. Whenever a condition evaluates to True, the corresponding colour is applied to the text displayed in the table. This allows different entries within the same pop-up list to be visually distinguished based on their properties or status, making the list easier to understand and navigate.
When a Collection is displayed as a Table, the values of each method are presented in separate columns. By default, TallyPrime aligns the contents of every column to the left. While this is generally suitable for textual information, it may not always be the best choice for other types of data. For example, numbers, amounts, and quantities are easier to compare when they are right-aligned, whereas short values such as status indicators or codes may be better presented in the centre.
The Column Align attribute allows you to control the alignment of each column in the table, making the displayed information more organised and easier to read.
The attribute accepts a comma-separated list of alignment values, where each value corresponds to a column in the order in which the columns are defined. The permissible values are:
| Permissible Value | Alias | Description |
| Left | Top | Aligns the contents of the column to the left. Top is an alias of Left. |
| Right | Bottom | Aligns the contents of the column to the right. Bottom is an alias of Right. |
| Centre | Center | Aligns the contents of the column to the centre. Center is an alias of Centre. |
| Prompt | — | Aligns the column using the alignment of the corresponding table prompt (heading). |
| Justified | — | Justifies the contents within the available column width. |
Syntax
[Collection : <Collection Name>]
Column Align : <Align Keyword>,……
Example
[Collection : TSPL Ledger Collection]
Type : Ledger
Title : $$LocaleString:”List of Ledgers”
Sub Title : $$LocaleString:”Particulars”, $$LocaleString:”Closing Balance”
Format : $Name, 25
Format : $ClosingBalance : “DrCr”
Column Align : Left, Right
The collection displays a table with two columns. The first column displays the Ledger Name, while the second column displays the Closing Balance in Debit/Credit (DrCr) format.
The Column Align attribute specifies the alignment for each column in the same order as the corresponding Format attributes. Here:
- Left aligns the Ledger Name to the left, making textual information easy to read.
- Right aligns the Closing Balance to the right, allowing numeric values to line up correctly for easy comparison.
Sometimes, the information needed in a report is not stored directly in the data. Instead, it must be derived or calculated using one or more existing values. Imagine a collection of sales orders where each order contains the Order Amount. While preparing a report, you want to identify whether an order is Big or Small. However, the orders only store the amount, they do not contain a field that indicates the order size.
For example:
| Order No. | Order Amount |
| SO001 | ₹800 |
| SO002 | ₹2,500 |
| SO003 | ₹950 |
Instead of manually checking each order, you define a rule:
- If the order amount is greater than ₹1,000, label it “Big Order”.
- Otherwise, label it “Small Order”.
The Compute alias Method attribute allows you to define this rule within the collection. As TallyPrime retrieves each object, it evaluates the specified formula and creates a new computed method for that object. This computed method exists only within the collection and can be used just like any other method for displaying data, filtering records, sorting collections, or performing further calculations.
In the above example, the collection would internally contain:
| Order No. | Amount | Order Category (Computed) |
| SO001 | ₹800 | Small Order |
| SO002 | ₹2,500 | Big Order |
| SO003 | ₹950 | Small Order |
Note that Order Category is not stored in the original Sales Order object. It is created dynamically by the Compute attribute while the collection is being evaluated. The Compute attribute creates a new method within a collection by evaluating a formula for every object retrieved. The original data remains unchanged, while the computed method becomes available for use throughout the collection.
Syntax
[Collection : <Collection Name>]
Compute : <Method-Name> : <Method-Formula>
Example
[Collection : TSPL Sales Inventory Collection]
Source Collection : TSPL Sales Voucher Collection
Walk : Inventory Entries
Fetch : StockItemName, BilledQty, Rate
Compute : ItemAmount : $BilledQty * $Rate
The collection is built from Sales Voucher objects and uses the Walk attribute to navigate to the Inventory Entries of each voucher. The Fetch attribute retrieves the Stock Item Name, Billed Quantity, and Rate for every inventory entry.
The Compute attribute then creates a new method named ItemAmount by multiplying the values of the BilledQty and Rate methods.
For example, if an inventory entry contains:
| Stock Item | Billed Qty | Rate |
| Laptop | 5 | ₹40,000 |
The computed method ItemAmount evaluates to 5 × ₹40,000 = ₹2,00,000
Similarly, if another inventory entry contains:
| Stock Item | Billed Qty | Rate |
| Printer | 2 | ₹15,000 |
the computed method evaluates to 2 × ₹15,000 = ₹30,000
The ItemAmount method is not part of the original Inventory Entry object. It is created dynamically for every object in the collection as the collection is evaluated. Once computed, this method can be used like any other method for example, to display the item amount in a report, sort the collection, apply filters, or perform further calculations such as aggregation using Aggr Compute.
Imagine an accountant preparing a report from Sales Vouchers. Each voucher contains multiple inventory entries, and while analysing the voucher, the accountant calculates the total quantity of items sold. This value will be required several times later—for grouping vouchers, calculating totals, and displaying additional information in the report. Instead of calculating the total quantity every time it is needed, the accountant writes it down on a worksheet. Whenever the value is required, the worksheet is referred to instead of repeating the calculation. The worksheet is not part of the voucher or its inventory entries. It simply stores a calculated value that can be reused while preparing the report.
The Compute Var attribute serves a similar purpose during collection evaluation. It calculates a value and stores it in a temporary variable instead of creating a method in the collection object. This variable can then be referenced by subsequent collection attributes, eliminating the need to repeatedly evaluate the same expression. Unlike the Compute attribute, which creates a new method for every object in the collection, Compute Var stores the calculated value only in a variable. Since the variable is object context free element, it is available throughout the remaining stages of collection processing, it is particularly useful when the same calculated value is required multiple times—for example, while grouping objects using By, performing aggregations using Aggr Compute, or creating additional computed methods using Compute. The variable exists only while the collection is being evaluated. It is not added to the collection object and is discarded once the collection processing is complete.
During collection evaluation, the Compute Var attribute is processed after the Source Collection, Walk, and Source Var attributes, but before the By , Compute, Aggr Compute, Filter Var and Filter attributes. This evaluation order ensures that the computed variable is available for all subsequent collection processing, allowing the same calculated value to be reused efficiently without recalculating it. In one liner, the Compute Var attribute calculates a value once, stores it in a temporary variable, and makes it available to the remaining stages of collection evaluation.
Syntax
[Collection : <Collection Name>]
Compute Var : <Variable Name> : <Data Type> : <Formula>
Example
[Collection : TSPL Sales Summary]
Source Collection : Voucher Collection
Walk : Inventory Entries
Compute Var : ItemValue : $BilledQty * $Rate
By : StockItem : $StockItemName
Aggr Compute : Total Sales : Sum : ##ItemValue
The collection is built from the Voucher Collection and uses the Walk attribute to navigate to the Inventory Entries of each voucher. As each inventory entry is processed, the Compute Var attribute calculates the value of the item by multiplying BilledQty and Rate, and stores the result in a temporary variable named ItemValue.
For example, consider the following inventory entries:
| Stock Item | Billed Qty | Rate | Item Value (Computed Variable) |
| Laptop | 5 | ₹40,000 | ₹2,00,000 |
| Laptop | 2 | ₹40,000 | ₹80,000 |
| Printer | 3 | ₹15,000 | ₹45,000 |
The By attribute then groups all inventory entries by StockItemName. Once the groups are formed, the Aggr Compute attribute uses the computed variable ##ItemValue to calculate the total sales for each stock item.
The resulting summary is:
| Stock Item | Total Sales |
| Laptop | ₹2,80,000 |
| Printer | ₹45,000 |
In this example, ItemValue is not added as a method to the inventory entry. Instead, it exists only as a temporary variable during collection evaluation. The variable is calculated once for each inventory entry and is subsequently reused by the Aggr Compute attribute to calculate the total sales for every stock item.
Imagine a warehouse that stores different kinds of goods. Some items are kept on storage racks, some are stored in cold rooms, while others are received directly from suppliers whenever they are needed. Before any item can be packed or shipped, the warehouse staff must first identify where the required item is stored. Only then can it be retrieved and prepared for further processing.
A collection follows the same principle. Before it can process any information, it must first retrieve the data it will work with. The Data Source attribute identifies where the collection should obtain its data from.
Depending on the specified data source, TallyPrime retrieves information from a supported source such as an XML file, a JSON file, an HTTP service, an external database, a directory, a variable, a report, a Rule Set, or a Plug-in. The retrieved information is then converted into collection objects, allowing the collection to process the data using attributes such as Walk, Fetch, Compute Var, By, Aggr Compute, Compute, and Filter, irrespective of where the data originated.
The Data Source attribute is primarily used when the required information is not available as a native Tally business object or when the data needs to be obtained from another supported source. It provides a common mechanism for populating collections with data originating from both TDL constructs and external systems, enabling developers to build reports, integrations, validation frameworks, and utilities without worrying about the underlying source format.
The Data Source attribute tells TallyPrime where the collection should retrieve its data from before any collection processing begins. The following are the permissible values :
| Data Source Type | Purpose | Syntax | Parameters | Example |
| File XML | Creates a collection from an XML file stored locally or on a shared location. | Data Source : File XML : <File Path> [:<Encoding>] | File Path – Full path of the XML file.Encoding (Optional) – Character encoding such as UNICODE or ASCII. | Data Source : File XML : “C:\Data\Customers.xml” |
| HTTP XML | Retrieves XML data from an HTTP/HTTPS web service. | Data Source : HTTP XML : <URL> [:<Encoding>] | URL – Endpoint returning XML data.Encoding (Optional) | Data Source : HTTP XML : “https://server/api/customers.xml” |
| File JSON | Creates a collection from a JSON file stored locally or on a shared location. | Data Source : File JSON : <File Path> [:<Encoding>] | File Path – Full path of the JSON file.Encoding (Optional) | Data Source : File JSON : “C:\Data\Products.json” |
| HTTP JSON | Retrieves JSON data from an HTTP/HTTPS service, typically REST APIs. | Data Source : HTTP JSON : <URL> [:<Encoding>] | URL – Endpoint returning JSON data.Encoding (Optional) | Data Source : HTTP JSON : “https://api.company.com/products” |
| HTTP JSONEx | Retrieves data using the enhanced JSON protocol supported by TallyPrime 7.0 release onwards. | Data Source : HTTP JSONEx : <URL> [:<Encoding>] | URL – Endpoint supporting JSONEx.Encoding (Optional) | Data Source : HTTP JSONEx : “https://api.company.com/orders” |
| Variable | Creates a collection from the elements of a Simple List or Compound List Variable. | Data Source : Variable : <Variable Name> | Variable Name – Name of the variable whose elements form the collection. | Data Source : Variable : SVItems |
| Report | Creates a collection from objects available in the current report. | Data Source : Report : <Scope> | Scope – Current Line, Selected Lines, UnSelected Lines, All Lines, Line, or Sorting Methods. | Data Source : Report : Selected Lines |
| Parent Report | Creates a collection from objects available in the parent report. | Data Source : Parent Report : <Scope> | Same scope values as Report. | Data Source : Parent Report : Current Line |
| Directory | Creates a collection containing information about files and folders in a directory. | Data Source : Directory : <Directory Path> | Directory Path – Location of the directory to be scanned. | Data Source : Directory : “C:\Invoices” |
| ODBC | Retrieves records from an external database using an ODBC connection. | Data Source : ODBC : <Query> | SQL Query or ODBC Statement used to fetch records. | Data Source : ODBC : “SELECT * FROM CUSTOMER” |
| Rule Set | Creates a collection from the rules defined in a Rule Set. | Data Source : Rule Set : <Rule Set Name> | Rule Set Name | Data Source : Rule Set : GSTValidationRules |
| Num Set | Creates a collection from the numeric values stored in a Num Set. | Data Source : Num Set : <Num Set Name> | Num Set Name | Data Source : Num Set : SalesTargets |
| Flag Set | Creates a collection from the logical values stored in a Flag Set. | Data Source : Flag Set : <Flag Set Name> | Flag Set Name | Data Source : Flag Set : EnabledFeatures |
| PlugIn XML | Retrieves XML data returned by a native Plug-in DLL. | Data Source : PlugIn XML : <DLL Name> | DLL Name or registered Plug-in identifier. | Data Source : PlugIn XML : “CustomerPlugin.dll” |
| AxPlugIn XML | Retrieves XML data returned by an ActiveX Plug-in. | Data Source : AxPlugIn XML : <Namespace.Class> | Namespace.Class of the ActiveX component. | Data Source : AxPlugIn XML : TestDLL.Class1 |
| PlugIn JSON | Retrieves JSON data returned by a Plug-in. | Data Source : PlugIn JSON : <DLL Name> | DLL Name or registered Plug-in identifier. | Data Source : PlugIn JSON : “CustomerPlugin.dll” |
| XML String | Creates a collection directly from an XML string available in memory. | Data Source : XML String : <Expression> | Expression returning an XML string. | Data Source : XML String : ##XMLResponse |
| JSON String | Creates a collection directly from a JSON string available in memory. | Data Source : JSON String : <Expression> | Expression returning a JSON string. | Data Source : JSON String : ##JSONResponse |
Syntax
[Collection : <Collection Name>]
Data Source : <Data Source Type> : <Identity> [: <Encoding>]
Example
[Collection : TSPL JSON Collection]
Data Source: HTTP JSON : “https://webhook.site/f567fe43-7036-4d16-9f11-015c871fb291”
Export Header: “Accept:application/json”
JSON Object Path: “LEDGER:1:DATA:1”
Fetch: Name, Parent, OpeningBalance, ClosingBalance
The collection ‘TSPL JSON Collection’ retrieves ledger information from an external web service that returns data in JSON format. The Data Source attribute instructs the collection to obtain its data using the HTTP JSON data source and connects to the specified URL. The Export Header attribute sends an HTTP request header indicating that the response is expected in JSON format.The JSON response may contain multiple nested objects. The JSON Object Path attribute identifies the portion of the JSON document that contains the ledger records. In this example, the path LEDGER:1:DATA:1 navigates through the JSON hierarchy and selects the array of ledger objects that should populate the collection.
Imagine preparing a sales report for a particular department. The report should include all products belonging to that department, except those that have been discontinued. Although the discontinued products are still part of the department hierarchy, they should not appear in the report.
One possible approach is to use the Filter attribute. This allows every product to be evaluated against a condition, such as its status, and only those satisfying the condition are included in the collection. This approach is suitable when the inclusion or exclusion depends on business logic or object properties.
Another possible approach is to use the Child Of attribute. However, Child Of is designed to retrieve objects belonging to a specific parent in a hierarchy. Selecting a different parent changes the scope of the collection by retrieving a different branch of the hierarchy; it does not exclude specific objects from an otherwise valid collection. In situations where multiple branches need to be included while omitting only a few known objects, developers often end up creating multiple collections using Child Of and combining them using Union. This increases the complexity of the collection definition and introduces additional processing.
The Exclude attribute addresses this requirement more directly. Instead of defining where the collection should begin or evaluating conditions for every object, it explicitly identifies the objects that should not become part of the collection. The specified object can be an individual object, such as a Ledger, or an entire hierarchy, such as a Group. When working with hierarchical objects, reserved functions can be used to exclude all objects belonging to the specified hierarchy.
By allowing unwanted objects to be excluded within a single collection definition, the Exclude attribute eliminates the need to create multiple collections solely to omit a few branches or objects, thus retrieving collections quickly and improvising performance. This not only makes the code easier to understand and maintain but also reduces the overhead of building and combining multiple collections, resulting in better performance, especially for large hierarchies.
| Attribute | Usage |
| Child Of | The collection should retrieve objects belonging to a specific parent in a hierarchy. |
| Filter | Inclusion or exclusion depends on object values or business conditions. |
| Exclude | Specific objects or entire hierarchies are already known and must be omitted from the collection. This avoids creating multiple collections and combining them using Union, resulting in cleaner code and improved performance. |
In simple terms, use Exclude to explicitly omit known objects or hierarchies from a collection, Child Of to retrieve objects belonging to a specific parent in a hierarchy, and Filter to include or exclude objects based on conditions or business rules.
Note:
- If a collection contains the Child Of, Exclude, and Filter attributes, they are evaluated in the order Child Of → Exclude → The collection scope is established first, refined by excluding the specified objects, and finally filtered using the specified condition.
- The Exclude attribute accepts multiple comma-separated entries. Each entry consists of an Object Type followed by an Object Identifier. The object identifier can be a literal object name, a reserved platform function (such as $$LedgerProfit or $$GroupBank), or any expression that evaluates to a valid object name at runtime.
Syntax
[Collection : <Collection Name>]
Exclude : <Object Type> : <Object Identifier> [, <Object Type> : <Object Identifier> …]
Example
[Collection: CostCentreEnabledLedger]
Type : Ledger
Exclude : Ledger:$$LedgerProfit, Group:$$GroupStock, + Group:$$GroupCash, Group:$$GroupBank, Group:$$GroupBankOD
Filter : IsCostCentreEnabled
This collection retrieves Ledger objects while excluding several predefined ledgers and groups. The first exclusion, is the Ledger : $$LedgerProfit that excludes the Profit & Loss Ledger from the collection. The remaining exclusions specify Group objects using reserved platform functions. These exclude the Stock-in-Hand, Cash, Bank Accounts, and Bank OD Accounts groups. Since these are hierarchical objects, all ledgers belonging to these groups are also excluded from the collection.
Using multiple Exclude entries allows the collection to retrieve only the required ledgers without creating separate collections or writing complex filter conditions. This results in a simpler collection definition and improved performance, particularly when working with large hierarchies.
Everyone is familiar with the Trial Balance report in TallyPrime would have noticed that the report can be viewed at different levels of detail. A group such as Current Assets can be expanded individually to view its child groups and ledgers, or the Detailed button can be used to expand all groups at once. This expansion takes place at the report level, where different parts of the report become visible based on the user’s action. The Explode attribute in a Collection provides a similar capability, but at the Table level. Instead of expanding report parts, it expands an entry in a table into another related collection. This allows hierarchical information to be presented within the same table, enabling users to progressively navigate through the data without leaving the current view.
The expansion can also be controlled using a logical condition. When the specified condition evaluates to Yes, the related collection is gathered and displayed beneath the corresponding row. If the third parameter is specified as No, the exploded collection is still gathered during collection construction but is not displayed. If omitted, the third parameter defaults to Yes.
The Explode attribute is effective only when the collection is displayed as a Table. If the collection is used for any other purpose, such as computation or data processing, the attribute is ignored. It is important to distinguish this attribute from the Explode attribute available in a Part definition. While the Part-level Explode attribute expands a report by displaying additional parts during display, print, or export, the Collection-level Explode attribute expands individual rows within a table by displaying another related collection. Although both provide an expand/collapse experience, they operate at different levels of the TDL framework.
In simple terms, the Explode attribute allows a row in a table to expand into another related collection, enabling hierarchical navigation and drill-down within the same table.
Syntax
[Collection : <Collection Name>]
Explode: <Collection Name> [: <Explode Condition> [: <Initial Expand Condition>]]
Where,
| Parameter | Description |
| Collection Name | Specifies the collection that will be exploded for the current row in the table. |
| Explode Condition (Optional) | A logical expression that determines whether the specified collection should be exploded for the current row. If omitted, the collection is eligible for explosion for every row. |
| Initial Expand Condition (Optional) | A logical expression that determines whether the exploded collection should be expanded automatically when the table is initially populated. If omitted, the default value is Yes. When it evaluates to No, the exploded collection is still gathered during collection construction but remains collapsed until explicitly expanded. |
Example
[Collection :TSPL Group Collection]
Title : $$LocaleString:”List of Accounting Master”
Type : Group
Format : $Name, 20
Format : $Parent, 15
Align : Center
Style : Normal Bold : @@IsGroup
Explode: TSPLSubLedgers : @@IsGroup : No
Indent : 2 * $$TableExplodeLevel
Table Sort : $Parent
This collection retrieves Group objects and displays them in a table. The Explode attribute specifies TSPLSubLedgers as the collection to be exploded for each Group. Before exploding the collection, the condition @@IsGroup is evaluated. Since the condition returns Yes for Group objects, the TSPLSubLedgers collection is gathered in the context of each Group. The third parameter is specified as No, indicating that the exploded collection should not be expanded when the table is initially displayed. Although the related collection is gathered during collection construction, it remains collapsed. Users can subsequently expand individual rows to view the corresponding objects from the TSPLSubLedgers collection. This approach is particularly useful when working with large hierarchies, as it presents a concise initial view while still allowing users to drill down into the required branches of the hierarchy on demand.
Imagine a solution that needs to retrieve information from an external web application over HTTP. Before the application processes the request, it expects certain HTTP headers to accompany it. These headers may specify the expected response format, identify the requesting application, provide authentication information, or convey other details required by the receiving application. Without the required headers, the receiving application may reject the request or return an unexpected response. The Export Header alias Header attribute allows a collection to include one or more HTTP headers while sending an HTTP request to an external application. The specified headers become part of the outgoing request and provide additional information required by the destination server to process the request correctly. The Export Header attribute is applicable only when the collection uses an HTTP-based data source, such as HTTP XML, HTTP JSON, or HTTP JSONEx. Whenever the collection sends an HTTP request, all the specified headers are automatically included. Multiple Export Header attributes can be specified within the same collection definition, allowing several HTTP headers to be sent as part of a single request.
Syntax
[Collection : <Collection Name>]
Export Header : <String Expression>
Example
[Collection : TSPL JSON Collection]
Data Source: HTTP JSON : “https://webhook.site/f567fe43-7036-4d16-9f11-015c871fb291”
Export Header: “Accept:application/json”
JSON Object Path: “LEDGER:1:DATA:1”
Fetch: Name, Parent, OpeningBalance, ClosingBalance
The collection ‘TSPL JSON Collection’ retrieves data from an external HTTP endpoint using the HTTP JSON data source. The Export Header attribute specifies the HTTP header Accept: application/json, indicating that the collection expects the response to be returned in JSON format. When the HTTP request is sent, this header is automatically included, enabling the receiving application to determine the preferred response format. Once the JSON response is received, the collection navigates to the objects specified by the JSON Object Path attribute and retrieves the required fields using the Fetch attribute.
Imagine you’re creating a report to display the details of all the Ledgers in a company. The collection is already configured to retrieve Ledger objects. However, each Ledger contains numerous methods, such as Name, Parent, Opening Balance, Closing Balance, Mailing Address, Contact Details, GST information, and many more. Retrieving every method when only a few are required would result in unnecessary processing. The Fetch alias Native Method attribute specifies the native methods that should be retrieved from each object in the collection. Instead of calling every available method, it fetches only those required for report construction or further processing. This improves the efficiency of the collection by reducing the amount of data that needs to be retrieved and processed. The importance of the Fetch attribute becomes even more evident when working with large collections or TallyPrime in Remote mode. In such scenarios, fetching only the required methods reduces the volume of data transferred between the remote and the server, leading to better performance and faster report generation. The Fetch attribute specifies which native methods of an object should be retrieved, ensuring that only the required information is made available for efficient report generation and processing.
Syntax
[Collection : <Collection Name>]
Fetch : <MethodName 1> ,<MethodName 2> ,..,<MethodName n>
Example
[Collection : TSPL Ledger Collection]
Type : Ledger
Fetch : Name, Parent, OpeningBalance, ClosingBalance
This collection retrieves Ledger objects by specifying Ledger as the collection type. The Fetch attribute instructs the collection to retrieve only the native methods Name, Parent, OpeningBalance, and ClosingBalance from each Ledger object. These methods are then made available for use while constructing reports or performing further processing.
Imagine you are a store manager reviewing your inventory. Items that are out of stock are not relevant for planning today’s sales or replenishment, so you decide to display only the stock items with a positive balance. Later, you want to narrow the view further by focusing only on items belonging to the Raw Materials group. Instead of retrieving all the items and analysing them manually, you apply one or more filter conditions. The result is a report that displays only the information relevant to he current requirement, making analysis faster, cleaner, and more efficient. The Filter attribute is used to specify one or more conditions for selecting the objects in a collection. Each condition is defined using a System Formula, and only those objects for which the formula evaluates to Yes are retained in the collection. Multiple filter conditions can be specified by separating the formula names with commas. An object is included in the collection only if it satisfies all the specified filter conditions. It is important to understand that the Filter attribute evaluates only the objects that have already been retrieved into the collection. It does not control where the objects are retrieved from—that responsibility lies with attributes such as Child Of. Similarly, if the Exclude attribute is specified, the excluded objects are removed before the filter conditions are evaluated.
When Child Of, Exclude, and Filter are specified together, they are evaluated sequentially. Child Of first retrieves the objects belonging to the specified parent hierarchy, Exclude then removes the specified objects or hierarchies from the retrieved set, and finally Filter evaluates the remaining objects against the specified filter conditions to retain only those that satisfy the criteria.
Syntax
[Collection : <Collection Name>]
Filter : <System Formulae>
Example
[Collection : TSPL Ledger Collection]
Type : Ledger
Child Of : $$GroupSundryDebtors
Fetch : Name, Parent, OpeningBalance, ClosingBalance
Filter : TSPLClosingBalanceFilter
[System: Formula]
TSPLClosingBalanceFilter : $ClosingBalance > 0
This collection retrieves Ledger objects that belong to the Sundry Debtors group by using the Child Of attribute. The Filter attribute specifies the system formula TSPLClosingBalanceFilter, which evaluates the condition $ClosingBalance > 0 for each retrieved Ledger object. Only those Ledgers whose Closing Balance is greater than zero satisfy the condition and are retained in the collection. Ledgers with a zero or negative closing balance are excluded from the final result. As a result, the collection contains only those Sundry Debtor Ledgers that have a positive closing balance, making the collection more focused and relevant for further processing or report generation.
Imagine you’re preparing a report to identify customers whose outstanding balance exceeds a configurable credit limit. The credit limit is not a fixed value—it may be calculated based on user input, company policies, or other business rules. Since this calculated value is required while evaluating every Ledger in the collection, computing it repeatedly for each object would be inefficient. The Filter Var attribute is used to evaluate and assign a value to a variable based on the objects available in the collection. This evaluated variable can then be referenced by the Filter attribute while determining whether an object should be retained in the collection.
The evaluation of Filter Var takes place after the collection has retrieved the required native methods using the Fetch attribute and computed additional methods using the Compute attribute. This ensures that all the required data is available before the variable is evaluated. Once the variable has been assigned a value, the Filter attribute uses it while evaluating the specified filter conditions.
Filter Var is particularly useful when the filter conditions depend on an intermediate value derived from the collection. Instead of evaluating the same expression repeatedly, the value is computed once, stored in a variable, and then used by the Filter attribute during object evaluation. This avoids redundant calculations and makes the filter logic easier to manage, especially when the same value is referenced by multiple filter conditions.
The Filter Var attribute evaluates and stores an intermediate value in a variable before the Filter attribute is executed, enabling the filter conditions to use the evaluated value while selecting the required objects. Within a collection, the evaluation follows this sequence:
Fetch → Compute → Filter Var → Filter
This sequence ensures that the required methods are first retrieved, additional methods are computed if required, the variable is then evaluated, and finally the filter conditions are applied using the evaluated variable.
Syntax
[Collection : <Collection Name>]
Filter Var : <Variable Name> : <Data Type> : <Formula>
Example
[Collection : TSPL Ledger Collection]
Type : Ledger
Fetch : Name, ClosingBalance
Filter Var : IsDebtorBillWise : Logical : ($Parent = “Sundry Debtors”) AND NOT $IsBillWiseOn
Filter : TSPLDebtorFilter
[System : Formula]
TSPLDebtorFilter : ##IsDebtorBillWise
The collection ‘TSPL Ledger Collection’ retrieves Ledger objects and fetches the Name, Parent, and IsBillWiseOn methods. The Filter Var attribute evaluates whether the current Ledger belongs to the Sundry Debtors group and is not configured for bill-wise accounting. The result of this evaluation is stored in the logical variable ##IsDebtorBillWise. The Filter attribute then invokes the system formula TSPLDebtorFilter, which simply evaluates the value of ##IsDebtorBillWise. Only those Ledgers for which the variable evaluates to Yes are retained in the collection.
Although this example could also be implemented by writing the complete condition directly in the Filter formula, using Filter Var becomes advantageous when the business condition is complex or when the same evaluated value is required by multiple filter formulas.
Imagine you’re creating a Table that allows users to select a Ledger. By default, the table displays the Name of each Ledger because every Ledger object contains the native method Name. However, there are situations where displaying only the Name is not sufficient. For example, users may also want to see the Parent Group, Closing Balance, GST Registration Type, or a user-defined method that you’ve computed specifically for the table. Simply retrieving these methods using the Fetch attribute makes them available within the collection, but it does not automatically display them in the table.
This is where the Format attribute comes into play. It specifies which method should be displayed as a column in the table and optionally defines the width and display format of that column. The method can be a native method, a computed method, or a user-defined method available in the collection. If the collection object contains the native method Name and no Format attribute is specified, TallyPrime automatically displays the Name in the table. However, when additional columns or user-defined methods need to be displayed, the Format attribute must be used to specify them explicitly. Multiple Format attributes can be specified within the same collection, with each attribute representing a separate column in the table.
Syntax
[Collection : <Collection Name>]
Format : <Method Name> [,<Width> [: <Display Format>]]
Example
[Collection : TSPL Ledger Collection]
Type : Ledger
Fetch : Name, Parent, ClosingBalance
Format : $Name, 25
Format : $Parent, 20
Format : $ClosingBalance : “DrCr”
The collection ‘TSPL Ledger Collection‘ retrieves Ledger objects and fetches the Name, Parent, and ClosingBalance methods. The Format attribute specifies how these methods should be presented in the table.
- The first Format attribute displays the Name method in a column having a width of 25 characters.
- The second Format attribute displays the Parent method in a column having a width of 20 characters.
- The third Format attribute displays the ClosingBalance method. Instead of specifying a column width, the Display Format parameter uses “DrCr”, causing debit and credit balances to be displayed in the standard TallyPrime Dr/Cr format.
Each Format attribute represents a separate column in the table. The columns are displayed in the same order in which the Format attributes are specified in the collection definition.
Suppose you’re designing a Ledger selection table that appears in a popup while the user is selecting a Ledger. Depending on the company, the collection may contain only a few Ledgers or several hundred. If the table contains only a few rows, it occupies only the space required to display those rows, leaving the remaining area of the popup empty. This can result in an inconsistent user experience, especially when the same table is used across different companies. In such scenarios, the Full Height attribute can be used to make the table occupy the entire available vertical space, irrespective of the number of objects in the collection. This provides a consistent appearance for lookup tables and selection lists while making better use of the available screen space. The Full Height attribute determines whether the Table displaying the collection should occupy the full available height. When specified as Yes, the table expands to use the maximum vertical space, even if the collection contains only a few objects. When specified as No, the table occupies only the height required to display the available objects. If omitted, the default value is No.
Since a collection is a data object, the Full Height attribute has no effect on the collection itself. It is honoured only when the collection is displayed as a Table through a Field.
Syntax
[Collection : <Collection Name>]
Full Height : <Logical Value>
Example
[Collection : TSPL Ledger Collection]
Type : Ledger
Fetch : Name
Full Height : Yes
The TSPL Ledger Collection retrieves Ledger objects and displays them as a Table. The Full Height attribute is specified as Yes, causing the table to occupy the maximum available vertical space when it is displayed. Even if the collection contains only a few Ledger objects, the table expands to fill the available height instead of displaying only the required number of rows. If the Full Height attribute is omitted or specified as No, the table occupies only the height required to display the available Ledger objects.
Suppose you’re creating a collection of Ledger objects for a report. The report is primarily intended to display all Sundry Debtor Ledgers. However, irrespective of the selected group, the report must also display a few specific Ledgers, such as Cash and Round Off, because they are required for the business process.
One possible approach is to create separate collections for each set of Ledgers and combine them using the Union attribute. While this achieves the desired result, it increases the complexity of the collection definition and introduces additional processing to construct and merge multiple collections. Another approach is to use the Filter attribute. However, Filter only evaluates the objects that are already present in the collection. It cannot retrieve or add objects that were never part of the collection in the first place. Similarly, the Child Of attribute defines where the collection retrieves its objects from. Changing the parent changes the scope of the collection but does not provide a mechanism to add specific objects that lie outside that hierarchy. The Include attribute addresses this requirement. It allows one or more known objects or hierarchies to be explicitly added to a collection, even though they are not part of the collection’s normal retrieval scope. The specified object can be an individual object, such as a Ledger, or an entire hierarchy, such as a Group. When hierarchical objects are specified, reserved platform functions can be used to include all objects belonging to the specified hierarchy.
Using the Include attribute eliminates the need to create additional collections solely to retrieve a few extra objects. This simplifies the collection definition and can improve performance by avoiding the overhead of constructing and combining multiple collections.
Syntax
[Collection : <Collection Name>]
Include : <Object Type> : <Expression>[, <Object Type> : < Expression>]…
Example
[Collection: TSPL Expense Ledgers]
Type : Ledger
Include : Group:$$GroupIndirectExpenses, Group:$$GroupDirectExpenses
Include : Group:$$GroupFixedAssets, Group:$$GroupDuties
The collection ‘TSPL Expense Ledgers’ retrieves Ledger objects. The Include attribute specifies the Groups whose Ledgers should become part of the collection. The first Include statement adds all the Ledgers belonging to the Indirect Expenses and Direct Expenses groups. The second Include statement further includes the Ledgers belonging to the Fixed Assets and Duties & Taxes groups. As a result, the collection contains Ledgers from all four Groups.
By default, when a collection retrieves business objects, only the objects that are currently available in the company data are included. Any objects that have been deleted are ignored and do not become part of the collection. There are situations where deleted objects are also required. For example, Edit Log and audit reports may need to analyse both active and deleted objects to present a complete history of changes made to the company data. The Include Delete attribute changes this default behaviour by allowing deleted objects to be retrieved as part of the collection. When specified as Yes, the collection includes both active and deleted objects. When specified as No, or if the attribute is omitted, only active objects are retrieved.
The Include Delete attribute can be used with collections of any business object that supports deleted records. If the specified object type does not maintain deleted objects, the attribute has no effect.
In simple terms, the Include Delete attribute allows a collection to retrieve deleted objects that are excluded by default.
Syntax
[Collection : <Collection Name>]
Include Delete : <Logical Value>
Example
[Collection : TSPL Voucher Collection]
Type : Voucher
Include Delete : Yes
The TSPL Voucher Collection retrieves Voucher objects. The Include Delete attribute is specified as Yes, causing the collection to retrieve both active and deleted Voucher objects. This enables the collection to be used in scenarios such as Edit Log and audit reports, where deleted transactions must also be analysed or displayed. If the attribute were omitted or specified as No, only the active Voucher objects would become part of the collection, while deleted Voucher objects would be ignored.
Consider a table that displays an accounting hierarchy, such as Groups and their Sub-Groups. If every row begins at the same position, it becomes difficult to distinguish parent objects from their child objects. Indenting the child objects makes the hierarchy immediately apparent and improves readability. The Indent attribute specifies the number of character positions by which the contents of a column should be indented. It is commonly used to display hierarchical information, where child objects appear slightly offset from their parent objects. Although the Indent attribute can be used for any table column, it is most frequently used with the Explode attribute. As a table expands to display child objects, the indentation is usually increased based on the explosion level so that each level of the hierarchy is displayed further to the right than its parent.
The Indent attribute controls the horizontal indentation of a table column, making hierarchical data easier to read and navigate.
Syntax
[Collection : <Collection Name>]
Indent : <Numeric Expression>
Example
[Collection : TSPL Group Collection]
Type : Group
Format : $Name, 30
Explode : TSPLSubGroups : @@IsGroup
Indent : 2 * $$TableExplodeLevel
The collection ‘TSPL Group Collection’ retrieves Group objects and displays them in a table. The Explode attribute displays the child Groups beneath their respective parent Groups. The Indent attribute uses the expression 2 * $$TableExplodeLevel to determine the indentation for each row. At the top level, the indentation is zero. As each level of the hierarchy is expanded, the indentation increases by two-character positions, visually distinguishing parent Groups from their child Groups.
Suppose you’re integrating TallyPrime with a Plugin (DLL) that retrieves information from an external application. The Plugin is capable of performing different operations, such as retrieving customer details, fetching inventory information, or obtaining tax rates. Before the Plugin can execute the required operation, it often needs some input, such as a customer code, stock item name, voucher number, or any other identifier. The Input Parameter attribute provides this input to the Plugin. It allows a single string value to be passed from the collection to the Plugin when the collection is evaluated. The Plugin receives this value as its input parameter and uses it to determine what information should be retrieveդ or processed before returning the response to TallyPrime. The value specified for the Input Parameter attribute can be a literal string, a method, a formula, or any expression that evaluates to a string at runtime. This makes it possible to pass dynamic values based on the current object or the context in which the collection is being evaluated.
The Input Parameter attribute is applicable only when the collection retrieves data using a Plugin-based data source, namely:
- Plugin JSON
- Plugin XML
- AX Plugin XML
It is always used together with the Data Source attribute. While the Data Source attribute specifies the Plugin that should supply the data, the Input Parameter attribute specifies the input value that should be passed to that Plugin.
In simple terms, the Input Parameter attribute passes a single string value from the collection to a Plugin, enabling the Plugin to retrieve or generate the required data based on that input.
Syntax
[Collection : <Collection Name>]
Data Source : Plugin JSON / Plugin XML / AX Plugin XML / Plugin JSONEx / : <Plugin Name>
Input Parameter : <String Expression>
Example
[Collection : TSPL Customer Collection]
Data Source : Plugin JSON : “CustomerPlugin”
Input Parameter : “CUST001”
Fetch : CustomerName, City, GSTIN
The collection ‘TSPL Customer Collection’ retrieves data from the CustomerPlugin using the Plugin JSON data source. The Input Parameter attribute, passes the string “CUST001” to the Plugin. When the collection is evaluated, the Plugin receives this value and uses it to retrieve the details of the corresponding customer. The Plugin returns the response in JSON format, after which the collection retrieves the required methods using the Fetch attribute.
Suppose you’re integrating TallyPrime with a Plugin (DLL) that performs complex processing, such as validating GST information, calculating tax, or interacting with an external business application. In such scenarios, passing a single string value may not be sufficient. The Plugin may require multiple pieces of information, such as customer details, voucher information, stock items, quantities, and tax values, structured in a well-defined format.
The Input JSON and Input XML attributes allow a collection to pass an entire JSON or XML document as input to the Plugin. When the collection is evaluated, the specified JSON or XML is sent to the Plugin, which processes the input and returns the required response.
The value specified for these attributes can be a literal JSON/XML string, a formula, a method, or any expression that evaluates to a valid JSON or XML document at runtime. This enables the input to be constructed dynamically based on the current object or report context.
These attributes are applicable only when the collection retrieves data using a Plugin-based data source, namely:
Plugin JSON
Plugin XML
AX Plugin XML
They are always used together with the Data Source attribute. While the Data Source attribute identifies the Plugin that supplies the data, the Input JSON or Input XML attribute provides the structured input required by the Plugin to perform its operation.
The choice between Input JSON and Input XML depends on the format expected by the Plugin. A Plugin designed to process JSON requests uses Input JSON, whereas a Plugin expecting XML requests uses Input XML.
- Use Input Parameter when the Plugin requires a single string value as input.
- Use Input JSON or Input XML when the Plugin expects structured data containing multiple values.
- TallyPrime does not validate or interpret the JSON or XML document. It simply passes the specified document to the Plugin. The Plugin is responsible for parsing the request and determining its meaning.
In simple terms, the Input JSON and Input XML attributes pass structured JSON or XML data from a collection to a Plugin, enabling the Plugin to process complex requests that cannot be represented by a single input parameter.
Syntax
Input JSON
[Collection : <Collection Name>]
Data Source : Plugin JSON / Plugin JSONEx: <Plugin Name>
Input JSON : <JSON Expression>
Input XML
[Collection : <Collection Name>]
Data Source : Plugin XML / AX Plugin XML : <Plugin Name>
Input XML : <XML Expression>
Note: The expression must evaluate to a valid JSON or XML document. The structure and interpretation of the document are entirely defined by the Plugin implementation.
Example – Input JSON
[Collection : TSPL Customer Collection]
Data Source : Plugin JSON : “CustomerPlugin”
Input JSON : “{“”CustomerID””:””CUST001″”,””Company””:””ABC Pvt Ltd””}”
Fetch : CustomerName, City, GSTIN
The collection retrieves data from the CustomerPlugin using the Plugin JSON data source. The Input JSON attribute passes a JSON document containing the CustomerID and Company information to the Plugin. When the collection is evaluated, the Plugin receives this JSON document, processes the request, and returns the corresponding customer details.
Example – Input XML
[Collection : TSPL Customer Collection]
Data Source : Plugin XML : “CustomerPlugin”
Input XML : “<Request><CustomerID>CUST001</CustomerID></Request>”
Fetch : CustomerName, City, GSTIN
The collection retrieves data from the CustomerPlugin using the Plugin XML data source. The Input XML attribute passes an XML document containing the CustomerID to the Plugin. The Plugin processes the XML request and returns the corresponding customer information, which is subsequently retrieved using the Fetch attribute.
Suppose you’re developing a solution where data maintained in TallyPrime needs to be consumed by an external application such as Microsoft Excel, Power BI, Crystal Reports, or a custom reporting application. Although TallyPrime can function as an ODBC Server, the collections defined in TDL are not automatically visible to ODBC client applications. The Is ODBC Table attribute is used to expose a collection as an ODBC table, allowing external applications to access the collection using standard ODBC queries. Once the collection is exposed, each object in the collection represents a row in the ODBC table, while the exposed methods become the corresponding columns. Making a collection available through ODBC is a two-step process:
- Expose the required methods of the collection objects using the Fetch attribute (or by defining computed methods).
- Specify Is ODBC Table : Yes to expose the collection as an ODBC table.
Both steps are essential. The Fetch attribute determines what information is available as table columns, while the Is ODBC Table attribute determines whether the collection itself is accessible to external ODBC client applications. The ‘Is ODBC Table’ attribute is applicable only when TallyPrime is running as an ODBC Server. If omitted or specified as No, the collection remains available only within TDL and cannot be queried by external applications.
In simple terms, use the Is ODBC Table attribute when you want to make a TDL collection available to external applications through ODBC for reporting, analytics, or data integration.
Syntax
[Collection : <Collection Name>]
Is ODBC Table : <Logical Value>
Example
[Collection : TSPL Ledger Collection]
Type : Ledger
Fetch : Name, Parent, ClosingBalance
Is ODBC Table : Yes
The TSPL Ledger Collection retrieves Ledger objects and exposes the Name, Parent, and ClosingBalance methods using the Fetch attribute. The Is ODBC Table attribute is specified as Yes, making the collection available as an ODBC table when TallyPrime is running as an ODBC Server. External ODBC client applications can now query this collection using SQL statements. Each Ledger object in the collection represents a row in the ODBC table, while the Name, Parent, and ClosingBalance methods become the corresponding columns that are available to the ODBC client. This example also demonstrates the relationship between the Fetch and Is ODBC Table attributes. The Fetch attribute determines the methods that are exposed as columns, whereas the Is ODBC Table attribute makes the collection itself accessible to external ODBC client applications. If, the Is ODBC Table attribute were omitted or specified as No, the collection would remain available only within TDL and could not be queried through ODBC.
Suppose TallyPrime receives data from an external application in JSON or XML format. The received data may contain several levels of information, with different objects representing entities such as Ledgers, Customers, Stock Items, or transactions. To construct a collection from this data, TallyPrime needs to identify the relevant object within the received structure before its values can be retrieved.
The JSON Object attribute, also available as XML Object, specifies the object in the JSON or XML data that should be considered while constructing the collection. Once the required object is identified, its properties in JSON or elements in XML can be accessed as methods and used within the collection.
This attribute becomes particularly useful when the received JSON or XML contains multiple objects or a nested structure, and the collection needs to work with a particular object from that structure.
The JSON Object attribute can be used along with JSON Object Path (alias XML Object Path) when navigation through multiple levels of the incoming data is required. While JSON/XML Object Path identifies the location of the required data within the hierarchy, JSON/XML Object identifies the object at that location that needs to be considered for collection construction.
Therefore, when constructing a collection from external JSON or XML data, the flow can be understood as Data Source → JSON/XML Object Path → JSON/XML Object → Fetch. The Data Source identifies where the external data comes from, Object Path navigates to the required location within that data, Object identifies what should be considered at that location, and Fetch retrieves the required values from it.
Syntax
[Collection : <Collection Name>]
JSON Object / XML Object : <JSON/XML Object Name>
Example
[Collection : TSPL JSON Collection]
Data Source : HTTP JSON : “https://example.com/api/ledgers”
JSON Object Path : “DATA:LEDGERS”
JSON Object : “LEDGER”
Fetch : Name, Parent, OpeningBalance, ClosingBalance
The TSPL JSON Collection retrieves data from an external application using the HTTP JSON data source. The JSON Object Path attribute navigates to the DATA:LEDGERS node within the received JSON document. At this location, the JSON Object attribute specifies that every LEDGER object should be treated as one collection object. Once the current object is established, the Fetch attribute retrieves the Name, Parent, OpeningBalance, and ClosingBalance properties from each LEDGER object and makes them available within the collection.
The Data Source attribute retrieves the JSON data, JSON Object Path locates the required section of the document, JSON Object identifies the object that represents each collection object, and finally the Fetch attribute retrieves the required values from that object. As a result, every LEDGER object in the JSON document becomes one object in the collection, with the fetched properties available for further processing or display.
Suppose you’re retrieving data from an external source such as a JSON document, an XML document, or a database (for example, an Excel workbook accessed through ODBC). The structure and object names used by these external sources may not match the object names used in your TDL application. Before TallyPrime can construct a collection, it needs a way to associate the external object with a TDL object. The JSON Object attribute (aliases XML Object and SQL Object) is used to map a user-defined TDL object name to the corresponding object in the external data source. This mapping enables TallyPrime to interpret the incoming data correctly and construct collection objects from it. The attribute is applicable when the collection retrieves data from JSON, XML, or SQL-based data sources. Depending on the type of data source, the corresponding alias is used:
- JSON Object – Used with JSON data sources.
- XML Object – Used with XML data sources.
- SQL Object – Used with SQL-based data sources, such as Excel or other ODBC-compliant databases.
The JSON/XML/SQL Object attribute is generally used together with the corresponding Object Path attribute. While the Object Path attribute navigates to the required location within the external data, the Object attribute maps the user-defined TDL object to the external object found at that location. Once the mapping is established, the Fetch attribute retrieves the required values from the mapped object.
Therefore, the overall flow of collection construction can be understood as:
Data Source → Object Path → Object Mapping → Fetch
where:
- Data Source identifies where the external data is obtained from.
- Object Path locates the required section within the external data.
- JSON/XML/SQL Object maps the user-defined TDL object to the corresponding external object.
- Fetch retrieves the required values from the mapped object.
The JSON Object (alias XML Object and SQL Object) attribute maps a user-defined TDL object to the corresponding object in an external JSON document, XML document, or SQL data source, enabling TallyPrime to construct the collection correctly.
Syntax
[Collection : <Collection Name>]
JSON Object Path : <Object Path Expression>
Example
[Collection : TSPLLeaveSummaryJSON]
Data Source : HTTP JSON : “http://localhost/ExportHeader/getleavedetails.php”
Export Header : “Accept:application/json”
Export Header : “Accept-Charset:utf-8”
Export Header : “EmpId:”+##TSPLEmpId
Remote Request : TSPL Leave Request : UTF8
JSON Object Path : “LeaveInfo:1:LeaveDetails:1”
The JSON Object Path (alias XML Object Path) attribute specifies the location of the object that should be retrieved from the incoming JSON or XML document. In the example, the external application returns data in JSON format. The path ‘LeaveInfo:1:LeaveDetails:1’ navigates through the JSON hierarchy to locate the required LeaveDetails object. Once this object is reached, its properties become available for retrieval using the Fetch attribute.
The object path consists of object names separated by a colon (:). Where multiple occurrences of the same object exist, an index can be specified to identify the required occurrence. This enables TallyPrime to navigate complex JSON and XML hierarchies and locate the exact object that should be used while constructing the collection.
Suppose your company operates in a multilingual environment where master records are maintained in multiple languages. For example, a Ledger may be created in English, while its translated names are available in Hindi, Marathi, Kannada, or German. Depending on the requirement, a collection may need to retrieve masters associated with a particular language or retrieve all masters irrespective of the language in which they were created.
The KB Language attribute specifies the Knowledge Base (KB) Language ID whose masters should be retrieved by the collection. When a specific language ID is specified, only the masters associated with that language are included in the collection. If the value is specified as 0, the collection retrieves all matching masters irrespective of the language in which they were created.
The following table lists the commonly used KB Language IDs available in TallyPrime.
| Language | KB Language ID | System Formula |
| All Languages | 0 | — |
| Arabic | 1025 | @@ArabicLanguageId |
| English | 1033 | @@EnglishLanguageId |
| Indonesian | 1057 | @@IndonesiaLanguageId |
| Hindi | 1081 | @@HindiLanguageId |
| Bahasa | 1086 | @@BahasaLanguageId |
| Bengali | 1093 | @@BengaliLanguageId |
| Punjabi | 1094 | @@PunjabiLanguageId |
| Gujarati | 1095 | @@GujaratiLanguageId |
| Tamil | 1097 | @@TamilLanguageId |
| Telugu | 1098 | @@TeluguLanguageId |
| Kannada | 1099 | @@KannadaLanguageId |
| Malayalam | 1100 | @@MalayalamLanguageId |
| Marathi | 1101 | @@MarathiLanguageId |
| Hinglish | 33849 | @@HinglishLanguageId |
It is recommended to use the predefined system formulas instead of hardcoding the numeric language IDs, as they make the code more readable and easier to understand.
The KB Language attribute determines which master records are retrieved into the collection. It does not control the language in which the user interface is displayed. If your TDL application contains fixed text such as report titles, menu names, button captions, prompts, messages, or any other labels displayed in the TallyPrime user interface, those strings should be maintained in a Dictionary so that they can be translated and displayed in the user’s selected language. TallyPrime provides the Dictionary Manager to create, maintain, and distribute multilingual dictionaries for TDL applications.
The KB Language attribute controls the language of the master data retrieved by a collection, whereas the Dictionary Manager controls the language in which fixed text and user interface labels are displayed. For more information on creating and managing multilingual dictionaries, refer to the Dictionary Manager section in the Developer Reference here.
Syntax
[Collection : <Collection Name>]
KB Language : <Expression>
Example
[Collection : TSPL Ledger Collection]
Type : Ledger
KB Language : If ##SVFilterMasterTableOnLanguage Then ##SVCurrentUILanguageId + Else 0
Fetch : Name, Parent
|
|
[Field : TSPL Config UI Language Id]
Use : Number Field
Modifies : SVCurrentUILanguageId
Set As : If #ConfigUILanguage = $$LocaleString:”English” Then @@EnglishLanguageId +
Else $$Table:ConfigUILanguage:$LanguageId
Set Always : Yes
Skip : Yes
Invisible : Yes
The TSPL Ledger Collection retrieves Ledger objects and dynamically determines the language of the masters to be retrieved using the KB Language attribute. The expression associated with KB Language first checks the value of the variable ##SVFilterMasterTableOnLanguage. If the variable evaluates to Yes, the collection retrieves only those Ledger masters associated with the language specified by ##SVCurrentUILanguageId. If the variable evaluates to No, the expression evaluates to 0, causing the collection to retrieve all Ledger masters irrespective of the language in which they are maintained.
The variable ##SVCurrentUILanguageId is assigned in the TSPL Config UI Language Id field. When the user selects a language from the configuration screen, the field updates the variable with the corresponding KB Language ID. If the selected language is English, the predefined system formula @@EnglishLanguageId is assigned. For all other languages, the corresponding language ID is retrieved from the ConfigUILanguage table.
Suppose you’re creating a report that displays the total sales for each Stock Item. During aggregation, multiple Inventory Entries belonging to different vouchers are combined to produce a single aggregated object representing the Stock Item. While the aggregated object contains the total sales value, it does not indicate which individual Inventory Entries contributed to that total. There are situations where the aggregated result alone is not sufficient. For example, after viewing the total sales of a Stock Item, a user may want to identify the individual Inventory Entries or Vouchers that contributed to that total for verification, reconciliation, or drill-down analysis.
The Keep Contributors attribute addresses this requirement by preserving all the objects that participate in the aggregation. Instead of discarding the contributing objects after the aggregated object is created, TallyPrime maintains them as a named sub-collection within each aggregated object. The name of this sub-collection is specified as the value of the Keep Contributors attribute. These contributor objects can later be accessed through the sub-collection to determine exactly which objects participated in the aggregation.
For example, if multiple Inventory Entries belonging to different Sales Vouchers are aggregated to calculate the total sales of a Laptop, the aggregated Laptop object will contain not only the calculated Total Sales, but also the named contributor sub-collection containing all the Inventory Entries that contributed to that total. This makes it possible to implement drill-down reports where selecting the aggregated object immediately displays the individual contributor objects that make up the aggregated value.
Although Keep Contributors and Keep Source both preserve information after a collection is constructed, they serve different purposes. Consider a collection that aggregates the total sales of a Laptop from three Sales Vouchers—SI-001, SI-002, and SI-003. If Keep Contributors is specified, the aggregated Laptop object not only stores the Total Sales, but also maintains a named sub-collection containing the Inventory Entries from SI-001, SI-002, and SI-003. This enables the application to answer questions such as, “Which vouchers or inventory entries contributed to the total sales of Laptop?” and makes drill-down, reconciliation, and audit reports possible.
In contrast, Keep Source does not maintain these contributor objects within the aggregated Laptop object. Instead, it preserves the entire source collection (for example, the original Voucher Collection) that was used to construct the aggregated collection. This allows the same source collection to be reused later for another aggregation, computation, or processing operation without reconstructing it. Therefore, while Keep Contributors preserves the relationship between an aggregated object and its contributing objects, Keep Source preserves the original source collection itself. In simple terms, Keep Contributors answers the question, “Which objects contributed to this aggregated result?”, whereas Keep Source answers, “Can the original source collection be reused for further processing?” The Keep Contributors attribute is applicable only to aggregated collections, where objects are grouped using attributes such as By and aggregated using attributes such as Aggr Compute. It has no effect on collections that do not perform aggregation. Since the contributor objects are retained as part of each aggregated object, enabling this attribute increases memory consumption and should therefore be used only when the contributing objects need to be accessed after aggregation.
Syntax
[Collection : <Collection Name>]
Keep Contributors : <Sub Collection Name>
Example
[Collection : TSPL Sales Summary]
Source Collection : Voucher Collection
Walk : Inventory Entries
By : StockItem : $StockItemName
Aggr Compute : TotalSales : Sum : $Amount
Keep Contributors : ContributingEntries
The TSPL Sales Summary collection walks through the Inventory Entries of every Voucher and groups them by Stock Item using the By attribute. The Aggr Compute attribute then calculates the TotalSales for each Stock Item by summing the Amount of all contributing Inventory Entries.
The Keep Contributors attribute specifies ContributingEntries as the name of the sub-collection in which the contributor objects should be maintained. As a result, each aggregated Stock Item object not only contains the calculated TotalSales, but also maintains a sub-collection named ContributingEntries containing all the Inventory Entries that participated in the aggregation.
For example, assume the following Inventory Entries exist:
| Voucher | Stock Item | Amount |
| SI-001 | Laptop | ₹50,000 |
| SI-002 | Laptop | ₹35,000 |
| SI-003 | Printer | ₹20,000 |
| SI-004 | Laptop | ₹15,000 |
After aggregation, the collection contains two aggregated objects:
- Laptop → TotalSales: ₹1,00,000
- Printer → TotalSales: ₹20,000
Since Keep Contributors : ContributingEntries is specified, the aggregated Laptop object also maintains a sub-collection named ContributingEntries, containing the Inventory Entries from SI-001, SI-002, and SI-004 that contributed to its total sales. Similarly, the Printer object maintains a sub-collection containing the Inventory Entry from SI-003.
These contributor objects can later be traversed or displayed to implement drill-down reports, audit trails, reconciliation reports, or any scenario where the individual objects contributing to an aggregated result need to be identified.
Suppose you’re designing a Monthly Sales Dashboard that analyses thousands of Sales Vouchers. The dashboard displays several views of the same data, such as Total Sales, Top-selling Items, Region-wise Sales, Customer-wise Sales, and Item-wise drill-downs. Although each section presents the information differently, all of them are derived from the same collection of Sales Vouchers.
Without the Keep Source attribute, every time another collection or report requires the source data, TallyPrime reconstructs the source collection by reading the vouchers again. This reconstruction occurs repeatedly whenever the user scrolls through the report, opens a drill-down, refreshes the report, changes a filter, or switches between summary and detailed views. When the source collection contains thousands of objects, repeatedly reconstructing it can noticeably affect performance.
The Keep Source attribute addresses this problem by retaining the source collection after it has been constructed. Instead of rebuilding the same source collection multiple times, subsequent collections and reports can reuse the retained collection, resulting in faster response times and a smoother user experience.
Unlike Keep Contributors, which preserves the objects contributing to each aggregated object, Keep Source preserves the entire source collection. For example, if a collection aggregates Sales Vouchers by Stock Item, specifying Keep Contributors enables each aggregated Stock Item to maintain the list of Inventory Entries that contributed to its total sales, making drill-down and traceability possible. In contrast, specifying Keep Source retains the original Voucher Collection itself, allowing other collections or reports to reuse it without reconstructing it. Thus, Keep Contributors is intended for drill-down and traceability, whereas Keep Source is intended for performance optimisation and reuse of source collections.
The Keep Source attribute allows you to specify where the source collection should be retained in the collection ownership hierarchy. This is achieved using the values Yes, ., .., …, and ().. As you move from . to .. and …, the source collection is retained progressively higher in the ownership hierarchy. Specifying (). retains the source collection at the root owner, making it available throughout the entire report hierarchy.
Retention Levels
| Value | Description | Use Case |
| Yes | Retains the source collection with the current collection. | When only the current collection needs to reuse the source collection. |
| . | Retains the source collection with the immediate parent (owner). | When sibling collections under the same parent need to reuse the source collection. |
| .. | Retains the source collection one level above the immediate parent. | When multiple nested collections need to share the same source collection. |
| … | Continues moving the retained source collection further up the ownership hierarchy. | Deeply nested report or collection hierarchies. |
| (). | Retains the source collection at the root owner of the hierarchy. | Dashboards or analytical reports where many collections reuse the same source collection. |
The following diagram illustrates how the retention level determines where the source collection is preserved within the collection ownership hierarchy.
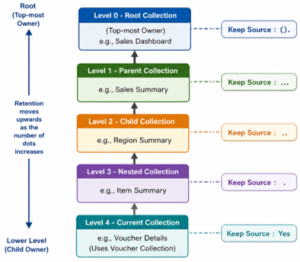
Practical Example
Consider the above report hierarchy and assume that Voucher Collection is the source collection used by Item Summary.
- Keep Source : Yes retains the Voucher Collection with Item Summary. Only Item Summary can reuse the source collection.
- Keep Source : . retains the Voucher Collection with Region Summary. Both Item Summary and any other collections owned by Region Summary can reuse it.
- Keep Source : .. retains the Voucher Collection with Sales Summary. Consequently, Region Summary, Customer Summary, and all their child collections can reuse the same Voucher Collection.
- Keep Source : (). retains the Voucher Collection with the Sales Dashboard, which is the root owner. As a result, every report and collection under the dashboard—including GST Analysis—can reuse the same Voucher Collection without reconstructing it.
In simple terms, think of Keep Source as caching the source collection at a chosen level in the collection hierarchy. The higher the retention level, the larger the portion of the report hierarchy that can reuse the cached source collection, thereby eliminating unnecessary reconstruction and improving performance.
Syntax
[Collection : <Collection Name>]
Keep Source : Yes / dotted syntax
Example 1 – Retaining the Source Collection
[Collection : TSPL Voucher Collection]
Type : Voucher
Keep Source : Yes
The collection retrieves Voucher objects and retains the constructed source collection in memory. If another collection or report subsequently requires the same Voucher collection, it can reuse the retained collection instead of reconstructing it.
Example 2 – Retaining at the Root Level
[Collection : TSPL Voucher Collection]
Type : Voucher
Keep Source : ().
The Voucher collection is retained at the root of the collection hierarchy. Any collection within the report hierarchy that depends on the same source collection can reuse it, eliminating repeated construction of the Voucher collection and improving overall report performance.
Many reports and configuration screens require users to choose from a fixed set of values such as Country, Stock Valuation Type, Interest Style, or Payment Mode. These values are predefined and do not exist as objects in the company data, yet they need to be presented as a collection for user selection. The List attribute (alias List Name) is used to construct a collection from a predefined list of string values. Instead of gathering objects from a data source such as Ledger, Voucher, or Stock Item, the collection is populated only with the strings explicitly specified using the List attribute. The attribute is a list attribute and the List attribute can be specified multiple times within the same collection. Each attribute adds one or more string values to the collection. The values can also be provided using a comma i.e. a comma separated list.
This attribute is particularly useful for creating small, static collections used in tables, configuration screens, filters, option lists, or any scenario where the values are known beforehand and do not need to be gathered dynamically from the company data.
Syntax
[Collection : <Collection Name>]
List : <String 1>, <String 2>, …
Example
[Collection : TSPL Payment Modes]
List : “Cash”, “Cheque”, “NEFT”
List : “RTGS”, “UPI”, “Credit Card”
The TSPL Payment Modes collection is created using the List attribute. Instead of gathering data from a source such as Ledger, Voucher, or Stock Item, the collection is populated with the predefined string values specified using the List attribute. The first List attribute adds the values Cash, Cheque, and NEFT to the collection, while the second List attribute appends RTGS, UPI, and Credit Card. Together, they form a single collection containing all six payment modes.
Such collections are commonly used to populate tables, configuration screens, filter options, or user selection lists, where the available values are fixed and known in advance. Since the values are explicitly specified in the collection definition, there is no dependency on company data or any external data source.
The resulting collection conceptually contains the following values:
| Value |
| Cash |
| Cheque |
| NEFT |
| RTGS |
| UPI |
| Credit Card |
This collection can subsequently be associated with a Table attribute in a field, enabling users to select one of the predefined payment modes.
Consider a report that retrieves all Ledger objects from a company containing several thousand ledgers. If the report is intended to display only the first 100 Ledgers, retrieving every Ledger from the database would unnecessarily consume time and memory. The Max attribute (alias Maximum) is used to specify the maximum number of objects that a collection can gather. Once the specified limit is reached, no additional objects are added to the collection, even if more matching objects are available. This helps improve performance by reducing the amount of data retrieved and processed. The Max attribute is particularly useful when displaying preview lists, implementing pagination, retrieving only the Top N records, or limiting the number of objects processed during data-intensive operations.
Syntax
[Collection : <Collection Name>]
Max : <Numberic Expression>
Example
[Collection : TSPL Ledger Collection]
Type : Ledger
Max : 100
Fetch : Name, Parent
The TSPL Ledger Collection retrieves Ledger objects and fetches the Name and Parent methods. The Max attribute is specified as 100, instructing TallyPrime to gather at most 100 Ledger objects into the collection. If the company contains fewer than 100 Ledgers, all available Ledgers are retrieved. However, if the company contains more than 100 Ledgers, only the first 100 matching Ledger objects become part of the collection.
When a Collection is associated with a Table, each object in the collection is displayed as a row in the table. Some columns, such as Narration, Address, Description, or any user-defined method containing lengthy text, may require word wrapping to display their complete contents. While word wrapping improves readability, allowing the text to wrap indefinitely can make the table excessively tall and inconsistent in appearance. The Max Word Wrap Lines attribute is used to specify the maximum number of lines over which the contents of a table row can be word-wrapped. This attribute is effective only when the collection is used as a Table. Once the specified limit is reached, the row height does not increase further, ensuring that long text does not occupy excessive screen space.
The attribute is particularly useful when designing lookup tables, selection lists, and other user interfaces where lengthy descriptions need to be displayed while maintaining a compact and consistent table layout.
Syntax
[Collection : <Collection Name>]
Max Word Wrap Lines : <Numberic Expression>
Example
[Collection : TSPL Stock Item Collection]
Type : Stock Item
Fetch : Name, Notes
Format : $Name, 25
Format : $Notes, 40
Max Word Wrap Lines : 3
The TSPL Stock Item Collection retrieves Stock Item objects and fetches the Name and Notes methods. The Format attributes display the Name and Notes as separate columns when the collection is invoked as a Table. The Max Word Wrap Lines attribute is specified as 3, limiting the Notes column to a maximum of three wrapped lines for each Stock Item. If the notes fit within three lines, they are displayed completely. However, if the notes are longer, the row height does not increase beyond three lines, thereby preventing the table from becoming excessively tall.
This is particularly useful when displaying Stock Items in a selection table where each item may contain detailed notes or product descriptions which could be long. Limiting the number of wrapped lines ensures that the table remains compact, easy to navigate, and visually consistent, while still displaying sufficient information for the user to identify the appropriate Stock Item.
Most collections are designed to contain objects of a single type. Whether the objects are retrieved using the Type attribute (such as Ledger, Voucher, or Stock Item) or obtained from an external Data Source (such as XML, JSON, ODBC, or a DLL), every object in the collection is typically represented using the same object definition. In these scenarios, the object type is known beforehand and remains the same for all objects in the collection. However, not every data source is homogeneous. In many integration scenarios, a single data source may contain records representing different business entities. As the collection processes each record, it must decide what kind of object should be created to represent that record. For example, an incoming JSON payload may contain Customer, Supplier, and Employee records, while an XML document may contain Header, Line Item, and Tax Detail records. Although all these records are received through the same collection, each represents a different entity with its own methods, storage definitions, and behaviour. Consequently, they cannot all be represented using a single object type.
The New Object attribute addresses this requirement by allowing the type of object to be determined dynamically while the collection is being populated. As each record is processed, TallyPrime evaluates the specified condition and creates an object of the appropriate type. Multiple New Object attributes can be specified within the same collection. These conditions are evaluated sequentially, and the first condition that evaluates to True determines the type of object that is created and added to the collection.
Syntax
[Collection : <Collection Name>]
New Object : <Object Definition Name>[:<Condition>]
Example
[Collection : TSPL Business Partner Collection]
Data Source : File JSON : “BusinessPartners.json”
New Object : Customer Object : $PartnerType = “Customer”
New Object : Supplier Object : $PartnerType = “Supplier”
Fetch : Name, PartnerType, City
Sample JSON
[
{
“Name” : “ABC Traders”,
“PartnerType” : “Customer”,
“City” : “Mumbai”
},
{
“Name” : “XYZ Supplies”,
“PartnerType” : “Supplier”,
“City” : “Pune”
}
]
The TSPL Business Partner Collection retrieves records from the JSON file BusinessPartners.json. Each record contains a field named PartnerType, which identifies whether the record represents a Customer or a Supplier. The collection specifies two New Object attributes. As each record is processed, TallyPrime evaluates the conditions in the order in which they are specified. If the PartnerType is Customer, a Customer Object is created. If the PartnerType is Supplier, a Supplier Object is created. The newly created object is then added to the collection. As a result, the collection contains objects of different types, even though all records originate from the same JSON data source. This eliminates the need to create separate collections for Customer and Supplier records and enables a single collection to process heterogeneous data efficiently. Conceptually, the collection would contain:
TSPL Business Partner Collection
├── Customer Object
│ Name : ABC Traders
│ City : Mumbai
└── Supplier Object
│Name : XYZ Supplies
│City : Pune
This approach is particularly useful in JSON/XML integrations, data migration utilities, and connector frameworks, where a single data source often contains records representing different business entities that must be converted into different TDL object definitions before further processing.
Most collections retrieve objects from a predefined source using attributes such as Type or Data Source. However, there are situations where the required objects are not available from any existing source and need to be explicitly included in the collection. For example, you may have created one or more user-defined TDL objects to represent business entities, configuration data, or intermediate processing results, and you want these objects to be treated as members of a collection. The Object attribute is used to specify one or more user-defined object definitions that should be included in a collection. Instead of gathering objects from the company data or an external data source, the collection is populated with the specified object definitions. This allows custom objects to participate in collection operations such as Walk, Filter, Sort, Search, Repeat, or any other processing performed on collections.
The Object attribute is particularly useful when building collections that combine multiple TDL-defined objects, creating configuration or metadata collections, or organising custom business objects that do not originate from standard TallyPrime data. Unlike the Type attribute, which retrieves objects of a specific type from an existing source, the Object attribute explicitly specifies the user-defined object definitions that should form part of the collection.
Syntax
[Collection : <Collection Name>]
Object : <Object Definition Name> [, <Object Definition Name>]…
Example
[Collection: TSPL EmbedType]
Title : $$LocaleString:”Mail Sending”
Object : TSPLAsEmbed, TSPLAsAttach
Format : $Name
Format : $Explanation
Client Only : Yes
[Object : TSPLAsEmbed]
Name : @@AsEmbed
Explanation : “”
[Object : TSPLAsAttach]
Name : @@AsAttach
Explanation : $$LocaleString:”Recommended for Printing”
The TSPL EmbedType collection is constructed using the Object attribute, which explicitly includes the user-defined objects TSPLAsEmbed and TSPLAsAttach. Unlike collections that retrieve objects from a Type or an external Data Source, this collection is built entirely from the specified object definitions. The TSPLAsEmbed and TSPLAsAttach objects define the methods Name and Explanation. These methods are displayed as separate columns in the table using the Format attributes. When the collection is invoked as a table, it presents two selectable options:
| Name | Explanation |
| As Embed | (Blank) |
| As Attach | Recommended for Printing |
This approach is particularly useful when presenting a fixed set of predefined options that are defined entirely in TDL and are not stored as company data.
A Collection is a TDL definition used to gather and organise data for processing, reporting, or user interaction. While collections commonly retrieve data from TallyPrime objects such as Ledgers, Vouchers, or Stock Items, they can also retrieve data from external databases using ODBC (Open Database Connectivity).
The ODBC capability enables TallyPrime to communicate with external relational databases such as Excel, Microsoft SQL Server, Microsoft Access, MySQL, or any other database that exposes an ODBC driver. This allows developers to retrieve data maintained outside TallyPrime and process it using the same collection framework available for TallyPrime data.
A collection can connect to an external database in one of two ways:
- Using a Data Source Name (DSN): The connection details are predefined in the operating system. The collection simply refers to the DSN, and the ODBC driver establishes the connection using the stored configuration.
- Using a DSN-less connection: Instead of relying on a predefined DSN, the collection specifies the connection details directly, such as the ODBC Driver, Server, Database, Path, User ID, or other connection parameters. This approach makes the solution more portable because it does not require users to create and configure a DSN on every machine.
Once the connection is established, the collection can execute SQL queries against the external database and retrieve the resulting records. These records become part of the collection and can subsequently be filtered, sorted, aggregated, searched, or displayed in reports and tables, just like data retrieved from TallyPrime.
This capability is particularly useful in ERP integrations, CRM integrations, data migration utilities, business intelligence dashboards, and synchronisation solutions, where information needs to be exchanged between TallyPrime and external applications.
ODBC allows a TDL collection to retrieve and process data directly from an external database. The connection can be established either through a predefined Data Source Name (DSN) or by specifying the database connection details directly using a DSN-less connection.
Syntax
[Collection : <Collection Name>]
ODBC : <ODBC Driver Connection String>
SQL : <SQL Select Query>
Example
DSN-less connection to MS Access
[Collection : TSPL Customer Data]
ODBC : “Driver={Microsoft Access Driver (*.mdb)};Dbq=C:\CustomerData.mdb;Uid=;Pwd=;”
SQL : “Select * From CustomerMaster”
For example, if CustomerMaster contains the following columns:
| CustomerName | City | CreditLimit |
| ABC Traders | Mumbai | 500000 |
| XYZ Enterprises | Pune | 750000 |
each row retrieved from the external database is treated as an object in the TDL collection, and each column is available as a method of that object.
The retrieved data can therefore be accessed as:
Object 1
$CustomerName → ABC Traders
$City → Mumbai
$CreditLimit → 500000
Object 2
$CustomerName → XYZ Enterprises
$City → Pune
$CreditLimit → 750000
The TSPL Customer Data collection establishes a connection with the external MS Access database using the ODBC attribute. In this example, the connection is DSN-less, because the ODBC driver and database file path are specified directly in the connection string rather than referring to a preconfigured DSN.
The SQL attribute then specifies the query to be executed against the external database. The query retrieves all records from the CustomerMaster table. Once the data is retrieved, TallyPrime represents each row as an object in the collection and makes each column available as a method of that object. This allows the externally retrieved data to be accessed in TDL using $ methods, just like methods of other objects.
For example, $CustomerName accesses the value from the CustomerName column, $City accesses the City column, and $CreditLimit accesses the CreditLimit column. The collection can subsequently be used for further TDL processing, such as filtering, computing, sorting, or displaying the retrieved data in a report or table.
The ODBC connection can also be established using a DSN instead of specifying the complete connection details. In that case, the DSN configured for the external database is provided through the ODBC attribute, while the SQL attribute continues to specify the query used to retrieve the required data.
Consider a Customer-wise Outstanding report that allows the user to drill down through the following hierarchy:
Customer Group → Customer → Outstanding Bills → Bill Details
The report is designed to be reusable for different Customer Groups and Customers. When the user selects a particular Customer, the Outstanding Bills collection must retrieve only the bills belonging to that Customer. The Customer Name is available in the requestor object, that is, the Customer object from which the Outstanding Bills collection is requested. However, once the collection starts gathering Voucher objects, the collection is evaluating Voucher objects rather than the Customer object. Therefore, the Customer Name from the requestor context needs to be carried into the collection so that it can be used while filtering the Vouchers. Since every method is evaluated in the context of the current object, using $Name at a later stage would no longer retrieve the Customer Name; it would evaluate $Name in the context of the current Voucher object.
This creates a context gap: the value required to filter or process the collection belongs to the requestor object, whereas the collection is evaluating a different set of objects. A mechanism is therefore required to carry the requestor’s value into the collection. A variable provides a context-free way of retaining this value. The Parm Var attribute provides this mechanism by capturing the required value from the requestor’s context and making it available to the collection as a parameter, without retaining the requestor object’s context.
Syntax
[Collection : <Collection Name>]
Parm Var : <Parameter Name> : <Data Type> : <Expression>
Example
[Collection : TSPL Customer Outstanding]
Type : Voucher
Parm Var : CustomerName : String : $Name
Filter : TSPL Customer Outstanding Filter
[System : Formula]
TSPL Customer Outstanding Filter : $PartyLedgerName = ##CustomerName
The TSPL Customer Outstanding collection retrieves Voucher objects. However, the collection needs the Customer Name from the Customer object that requested the collection to identify which Vouchers belong to that Customer. The Parm Var attribute captures $Name from the requestor Customer object and stores it in the parameter variable CustomerName.
Once the collection starts processing Voucher objects, ##CustomerName continues to hold the Customer Name received from the requestor. The Filter can therefore use ##CustomerName to compare it with $PartyLedgerName of each Voucher.
For example, when the collection is requested from the ABC Traders Customer object:
Customer Object
Name : ABC Traders
│
│ Parm Var : CustomerName : String : $Name
▼
##CustomerName = “ABC Traders”
│
▼
Voucher Collection
│
│ $PartyLedgerName = ##CustomerName
▼
Vouchers belonging to ABC Traders
If the same collection is requested from XYZ Enterprises, CustomerName receives “XYZ Enterprises”, and the same collection retrieves the corresponding Vouchers.
Consider a Stock Item-wise Sales Analysis that is built using Sales Vouchers. The Sales Voucher collection acts as the source collection, while another collection walks through the Inventory Entries and performs further processing to derive item-wise sales information.
While constructing the resultant collection, certain methods from the source Voucher objects may be required for filtering, computation, aggregation, or other collection operations. If these methods are not already available in the source objects, they may have to be retrieved when they are subsequently referenced during collection processing. When the source collection contains a large number of objects, such repeated retrieval can impact the performance of the report.
The Prefetch attribute is used to specify the methods that should be fetched in advance into the source objects. This makes the required method values available in the source object before further collection processing takes place.
For example, if a resultant collection requires the Date, VoucherNumber, PartyLedgerName, and Amount methods of the source Voucher objects at different stages of processing, these methods can be prefetched. When the collection subsequently refers to these methods, their values are already available with the respective source objects.
Prefetch is therefore useful when the methods required from the source objects are known beforehand, particularly when working with large source collections or multiple levels of collection processing where the same source-object methods may otherwise need to be accessed repeatedly.
Prefetch should not be confused with Fetch. While Fetch specifies the methods to be fetched for the objects of the collection, Prefetch specifies the methods that need to be fetched into the source objects in advance, so that they are available for subsequent processing.
Syntax
[Collection : <Collection Name>]
Prefetch : <Method Name> [, <Method Name> …]
Example
[Collection : TSPL Sales Vouchers]
Type : Voucher
Child Of : $$VchTypeSales
[Collection : TSPL Item-wise Sales]
Source Collection : TSPL Sales Vouchers
Prefetch : Date, VoucherNumber, PartyLedgerName
Walk : Inventory Entries
By : StockItem : $StockItemName
Aggr Compute : SalesValue : Sum : $Amount
Here, TSPL Sales Vouchers is the source collection. The TSPL Item-wise Sales collection processes its objects and walks through the Inventory Entries.
The Prefetch attribute specifies Date, VoucherNumber, and PartyLedgerName as methods that are required from the source Voucher objects. These methods are fetched into the source objects in advance so that their values are available when required during subsequent processing of the collection.
This is different from Fetch, which fetches the specified methods for the objects being gathered by the collection. Prefetch specifically prepares the source objects with methods that will be required during subsequent collection processing.
Consider a Sales Analysis report that first processes Sales Vouchers to determine the total quantity and total sales for each Stock Item. After the first Walk and aggregation, the collection contains:
| Stock Item | Total Qty | Total Sales |
| Item A | 120 | 75,000 |
| Item B | 80 | 52,000 |
| Item C | 150 | 96,000 |
The same report also needs to present a Stock Category-wise Sales Summary. For example, Item A and Item B belong to Electronics, while Item C belongs to Accessories. The required output is:
| Stock Category | Total Qty | Total Sales |
| Electronics | 200 | 1,27,000 |
| Accessories | 150 | 96,000 |
The Item-wise collection has already processed the individual Voucher and Inventory Entry data and calculated $TotalQty and $TotalSales for each Stock Item. Therefore, while creating the Category-wise summary, there is no need to walk through the original Sales Vouchers and calculate these values again. Instead, the already-created Item-wise summary objects can be walked again and grouped by Stock Category.
Here, the Recompute attribute is required because methods already available in the source collection need to be brought into the resultant collection during Re-walk. For example, $TotalQty and $TotalSales have already been calculated in the Item-wise Sales Summary. When these values are required for creating the Category-wise Sales Summary, Recompute fetches the required methods from the source collection instead of deriving the values again from the original Voucher data.
While fetching a method, Recompute also allows a new method name (alias) to be assigned to it in the resultant collection. For example, $TotalSales available in the source collection can be brought into the resultant collection as $SalesAmount.
The methods can therefore be carried forward as:
| Method in Item-wise Source Collection | Method in Resultant Collection |
| $StockItem | $ItemName |
| $TotalQty | $Quantity |
| $TotalSales | $SalesAmount |
Recompute works only in Re-walk mode; therefore, Re-walk is mandatory for using this attribute. Without Re-walk, the Recompute attribute is not executed.
Recompute is useful when methods that have already been computed or aggregated in a source collection are required while constructing another collection during Re-walk. It enables those existing method values to be fetched from the source collection and, where required, made available under different method names, instead of deriving the values again from the original data.
Syntax
[Collection : <Collection Name>]
Recompute : <Method Name> : <Source Method>
Example
Continuing with the Item-wise Sales Summary → Stock Category-wise Sales Summary scenario:
[Collection : TSPL Item-wise Sales]
Source Collection : TSPL Sales Vouchers
Walk : Inventory Entries
By : StockItem : $StockItemName
Aggr Compute : TotalQty : Sum : $BilledQty
Aggr Compute : TotalSales : Sum : $Amount
[Collection : TSPL Category-wise Sales]
Source Collection : TSPL Item-wise Sales
Re Walk : Yes
Recompute : ItemName : $StockItem
Recompute : Quantity : $TotalQty
Recompute : SalesAmount : $TotalSales
The TSPL Item-wise Sales collection first walks through the Inventory Entries of the Sales Vouchers and creates an aggregated object for each Stock Item. As a result, methods such as $StockItem, $TotalQty, and $TotalSales are available in the Item-wise Sales collection.
The TSPL Category-wise Sales collection uses this already-processed collection as its Source Collection and operates in Re-walk mode. Since the values required for further processing are already available in the source objects, Recompute fetches these methods into the objects being constructed during Re-walk.
Each Recompute also assigns a new method name to the fetched value:
| Source Collection Method | Resultant Method | Purpose |
| $StockItem | $ItemName | Carries the Stock Item into the resultant object as ItemName |
| $TotalQty | $Quantity | Carries the already-aggregated quantity as Quantity |
| $TotalSales | $SalesAmount | Carries the already-aggregated sales value as SalesAmount |
For example:
‘Recompute : SalesAmount : $TotalSales’ does not calculate the Sales Amount again. $TotalSales has already been calculated by Aggr Compute in the source collection. Recompute fetches that existing value from the source object and makes it available as $SalesAmount in the resultant object.
The flow can therefore be understood as:
Item-wise Sales Source Object
—————————–
$StockItem = “Item A”
$TotalQty = 120
$TotalSales = 75,000
│
│ Re-walk + Recompute
▼
Resultant Object
—————————–
$ItemName = “Item A”
$Quantity = 120
$SalesAmount = 75,000
Recompute is executed only during Re-walk. Therefore, Re Walk : Yes is mandatory when Recompute is used. Its purpose is not to recalculate an expression, despite the name Recompute, but to fetch an existing method from the source collection during Re-walk and make it available in the resultant collection, with the option of assigning it a different method name.
An integration may require TallyPrime to request specific information from an external HTTP server, where the server expects the request in XML format. For example, an organisation may maintain employee leave information in an external application. When a user wants to view the leave details of a particular employee in TallyPrime, TallyPrime needs to send an XML request containing the Employee ID to the external server and gather the XML response into a Collection.
In such a requirement, the XML request can be constructed using a TDL Report. The Remote Request attribute is used to specify the name of the Report that needs to be generated and sent to the HTTP server as the XML request. The response received from the server is then gathered into the Collection for further processing or display.
At times, the request cannot be constructed until certain information is provided by the user. For example, the user may first need to enter an Employee ID or select a date range before requesting the leave details. These inputs must be captured before the Remote Request Report is generated.
For such cases, Pre Request is used to specify the Report that accepts the required user inputs. Once the inputs are captured, the Report specified in Remote Request uses these values to construct the XML request and send it to the HTTP server.
The request flow is:
User Input → Pre Request Report → Remote Request Report → HTTP Server → XML Response → Collection
Thus, Remote Request identifies the Report that constructs the XML request to be sent to the HTTP server, while Pre Request supports the requirement when user inputs need to be collected before constructing that request.
Syntax
[Collection : <Collection Name>]
Data Source : HTTP XML : <URL>
Remote Request: <Request Report Name> [, <Pre-request Display Report> : <Encoding Type>]
Example
[Collection : TSPL Employee Leave Details]
Data Source : HTTP XML : “http://localhost/getleavedetails”
Remote Request : TSPL Leave Request, TSPL Employee Input : UTF8
Consider an integration where employee leave details are maintained in an external HR application. Before retrieving the leave details, the user needs to provide an Employee ID. The Employee ID is then used by the request report to generate the XML request that is sent to the HTTP server.
The TSPL Employee Leave Details collection retrieves the employee leave information from the HTTP server specified using Data Source.
The Remote Request attribute specifies two reports, TSPL Leave Request and TSPL Employee Input.
TSPL Employee Input is the pre-request display report. It is displayed before the request is sent and allows the user to provide the required Employee ID.
For example:
Employee ID : EMP001
Once the input is accepted, TSPL Leave Request is used to generate the XML request that needs to be sent to the HTTP server. The report uses the Employee ID captured through the pre-request report while constructing the request.
The generated request can contain information such as:
<LeaveRequest>
<EmployeeID>EMP001</EmployeeID>
</LeaveRequest>
UTF8 specifies the encoding to be used while generating the request.
The HTTP server processes the XML request and returns the leave details for EMP001 as an XML response. The response is then gathered into the TSPL Employee Leave Details collection, where it can be further processed or displayed in TallyPrime.
The sequence in this example is:
Employee Input → XML Request Report → HTTP Server → XML Response → Collection
If the request report does not require any user input, the pre-request display report need not be specified and the request report can be sent directly.
A comparative or columnar report may need to display the same information for multiple values. For example, a Sales Analysis report may need to compare sales across different periods, Ledgers, Stock Items, Companies, or other dimensions, with each value represented as a separate column.
In such reports, the Collection providing the data must be evaluated repeatedly for each value participating in the comparison. The Repeat attribute at the Collection level is used for this purpose. It enables the Collection to be evaluated for each repeat context, so that the same collection logic can provide the corresponding data for every repeated value.
For example, consider a Ledger-wise Sales Comparison report:
| Particulars | Customer A | Customer B | Customer C |
| Sales | 75,000 | 52,000 | 96,000 |
The logic used to gather Sales remains the same for all three customers. However, the context changes from Customer A → Customer B → Customer C. The Collection therefore needs to be evaluated separately for each customer rather than creating three different Collections.
Similarly, in a period-wise comparison:
| Particulars | April | May | June |
| Sales | 1,25,000 | 1,48,000 | 1,36,000 |
the same Collection is evaluated for the repeat context corresponding to April, May and June.
The Collection-level Repeat works as part of the repeat mechanism of the report. The values to be repeated are established through the related Repeat definitions, such as the repeated variables at the Report level. The Collection then uses that repeat context while gathering or processing the data required for each repetition.
Repeat is used whenever the same Collection needs to be evaluated repeatedly for different comparison values, making it particularly useful for columnar and comparative reports.
Syntax
[Collection : <Collection Name>]
Repeat : <Variable Name>
Example
[Collection : TSPL Sales Vouchers]
Type : Voucher
Child Of : $$VchTypeSales
Repeat : ##TSPLPeriodicity
Fetch : Date, VoucherNumber, Amount
[Report : TSPL Monthly Sales]
Variable : TSPLPeriodicity
Repeat : TSPLPeriodicity
[Variable : TSPLPeriodicity]
Type : String
Default : “Month”
Volatile : No
The TSPLPeriodicity variable holds the value Month, which represents how the Sales information needs to be repeated in the report. The Repeat attribute in TSPL Monthly Sales makes this variable participate in the Report’s repeat mechanism and establishes the context for generating the repeated columns.
The TSPL Sales Vouchers Collection gathers Sales Vouchers and uses Repeat : ##TSPLPeriodicity to participate in the same repeat context. Since ##TSPLPeriodicity evaluates to Month, the Collection provides the Sales Voucher data corresponding to each monthly repetition rather than treating the entire report period as a single set of data.
For example, if the report covers April to June, the same Collection can provide data corresponding to the April, May and June columns, while the Collection definition itself remains unchanged.
| Particulars | April | May | June |
| Sales | ₹1,25,000 | ₹1,48,000 | ₹1,36,000 |
Thus, the Report establishes the repeat context through TSPLPeriodicity, while the Collection-level Repeat enables the Collection to provide data for each repetition. Although Month is used in this example, the repeat value can represent another comparison dimension depending on the design of the columnar or comparative report.
A user may need to select an object from a collection and then perform an action on the selected object. For example, a list of Ledgers may be displayed first, and after selecting a Ledger, another report may open to display, alter, or print information related to that Ledger.
The Report attribute at the Collection level is used to specify the report that should be opened based on the object selected from the collection.
This attribute does not work in isolation. It is used when the Collection is invoked through global actions such as Display Collection, Alter Collection, or Print Collection. In such scenarios, two reports are involved:
- The Trigger Report displays the collection as a pop-up list and enables the user to select an object.
- The Report specified using the Report attribute is opened after the selection and operates in the context of the selected object.
The Variable attribute is used along with this mechanism to hold or pass the value associated with the selected object, where required.
For example, consider a requirement where a user needs to view details of a particular Ledger. The Display Collection action first invokes the Trigger Report, which displays the available Ledgers. When the user selects ABC Traders, the Report specified in the Collection is opened for the selected Ledger.
The execution flow can be understood as:
Display/Alter/Print Collection → Trigger Report → Collection List → Object Selection → Report
Therefore, the Collection-level Report attribute is useful for selection-driven report navigation, where an object is first selected from a collection and another report needs to be displayed, altered, or printed based on that selection.
Syntax
[Collection : <Collection Name>]
Trigger : <Trigger Report Name>
Variable : <Variable Name>
Report : <Report Name>
Example
Consider a requirement where a user needs to select a Ledger from a list and, based on the selected Ledger, open a report displaying its details.
[Collection : TSPL Ledger List]
Type : Ledger
Fetch : Name
Trigger : TSPL Ledger Selection
Variable : TSPLSelectedLedger
Report : TSPL Ledger Details
The Collection can be invoked through a global action such ‘Display Collection’. The variable used to retain the selected Ledger is defined as ‘Type : String’. The ‘TSPL Ledger List Collection’ gathers Ledger objects and presents them through the trigger report ‘TSPL Ledger Selection’. This trigger report provides the interface where the user selects the required Ledger. The Variable attribute associates the selected value with TSPLSelectedLedger, allowing the selected Ledger to be carried forward after the user makes a choice.
The Report attribute specifies TSPL Ledger Details as the report that should be opened after the selection. Therefore, if the user selects ABC Traders, the Ledger Details report is invoked for that selected Ledger.
In this flow, Trigger determines where the selection is made, Variable carries the selected value, and Report identifies the report to be invoked after the selection. The Report attribute therefore works as part of the broader Display Collection / Alter Collection / Print Collection mechanism rather than functioning independently.
A report may need to provide users with a predefined set of related reports as selectable options. For example, while working with a Group, users may need access to Group Outstandings, Group Summary, Group Monthly Summary, Group Cost BreakUp, Group Analysis and other reports relevant to that context.
The Report List attribute is used to specify the Report definitions whose names need to form the contents of a Collection. Each Report specified using Report List becomes an entry in the Collection, allowing multiple related reports to be grouped and subsequently presented to the user through a common selection interface.
This is useful when a solution needs to provide contextual navigation to a set of reports. For example, a Button may invoke a Report containing this Collection as a Table. The Table presents the report names available in the Collection, allowing the user to select and navigate to the required report.
The objective of Report List is therefore to build a Collection using predefined Report definitions, rather than gathering regular business objects such as Ledgers, Groups or Vouchers. Report List itself only identifies the Reports that form the Collection; how the Collection is displayed and consumed depends on the design of the calling interface.
Syntax
[Collection : <Collection Name>]
Report List : <Report Name>, <Report Name>, …..
Example
[Collection : TSPL GroupRelReports]
ReportList : TSPL Group Outstandings, TSPL Group Summary, TSPL Group Monthly Summary
ReportList : TSPL Group Cost BreakUp
The TSPLGroupRelReports Collection is designed to provide a set of reports. Instead of gathering business objects through attributes such as Type, the Collection is populated with Report definitions using Report List. Each Report List entry adds the specified Report to the Collection. As a result, the Collection contains entries for TSPLGroup Outstandings, TSPLGroup Summary, TSPLGroup Monthly Summary and TSPL Group Cost BreakUp. The TSPL GroupRelReports Collection can then be consumed by an appropriate interface. For example, a Button may invoke a Report in which this Collection is used as a Table. The Table displays the Report names as selectable entries, enabling the user to choose the required report.
The flow can be understood as:
Button → Report → TSPL GroupRelReports used as Table → Report names displayed → User selects the required Report
Thus, Report List is responsible for forming the Collection of available Reports, while the calling Report, Table or other interface determines how those entries are presented and used.
A collection may need to perform a calculation that depends on information obtained after all the required objects have been processed once. For example, while walking the Inventory Entries of a Voucher, the total value of all the items may first need to be calculated. Once this total is known, the same Inventory Entries may need to carry that total as a method for further reporting or computation.
During the initial Walk, TallyPrime traverses the specified sub-objects and performs the required computations and aggregations. However, a value that is progressively accumulated during this walk reaches its final value only after the required objects have been processed. If that final value needs to be made available against the objects that were already walked, those objects need to be processed again.
The ReWalk attribute enables this second pass. When ReWalk is set to Yes, TallyPrime walks the objects specified through Walk again. During this second pass, ReCompute statements are executed, allowing values calculated or accumulated during the first walk to be assigned as methods to the resultant objects.
Therefore, ReWalk is useful where the processing follows a two-pass requirement:
First Walk → Calculate/Accumulate values → ReWalk → ReCompute methods using the calculated values
ReWalk and ReCompute are consequently closely related. ReWalk provides the second traversal, while ReCompute specifies what needs to be computed during that traversal. The Developer Reference describes ReWalk and ReCompute specifically as attributes provided for re-computation in collections.
Syntax
[Collection : <Collection Name>]
Source Collection : <Source Collection Name>
Walk : <Sub-Collection>
ReWalk : <Logical Value>
ReCompute : <Method Name> : <Expression>
Example
[Collection : TSPL Vouchers]
Type : Voucher
[Collection : TSPL Item Summary]
Source Collection : TSPL Vouchers
Walk : Inventory Entries
Compute Var : WalkTotal : Amount : $$NettAmount:##WalkTotal:$Amount
By : Item : $StockItemName
Aggr Compute : TotalAmount : Sum : $Amount
ReWalk : Yes
ReCompute : ItemTotalAmount : ##WalkTotal
TSPL Vouchers provides the Voucher objects that act as the source for TSPL Item Summary. The Walk attribute traverses the Inventory Entries available within each source Voucher.
During this first walk, Compute Var uses WalkTotal to accumulate the Amount of the Inventory Entries. At the same time, By groups the objects by Stock Item and Aggr Compute calculates the corresponding item-wise TotalAmount.
The important requirement arises after this first traversal: the accumulated WalkTotal now contains the value obtained from processing the Inventory Entries, but that final accumulated value needs to be made available as a method against the resultant objects.
ReWalk : Yes therefore instructs TallyPrime to traverse the walked objects a second time. During this second traversal, ReCompute is executed and creates the method ItemTotalAmount using the already accumulated ##WalkTotal value.
For example, if a Voucher contains:
| Stock Item | Amount |
| Item A | ₹25,000 |
| Item B | ₹35,000 |
| Item C | ₹40,000 |
| Total | ₹1,00,000 |
The first Walk processes the Inventory Entries and arrives at the total of ₹1,00,000. During ReWalk, ReCompute can make this accumulated value available as ItemTotalAmount against the objects being processed in the second pass.
The roles of the attributes are therefore distinct: Walk performs the initial traversal and calculation, ReWalk enables the second traversal after those calculations are available, and ReCompute specifies the methods that need to be evaluated during that second traversal.
A report may need to retrieve a particular value from a Collection repeatedly and quickly, especially in comparative or matrix reports. For example, a report may display Ledgers as rows and Cost Centres as columns, with each cell showing the corresponding Amount. Searching the Collection repeatedly for every Ledger–Cost Centre combination can require scanning the Collection multiple times and can affect performance as the volume of data increases. Tally’s Developer Reference specifically recommends indexing with Search Key as a better approach for such multi-dimensional reports.
The Search Key attribute is used to create an in-memory index for the objects in a Collection. The key can be based on a single method or a combination of methods that uniquely identifies an object. Once the Collection is indexed, the required object and its method values can be accessed directly through the key instead of scanning the Collection each time. Search Key is case-sensitive.
Search Key is used in conjunction with the function $$CollectionFieldByKey. Search Key defines how the objects are indexed, while $$CollectionFieldByKey uses a matching key to locate an object and retrieve the required method from it. If multiple methods form the Search Key, the lookup key must map to those methods in the same order.
Syntax
[Collection : <Collection Name>]
Search Key : <Expression>
Example
[Collection : TSPL Ledger CostCentre]
Use : Voucher Collection
Walk : LedgerEntries, CategoryAllocations, CostCentreAllocations
By : PartyLedgerName : $PartyLedgerName
By : CostCentreName : $Name
Aggr Compute : Amount : Sum : $Amount
Search Key : $PartyLedgerName + $CostCentreName
[Field : TSPL Amount]
Set As : $$CollectionFieldByKey:$Amount:@@TSPLSearchKey:TSPL Ledger CostCentre
[System : Formula]
TSPLSearchKey : #LedgerName + #CostCentreName
The ‘TSPL Ledger CostCentre’ Collection walks through the Voucher hierarchy up to Cost Centre Allocations and groups the resultant objects by Party Ledger Name and Cost Centre Name. Aggr Compute calculates the Amount for each Ledger–Cost Centre combination. Search Key then creates an index using the combination of $PartyLedgerName and $CostCentreName. Each aggregated object can therefore be located using the corresponding Ledger and Cost Centre combination.
In TSPL Amount field, $$CollectionFieldByKey retrieves $Amount from the indexed Collection. TSPLSearchKey constructs the lookup key using the Ledger Name and Cost Centre Name applicable to the current cell of the matrix report. The order of these values corresponds to the order used while defining the Search Key.
For example, if the Collection contains the following aggregated objects:
| Ledger | Cost Centre | Amount |
| ABC Traders | Bangalore | ₹25,000 |
| ABC Traders | Mumbai | ₹18,000 |
| XYZ Traders | Bangalore | ₹32,000 |
A lookup using ABC Traders + Mumbai can directly locate the corresponding Collection object and retrieve ₹18,000, rather than scanning the Collection to find the matching Ledger and Cost Centre.
A Collection may be used as a Table in a Field, where the user can select a value from the available objects. In such cases, the Field may also need an initial or default value based on the objects available in the Table.
The Set attribute, also referred to as Set As, is used to specify the default value to be set in the Field when the Collection is used as a Table. The expression specified with Set is evaluated in the context of the Collection object and determines the value that the Table provides to the Field.
For example, a Ledger Collection may display Ledger names in a Table. Specifying $Name using Set enables the Ledger Name of the relevant Table object to be set as the Field value.
Set should not be confused with Format. While Format determines what information from each Collection object is displayed in the Table and how the columns are presented, Set determines the value that is set in the Field associated with the Table. A Table can therefore display multiple methods through Format, while Set identifies the value to be used by the Field.
This attribute is relevant specifically when the Collection is consumed as a Table; it does not set or modify a method in the underlying Collection object. Tally’s Table Framework demonstrates Collection-level Set As together with Format, including examples where $Name is set while additional methods are presented as Table columns.
Syntax
[Collection : <Collection Name>]
Set : <Expression>
Example
[Collection : TSPL Ledger Collection]
Type : Ledger
Fetch : Name, Parent
Set As : $Name
Format : $Name, 25
Format : $Parent, 20
The TSPL Ledger Collection gathers Ledger objects and fetches the Name and Parent methods required for the Table. ‘Format’ presents the Ledger Name and its Parent Group as two columns, allowing the user to see additional information while selecting a Ledger. Set As : $Name specifies that the Ledger Name is the value to be set in the Field associated with the Table. Therefore, although the Table displays both the Ledger Name and Parent Group, the value selected and set in the Field is based on $Name.
For example, the Table may display:
| Name | Parent |
| ABC Traders | Sundry Debtors |
| XYZ Suppliers | Sundry Creditors |
If ABC Traders is the applicable Table entry, the Field receives ABC Traders as its value; Sundry Debtors is additional information displayed through Format and is not the value being set in the Field. This distinction between what the Table displays (Format) and what the Field receives (Set/Set As) is the key point I would add to your existing definition.
A Collection may contain the required objects, but the sequence in which those objects are gathered may not be the sequence required for displaying or processing them. For example, a Ledger report may need to arrange Ledgers alphabetically by Name, by Closing Balance, or by a combination of both.
The Sort attribute is used to arrange the objects of a Collection in a specified order based on the value returned by a method, function, formula, or expression. Sorting can be performed using a single expression or multiple expressions. Where multiple expressions are specified, the first expression acts as the primary sorting criterion; subsequent expressions are used when objects have the same value for the preceding criterion. The default order specified through Sort is ascending. A hyphen (-) before an expression changes the sorting for that expression to descending. Therefore, $Name sorts Name in ascending order, whereas -$Name sorts it in descending order. Different sorting directions can also be combined within the same Sort specification. It is important to distinguish Collection sorting from Table display sorting.
If a Collection is displayed as a Table and no Table Sort is specified, TallyPrime generally sorts the displayed values based on the first displayed column. For example, if $Name is the first column, the Table is normally presented based on Name. The Table Framework documentation demonstrates this behaviour with a Collection whose first column is the object’s Name. If the requirement is to preserve the order in which objects were gathered or inserted into the Table, Sort : Default can be specified. In Sort, the keyword Default means display the values in gathering/insertion order; it should not be confused with Default used as the Sort Name in the Collection-level Sort syntax.
Therefore:
- Sort controls the order of the objects within the Collection.
- Table Sort controls how those objects are sorted when the Collection is displayed as a Table.
- Without an explicit Table Sort, the Table framework may sort the displayed values based on the first displayed column.
- Table Sort : Default preserves the Collection’s gathering/insertion order while displaying the Table.
This distinction is useful where the Collection’s processing order and the order in which information is presented to the user need to be controlled independently.
Syntax
[Collection : <Collection Name>]
Sort : <Sort Name> : <List of Expressions>
<List of Expressions> can contain one or more comma-separated expressions. By default, each expression is sorted in ascending order. Prefix an expression with – to sort it in descending order.
Example
[Collection : TSPL Ledger Collection]
Type : Ledger
Fetch : Name, ClosingBalance
Sort : Default : $ClosingBalance, -$Name
The TSPL Ledger Collection gathers Ledger objects and fetches the Name and ClosingBalance methods required by the report. Sort first uses $ClosingBalance to arrange the objects. Since the expression does not have a hyphen, the Ledgers are sorted by Closing Balance in ascending order. -$Name acts as the second sorting criterion. If two or more Ledgers have the same Closing Balance, their Names are sorted in descending order to determine their relative position.
For example:
| Name | Closing Balance |
| Fortune Computers | ₹5,000 |
| Janata Timbers | ₹7,000 |
| Universal Computers | ₹10,000 |
| Global Traders | ₹10,000 |
| Prism Softlinks | ₹25,000 |
The primary sorting criterion places the ₹5,000 balance before ₹7,000, ₹10,000 and ₹25,000. Since Universal Computers and Global Traders both have a Closing Balance of ₹10,000, the second criterion -$Name determines their order and places the Names in descending sequence.
A Collection may need to process data that is already available through another Collection, instead of gathering the original data again. For example, one Collection may gather Sales Vouchers, while another Collection uses those Vouchers to create an Item-wise Sales Summary. In such cases, the second Collection needs a way to identify the data on which its processing should begin.
The Source Collection attribute is used to specify the Collection whose objects will act as the source for the current Collection. Once the source is identified, the current Collection can work with those objects and further process them using attributes such as Source Var, Walk, Compute Var, By, Aggr Compute, Compute, Fetch, Filter Var and Filter.
This is useful when the same data needs to be reused, transformed or summarised in different ways. For example, a Collection containing Sales Vouchers can be used to create an Item-wise Sales Summary, and that summary can subsequently become the source for another Collection that creates a Category-wise Sales Summary. This allows Collection processing to be built in stages without defining the original data gathering logic again.
Conceptually, the processing can be:
Sales Vouchers → Item-wise Sales → Category-wise Sales
Source Collection identifies only the starting data for the current Collection. It does not determine how that data is processed. Attributes such as Walk, By, Aggr Compute, Compute and Filter determine what happens to the source objects after they are available.
For example, if the Source Collection contains Voucher objects and the required information is available within their Inventory Entries, Walk can be used to traverse from each Voucher to its Inventory Entries. Therefore, the two attributes serve different purposes:
Source Collection → identifies the Collection to start from
Walk → identifies the sub-object path to traverse within those source objects
If Walk is not specified, the current Collection works with the objects available directly in the Source Collection.
Specifying the Source
The source can be specified explicitly by providing the name of an existing Collection ‘Source Collection : TSPL Sales Vouchers’. This approach is suitable when the Collection that provides the data is known and can be referenced directly by name. More than one Collection can also be specified where objects from multiple Collections need to participate as source data ‘Source Collection : Collection1, Collection2’
However, the source does not always need to be identified by a Collection name. In reusable or nested Collection processing, the required source may already be available through the current execution context. In such cases, Source Collection supports contextual references using dot notation.
Source Collection : .
A dot refers to the Collection available at the corresponding level of the current context. Additional dots can be used to move progressively through the owner hierarchy:
Source Collection : ..
Source Collection : …
Source Collection : ….
This is useful where a Collection is designed to operate on data supplied by its surrounding context rather than being permanently tied to a particular named Collection. The same Collection definition can therefore be reused in different contexts.
For example, a Collection may contain:
Source Collection : .
Walk : RestoreCMP
Here, the source is determined from the current context. The Collection then walks RestoreCMP available from that source. There is no need to hard-code the name of the Collection providing the source objects.
Similarly:
Source Collection : ….
Walk : All Ledger Entries, CENVATDutyAllocations, CENVATDutyItemAllocations
The additional dots move through the owner hierarchy to obtain the required source before Walk begins traversing the specified sub-object path.
Source Collection can also use:
Source Collection : ().
This notation is useful for resolving the source through the primary owner context, instead of depending on a fixed number of intermediate levels in a nested hierarchy. It becomes particularly useful in reusable or deeply nested definitions where the number of intermediate owner levels may vary.
Therefore, the appropriate Source Collection specification depends on where the source data comes from and how reusable the Collection needs to be:
| Specification | Purpose |
| <Collection Name> | Uses a specifically identified Collection as the source |
| <Collection1>, <Collection2> | Uses objects from multiple named Collections |
| . | Uses the Collection available in the immediate/current context |
| .. | Resolves the source further up the owner hierarchy |
| … / …. | Continues moving upwards through additional owner levels |
| (). | Resolves the source through the primary owner context |
A named Source Collection is appropriate where the source is fixed and explicitly known. A contextual Source Collection is more appropriate where the source depends on the caller or owner hierarchy and the Collection needs to remain reusable across different contexts.
It is also important to note that Source Collection is not mandatory for every Collection. A Collection can gather data independently using attributes such as Type, Data Source, List, Object, ODBC-related attributes or other supported mechanisms. Source Collection is required specifically when objects already available through another Collection or Collection context need to become the starting point for further Collection processing.
SyntaxTop of Form
[Collection : <Collection Name>]
Source Collection : <Collection Name(s)> or dotted notation (. / .. / … / …. / (). )Bottom of Form
Example
[Collection : TSPL Sales Vouchers]
Type : Voucher
Child Of : $$VchTypeSales
[Collection : TSPL Item-wise Sales]
Source Collection : TSPL Sales Vouchers
Walk : Inventory Entries
By : StockItem : $StockItemName
Aggr Compute : SalesAmount : Sum : $Amount
‘TSPL Sales Vouchers’ gathers the Sales Voucher objects and acts as the source for ‘TSPL Item-wise Sales’. The Source Collection attribute identifies TSPL Sales Vouchers as the starting point for processing. The second Collection therefore works on the Voucher objects already available through this source rather than defining the Voucher gathering logic again. Walk traverses the Inventory Entries available within each source Voucher. By groups these entries based on $StockItemName, while Aggr Compute sums $Amount for each Stock Item and stores the result in SalesAmount. The processing can be understood as:
Sales Vouchers → Inventory Entries → Group by Stock Item → Aggregate Amount → Item-wise Sales Summary
Here, Source Collection establishes where the data comes from, while Walk, By and Aggr Compute determine how that source data is processed to produce the required summary.
A Collection based on a Source Collection may need only a few methods from each source object for subsequent processing. For example, an Item-wise Sales Collection may walk through the Inventory Entries of Sales Vouchers but also require methods such as the Voucher Date, VoucherNumber or PartyLedgerName from the source Voucher object.
The Source Fetch attribute, also known as Source Native Method, is used to fetch the required methods from the objects of the Source Collection. This ensures that the required source-object methods are available while the current Collection processes, walks, groups or aggregates the source data.
Source Fetch becomes particularly useful when Walk changes the object context. For example, after a Collection starts with a Voucher and walks to its Inventory Entries, the current processing context is the Inventory Entry. However, some information required for processing may still belong to the source Voucher. Source Fetch allows those required methods to be fetched from the source object before further Collection processing takes place.
It is therefore used in conjunction with Source Collection where specific methods of the source objects are required by the resultant Collection. This attribute should not be confused with Fetch.
Difference between Fetch and Source Fetch
Both attributes fetch methods, but they operate on different object contexts.
| Attribute | Fetches methods from | Purpose |
| Fetch | Objects of the current/resultant Collection | Makes required methods available on the objects being gathered by the Collection |
| Source Fetch / Source Native Method | Objects of the Source Collection | Makes required methods of the source objects available for subsequent Collection processing |
Consider this hierarchy:
Sales Voucher
→ Date
→ Voucher Number
→ Party Ledger Name
→ Inventory Entries
→ Stock Item Name
→ Billed Quantity
→ Amount
If the Collection starts from Sales Vouchers and walks to Inventory Entries, methods such as $StockItemName and $Amount belong to the objects being walked, whereas Date, VoucherNumber and PartyLedgerName belong to the source Voucher.
Therefore:
Fetch → methods required from the current Collection objects
Source Fetch → methods required from the Source Collection objects
This distinction is especially relevant in summary Collections, nested walks and other scenarios where the object being processed is different from the object from which the Collection originally started.
Syntax
[Collection : <Collection Name>]
Source Fetch : <Method Name 1>, <Method Name 2>, …
Example
[Collection : TSPL Sales Vouchers]
Type : Voucher
[Collection : TSPL Item-wise Sales]
Source Collection : TSPL Sales Vouchers
Source Fetch : Date, VoucherNumber, PartyLedgerName
Walk : Inventory Entries
Fetch : StockItemName, BilledQty, Amount
By : StockItem : $StockItemName
Aggr Compute : SalesAmount : Sum : $Amount
TSPL Sales Vouchers provides the Voucher objects that act as the source for TSPL Item-wise Sales.
Source Fetch fetches Date, VoucherNumber and PartyLedgerName from each source Voucher object. These methods belong to the source objects and can therefore be made available before the Collection proceeds with further processing.
Walk then traverses from each Voucher to its Inventory Entries. At this stage, the processing context moves from the source Voucher to the individual Inventory Entries.
Fetch retrieves StockItemName, BilledQty and Amount, which are required from the objects being processed after the walk. By groups these entries by Stock Item, and Aggr Compute calculates the total Sales Amount for each Stock Item.
The distinction in this example is therefore:
Source Voucher → Source Fetch → Date, Voucher Number, Party Ledger Name
Inventory Entry → Fetch → Stock Item, Quantity, Amount
This allows the Collection to work with methods required from the source objects as well as the objects being processed, without confusing the two object contexts.
A Collection based on a Source Collection may repeatedly require certain methods from its source objects while performing operations such as Walk, grouping, aggregation or computation. For example, an Item-wise Sales Collection may start with Sales Vouchers, walk through their Inventory Entries, and still require Voucher-level information such as Date, VoucherNumber or PartyLedgerName during subsequent processing.
The Source PreFetch attribute, also known as Source Pre Native Method, is used to prefetch the specified methods into the objects of the Source Collection. Instead of waiting until a method is required during subsequent processing, the required methods are fetched in advance and made available with the source objects.
This is useful where the required source methods are known beforehand and will be accessed during further Collection processing. Prefetching them can reduce repeated method retrieval during processing, which becomes particularly relevant when the Source Collection contains a large number of objects or when the same source methods are required repeatedly while walking and processing subordinate objects.
Source PreFetch is therefore primarily a data availability and performance optimisation mechanism. It does not create a new method or change the value of an existing method. It ensures that the specified native methods are fetched into the source objects in advance so that they are readily available when subsequent Collection processing requires them.
When should Source PreFetch be used?
Source PreFetch is useful where:
- the current Collection is based on a Source Collection;
- specific native methods of the source objects will be required during subsequent processing;
- the Collection performs further operations such as Walk, computation, grouping or aggregation; and
- fetching those methods in advance can avoid retrieving them later during repeated processing.
It is particularly relevant for large or complex Collection processing, where the source objects are traversed further and source-level information continues to be required.
Source Fetch vs Source PreFetch
Both attributes work with methods belonging to the Source Collection objects, but the difference is when those methods are fetched.
| Attribute | Purpose |
| Source Fetch / Source Native Method | Fetches the required methods from objects of the Source Collection |
| Source PreFetch / Source Pre Native Method | Fetches the required methods in advance into the source objects, before subsequent Collection processing requires them |
Therefore, Source Fetch should be used when source-object methods need to be fetched as part of the Collection’s normal processing. Source PreFetch is more appropriate where those methods need to be available beforehand, particularly when they will be required repeatedly during further processing.
This also distinguishes it from PreFetch, which prefetches required methods for the Collection’s processing context, whereas Source PreFetch specifically targets objects belonging to the Source Collection.
Syntax
[Collection : <Collection Name>]
Source PreFetch : <Method Name 1>, <Method Name 2>, …
Example
[Collection : TSPL Sales Vouchers]
Type : Voucher
[Collection : TSPL Item-wise Sales]
Source Collection : TSPL Sales Vouchers
Source PreFetch : Date, VoucherNumber, PartyLedgerName
Walk : Inventory Entries
By : StockItem : $StockItemName
Aggr Compute : SalesAmount : Sum : $Amount
TSPL Sales Vouchers provides the Voucher objects that act as the source for TSPL Item-wise Sales. Source PreFetch prefetches Date, VoucherNumber and PartyLedgerName into the source Voucher objects before the Collection proceeds with further processing. These Voucher-level methods are therefore available from the source objects when required during subsequent processing.
Walk then traverses the Inventory Entries contained within the source Vouchers. By groups the resulting entries according to Stock Item, while Aggr Compute calculates the Sales Amount for each Stock Item.
In this example, Source PreFetch does not participate in the grouping or calculation itself. Its role is to ensure that the specified source Voucher methods are fetched in advance and available before the Collection starts processing the objects reached through Walk.
Consider a Voucher-wise Stock Item Summary where the source Collection contains Sales Vouchers and the current Collection walks through their Inventory Entries. The summary may need to use a value that belongs to the source Voucher, such as the Voucher Number or Voucher Type, while it is processing Stock Item entries.
Once Walk moves the evaluation context from the Voucher to an Inventory Entry, directly referring to a source-level method can become difficult because the current object is now the Inventory Entry. The Source Var attribute solves this by evaluating a value in the context of the source object before the Walk begins and storing that value in a collection-level variable. That variable can then be used later while the Collection processes the sub-objects reached through Walk. https://help.tallysolutions.com/objects-and-collections/?utm_source=chatgpt.com
This is particularly useful when a value from the source object needs to participate in later stages such as Compute Var, By, Aggr Compute, Compute, or Filter. The value is captured once from the source object and remains available as a variable even after the object context changes. This reduces the need to repeatedly use functions such as $$Owner or $$ReqObject merely to reach back to the source context. https://help.tallysolutions.com/article/DeveloperReference/tdlreference/release_1_5.htm?utm_source=chatgpt.com
The evaluation sequence is important. Source Var is evaluated after Source Collection and before Walk. Therefore, its formula is evaluated while the source object is still the current context. After that, Walk traverses the required sub-objects and the stored Source Var value can be reused during the remaining Collection processing. https://help.tallysolutions.com/objects-and-collections/?utm_source=chatgpt.com
A useful way to distinguish the collection-level variables is:
- Source Var → evaluates from the source object, before Walk.
- Compute Var → evaluates from the sub-object/current object after Walk.
- Filter Var → evaluates after Fetch and Compute, before the final Filter. https://help.tallysolutions.com/developer-reference/tally-definition-language/objects-and-collections/?utm_source=chatgpt.com
Syntax
[Collection : <Collection Name>]
Source Var : <Variable Name> : <Data Type> : <Expression>
The expression must evaluate to a value compatible with the specified data type. https://help.tallysolutions.com/objects-and-collections/?utm_source=chatgpt.com
Example
[Collection : TSPL Sales Vouchers]
Type : Vouchers : VoucherType
Child Of : $$VchTypeSales
[Collection : TSPL Party Item Sales]
Source Collection : TSPL Sales Vouchers
Source Var : PartyName : String : $PartyLedgerName
Walk : Inventory Entries
By : Party : ##PartyName
By : StockItem : $StockItemName
Aggr Compute : SalesAmount : Sum : $Amount
TSPL Sales Vouchers gathers the Sales Voucher objects and acts as the source for TSPL Party Item Sales. Before Walk begins, Source Var evaluates $PartyLedgerName in the context of the source Voucher and stores its value in variable ‘PartyName’. The Collection then walks to Inventory Entries, where the current object context changes from the Voucher to an individual Inventory Entry.
At the Inventory Entry level, $StockItemName and $Amount are directly available from the current object. The Party Name, however, belongs to the source Voucher. Since it was captured earlier through Source Var, ##PartyName continues to provide the Party Name even though the Collection is now processing an Inventory Entry.
By therefore uses values coming from two different object contexts: ##PartyName provides the Party from the source Voucher, while $StockItemName provides the Stock Item from the walked Inventory Entry. Aggr Compute then adds $Amount for each Party–Stock Item combination.
For example, the resultant Collection can provide:
| Party | Stock Item | Sales Amount |
| ABC Traders | Item A | ₹45,000 |
| ABC Traders | Item B | ₹15,000 |
| XYZ Stores | Item A | ₹30,000 |
The Party Name could also be accessed after Walk using an appropriate dotted owner-context reference, for example $..PartyLedgerName, where the object hierarchy permits it. In such an approach, Tally resolves the Party Name by navigating from the current Inventory Entry back to its owner context each time the expression is evaluated.
Source Var is preferable where a source-object value is required during subsequent Collection processing because the value is captured once while the correct source object is already in context. Later attributes can simply refer to ##PartyName without having to navigate back through the object hierarchy.
This becomes more useful as the Collection processing becomes deeper. For example:
Voucher → Inventory Entry → Batch Allocation → further sub-object
A dotted reference used at different levels needs to correctly navigate the corresponding owner hierarchy. Source Var keeps the required Voucher-level value available irrespective of how the current context changes during the subsequent Walk. It is also useful where the same source value is required by multiple attributes, since the source expression does not need to be repeatedly resolved.
Thus, while a dotted reference can be used for direct access to an owner object’s method, Source Var is better suited when a value from the source object needs to be retained and reused throughout subsequent Collection processing, particularly across deeper Walks or multiple computations.
At times, information required for a solution may be available in an external database such as Microsoft Access, SQL Server, MySQL, or another ODBC-compatible database. Instead of maintaining the same information again in Tally, the required data can be retrieved directly from the external database and used within a Collection.
The SQL attribute is used in a Collection definition to specify the SQL query that retrieves the required information from the external database. It determines which records and columns are returned to the Collection.
SQL is used along with an ODBC connection. The ODBC attribute specifies the database connection, while the SQL attribute specifies what information needs to be retrieved from that database. Each row returned by the query is available as an object in the Collection, allowing the retrieved information to be used for further processing or display.
Syntax
[Collection : <Collection Name>]
ODBC : <ODBC Driver Connection String>
SQL : <SQL Query>
Example
[Collection : TSPL Customer Data]
ODBC : “Driver={SQL Server};Server=localhost;Database=CustomerDB;Trusted_Connection=Yes;”
SQL : “SELECT CustomerName, City, CreditLimit FROM CustomerMaster”
The ODBC attribute establishes a connection to the CustomerDB database available on the local SQL Server. Trusted_Connection=Yes indicates that Windows authentication is used for the connection.
The SQL attribute queries the CustomerMaster table and retrieves the Customer Name, City, and Credit Limit for each record. The returned records are gathered into TSPL Customer Data and can then be used for further processing or display in TDL.
An external application may need to retrieve specific information from Tally by passing one or more input values. For example, an application may request the batch details for a particular Stock Item by passing the Stock Item Name to Tally through ODBC.
The SQL Parms attribute is used to specify the parameters that a Collection accepts when it is exposed as an SQL Procedure through Tally’s ODBC interface. The parameter names specified in SQL Parms must be declared as variables with the appropriate data types in TDL. The values received from the external application are then available within the Collection and can be used by attributes such as Child Of, Filter, or other expressions to determine the information to be returned.
For this use case, Tally acts as the ODBC Server and the external application acts as the ODBC Client. A Collection intended to work as an SQL Procedure is identified appropriately and can use SQL Values to specify the values that need to be returned to the calling application.
SQL Parms should not be confused with the ODBC and SQL attributes. The ODBC and SQL attributes are used when Tally acts as an ODBC Client and gathers information from an external database. SQL Parms, on the other hand, is used when an external ODBC client passes parameter values to a TDL Collection in Tally. Therefore, using SQL Parms does not require the ODBC and SQL attributes to be specified in the same Collection.
The two scenarios can be understood as:
ODBC + SQL
External Database → Tally
Tally queries and gathers information from an external database.
SQL Parms + SQL Values
External Application → Tally → External Application
The external application passes parameters to Tally, and the Collection processes those parameters and returns the required information.
Syntax
[Collection : <Collection Name>]
SQL Parms : <Parameter Name>
Example
[Collection : _TSPL Stock Item Batches]
Type : Batch
Child Of : ##TSPLStockItem
SQL Parms : TSPLStockItem
SQL Values : BatchName : $Name
SQL Values : ClosingStock : $ClosingBalance
[Variable : TSPLStockItem]
Type : StringTop of Form
In this example, an external application needs to retrieve batch-wise closing stock for a specific Stock Item from Tally. Instead of retrieving the batch information for every Stock Item, the application passes the required Stock Item Name as a parameter while calling the Collection through ODBC.
SQL Parms identifies TSPLStockItem as the parameter accepted by the Collection. The same parameter is declared as a String variable so that the value received from the external application can be used within TDL.
Once the Stock Item Name is received, Child Of uses ##TSPLStockItem to gather only the batches belonging to that Stock Item. SQL Values specifies the information that should be returned to the calling application—in this case, the Batch Name and Closing Stock.
The interaction therefore follows this flow:
External Application → passes Stock Item Name → SQL Parms → Collection gathers corresponding Batches → SQL Values → Batch details returned to External Application
This demonstrates the purpose of SQL Parms: it enables an external ODBC client to pass an input value to a TDL Collection so that the Collection can use that value while gathering the required information. Bottom of Form
An external application calling a TDL Collection as an SQL Procedure may need Tally to return multiple pieces of information after processing the request. For example, after passing a Stock Item Name through SQL Parms, the application may require the corresponding Batch Name, Closing Quantity and Closing Value.
The SQL Values attribute is used to specify the values that an SQL Procedure returns to the calling ODBC client. It defines the output matrix of the procedure by associating each value to be returned with the corresponding method or expression in the Collection.
SQL Values is therefore used on the output side of an SQL Procedure, while SQL Parms defines the values received as input. Multiple SQL Values attributes can be specified when more than one value needs to be returned for each object gathered by the Collection.
The relationship can be understood as:
External Application → SQL Parms → TDL Collection → SQL Values → External Application
For example, if an external application passes a Stock Item Name, SQL Parms can receive that name and use it to gather the relevant batches. SQL Values can then define which details of those batches, such as Batch Name and Closing Stock, are returned to the external application.
SQL Values is specifically relevant when a Collection is being used as an SQL Procedure through Tally’s ODBC interface. It should not be confused with the SQL attribute, which specifies a query when Tally itself retrieves information from an external database.
Syntax
[Collection : <Collection Name>]
SQL Values : <Value Name> : <Expression>
Example
[Collection : _TSPL Stock Item Batches]
Type : Batch
Child Of : ##TSPLStockItem
SQL Parms : TSPLStockItem
SQL Values : BatchName : $Name
SQL Values : ClosingStock : $ClosingBalance
[Variable : TSPLStockItem]
Type : String
In this example, an external application calls _TSPL Stock Item Batches through ODBC and passes the required Stock Item Name as an input parameter. SQL Parms receives this value in TSPLStockItem, which is then used by Child Of to gather the batches belonging to that Stock Item.
Once the required batch objects are gathered, SQL Values determines the information that will be returned to the external application. BatchName returns the Name of each gathered Batch, while ClosingStock returns its Closing Balance.
If the selected Stock Item has multiple batches, the SQL Procedure returns these values for each applicable Batch, effectively forming the output matrix of the procedure.
The complete interaction is:
External Application → Stock Item Name → SQL Parms → Batch Collection → SQL Values → Batch Name and Closing Stock → External Application
Thus, SQL Parms defines what the SQL Procedure receives, while SQL Values defines what the SQL Procedure returns.
A Collection displayed as a Table may contain values that need to be visually distinguished from other information. For example, a Group name may need to appear in bold, or a particular column may need a different font appearance to make important information easier to identify.
The Style attribute is used to specify the font style for values displayed through a Collection when it is used as a Table. The specified Style definition is applied to the values displayed in the corresponding table column.
The attribute affects only the presentation of the values in the Table. It does not modify the underlying data, Collection objects, or the values stored in their methods.
A predefined or user-defined Style definition can be specified based on the presentation required.
Syntax
[Collection : <Collection Name>]
Style : <Style Name> [: <Condition>]
Example
[Collection : TSPL Group Collection]
Type : Group
Format : $Name, 30
Format : $Parent, 20
Style : Normal Bold : $$IsGroup
TSPL Group Collection gathers Group objects and displays the Group Name and Parent through the Format attributes. The Style attribute applies the Normal Bold style to the values displayed in the Table when the specified condition evaluates to Yes. This allows the displayed values to be visually distinguished without changing any data in the Collection.
If the condition evaluates to No, the specified style is not applied. Bottom of Form
A Collection displayed as a Table may contain multiple columns, with each column representing different information. For example, a Ledger table may display the Ledger Name, Parent Group and Closing Balance. Providing a heading for each column helps identify what the values in that column represent.
The Sub Title attribute is used to specify the title displayed for each column of a Collection when it is used as a Table. The subtitles correspond to the columns defined for the Table and appear as column headings above their respective values.
Multiple subtitles can be specified in the same sequence as the columns displayed in the Table. This attribute affects only the presentation of the Collection and does not modify its objects or data.
Syntax
[Collection : <Collection Name>]
Sub Title : <Column Title 1>, <Column Title 2>, …
Example
[Collection : TSPL Ledger Collection]
Type : Ledger
Fetch : Name, Parent, ClosingBalance
Format : $Name, 25
Format : $Parent, 20
Format : $ClosingBalance, 15
Sub Title : “Ledger Name”, “Parent Group”, “Closing Balance”
TSPL Ledger Collection gathers Ledger objects and uses the three Format attributes to display the Ledger Name, Parent Group and Closing Balance as separate columns when the Collection is used as a Table.
Sub Title provides a heading for each of these columns in the same sequence. Therefore, Ledger Name appears above the first column, Parent Group above the second, and Closing Balance above the third.
The sequence of values specified in Sub Title should correspond to the sequence of columns defined for the Table.
A Collection displayed as a Table may need its values to appear in a particular order so that users can locate and compare information more easily. For example, Ledger names may need to appear alphabetically, or balances may need to be displayed from the highest to the lowest value.
The Table Sort attribute is used to specify the sorting order of values displayed in a Table. The sorting can be based on a method, function, or formula, and the values are sorted according to their respective data types. For example, String values are sorted alphabetically, while Number or Amount values are sorted numerically.
By default, the specified expression sorts the values in ascending order. Prefixing the expression with a minus sign (-) sorts them in descending order.
Table Sort controls the display order when the Collection is used as a Table. It should not be confused with the Sort attribute, which determines the order in which objects are arranged within the Collection itself.
Syntax
[Collection : <Collection Name>]
Table Sort : [-]<Method Name / Formula / Function>
Example
[Collection : TSPL Ledger Collection]
Type : Ledger
Fetch : Name, Parent, ClosingBalance
Format : $Name, 25
Format : $Parent, 20
Format : $ClosingBalance, 15
Table Sort : -$ClosingBalance
TSPL Ledger Collection gathers Ledger objects and displays the Ledger Name, Parent Group and Closing Balance as three columns when the Collection is used as a Table.
Table Sort uses $ClosingBalance as the sorting expression. Since it is prefixed with a minus sign (-), the rows in the Table are displayed in descending order of Closing Balance, with higher values appearing before lower values.
The sorting affects how the objects are presented in the Table; it does not change the underlying gathering or processing order of objects in the Collection.
While sorting a Collection displayed as a Table, text values need to be compared with one another to determine their order. The required comparison may vary depending on whether differences in uppercase and lowercase characters should influence that comparison.
The Table Text Compare attribute specifies how text values are compared during Table sorting. It works along with Table Sort. Table Sort identifies the method, formula, or function whose value is used for sorting, while Table Text Compare controls the comparison behaviour when those values are text.
For example, a Table may contain Ledger Names such as:
ABC Traders
abc traders
Abc Traders
Although these names contain the same characters, their letter case is different. Table Text Compare determines whether these case differences should be considered while comparing the values for sorting.
The permissible values are:
|
Value |
How it works |
|
Default |
Uses the standard text comparison behaviour provided by the Table framework. |
|
Exact Compare |
Compares text exactly as specified, including differences in uppercase and lowercase characters. Therefore, values that differ only by case are treated as different during comparison. |
|
Ignore Case |
Ignores differences in uppercase and lowercase characters while comparing text. For example, ABC Traders and abc traders are treated as equivalent text for comparison purposes. |
The purpose of Table Text Compare is therefore to provide control over text comparison during Table sorting, particularly where the Collection contains values with different combinations of uppercase and lowercase characters and the required sorting behaviour needs to either consider or ignore those differences.
It affects only the comparison used for sorting. It does not change the actual text stored in the Collection or convert the displayed values to uppercase or lowercase.
Syntax
[Collection : <Collection Name>]
Table Sort : <Method Name / Formula / Function>
Table Text Compare : <Default / Exact Compare / Ignore Case>
Example
[Collection : TSPL Ledger Collection]
Type : Ledger
Fetch : Name, Parent
Format : $Name, 25
Format : $Parent, 20
Table Sort : $Name
Table Text Compare : Ignore Case
TSPL Ledger Collection gathers Ledger objects and displays the Ledger Name and Parent Group when the Collection is used as a Table. Table Sort sorts the displayed rows based on $Name. Since Ledger Names are text values, Table Text Compare : Ignore Case instructs the Table to ignore differences in uppercase and lowercase characters while comparing the names for sorting.
For example, if the Collection contains ABC Traders, abc Distributors, and Abc Enterprises, the comparison is performed without giving significance to the different letter cases.
Changing the value to Exact Compare makes the comparison case-sensitive, so differences between uppercase and lowercase characters are considered while determining the sorting order. Default uses the standard text comparison behaviour of the Table framework.
The attribute changes only how the text is compared for sorting; it does not alter the Ledger Names stored or displayed in the Collection.
A Collection displayed as a Table may need a heading that tells the user what information the Table contains. For example, a Table containing Ledger objects can display List of Ledgers as its heading.
The Title attribute is used to specify the title of a Collection when it is displayed as a Table. It helps provide context to the values presented in the Table and makes it easier to identify the purpose of the selection list.
Title affects only the presentation of the Collection. It does not change the Collection name or the objects gathered by the Collection.
Syntax
[Collection : <Collection Name>]
Title : <String Expression>
Example
[Collection : TSPL Ledger Collection]
Type : Ledger
Fetch : Name, Parent
Format : $Name, 25
Format : $Parent, 20
Title : “List of Ledgers”
TSPL Ledger Collection gathers Ledger objects and displays the Ledger Name and Parent Group when the Collection is used as a Table.
The Title attribute specifies List of Ledgers as the title of the Table. Therefore, when the Collection is presented to the user as a selection Table, this text appears as its heading and helps identify the information available in the Table.
The Collection continues to be identified internally as TSPL Ledger Collection; Title only controls the heading presented to the user.
The Transaction Type attribute is used to filter objects based on the banking transaction type associated with the linked master. It is applicable only to Collections of Type PayLink or Party Pay Link.
The attribute accepts a System Name ($$SysName) that identifies the required banking transaction type. During collection gathering, only those PayLink or Party Pay Link objects that correspond to the specified transaction type are considered.
Note: This attribute is provided only for understanding and internal reference purposes. It is used in Tally’s internal banking-related implementation and is not intended as a general-purpose attribute for custom TDL solutions.
Internally, the following values are used:
|
Transaction Type |
TDL Value |
|
Cheque |
$$SysName:Cheque |
|
Electronic Cheque |
$$SysName:ElectronicCheque |
|
Electronic DD/PO |
$$SysName:ElectronicDDPO |
|
Inter-Bank Transfer |
$$SysName:InterBankTransfer |
|
Same Bank Transfer |
$$SysName:SameBankTransfer |
The same Collection can also contain multiple Transaction Type specifications where more than one banking transaction type needs to be considered.
Syntax
[Collection : <Collection Name>]
Type : <PayLink / Party Pay Link>
Transaction Type : <$$SysName:TransactionType>
Example
[Collection : TSPL Electronic Pay Links]
Type : PayLink
Transaction Type : $$SysName:ElectronicCheque
Transaction Type : $$SysName:ElectronicDDPO
Transaction Type : $$SysName:InterBankTransfer
Transaction Type : $$SysName:SameBankTransfer
TSPL Electronic Pay Links is based on PayLink objects. The multiple Transaction Type attributes restrict the Collection to the internally identified transaction types Electronic Cheque, Electronic DD/PO, Inter-Bank Transfer, and Same Bank Transfer.
Each value is specified through $$SysName, ensuring that the Collection refers to the corresponding system-defined banking transaction type rather than a user-defined text value.
The attribute therefore acts as a specialised filter for PayLink/Party Pay Link Collections, based on the transaction type maintained internally against the linked banking master.
A Collection may be used to present a list of objects from which the user selects one object and then proceeds to another Report. In such cases, the selected object itself needs to become the context for the next Report.
The Trigger attribute is used to specify the Report that should be invoked from the Collection to enable this selection-driven flow. The triggered Report works in the context of the object selected by the user from the Collection.
This attribute is typically used along with Collection actions such as Display Collection, Alter Collection, or Print Collection, where the Collection first presents a set of objects and the user selects one of them. The Trigger Report provides the interface in which that selection takes place, while other related Collection attributes such as Variable and Report can be used to carry the selected value and determine the subsequent Report to be opened.
For example, a Ledger Collection may be displayed to the user. When the user selects ABC Traders, the Report specified through Trigger is invoked in the context of the selected Ledger, allowing subsequent processing or navigation to be based on that object.
The flow can be understood as:
Collection invoked → Trigger Report displayed → User selects an object → Triggered Report works on the selected object
The main purpose of Trigger is therefore to establish the Report context in which the Collection selection is made, so that the selected Collection object can drive the next step in the workflow.
Syntax
[Collection : <Collection Name>]
Trigger : <Report Name>
Example
[Collection : TSPL Ledger Collection]
Type : Ledger
Fetch : Name, Parent
Format : $Name, 20
Trigger : TSPL Ledger Selection
Variable : TSPLLedName
Report : TSPL Ledger Details
[Variable : TSPLLedName]
Type : String
[Report : TSPL Ledger Selection]
Form : TSPL Ledger Selection
[Form : TSPL Ledger Selection]
Part : TSPL Ledger Selection
[Part : TSPL Ledger Selection]
Line : TSPL Ledger Selection
[Line : TSPL Ledger Selection]
Field : TSPL Ledger Name
[Field : TSPL Ledger Name]
Table : TSPL Ledger Collection
Show Table : Always
Modifies : TSPLLedName
TSPL Ledger Collection gathers Ledger objects and displays their names through the Format attribute. The Collection uses Trigger, Variable, and Report together to enable the user to select a Ledger and subsequently open a Report for that selection. Trigger specifies TSPL Ledger Selection as the Report through which the Collection is presented for selection. Within this Report, the TSPL Ledger Name Field uses TSPL Ledger Collection as its Table and Show Table : Always ensures that the list of Ledgers is displayed for selection.
The Field uses Modifies : TSPLLedName, so the Ledger selected from the Table is stored in the TSPLLedName variable. The same variable is associated with the Collection through the Variable attribute, establishing the variable that carries the selected value during the Collection-driven navigation.
After the selection is made, the Report attribute specifies TSPL Ledger Details as the Report to be invoked for the selected Ledger.
The complete flow is:
Collection invoked → TSPL Ledger Selection triggered → Ledger Table displayed → User selects a Ledger → Selection stored in TSPLLedName → TSPL Ledger Details opened for the selected Ledger
This example demonstrates how Trigger provides the selection Report, Variable carries the selected value, and Report identifies the Report to be opened after the selection.
A Collection needs to know what kind of objects it should gather and, where applicable, the object hierarchy from which those objects should be taken. The Type attribute specifies the object type that forms the Collection. For example, Type : Ledger gathers Ledger objects, while Type : Voucher gathers Voucher objects.
In some cases, the object needs to be identified more specifically through a Sub Type and a Primary Object. This form is useful where the objects being gathered belong to another primary object and the Collection needs to work within that hierarchy. For example ‘Type : Vouchers : VoucherType’. Here, Vouchers represents the Sub Type, while VoucherType represents the Primary Object.
When this extended syntax is used ‘Type : <Sub Type> : <Primary Object>’, the Child Of attribute is required to specify the actual parent object under which the Sub Type objects need to be gathered. Type identifies the relationship between the Sub Type and Primary Object, while Child Of supplies the specific parent instance.
Therefore, the two attributes work together:
Type : Vouchers : VoucherType → defines the object hierarchy
Child Of : $$VchTypeSales → identifies the specific parent within that hierarchy
If only the primary object type is required, such as ‘Type : Ledger’. Child Of is not mandatory. It becomes necessary when the Collection uses the Sub Type : Primary Object form and must identify which parent object should supply the child objects.
Syntax
[Collection : <Collection Name>]
Type : <Object Type>
or
[Collection : <Collection Name>]
Type : <Sub Type> : <Primary Object>
Child Of : <Parent Object>
Example
[Collection : TSPL Sales Vouchers]
Type : Vouchers : VoucherType
Child Of : $$VchTypeSales
Fetch : Date, VoucherNumber, Amount
TSPL Sales Vouchers gathers Voucher objects that belong to the Sales Voucher Type. ‘Type : Vouchers : VoucherType’ establishes that the Collection is gathering Voucher objects under the Voucher Type hierarchy. Since this extended Type syntax is used, Child Of specifies the actual parent object, $$VchTypeSales.
As a result, the Collection gathers only those Voucher objects that are children of the Sales Voucher Type, and the fetched methods can then be used for further processing or display.
During data entry, a Table may need to prevent values that have already been selected from appearing again. For example, while entering multiple Stock Items in a Voucher, once Pencil has been selected in an earlier line, it can be removed from the Stock Item Table for subsequent lines. This reduces the possibility of selecting the same value repeatedly.
The Unique attribute at the Collection level is used to control the unique values displayed in a Table based on values already selected and stored through a Field. As values are selected, the Collection compares the specified Table object method with the values already available in the Field storage and removes matching values from the Table. Your document describes this specifically as dynamically changing the values displayed in the Table based on the Field value.
For this behaviour to reflect immediately during data entry, the Field using the Collection must allow the Table to be dynamically refreshed. Otherwise, the Collection may contain the uniqueness information, but the displayed Table may not refresh after a value is selected.
Unique can work with one, two, or three parameters. If the method displayed by the Collection and the method used as Field storage are the same, only the Table Object Method needs to be specified. If they are different, the Field Object Method is additionally specified so that Tally knows which stored value should be compared with the Table value.
It can also maintain uniqueness within another dependent value. For example, different Stock Items may have identical Batch Names. In such a case, a Batch Name should be considered already selected only if it was selected for the same Stock Item. The optional Extended Method provides this additional context: previously selected Field values participate in uniqueness only where the corresponding Extended Method value matches the current one.
So, the purpose of Unique is not simply to remove duplicate objects from a Collection. It is to make a Table’s available choices respond to values already selected during data entry, including scenarios where uniqueness depends on another Field or object value.
Syntax
[Collection : <Collection Name>]
Unique : <Table Object Method> [, <Field Object Method>] [, <Extended Method>]
The Table Object Method specifies the method whose values should be displayed uniquely in the Table. The Field Object Method specifies the storage/method associated with the Field against which previously selected values are checked; it is optional unless an Extended Method is specified. The Extended Method provides an additional context for uniqueness—for example, maintaining unique Batch Names separately for each Stock Item.
Example
[#Field : VCH StockBatchName]
Use : Name Field
Width : @@VCHShortNameWidth
Show Table : Always
Table : StockBatchName
Invisible : NOT $$IsSales:##SVVoucherType
Storage : StockBatchName
Dynamic : “”
[Collection : StockBatchName]
Type : Batch
Child Of : #VCHStockItemName
Title : “List of Batch Name”
Format : $Name
Unique : $Name, $StockBatchName, $StockItemName
[System : UDF]
StockBatchName : String : 25001
The StockBatchName Collection gathers Batch objects belonging to the Stock Item selected in the current voucher line. Type : Batch identifies the objects to be gathered, while Child Of : #VCHStockItemName restricts the Table to Batches belonging to the currently selected Stock Item.
The Collection uses:
Unique : $Name, $StockBatchName, $StockItemName
Here, $Name is the Table Object Method whose values need to be displayed uniquely. In this case, it represents the Batch Name available in the Table.
$StockBatchName is the Field Object Method. The selected Batch Name is stored through Storage : StockBatchName, and this stored value is used to identify Batch Names that have already been selected in the preceding repeated lines.
$StockItemName is the Extended Method. It provides the additional Stock Item context while checking previously selected Batch Names. This is important because two different Stock Items can legitimately contain a Batch having the same name. A previously selected Batch Name is therefore excluded only when it belongs to the same Stock Item.
For example, if the data entry is:
|
Stock Item |
Batch |
|
Long Book |
Batch 1 |
|
Long Book |
selection pending |
then Batch 1 will no longer appear in the Batch Table for the second Long Book line. However, if another Stock Item also contains a Batch named Batch 1, that Batch can still be displayed because $StockItemName is different.
The Field also specifies Dynamic : “”. This is important because the available values in the Table change as the user makes selections. Dynamic refresh ensures that once a Batch is selected, the Table is refreshed and the corresponding value is removed immediately from subsequent applicable selections. Your earlier document specifically calls out this requirement for the Collection-level Unique behaviour to be reflected dynamically in the interface.
This example therefore demonstrates the three-level comparison performed by Unique: what value is displayed in the Table ($Name), what value has already been stored ($StockBatchName), and within which dependent context that stored value should be considered ($StockItemName).
A Collection can be used to present a list of objects from which the user selects an object before proceeding to another Report. In such a flow, the selected value needs to be retained so that it can be supplied to the Report that is subsequently opened.
The Variable attribute specifies the variable that holds the value of the object selected by the user from the Collection. This variable acts as the link between the selection made through the Trigger Report and the Report specified through the Report attribute.
Variable is therefore used along with the Collection attributes Trigger and Report. Trigger specifies the Report through which the selection is made, Variable holds the selected value, and Report specifies the Report that is subsequently invoked using that selection.
The flow can be understood as:
Collection → Trigger Report → User selects an object → Variable holds selected value → Target Report
Syntax
[Collection : <Collection Name>]
Variable : <Variable Name>
Example
Using the Ledger-selection example established earlier:
[Collection : TSPL Ledger Collection]
Type : Ledger
Fetch : Name, Parent
Format : $Name, 20
Trigger : TSPL Ledger Selection
Variable : TSPLLedName
Report : TSPL Ledger Details
[Variable : TSPLLedName]
Type : String
[Report : TSPL Ledger Selection]
Form : TSPL Ledger Selection
[Form : TSPL Ledger Selection]
Part : TSPL Ledger Selection
[Part : TSPL Ledger Selection]
Line : TSPL Ledger Selection
[Line : TSPL Ledger Selection]
Field : TSPL Ledger Name
[Field : TSPL Ledger Name]
Table : TSPL Ledger Collection
Show Table : Always
Modifies : TSPLLedName
TSPL Ledger Collection presents the Ledger objects for selection through the TSPL Ledger Selection Report. The TSPL Ledger Name Field uses the Collection as a Table. When a Ledger is selected, ‘Modifies : TSPLLedName’ stores the selected value in the TSPLLedName variable.
The Collection’s Variable : TSPLLedName identifies this variable as the one carrying the user’s selection for the Collection-driven Report flow. The Report attribute then identifies TSPL Ledger Details as the Report to be supplied with the selected Ledger information.
For example, if ABC Traders is selected, TSPLLedName holds ABC Traders, allowing the subsequent TSPL Ledger Details Report to work with that selection.
Thus, the three related attributes have distinct responsibilities: Trigger provides the selection interface, Variable carries the selected value, and Report identifies the Report that follows the selection.
A Source Collection may contain information at multiple levels of its object hierarchy. For example, a Voucher contains Inventory Entries, and each Inventory Entry can further contain Batch Allocations. If the information required for a Collection is available within these sub-objects rather than directly at the source-object level, the Collection needs a way to traverse to that level.
The Walk attribute is used to traverse through one or more levels of sub-objects available within each object of the Source Collection. It starts with the source object and follows the specified sub-object hierarchy until it reaches the level where the required information is available.
For example:
Voucher → Inventory Entries → Batch Allocations
Here, the Voucher is the source object. Walk first traverses its Inventory Entries and then the Batch Allocations available within each Inventory Entry. Once the Collection reaches the Batch Allocation level, the methods available in that context can be used for further operations such as grouping, computation, aggregation, or filtering.
Use Walk when the required information is not available directly in the source object but is available within one of its sub-objects or at a deeper level of the same hierarchy. If the required information is already available at the source-object level, Walk is not required.
An important effect of Walk is the change in object context. Before the Walk, expressions are evaluated in the context of the source object. As the Collection walks deeper, the current context changes to the respective sub-object. Therefore, methods referenced in subsequent Collection processing are evaluated in the context reached through the Walk. If information from the original source object is also required after the context changes, attributes such as Source Var can be used to retain that value before the Walk begins.
The processing can therefore be understood as:
Source Collection → Source Object → Walk through Sub-objects → Required Object Level → Group / Compute / Aggregate / Filter.
Syntax
[Collection : <Collection Name>]
Source Collection : <Source Collection Name>
Walk : <Sub Object> [, <Sub Object>, …]
Example
[Collection : TSPL Sales Vouchers]
Type : Voucher
Child Of : $$VchTypeSales
[Collection : TSPL Batch-wise Sales]
Source Collection : TSPL Sales Vouchers
Walk : Inventory Entries, Batch Allocations
By : StockItem : $StockItemName
By : BatchName : $BatchName
Aggr Compute : SalesQty : Sum : $BilledQty
Aggr Compute : SalesAmt : Sum : $Amount
TSPL Sales Vouchers gathers Sales Voucher objects and acts as the Source Collection for TSPL Batch-wise Sales.
The information required for the summary is not available entirely at the Voucher level. The Collection therefore uses Walk to traverse from each Sales Voucher to its Inventory Entries and then to the Batch Allocations within those Inventory Entries.
The traversal is:
Sales Voucher → Inventory Entries → Batch Allocations
After reaching the required sub-object level, the Collection groups the information by Stock Item and Batch Name. Aggr Compute then aggregates the quantity and amount for each Stock Item–Batch combination.
This example demonstrates the purpose of Walk: to move from the objects available in the Source Collection to the required level of their nested sub-objects so that information available at that level can be processed by the Collection.
A Source Collection may contain several sub-object paths that need to be processed to build a consolidated or aggregated result. For example, a Voucher may contain different nested structures such as Inventory Entries, Ledger Entries, Batch Allocations, Cost Centre Allocations, or other sub-objects. If each path is walked separately through different resultant Collections, the same Source Collection may need to be traversed repeatedly, which can increase processing time for large datasets.
The Walk Ex attribute is used when multiple walk paths need to be applied to the same already-gathered Source Collection. It allows a resultant Collection to specify a list of Collections, where each listed Collection defines its own Walk, grouping, computation, or aggregation logic.
The important point is that the Collections referred to through Walk Ex do not specify their own Source Collection. The Source Collection is defined once in the resultant Collection containing Walk Ex. Each referenced Collection then works on that common source and defines only the path and processing required for its respective sub-objects.
This allows several independent traversal paths to be processed against the same source objects without gathering or traversing the Source Collection separately for each path.
For example, consider a Voucher analysis where one summary needs to aggregate Inventory Entries, while another needs to aggregate Ledger Entries. Instead of building two independent summary Collections that each process the Voucher Collection separately, both walk definitions can be listed through Walk Ex. TallyPrime can then traverse the required paths during the same pass over each source Voucher.
The processing can be visualised as:
Source Voucher Collection
→ Walk Inventory Entries → perform required aggregation
→ Walk Ledger Entries → perform required aggregation
→ Combine the required results
The key objective of Walk Ex is therefore performance optimisation when multiple walk paths operate on the same Source Collection. By traversing all the specified paths in a single pass for each source object, it avoids repeated traversal of the same Source Collection and can significantly reduce processing overhead in complex reports.
Walk Ex is particularly useful for large transactional Collections, multi-dimensional summaries, complex Voucher analysis, and reports that need information from several different sub-object paths of the same source data.
An important dependency is that the Source Collection is specified in the resultant Collection containing Walk Ex, while the Collections listed in Walk Ex contain the individual Walk and aggregation definitions and do not independently specify a Source Collection.
Syntax
[Collection : <Resultant Collection Name>]
Source Collection : <Source Collection Name>
WalkEx : <Collection Name 1>, <Collection Name 2>, …
The Collections specified in WalkEx contain their respective Walk, By, Aggr Compute, or computation attributes. They do not need to specify the Source Collection because they use the Source Collection of the resultant Collection. https://help.tallysolutions.com/objects-and-collections/?utm_source=chatgpt.com
Example
Consider a requirement to create a single summary containing both Ledger-wise and Stock Item-wise amounts from Vouchers.
[Collection : TSPL Voucher Source]
Type : Voucher
[Collection : TSPL Voucher Summary]
Source Collection : TSPL Voucher Source
WalkEx : TSPL Ledger Details, TSPL StockItem Details
Keep Source : ().
[Collection : TSPL Ledger Details]
Walk : AllLedgerEntries
By : Particulars : $LedgerName
Aggr Compute : TotalAmount : Sum : $Amount
[Collection : TSPL StockItem Details]
Walk : AllInventoryEntries
By : Particulars : $StockItemName
Aggr Compute : TotalAmount : Sum : $Amount
TSPL Voucher Source gathers the Voucher objects only once and acts as the common Source Collection. TSPL Voucher Summary is the resultant Collection. Its WalkEx attribute refers to two Collections that define two different traversal paths.
TSPL Ledger Details walks through AllLedgerEntries, groups the entries by Ledger Name, and calculates the total Amount for each Ledger.
TSPL StockItem Details walks through AllInventoryEntries, groups the entries by Stock Item Name, and calculates the total Amount for each Stock Item.
Notice that neither of these two Collections specifies Source Collection. They automatically operate on the TSPL Voucher Source specified in the resultant TSPL Voucher Summary Collection. https://help.tallysolutions.com/objects-and-collections/?utm_source=chatgpt.com
The processing can be understood as:
TSPL Voucher Source
→ AllLedgerEntries → Ledger-wise Amount
→ AllInventoryEntries → Stock Item-wise Amount
→ TSPL Voucher Summary
The important advantage is that for each Voucher in the Source Collection, the Ledger Entry and Inventory Entry paths are traversed in a single pass. If separate summary Collections were created with the same Source Collection, the Voucher source would have to be traversed separately for each path. This is why WalkEx is particularly useful for improving performance where multiple walk paths need to process the same source data. https://help.tallysolutions.com/objects-and-collections/?utm_source=chatgpt.com
There is also a conditional form of WalkEx:
WalkEx : <Collection Name> : <Logical Expression>
The optional condition determines, for each source object, whether the corresponding WalkEx path should be traversed. https://help.tallysolutions.com/article/DeveloperReference/tdlreference/release_5_4_8.htm/?strInvokedFromSupportCentreFlag=1&strSCIframeName=&utm_source=chatgpt.com
An external application may return an XML document whose structure is different from the structure required for processing in Tally. Instead of requiring the external application to change its XML format, the received XML can be transformed into the required structure before the Collection processes it.
The XSLT attribute is used in a Collection to specify an XSL Transformation (XSLT) that transforms an XML document received from an external source into another XML document with the required structure.
XSLT acts as a transformation layer between the XML received from the external source and the XML that needs to be consumed by the Collection. It can be used to reorganise elements, rename or map XML nodes, select required information, or restructure the incoming XML according to the expected format.
The processing can be understood as:
External Source → XML Response → XSLT Transformation → Transformed XML → Collection
This is particularly useful when integrating with an external system whose XML structure cannot be directly changed or does not match the structure expected by the TDL solution. The transformation can be handled within the integration flow without requiring changes to the source system.
XSLT is relevant specifically to XML-based data exchange; it is not used for transforming JSON data.
Syntax
[Collection : <Collection Name>]
Data Source : HTTP XML : <URL>
XSLT : <XSLT File Name>
Example
[Collection : TSPL Customer Data]
Data Source : HTTP XML : “http://localhost/customerdata.xml”
XSLT : “CustomerTransform.xsl”
Fetch : Name, City, ClosingBalance
TSPL Customer Data receives an XML document from the specified external HTTP source. However, the structure of the XML returned by the external application may not be in the format required by the Collection.
XSLT specifies CustomerTransform.xsl as the transformation to be applied to the received XML. The XSLT file defines how elements in the incoming XML should be mapped or reorganised into the required XML structure.
The processing therefore follows:
External XML → CustomerTransform.xsl → Transformed XML → TSPL Customer Data
For example, the external application may return:
<Customer>
<CustomerName>ABC Traders</CustomerName>
<Location>Mumbai</Location>
<Balance>25000</Balance>
</Customer>
The XSLT can transform it into the structure expected by the Collection:
<LEDGER>
<NAME>ABC Traders</NAME>
<CITY>Mumbai</CITY>
<CLOSINGBALANCE>25000</CLOSINGBALANCE>
</LEDGER>
The Collection can then work with the transformed values through methods such as $Name, $City, and $ClosingBalance.
The XSLT transformation happens before the Collection consumes the received XML, allowing an external XML structure to be adapted without requiring the source application to change its response format.