
Map Nett Amount Values in Excel for Importing Data | Computing Values from Excel
You might have Opening Balance stored in multiple columns, with or without column headers in the Excel file. Similarly, you might want to compute values from different columns in the Excel worksheet. In such cases, you can use the Compute Value mapping options for importing such data.
Opening Balance in Different Columns for Debit & Credit | Compute Value using Cr/Dr
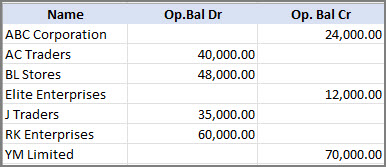
Let’s say you maintain an Excel sheet for entering the opening balances of your party accounts. You have separate columns for entering the debit and credit amount for each party and you want to import this list into TallyPrime.
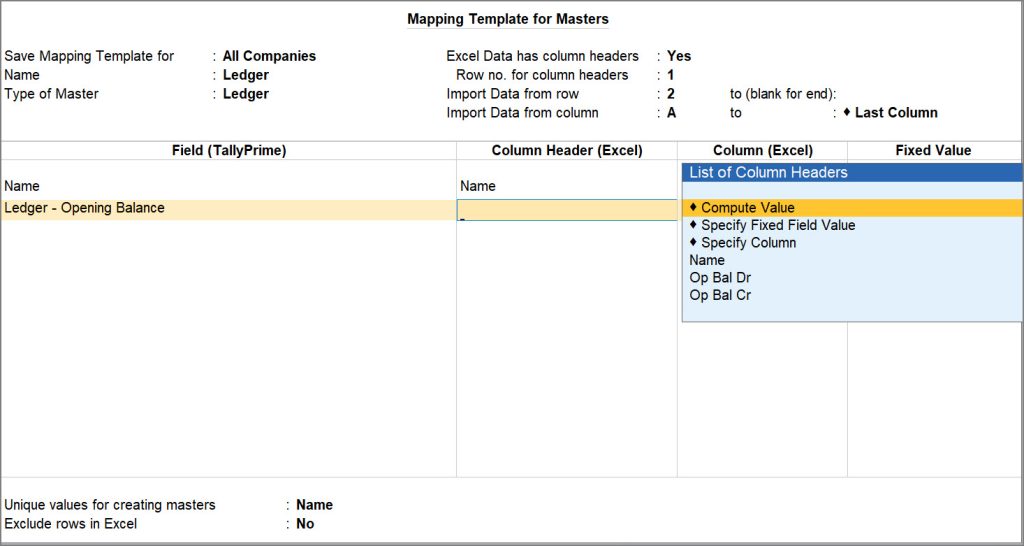
In the Mapping Template Creation screen,
- Under Field (TallyPrime), select Ledger – Opening Balance to map with the column in your Excel file.
- Under Column Header (Excel), select Compute Value from the List of Column Headers.
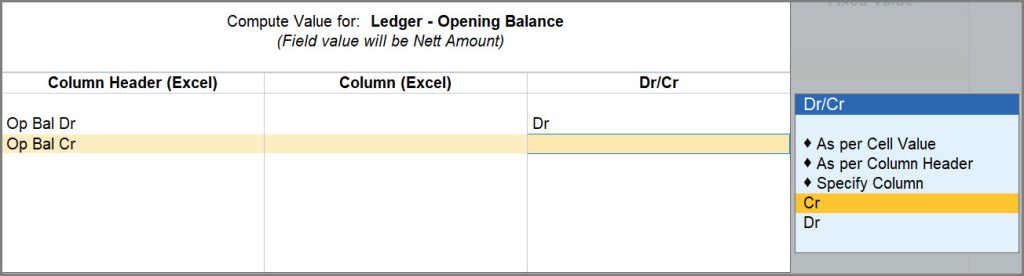
The Compute Value for: Ledger – Opening Balance screen appears.- Map the Column Headers and specify if the value is Debit or Credit and proceed for import.

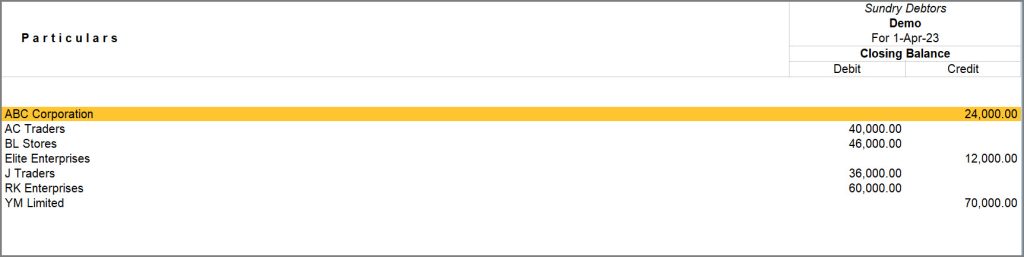
After importing the data, you can verify the change in credit and debit amounts from Alt+G (Go To) > Trial Balance.
- Map the Column Headers and specify if the value is Debit or Credit and proceed for import.
Once the Mapping Template is created, import the data in TallyPrime by using the respective mapping template.
Combine Values where the Field Value is a Combination of Multiple Cell Values
Let’s say that you have maintained stock item details in Excel sheet as follows:
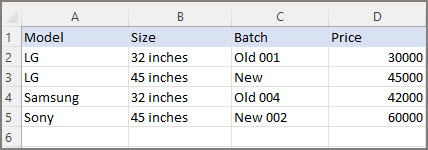
In case you want to use the details from the Column Headers Model and Size as the stock item name, you can map using the Compute Value option in the Import process.
In the Mapping Template Creation screen,
- Under Field (TallyPrime), select Name.
- Under Column Header (Excel), select Compute Value.
- Under Column Header (Excel), select the field values that you want to combine, for example, Model and Size.
- Under Column Header (Excel), select the field values that you want to combine, for example, Model and Size.
- Map other relevant fields for the stock items and save the mapping template.
- Import the data using the saved template.
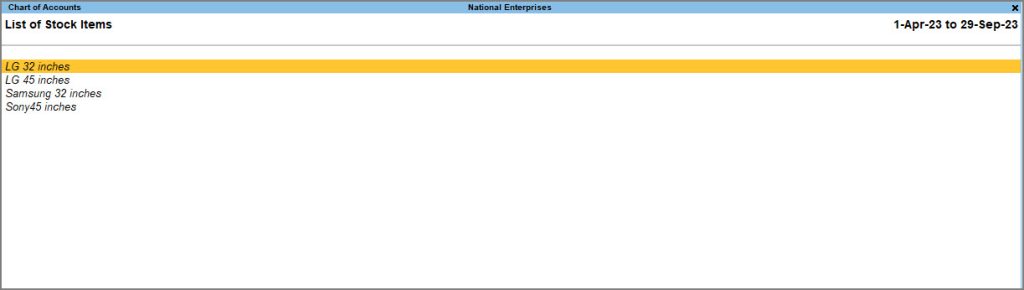
The Model and Size of the stock items appear as Name in the Chart of Accounts in TallyPrime.
Compute Values where the Field Value should be set to “Yes”
There are certain fields in TallyPrime that accept only Yes/No as the input, like Maintain Balances bill-by-bill, Cost centres are applicable and more. In you Excel file, you may have entered values other than Yes/No which you want to map with the fields in TallyPrime.
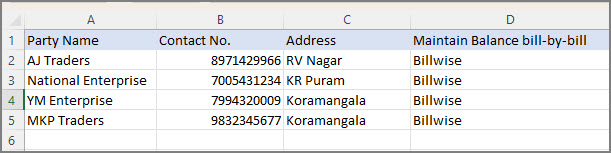
Let’s say your Excel file has data as follows and you want to map the value for Maintain balances bill-by-bill:

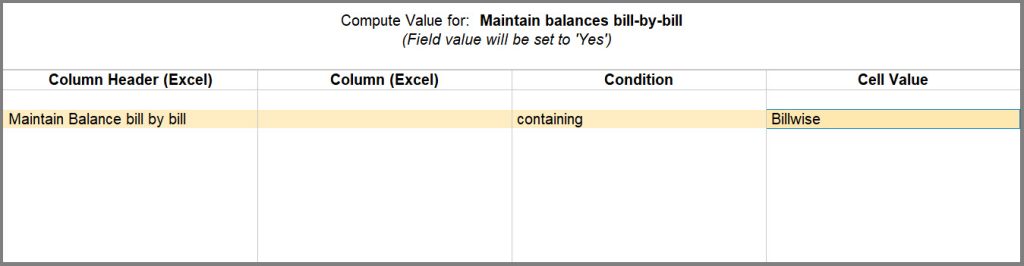
In the Compute Value for: screen,
- Under Column Header (Excel), select Maintain Balances bill-by-bill.
- From the List of Conditions, select containing.
- Select the Cell Value, for example, Billwise in this case.
- Map other relevant fields for the ledgers and save the mapping template.
By using this option, you can easily map your Excel data to TallyPrime fields that accept logical values like Yes or No. It simplifies the process of importing data and ensures that your data is correct and consistent within TallyPrime.
Mapping Data that is Common/Fixed in Multiple Rows in the Excel File | Fixed Field Value
Let’s say you have entered details of multiple parties in an Excel file, without specifying their Group, as they all belong to the same group – Sundry Debtors.
However, as you know that Group Name is mandatory during ledger entry, while importing you will need to specify the Group for the ledgers. You can use the Specify Fixed Field Value option while mapping the data to import such masters easily.
In the Mapping Template for Masters,
- Map the fields in TallyPrime with the corresponding column headers in your Excel worksheet.
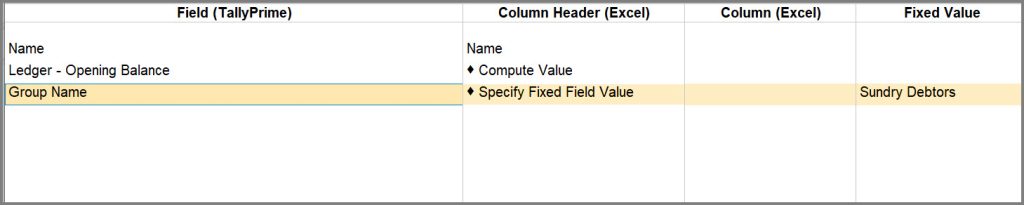
- Under Field (TallyPrime) select Group Name and under Column Header (Excel), select Specify Fixed Field Value.
A List of Groups is displayed on the screen to provide you a seamless experience for mapping. - From the List of Groups, select the Group Name that you want to consider as the fixed value while mapping the ledgers with TallyPrime, say Sundry Debtors.
As a result, all the parties in your Excel file will be systematically assigned to the specified group in TallyPrime, simplifying the data import process and ensuring that your ledger details are accurately organized for the import process.


