
Print Cheques from TallyPrime
Once you have specified all your cheque requirements, you can print either one or multiple cheques from TallyPrime, as needed. This means that you can choose how to deal with the cheque withdrawals and payments.
In TallyPrime, you can:
Bulk Cheque Printing: If you are handling routine or bulk cash withdrawals, then you can print cheques in bulk. This is particularly useful when you want to handle monthly cash requirements for cash-in-hand, salaries, miscellaneous expenses, invoice payments through cash, and so on. So, you would want to save time by printing multiple cheques in one go.
Single Cheque Printing: if you have an ad hoc requirement to print a cheque, then you can print a single cheque, even while creating a payment voucher.
In addition to the flexibility to print single or multiple cheques, you can also print cheques with a blank date.
Printing Cheques with Blank Date: You might want to print cheques while keeping the date as blank for various reasons such as:
- Post-Dated Cheques (PDCs): You want to handle future payments. So, leaving the date blank allows the user to fill it in manually when the cheque is actually handed over.
- Approval Workflow: The cheque may be printed in advance but held until final approval is received. Once approved, the date is added to reflect the actual issue date.
- Uncertain Payment Timing: When the exact date of payment is not known at the time of printing. For example, you might be waiting for delivery confirmation or invoice verification.
- Manual Signing Process: The signer may prefer to fill in the date at the time of signing to ensure accuracy.
Configure Bank Ledger for Cheque Printing
If the bank ledger you have selected is not configured for cheque printing, then in the Cheque Printing screen the header shows Bank not configured for Cheque Printing.
![]()
- Select the bank ledger which is not configured for cheque printing.
The Cheque Printing screen shows Bank not configured for Cheque Printing in the header. - Press Alt+B (Alter Ledger) to alter the respective Bank ledger and enable cheque printing in the Bank ledger.

Once the cheque printing is enabled, you can see the list of pending cheques for printing.
Print Selected Cheques
![]()
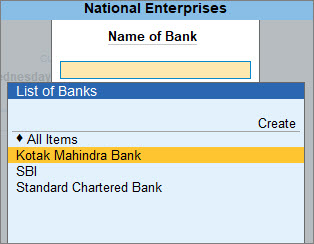
- Select the bank for printing the cheques.
- Press Alt+G (Go To) > type or select Cheque Printing > and press Enter.
- Select All Items or required Bank account from List of Banks to view the Cheque Printing screen.
- Press the spacebar to select the required row(s).
- Print the cheques.
- Press Ctrl+P (Print) to view the Cheque Printing Print screen.
- Press P (Print) to print. Only the selected cheques will be printed.
Print All Bank Cheques at Once
![]()
- Select the bank for printing the cheques.
- Press Alt+G (Go To) > type or select Cheque Printing and press Enter.
- Ensure that Inc Printed (F8) is disabled.
- Select the required bank from the List of Banks in the Select Bank screen.
- Print the cheques.
- Press Ctrl+P (Print) to print.
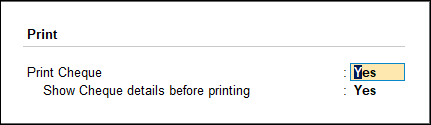
- Set the option Print Cheque to Yes in the Cheque Printing screen and press Enter.
- Press P (Print) to cheque print.
- Press Esc. The Cheque Printing screen appears with Cheque Details for the next cheque.
You can print all the cheques at once and issue them at the time of making payment.
Print a Cheque Without Date and Update it While Issuing Cheques
![]()
- Select the Bank ledger.
- Press Alt+G (Go To) > Alter Master > type or select Ledger > and press Enter.
- Select the bank ledger. For example, Kotak Mahindra Bank.
- Set Cheque Printing under Bank Configuration.
- Enable Set/Alter Cheque Printing configuration, to view the Cheque Format Selection screen.
- Select the required format from the List of Cheque Formats, to view the Cheque Dimensions screen.
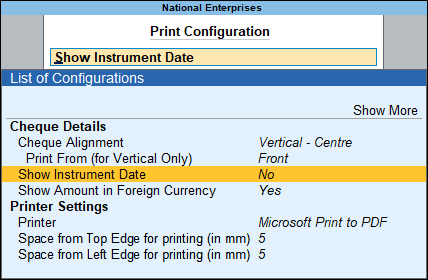
- Print cheques without the Instrument Date.
- Press Ctrl+P (Print) to view the Sample Cheque Printing and press C (Configure).
- Set Show Instrument Date to No.
- Press Ctrl+A to save.
Print Cheque from Payment Voucher
![]()
- Record the Payment voucher.
- Press Alt+G (Go To) > Create Voucher > press F5 (Payment) and press Enter.
- Debit the party ledger and enter the Amount and give the bill reference details, if any.
- Credit the bank ledger for which the cheque printing is enabled and enter the Amount and press Enter.
- Enter the cheque number in the Inst. no. field and the date in the Inst. date.
The voucher date is displayed by default. - Press Ctrl+A to save the Bank Allocations Screen.
- As always, press Ctrl+A to save the payment voucher.
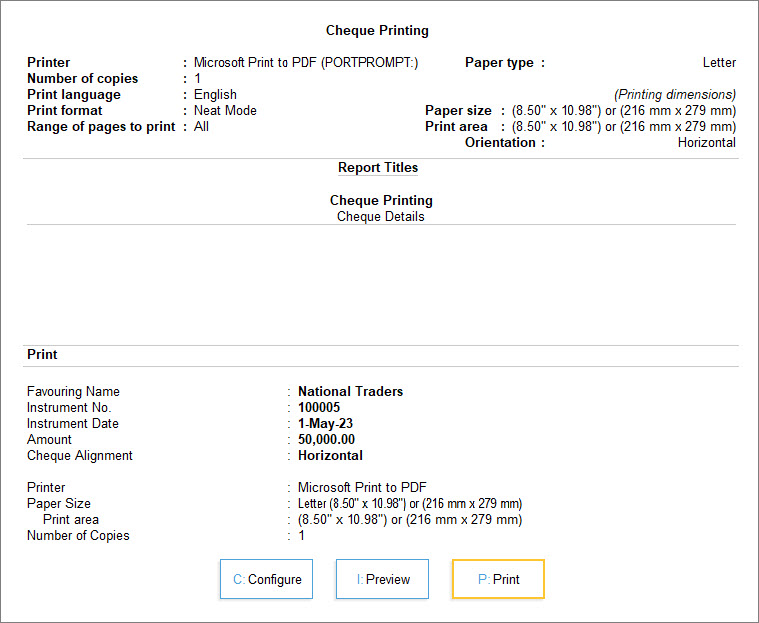
- Press I (Preview) to preview and P (Print) to print.
You can now directly print the cheques once the payment voucher is recorded.
Print cheque details in payment voucher
![]()
- Record the payment voucher.
- Press Alt+G (Go To) > Create Voucher > press F5 (Payment) and press Enter.
- Debit the party ledger and credit the bank ledger.
- As always, press Ctrl+A to save the payment voucher.
- Print the payment voucher with cheque details.
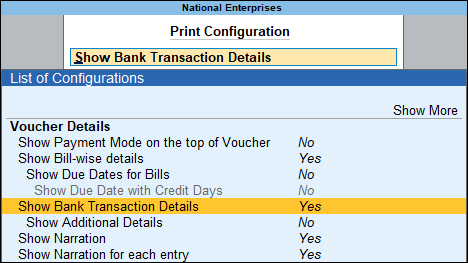
- Press C (Configure) > Set Show Bank Transaction Details to Yes to print the bank transaction details in the payment voucher.
- Press I (Preview) to preview and P (Print) to print.
- Press C (Configure) > Set Show Bank Transaction Details to Yes to print the bank transaction details in the payment voucher.
You can then print the cheque with the cheque details along with the bank name. The cheque details remain saved in the voucher and can be reprinted if required.
Print a Cheque to Withdraw Cash
![]()
- Record the Contra entry.
- Press Alt+G (Go To) > Create Voucher > press F4 (Contra).
- Credit the Bank account and enter the amount.
- Press Enter to go to the Bank Allocations screen.
- Press F12 (Configure) > set Show favouring name as Yes, to enter Self as the Favouring name.
The Bank Allocations screen appears as shown below:
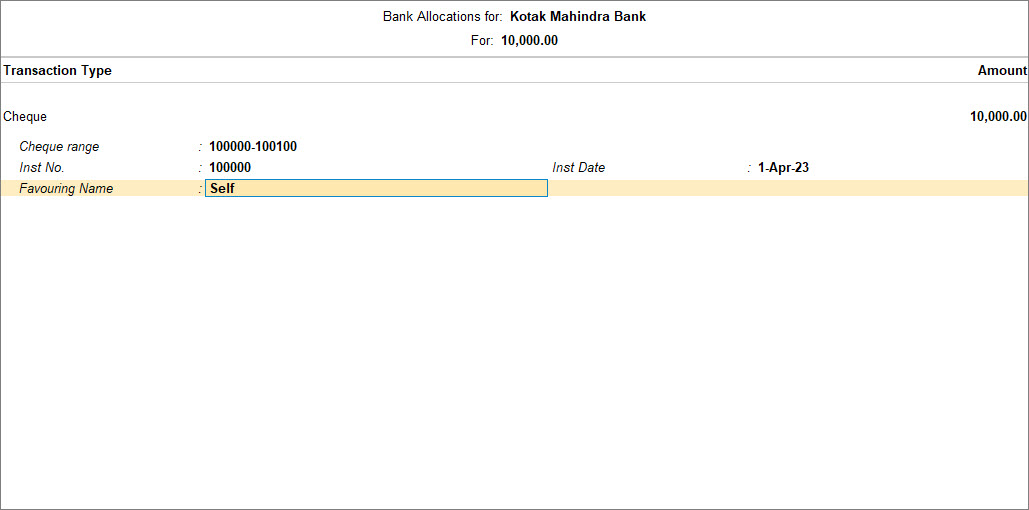
- Press Ctrl+A to accept and return to the Accounting Voucher Creation screen.
- Debit the Cash account.
- Press Ctrl+A to accept the screen.
- Print the cheque.
- In the Cheque Printing screen, press C (Configure) to set the print settings, if any.
- Press P (Print) to print the self-cheque.
You can print a cheque in your name and withdraw money from the bank.
View List of Cheques Pending for Printing | Cheque Printing Report
The Cheque Printing report in TallyPrime provides you with a list of cheques that are pending for printing. So, you can either select cheques and print them or print all of them in one go.
![]()
- Press Alt+G (Go To) > type or select Cheque Printing > and press Enter.
- Select All Items or the required Bank account from the List of Banks and press Enter.

- Press F8 (Incl Printed) or Ctrl+B (Basis of Values) to display all the cheques.

You can also customise Cheque Printing and view it, as required.
View Amounts in Hundreds, Thousands, and so on: Press Ctrl+B (Basis of Value) > select the Scale Factor, as needed.
View Cheque Register: Press Ctrl+H (Change View) > Cheque Register.
View Optional and Post-dated Vouchers: Press Ctrl+J (Exception Reports) > Optional/Post-dated Vouchers, as needed.
Alter Bank Ledger: Press Alt+B (Alter Ledger) > Enable Cheque Printing.
Alter Cheque Details: To edit or update the Favouring Name, Instrument No., and Instrument Date, press Alt+H (Alter Chq Details).


