
Snapshot Exchange in TallyPrime
Snapshot exchange sends and receives all the data created or altered after the last exchange. When doing the first snapshot exchange, all data gets exchanged. Thereby, this is ideal for the bulk exchange of data between branches.
It is essential to create the client rule and activate it on the server before exchanging a snapshot.
Snapshot Exchange
- Press Alt+Z (Exchange) > Snapshots > Exchange Snapshot Online.
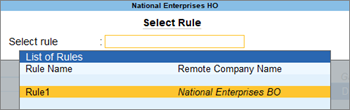
- Select the required rule and press Enter.
After the exchange of data between the client and the server, press F1 (Help) > Troubleshooting > Event Log for more details.

Export Snapshot
You can export your masters and transactions in the XML format. By default, the file gets created in the TallyPrime installation folder.
Export Snapshot exports all the data created or altered after the last export. While exporting the first snapshot, all data gets exchanged. The masters are exported first, followed by the transactions.
- Press Alt+Z (Exchange) > Snapshots > Export Snapshot.
- Select Masters or Transactions in the field Export for.
- Select the rule from the List of Rules.
- Specify the export location.
- Specify the output file name.
After exporting the data, press F1 (Help) > Troubleshooting > Event Log. You can now import this data to the server of your choice.

Import Snapshot
After exporting the masters and transactions from a client, you can import the data in the XML format to a server of your choice.
- Press Alt+Z (Exchange) > Snapshots > Import Snapshot. The Import Snapshot for Selected Rule screen appears.
- Select Masters or Transactions for the option Import for.
- Select the rule from the List of Rules.
- Enter the Import location or use the default export location.
- Enter an Output file name.
Press F1 (Help) > Troubleshooting > Event Log for more details. The message “Importing snapshot of XXXX” appears.


