
Use Voucher Numbering Methods
In TallyPrime, you can select the required method of voucher numbering of a voucher type. The assigned numbers act as unique identifier for each voucher and serve as references for discussions, audits, and compliance with regulations. You can also define numbering behaviour on the insertion/deletion of vouchers, enable additional numbering details, and use separate series for different categories of transactions.
Methods of Voucher Numbering
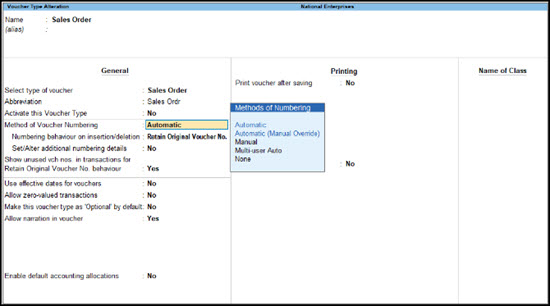
TallyPrime provides you with various voucher numbering methods such as Automatic, Automatic (Manual Override), Manual, and Multi-user Auto. However, based on your business needs, you can also disable the voucher numbering by selecting the None option from the Methods of Numbering. You can select the method of voucher numbering from the voucher type creation/alteration screen.
Automatic
Selecting this numbering method ensures that when you add or delete new vouchers to the company data, the vouchers numbers are updated automatically based on the existing voucher numbers.
To control this numbering method based on your business practices, you can select the Numbering behaviour on the insertion/deletion to Renumber Vouchers or Retain Original Voucher No. as required (applicable for TallyPrime 3.0 and later).
-
Renumber Vouchers: This option is set as default when you migrate your data to TallyPrime 3.0 or later from any of the earlier versions, or you create a new company or a voucher type in the latest release. This setting ensures that when you insert or delete a voucher, the existing voucher numbers are adjusted automatically.
Example: If the sequence is 1, 2, 3 and voucher 2 is deleted, the remaining vouchers are renumbered as 1, 2. -
Retain Original Voucher No.: Set this option, if you do not want to change the existing voucher numbers on insertion of new vouchers or deletion of existing vouchers.
These options are useful, depending on your business practices, when you are importing external data or syncing data from different sources in to the destination company.
Example: Deleting voucher 2 from the sequence 1, 2, 3 will result in a sequence of 1, 3.
Automatic (Manual Override)
Select this if you want to automate the number for vouchers, and manually override the automated number, if required.
For example, if the voucher is auto-numbered as 10, and you want to skip voucher numbers 11 to 20 for now, you can manually change the voucher number to 21. The next voucher number that appears prefilled will be 22. Skipped voucher numbers can be used whenever you want by manually changing the number.
You can set Prevent creating duplicate Voucher Nos to Yes, to avoid duplicate voucher numbers during entry. You can enable this option only if you have not recorded any transactions using this voucher type.
Manual
Select this to manually enter the voucher number in each voucher.
You can set Prevent creating duplicate Voucher Nos to Yes, to avoid duplicate voucher numbers during entry. You can enable this option only if you have not recorded any transactions using this voucher type.
Multi-User Auto
Select this option to enable the allotment of subsequent voucher numbers in a multi-user environment. However, this is applicable only in voucher creation and does not apply in the case of insertion or deletion of vouchers.
![]()
The Multi-User Voucher Numbering is an extension of the Automatic Numbering method. It hastens the process without errors. You can select the Numbering on the insertion/deletion to Renumber Vouchers or Retain Original Voucher No. as required.
To understand Multi-User Auto Voucher Numbering, let us consider three users – Mohan, Ram and Shyam. All of them are recording sales vouchers, using Automatic Voucher Numbering. The voucher number shown on the vouchers they are recording is 1 on each of the systems. When Mohan saves the voucher first, his voucher gets saved as 1. When Ram attempts to save the voucher after Mohan, the message “Voucher Number 1 already used! The new number will be 2!”. Similarly, when Shyam tries to save the voucher, he will get the message “Voucher Number 1 already used! The new number will be 3!”.
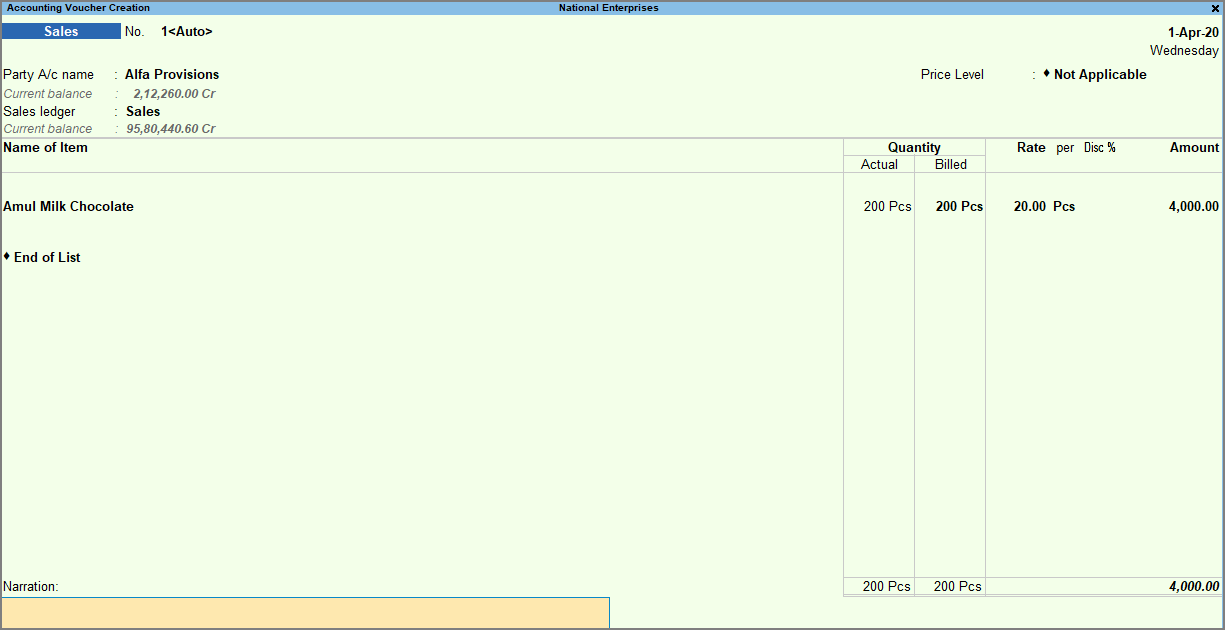
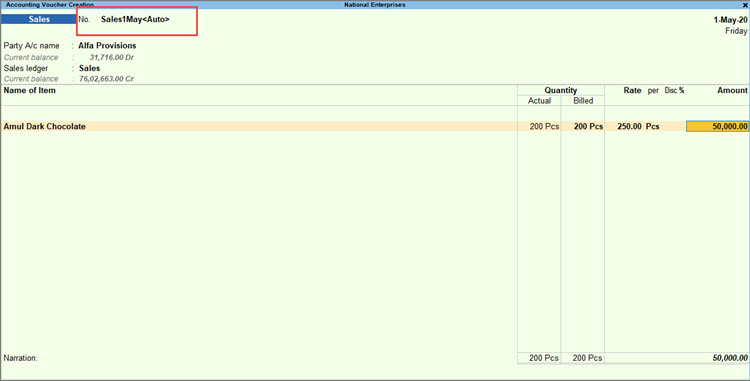
In order to eliminate this error message and avoid the re-acceptance of the voucher, you can use the option of Multi-User Auto Voucher Numbering. On enabling the Multi-user voucher numbering feature, the voucher number appears as 1<Auto> for all three users.
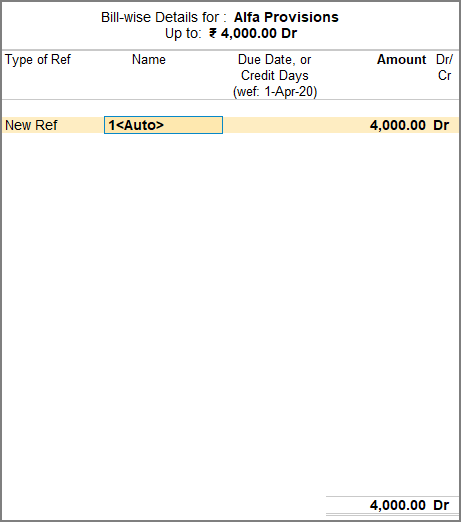
The bill-wise details screen and other relevant details will also be updated as 1<Auto>.
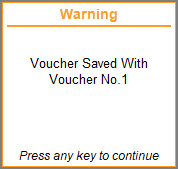
Let us assume that Mohan saves the entry first. The assigned voucher number 1<Auto> will be saved as 1 in the data.
When Ram and Shyam save the voucher, the voucher number 1 <Auto> will be changed to the next available voucher number.
None
Select this option to disable the voucher numbering.
Set Up Voucher Numbering
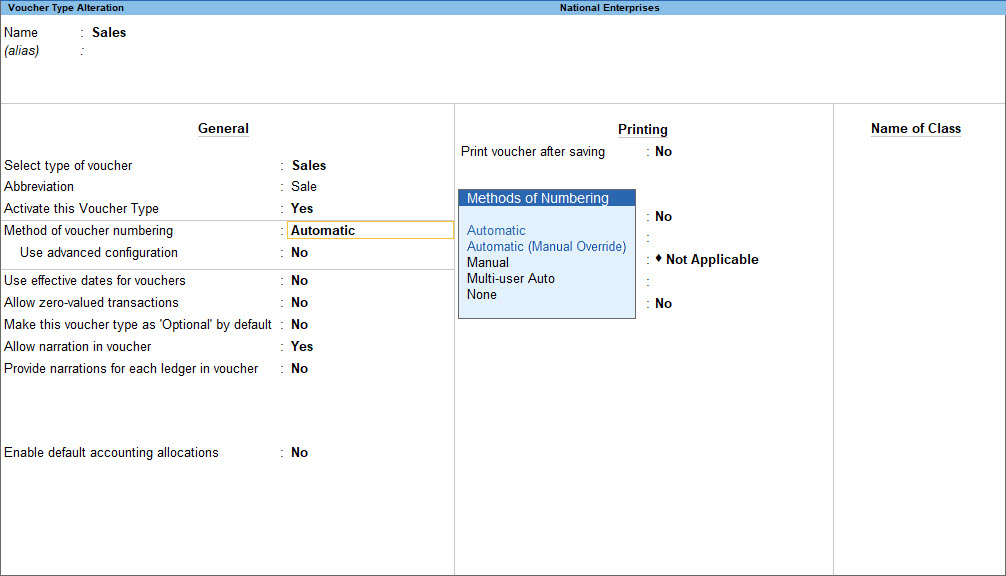
You can select the method of voucher numbering from the voucher type creation/alteration screen.
![]()
-
Press Alt+G (Go To) > type or select Alter Master > Voucher Type.
-
Select the Method of Voucher Numbering.
-
Show unused voucher nos. in transactions for Retain Original Voucher No. behaviour: Yes to eliminate the gaps in your voucher numbering sequence if you had deleted any voucher earlier.
-
Open the voucher where you want to apply the deleted voucher number.
- Press Ctrl+Alt+U (Unused Vch No.).
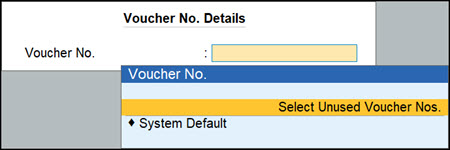
Alternatively, press Ctrl+I (More Details) > Voucher No. Details > Select Unused Voucher Nos.
- Accept the screen. As always, you can press Ctrl+A to save.
The unused voucher number will be applied for the voucher.
-
If you are using TallyPrime 7.0 or earlier
Click here...-
Show unused voucher nos. in transactions for Retain Original Voucher No. behaviour: Yes to eliminate the gaps in your voucher numbering sequence if you had deleted any voucher earlier.
When you delete transactions or mark them as optional, then the corresponding voucher numbers remains unused. Setting this option to Yes helps you to view such unused voucher numbers when you enter a new voucher and apply or reuse these numbers, if needed. However, this option is available only for Automatic and Multi-User Auto voucher numbering.
For example, if you have vouchers recorded with voucher numbers 1023 to 1027, and you had to delete voucher numbers 1023 from your books, this number will be retained as unused.
While recording a transaction, say a sales voucher:
- Press Ctrl+I (More Details) > Voucher No. Details > Select Unused Voucher Nos.
- From the List of Unused Voucher Nos., select the voucher number that you want to apply to the voucher, and press Enter.
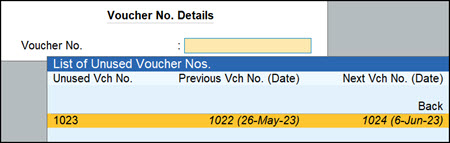
The voucher number 1023 gets applied to the sales voucher that you are recording.
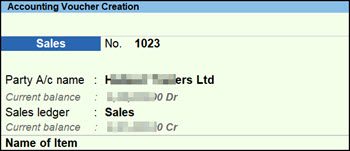
- Press Ctrl+A to save.
- Press Ctrl+I (More Details) > Voucher No. Details > Select Unused Voucher Nos.
Define Multiple Numbering Series for Vouchers
If you are on TallyPrime 3.0 or later, you can create different voucher numbering series for your vouchers, to suite your business requirements, and select the required numbering series while making the voucher entries.
Say, you want to use a continuous voucher numbering for all transactions that are beyond Rs. 50,000 based on your e-Way Bill threshold limit, and all the remaining transactions as part of a different voucher numbering. Similarly, you might want to use one numbering sequence for all interstate transactions and a different numbering sequence for all intrastate transactions with your parties. Further, you might be using multiple registrations for your company, and you want to use different voucher numbering sequences for each registration to ensure smooth tax filing.To manage all such cases, you can define multiple numbering series for vouchers.
-
Open a Voucher Type, say, Sales in the alteration mode and enable Define multiple numbering series for vouchers.
-
In the Voucher Type Alteration screen, press F12 (Configure) > set Define multiple numbering series for vouchers to Yes.
-
Set Define multiple numbering series for vouchers to Yes.
-
-
In the Define Numbering Series screen, select the default Series or create a new Numbering Series.
To know more, refer to Create Voucher Numbering Series.
Restart Voucher Numbering | Configure Voucher Numbering with Prefix & Suffix
Restarting voucher numbering helps reset and align the system with changes in the organization or financial periods, ensuring accurate record-keeping. You can restart the numbering of your vouchers by entering the date from which you want to restart the voucher numbers.
![]()
-
While setting up the numbering method for a voucher type, enable Set/Alter additional numbering details.
Note: This option will not be available if you have selected ‘Manual’ or ‘None’ as the method of voucher numbering. -
In the Voucher Type Creation (Secondary) screen, configure the number-related details for voucher numbering.
-
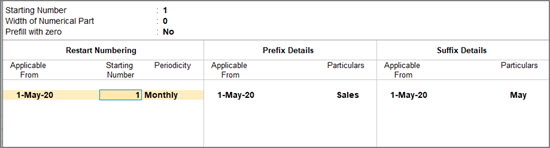
Starting Number: Enter the Starting Number as 1, if you want a fresh batch of voucher numbers from the date you created the company.
- Width of Numerical Part: You can define the number of digits for the voucher number.
For example, if you want the voucher number to appear as 0001, enter 4 in this field. Since the three zeros are not part of the starting number 1, set the next option Prefill with zero to Yes to generate the voucher number as 0001.
-
- Specify details for Restart Numbering.
-
Enter the Applicable From date, as required.
-
Enter the Starting Number, if you want to restart the voucher numbering each month.
-
Set the Periodicity, as required.
-
- Specify the Prefix and Suffix details for numbering.
-
Enter the Applicable From date, as required.
-
Enter the Prefix Details and Suffix Details, as required.
-
Now you can easily record your transactions with a new series of voucher numbers based on the periodicity you have set. To know more, refer to Create Voucher Numbering Series.
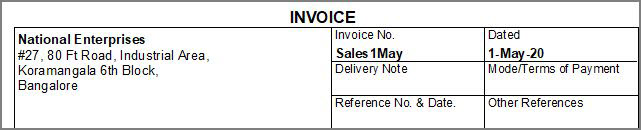
The sales voucher for the first voucher of May month appears, as shown below:
Restarting the numbering helps in maintaining clear and organized records, making it easier to track and analyze transactions within a specific time frame.
The change in the method of voucher numbering will also impact Edit Log.


