
Record Excise Sales Invoice (Excise for Dealer)
Excise sales can be recorded in sales invoice without linking the sales Voucher Type to tax unit or excise godown. If multiple tax units are created by linking it to godowns, the same can be selected while recording the invoice. On removing goods from the tax unit registered as Excise Dealer, the basic excise duty ledger need not be selected irrespective of the customer’s excise registration type. While recording the sales invoice, you can link the purchase bill.
Excise Sales Invoice
- Gateway of Tally > Vouchers > press F8 (Sales).
Alternatively, press Alt+G (Go To) > Create Voucher > press F8 (Sales). - Press Ctrl+H (Change Mode) > select Excise Invoice.
- Enter the reference number in Ref. field.
- Select the required Tax Unit.
Tax Unit option appears only when one or more user defined Tax Units are created by linking it to godown. - Select/retain the Excise Book Name.
The Excise Book Name option appears only if excise book is linked to Tax Unit. - The Excise Book Name linked to tax unit appears automatically. If multiple excise books are linked to tax unit, the required excise book can be selected from the List of Excise Books.
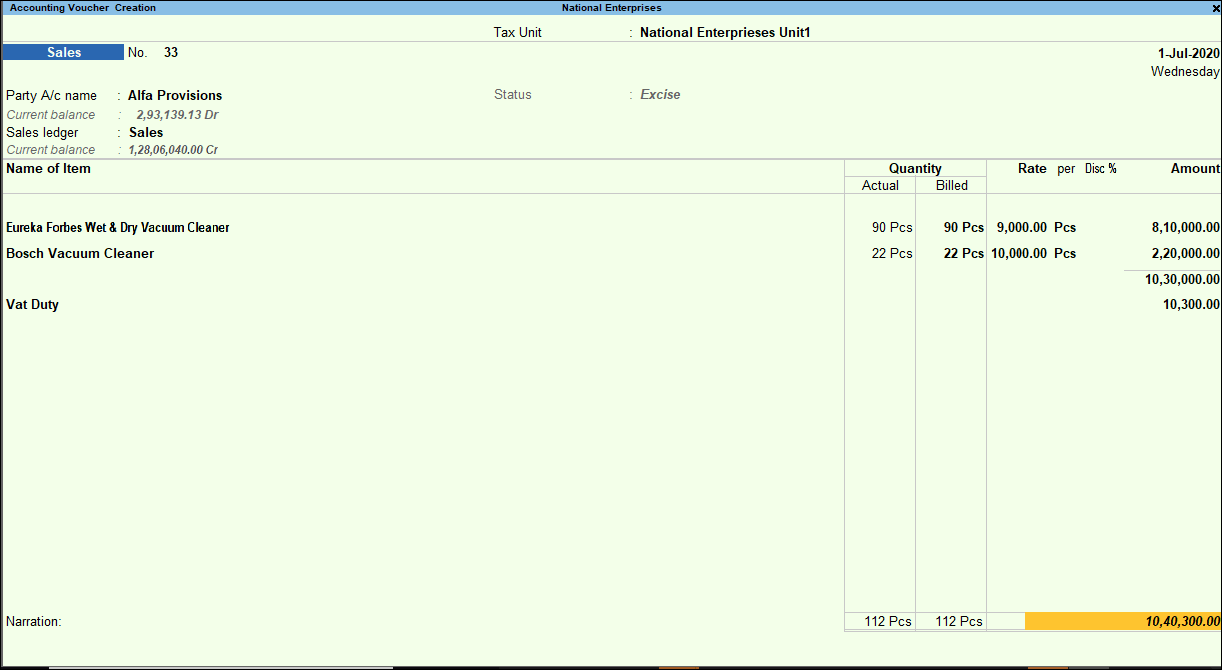
- Select the Party’s A/c Name from the List of Ledger Accounts.
- Select the Sales Ledger grouped under Sales Accounts. In the sales ledger, ensure the options Is VAT/CST Applicable and Is Excise Applicable are set to Applicable.
- Select the required Nature of Transaction in the VAT Classification Details screen. For example, Sales Taxable.
To view the VAT Classification Details screen, press F12 (Configure) in the sales invoice and set the option, Allow modification of Tax Details for VAT to Yes. - Link the purchase bills. The purchase bills can either be:
- Automatically linked to excise sales invoice
- Select the required stock item.
- If the tariff details are not defined in the stock item master, it will be picked from.
- Stock group, if user-defined stock group in which tariff details are defined is linked to the item.
- Tariff details defined at the company level.
- Select the Godown, enter the Quantity and Rate in the Stock Items Allocation screen.
- The purchases will be automatically linked to sales invoice.
- Manually linked to excise sales invoice
If there is a need to manually link the purchases to sales, including those invoices in which different Nature of Purchase are selected, press F12 (Configure) and set the options:- Use defaults for excise bill allocations to No to manually select the purchase bill.
- Allow different nature of purchase for excise bills to Yes to select the purchases recorded by selecting different Nature of Purchase.
- If the invoice is configured for manual selection of purchase bills, immediately after selecting the stock item, the Supplier Details screen appears with List of Purchases.
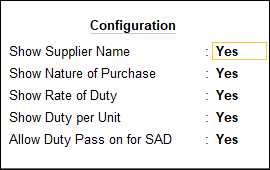
To display the supplier name, nature of purchase and duty per unit for each purchase bill, press F12 (Configure) in the Supplier Details screen and enable the options as shown below:
The purchase details appear as shown below:

- Select the required purchase bill from the List of Purchases.
- Enter the quantity being cleared as sales in Quantity Utilised column.

- Accept the Supplier Details screen.
In the Stock Item Allocation screen, select the Godown, enter the Quantity and Rate to display the amount.
Similarly, select another stock item, provide the Supplier Details and enter the relevant information in Stock Item Allocations screen.
- Automatically linked to excise sales invoice
- Select the VAT ledger.
- Set Provide VAT Details option to Yes/No as per requirement.
- Accept the sales invoice. The sales invoice can be printed in Rule 11 invoice format.
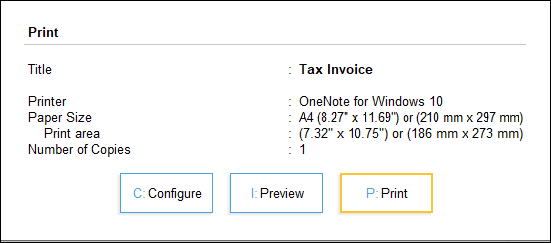
To print Rule 11 invoice
- Press Ctrl+P (Print Current). To generate a preview, Press I (Preview).
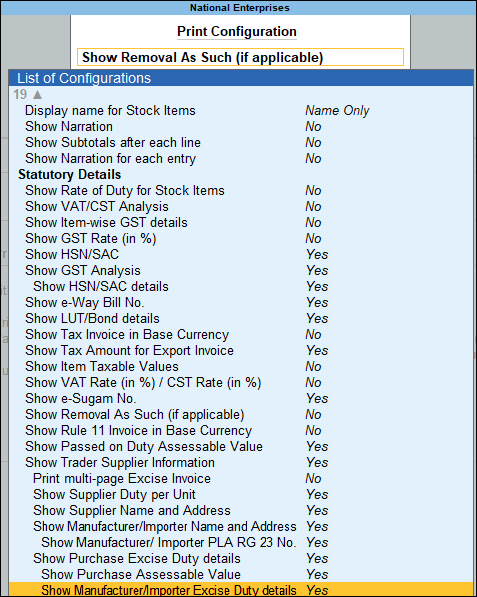
- Press C (Configure) and enable the options as shown below:
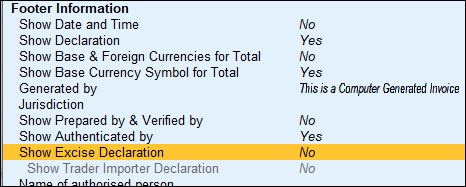
- Under Footer information we can the declaration related details.
- Accept the Invoice Print Configuration screen.
The Voucher Printing screen appears as shown below: - Press Enter to print invoice in Rule 11 invoice format.
Excise Sales – Selecting Multiple Nature of Purchases
- Gateway of Tally > Vouchers > press F8 (Sales).
Alternatively, press Alt+G (Go To) > Create Voucher > press F8 (Sales). - Press Ctrl+H (Change Mode) > select Excise Invoice.
- Enter the reference number in Ref. field.
- Select the required Tax Unit.
Tax Unit option appears only when one or more user defined Tax Units are created by linking it to godown. - Select/retain the Excise Book Name.
The Excise Book Name option appears only if excise book is linked to Tax Unit. - The Excise Book Name linked to tax unit appears automatically. If multiple excise books are linked to tax unit, the required excise book can be selected from the List of Excise Books.
- Select the Party A/c name from the List of Ledger Accounts.
- Select the Sales Ledger grouped under Sales Accounts. In the sales ledger, ensure the options Is VAT/CST Applicable and Is Excise Applicable are set to Applicable.
- Select the required Nature of Transaction in the VAT Classification Details screen. For example, Sales Taxable.
To view the VAT Classification Details screen, press F12 (Configure) in the sales invoice and set the option, Allow modification of Tax Details for VAT to Yes. - Press F12 (Configure) and set the options as given below to select the purchase bills multiple nature of purchases.
- Set the option Use defaults for excise bill allocations to No to select the purchase bills
- Set the option Allow different nature of purchase for excise bills to Yes to select bills of different stages of purchase.
- Select the stock item. The Supplier Details screen appears.
- Press F12 (Configure) of Supplier Details screen and set the option Show Nature of Purchase to Yes.
The Supplier Details screen appears with Nature of Purchase column as shown below: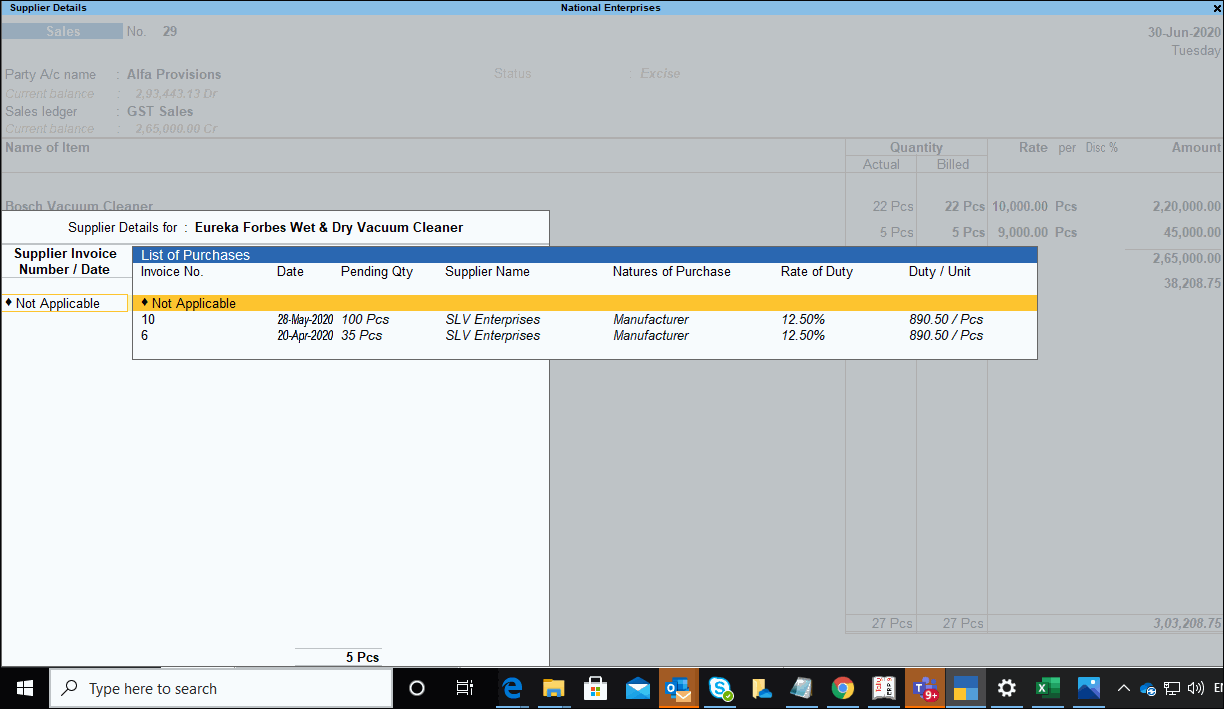
- Select the required purchase bills. The Supplier Details screen with different purchase bills appears as shown below:
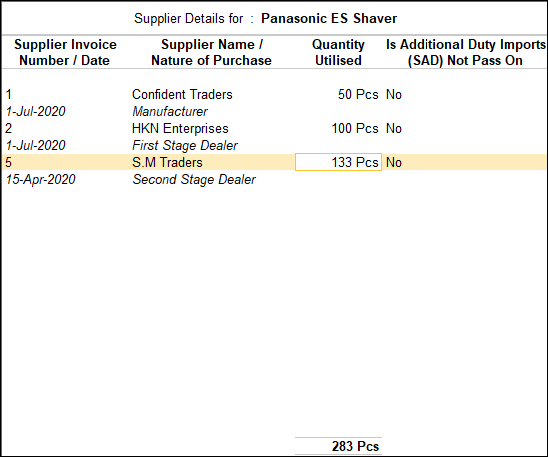
- Accept the Supplier Details screen.
- Select the VAT ledger.
- Set Provide VAT Details to Yes/No as per requirement.
- Accept the sales invoice.
Is this information useful?
YesNo


