HomeTallyPrimeTallyPrime with Cloud AccessTallyPrime on AWS Virtual Environment


Explore Categories


 PDF

Use TallyPrime on AWS Virtual Environment

If you need to access your business data while traveling, working from home, or have multiple users collaborating on the same data, the Virtual Computer Connection is the perfect solution. It acts as a dashboard to connect to a virtual computer, manage user accounts, handle data backups, and much more. Hosted on AWS infrastructure, the virtual computer allows you to store and access your data and applications anytime, anywhere.

In this section, we’ll guide you on how to get started with the Virtual Computer Connection. You can either install the Virtual Computer Connection client on your local computer or connect through a web browser via the Self Service portal. Once connected, you’ll be able to start using TallyPrime and access all the tools you need to manage your business data efficiently.

Access the Virtual Environment

Accessing your Virtual Environment is simple and flexible, designed to suit your convenience and system preferences. Whether you prefer using a browser for quick access or a dedicated client application for a desktop-like experience, this guide outlines both methods in detail.

In this section

Browser Access

Access your Virtual Computer directly through a web browser.

Recommended Browsers
For optimal performance, use the latest versions of the following browsers:

  • Chrome
  • Edge
  • Firefox

Prerequisites
Before accessing via browser, ensure the following:

  • A valid user account and credentials to log in to the Self Service portal.
  • The latest compatible browser version installed for the best experience.
Operating Systems Supported Browsers
Windows 7 SP1 or above Chrome
Mac 10.12 or above Chrome, Safari
Linux Chrome (in testing)

Note: Last tested version – Chrome 96

Client Access

For a desktop-like experience, download the TallyPrime Client Application.

Prerequisites
Ensure your local computer meets the following requirements:

Software Requirements

System Requirements

To ensure seamless access to your Virtual Computer, confirm that your system meets these requirements:

  • Browser Access: A stable internet connection and a compatible browser.
  • Client Access: Windows 10/11 with at least 4GB RAM and a dual-core processor.

Hardware Requirements

  • RAM: 512 MB (minimum)
  • Disk Space: 110 MB (plus 4.5 GB additional for .NET)
  • Processor: 1 GHz or higher
  • Internet Connection: Stable internet connectivity

Upon purchasing a plan, you will receive a notification email containing:

  • A link to download the Virtual Computer Connection installer.
  • Valid login credentials: Tally.NET ID, Password, and Secure PIN. 

Install the VCC

To access your business data and application on the move, you will require to install the Virtual Computer Connection (VCC) client on your local computer. Through the virtual connection, you can open the virtual computer and use TallyPrime to record your transactions.

Alternatively, you can also access the virtual computer through a web browser from the Self Service portal without having to install a client on your system and use TallyPrime. 

  1. Click the download link from the e-mail sent to you on purchasing the plan. This will download the installer to your local computer.
    Alternatively, download the client from the Download Virtual Computer Connection Client screen. 
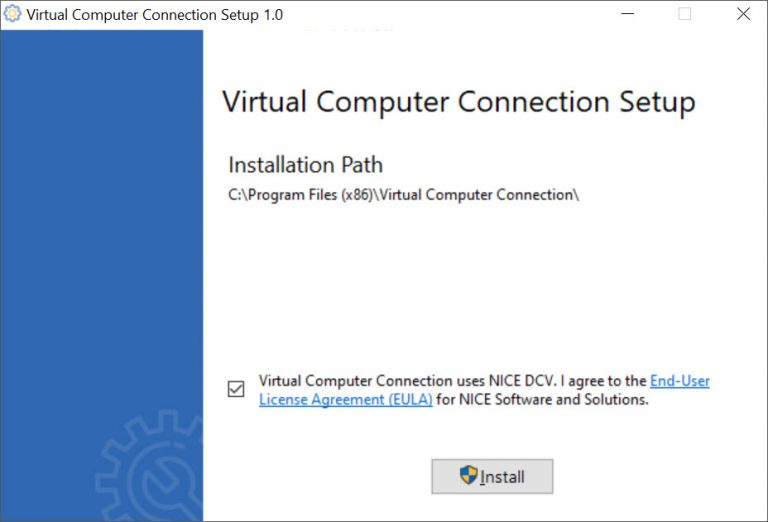
  2. Double-click the Setup.exe file to open the Virtual Computer Connection Setup window.
    By default, the installation path is set to C:\Program Files (x86)\Virtual Computer Connection. You will not be able to change this path.
  3. Accept the End-User License Agreement (EULA), and click Install.
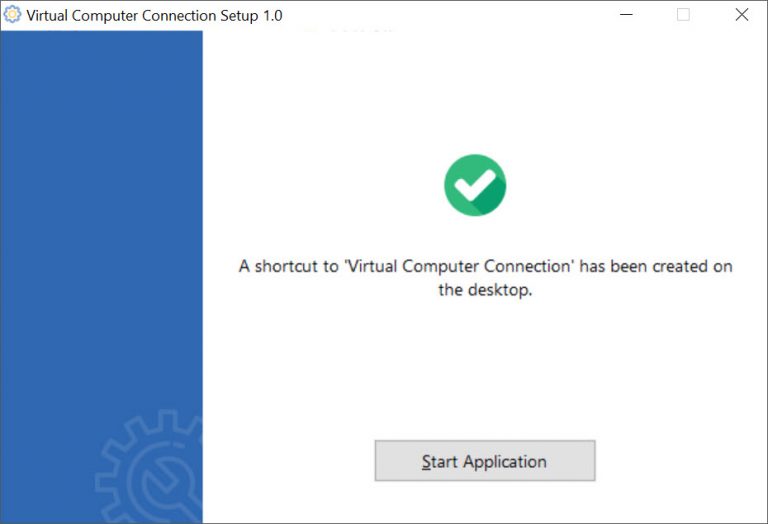
    Upon successful installation, a shortcut to Virtual Computer Connection is created on your computer desktop.
  4. Click Start Application on the setup window to open the Virtual Computer Connection client.
    You can also double-click the shortcut on your desktop to open the client.

In the event that you are unable to install the Virtual Computer Connection client, you can manually install supported Microsoft components for Windows 7. Following the successful installation of all the supported Microsoft components, you can now install the Virtual Computer Connection client.

If you need to uninstall or repair Virtual Computer Connection

  1. Browse to the folder where you downloaded the Setup.exe file – the installer.
  2. Double-click the file to open the Virtual Computer Connection Setup window.
  3. Click Repair or Uninstall, as needed.

Log in to the VCC

The Virtual Computer Connection (VCC) is the gateway to open your virtual computer that keeps your data and applications. Therefore, you will need to log in to access the virtual connection window. On successful login, connect your virtual computer and access the TallyPrime application.

To start using TallyPrime, you will need to activate your license on TallyPrime on the virtual computer, without the need to use TallyPrime separately on your local computer. At any given point, you can use your license either on your local computer or on the virtual environment.

  1. Ensure the following:
    • You have installed the Virtual Computer Connection on your local computer.
    • You have valid credentials to log in to the application.
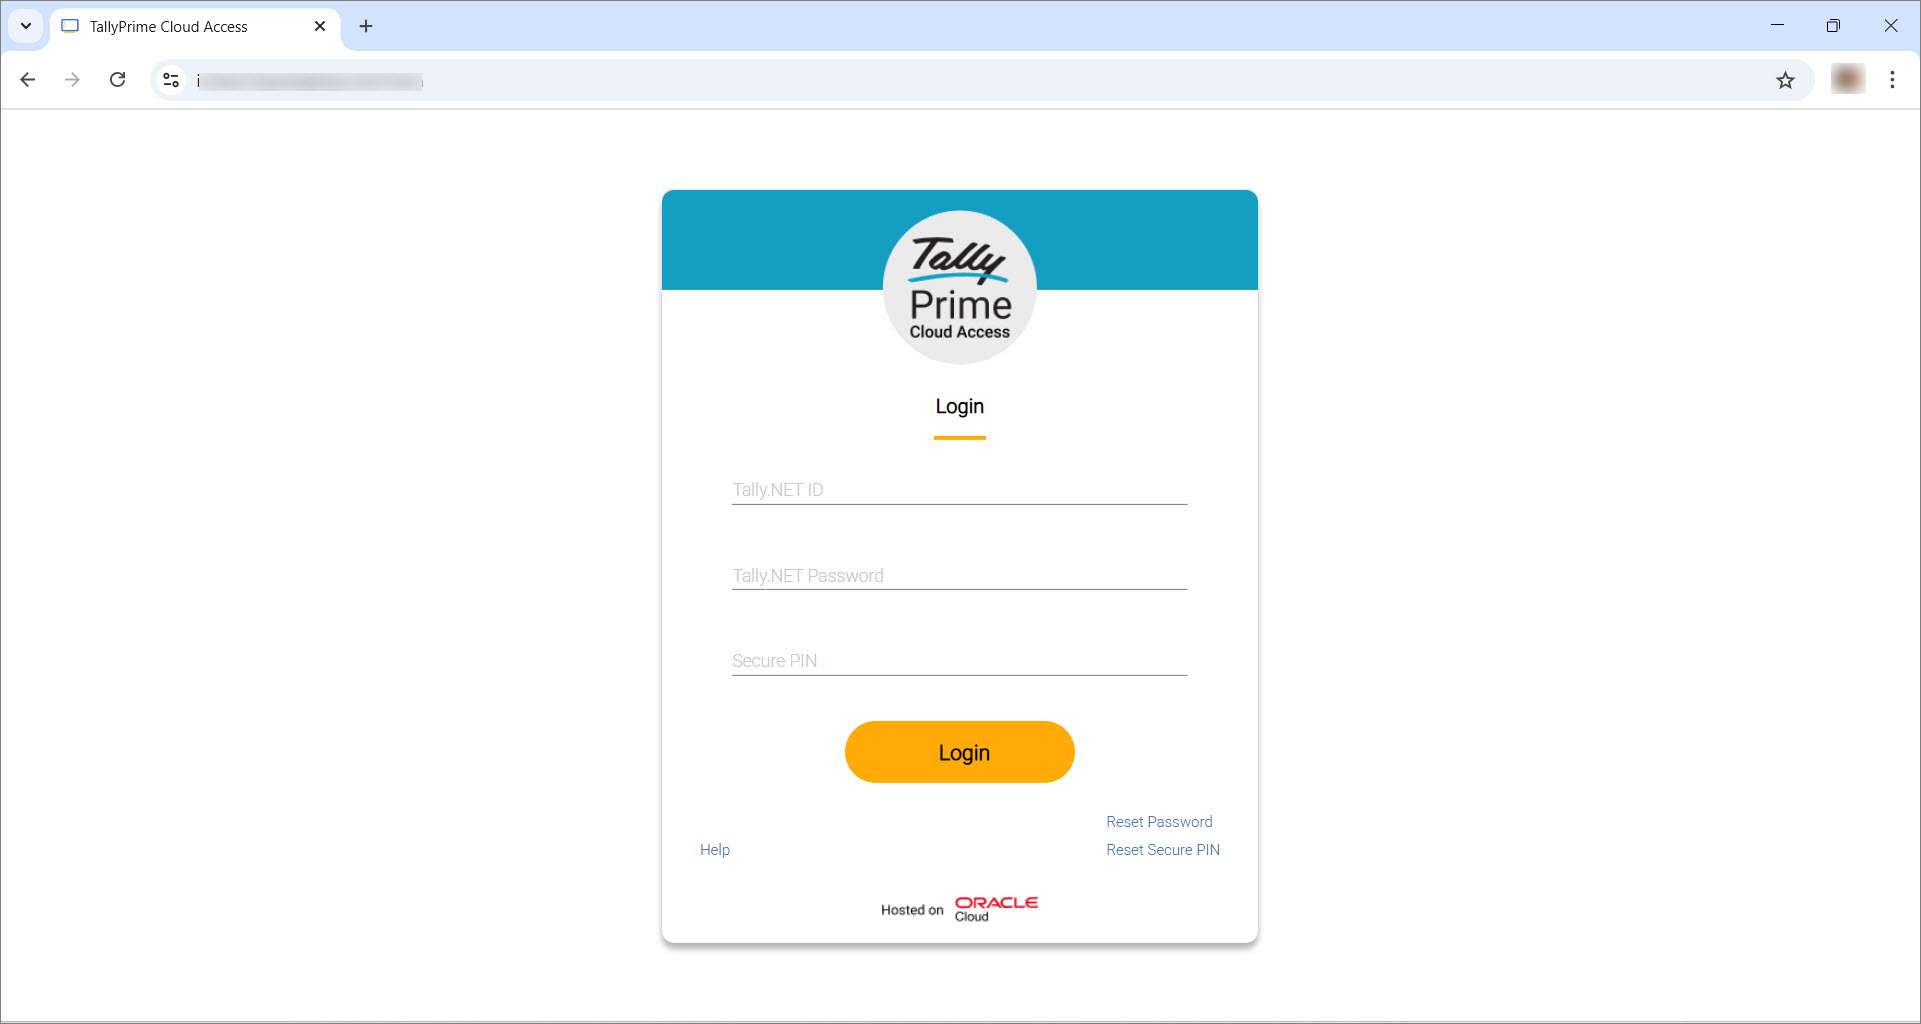
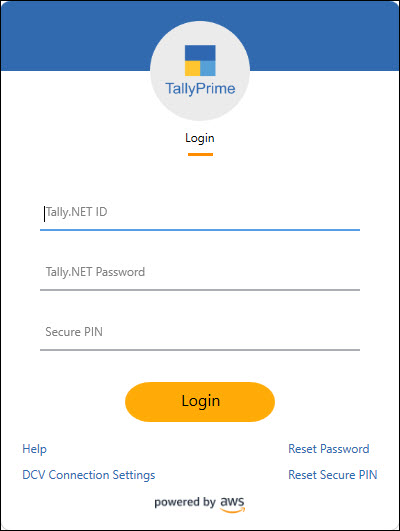
  2. Double-click the application icon on your local computer to open login screen of Virtual Computer Connection.
  3. On the Login screen, enter your credentials – Tally.NET IDTally.NET Password, and Secure PIN.
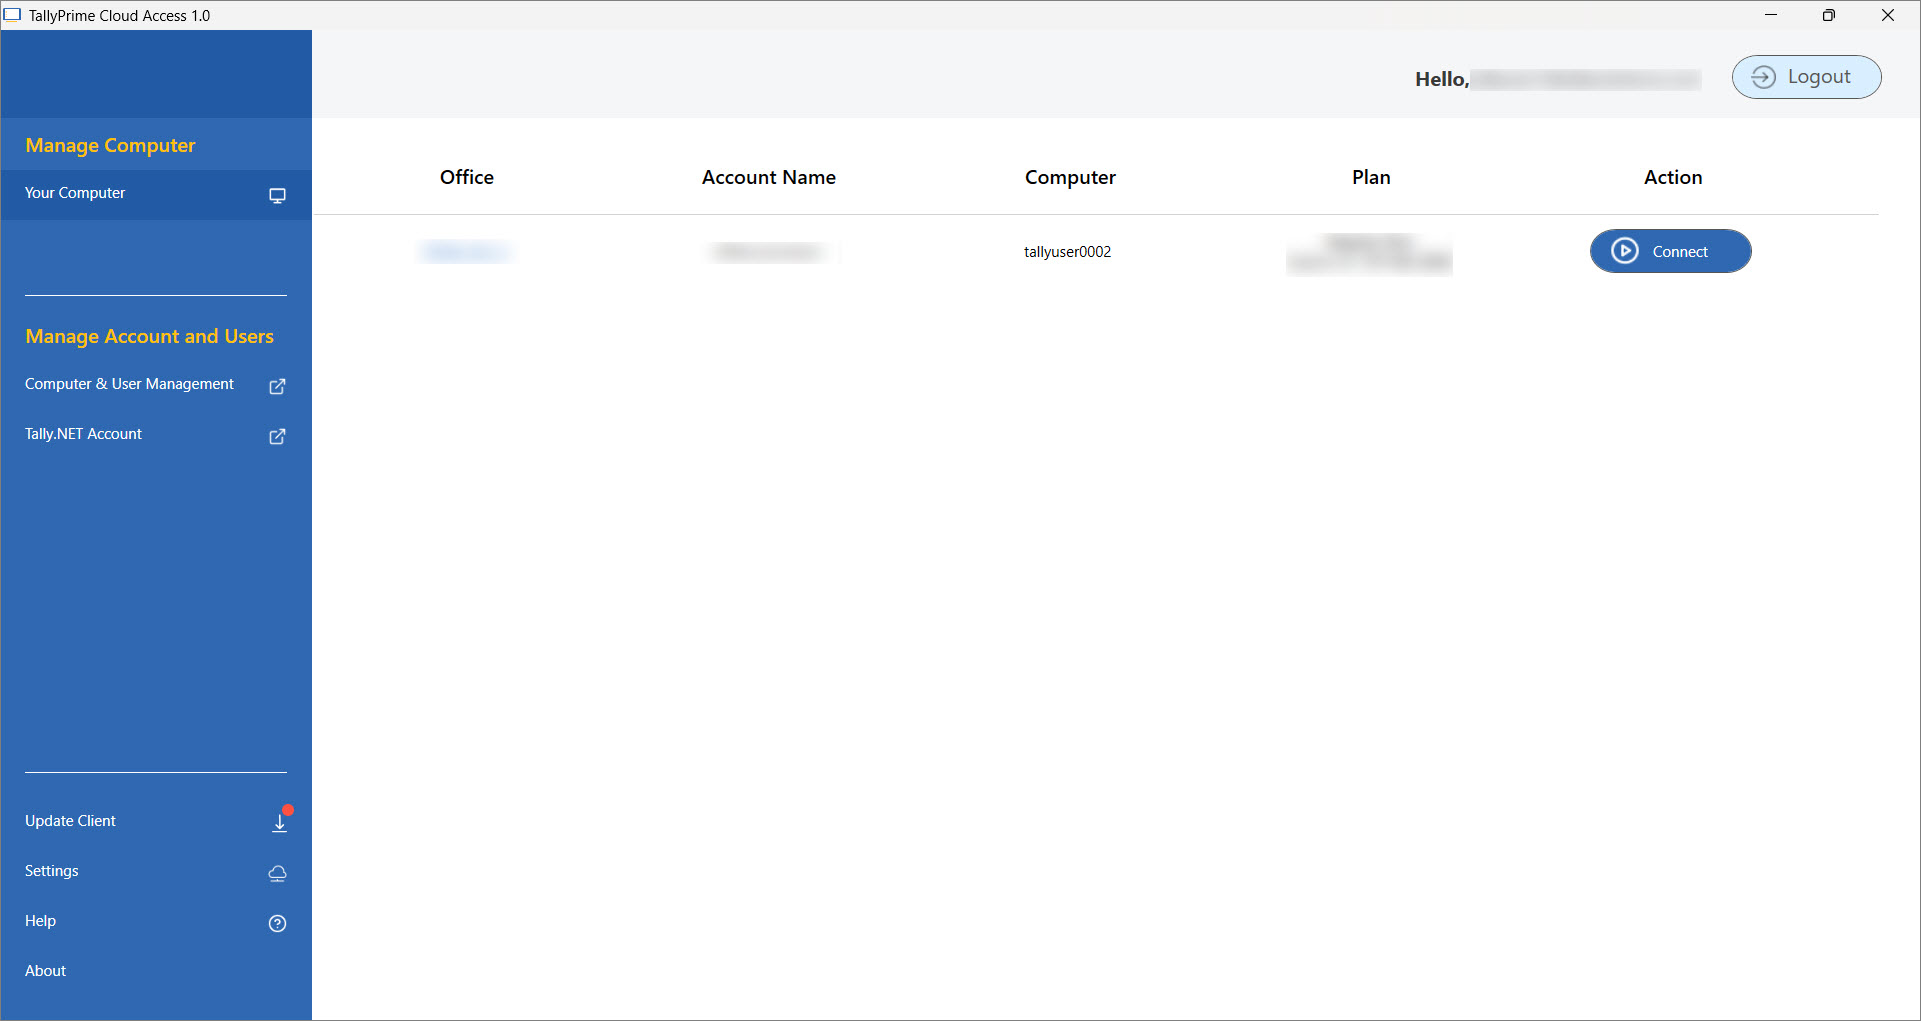
    The following screen appears:
    ssp
    If you have forgotten your Password or Secure PIN, you can reset the same from the Login screen.
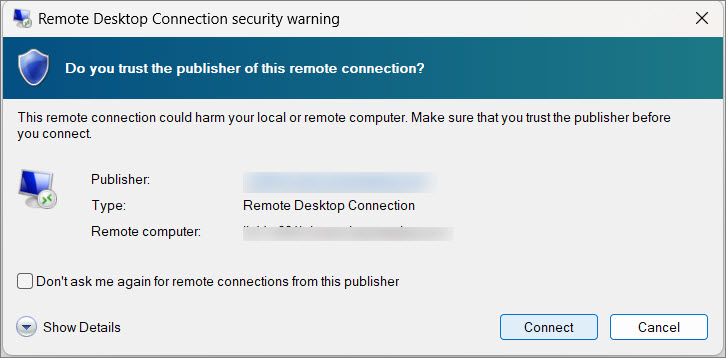
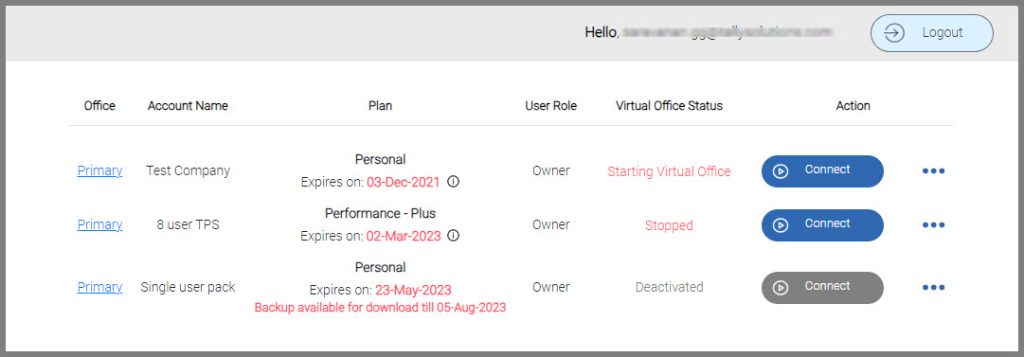
  4. From the Virtual Computer Connection window, click Connect to open your virtual computer.
    • If account is configured to a single computer: On successfully logging into the application, you directly get access to the computer assigned to your user role.
    • If account is configured to multiple computers: In the Virtual Computer Connection window, click Connect against the computer name to connect to the respective virtual computer.

For more details on using the virtual computer, refer to the topic – Manage Your Virtual Computer for TallyPrime on AWS

Log out from the VCC

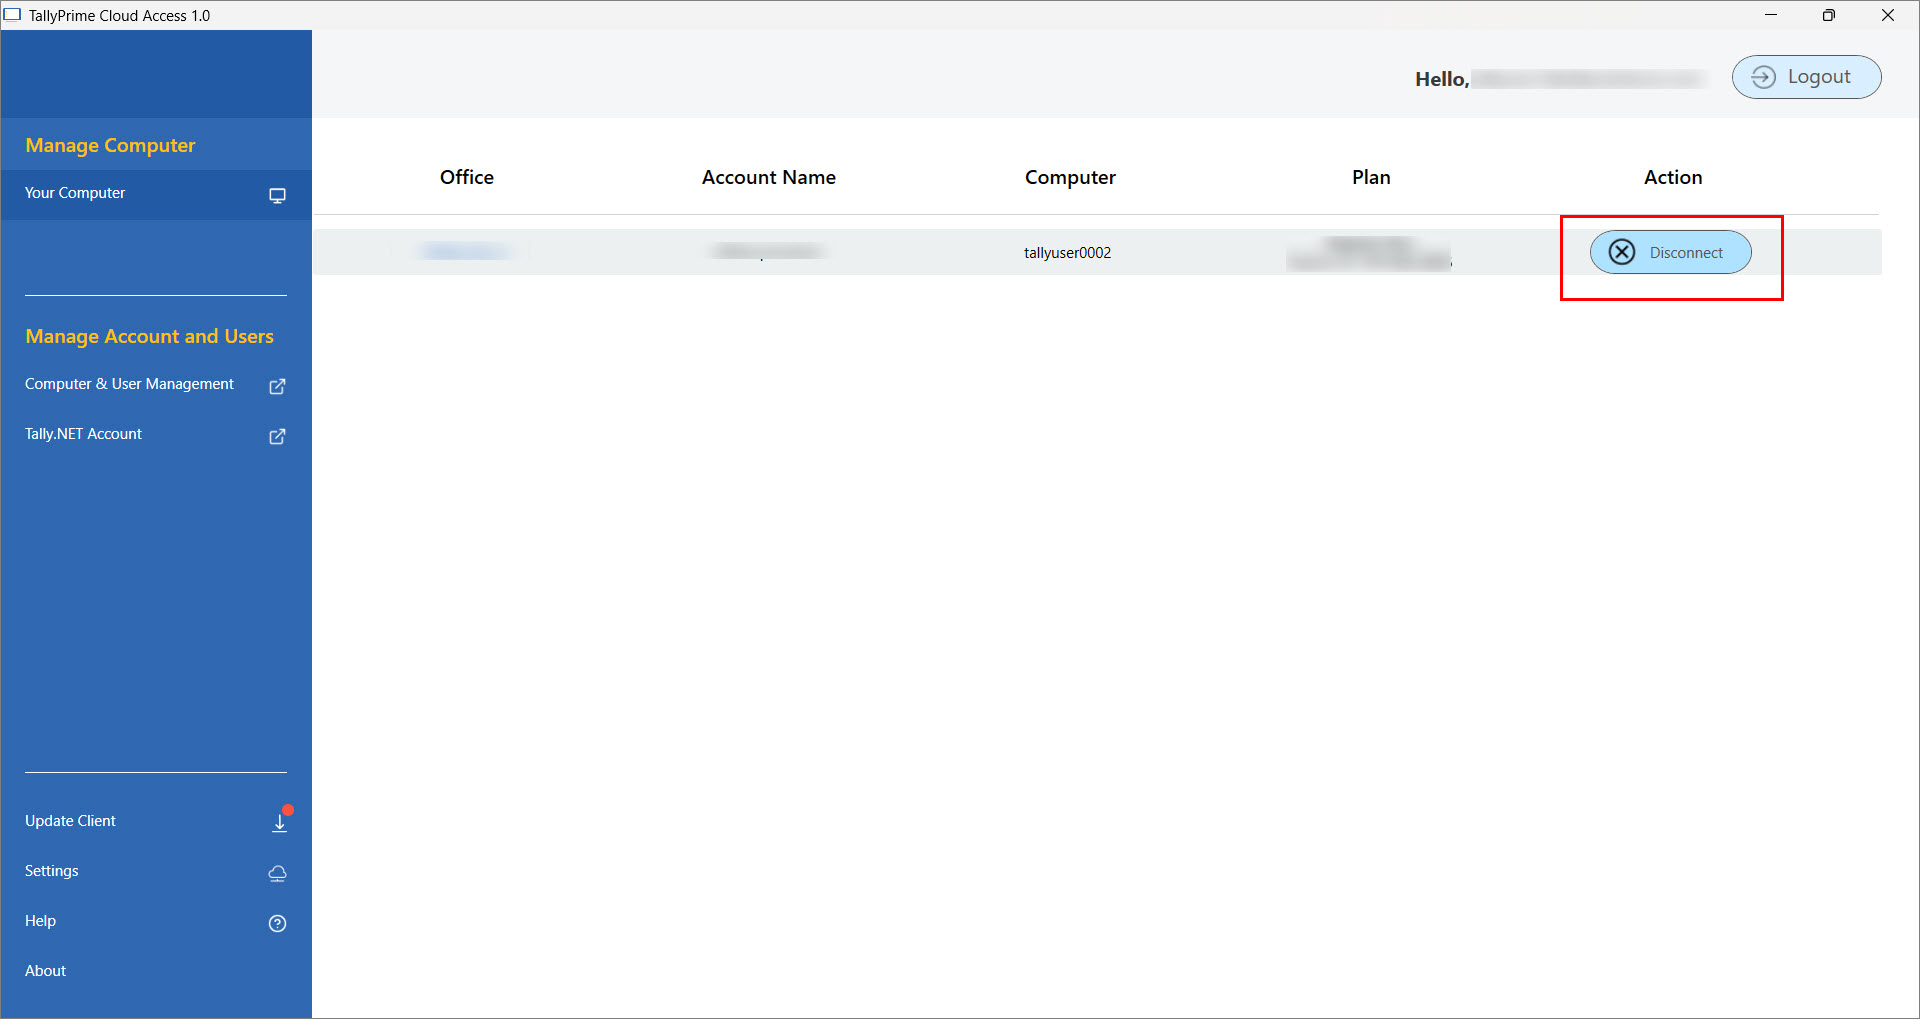
When you do not want to use the Virtual Computer Connection window, you can simply log out of the application:

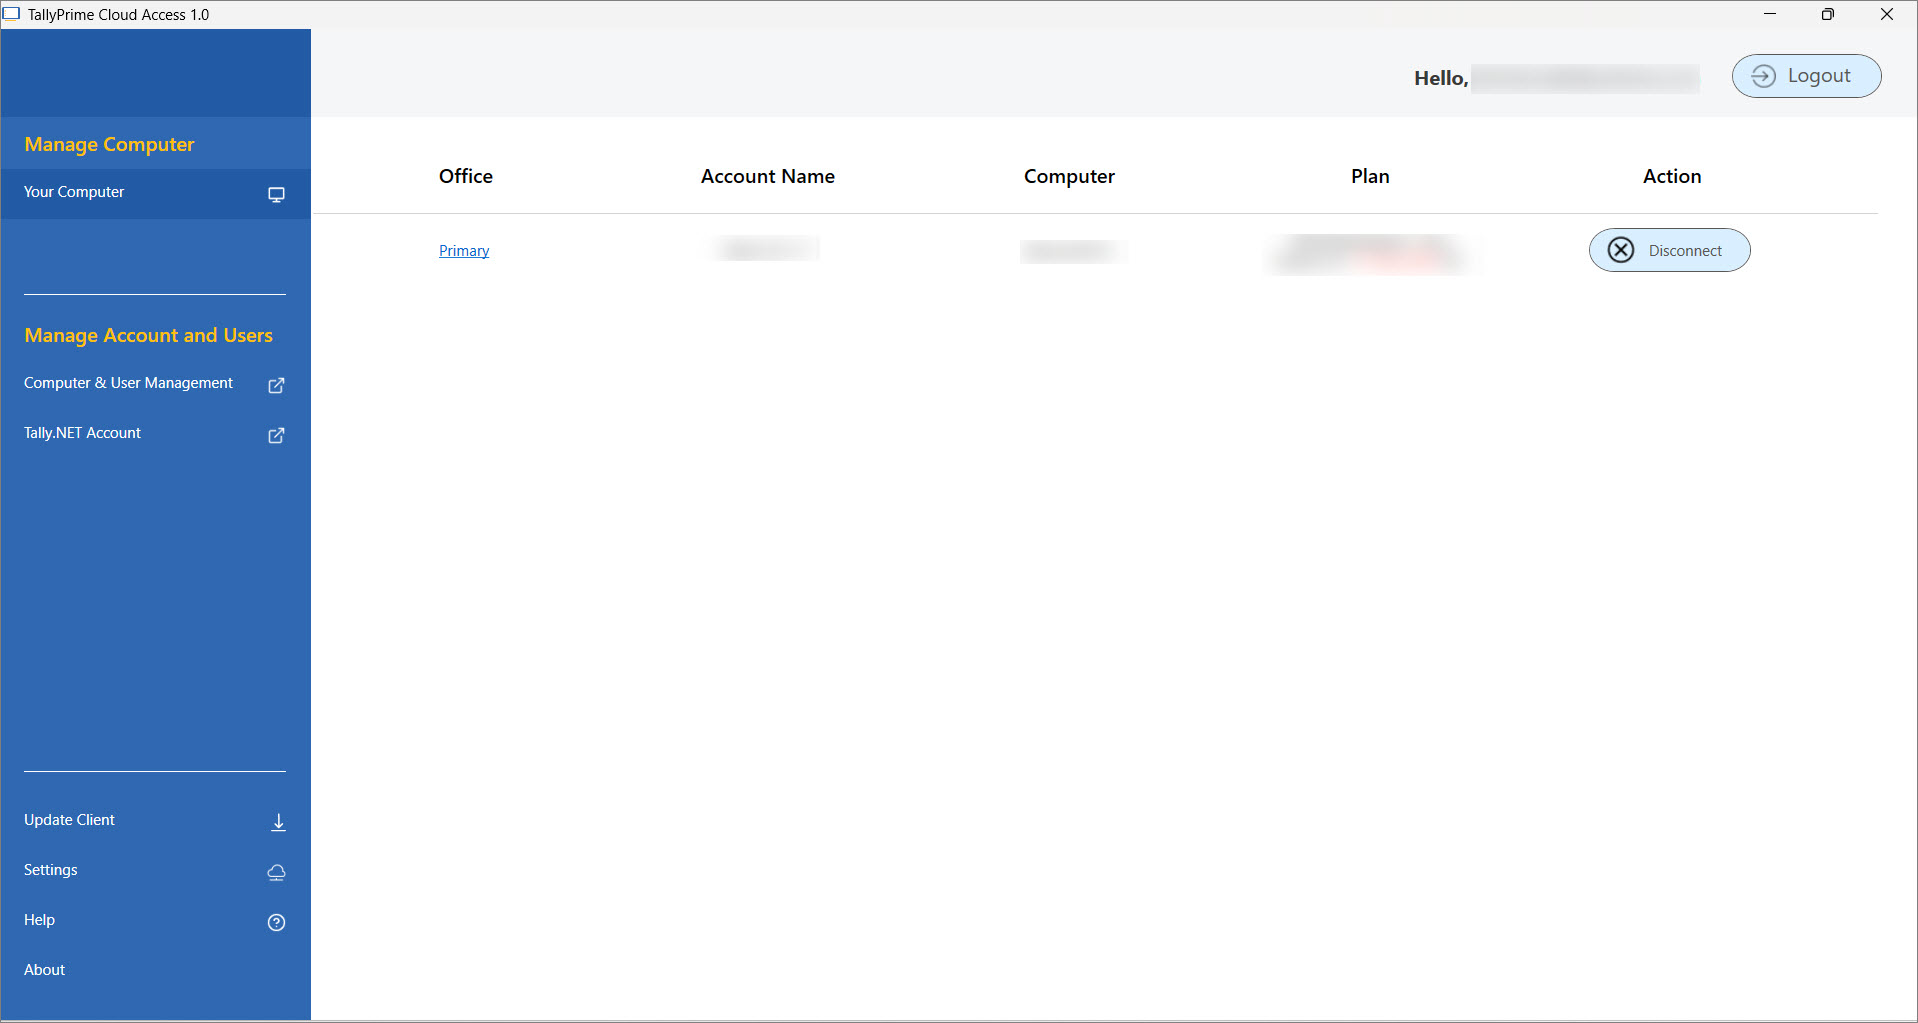
  • Click Logout, available on the top-right corner of the window.

Connect to Virtual Computer

You can connect to your Virtual Computer through the Computer and User Management portal and access your data in TallyPrime without having to install a client on your local system.

  1. Open the login screen of the portal.
  2. Enter your Tally.NET IDPassword, and Secure PIN to login.
    If you are logging in for the first time to the portal, you will be prompted to set up a new Secure PIN.
  3. On the Computer and User Management portal, under Action click on the Connect button and start your Virtual Computer.
    Connect Button
    This will open your Virtual Computer in a new tab.

If the Virtual Computer is in shutdown state, it will take around 5 minutes for the first user to connect to it since the system will start and connect. Following this, subsequent users will have direct access to the Virtual Computer and can connect to it immediately since the machine is already running.
However, you can start your Virtual Machine by clicking Start under the Action column. This will start your Virtual Machine in around 5 mins and selecting Open Virtual Computer afterwards will connect you to the Virtual Computer immediately.

The Start option will be displayed on the portal only when the Virtual Computer is in shutdown state. Whenever you receive a connection error while connecting to the Virtual Computer, clicking on the Close Tab button closes the tab and allows you to connect from the Self Service portal. The existing DCV features will remain unchanged in the browser as well.

Disconnect the Virtual Computer

Once you have completed your work, you can save your data, disconnect, and shut down the Virtual Computer from the Self Service portal to ensure that your data remains secure. There are two ways to disconnect your Virtual Computer from the Self Service portal.

  1. Close the tab manually to disconnect your Virtual Computer.
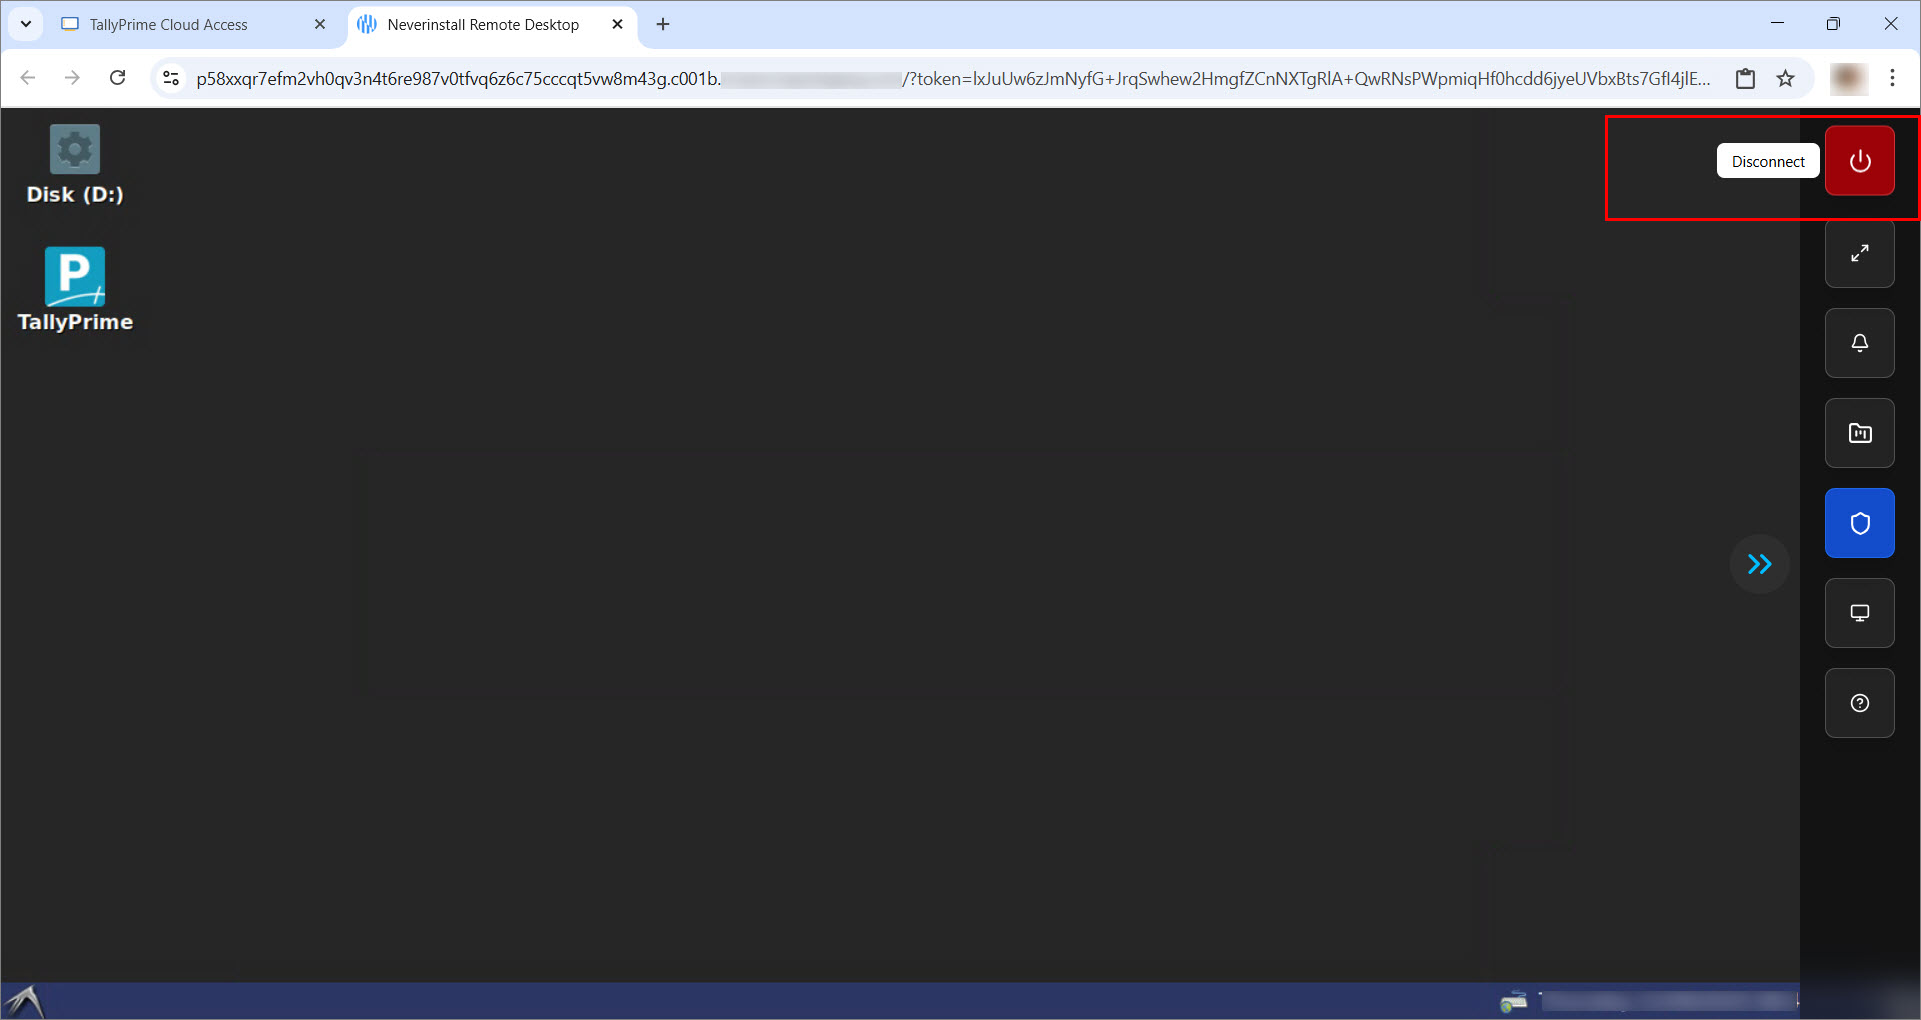
  2. Click the computer name that appears on the top-right corner and select Disconnect.
    You can close the tab manually after you have disconnected your Virtual Computer.

If your Virtual Computer is idle for 45 minutes due to inactivity, it will be disconnected automatically. You can close the tab manually and reconnect to continue your work when required.

Reset Your Tally.NET Password

If you have forgotten your Tally.NET password, resetting it is simple. 

  1. In the Login screen, click Reset Password.
    This opens the Control Centre.
  2. Reset your Tally.NET Password from Control Centre. 

You can use the new Tally.NET Password next time to login to the client or portal.

Reset Your Secure PIN

Similarly, if you have forgotten your Secure PIN, resetting it is easy. 

  1. In the Login screen, click Reset Secure PIN.
    The following screen appears:

  2. Provide your Tally.NET ID and Tally.NET Password and click Reset Secure PIN.
    A one-time PIN will be sent to your registered e-mail ID.
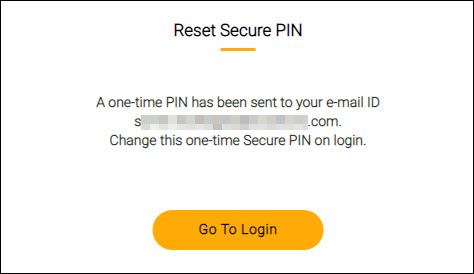
  3. Click Go to Login > enter the Tally.NET IDPassword and the one-time Secure PIN.
    The Change Secure PIN window appears.
  4. Provide New Secure PIN and Confirm Secure PIN > click Change PIN.
    The Change Secure PIN message box appears. You can use the new Secure PIN next time you login to the client.

You can click Go to List of Computers to open the homepage of the Computer & User Management portal.

Manage Users

If you have multiple users working on the same company data, you can add or remove users as needed. You can keep a user active or inactive depending on your work requirements. Let’s say, your plan allows you to have a maximum of four users working on four different computers at the same time. You can add six users to your virtual machine account and keep any four of them active at a given point to access the virtual computers.

In this section

Add & Edit Users

  1. On the Computer & User Management portal, under Action against the account name, click the ellipse sign (…), and select Settings > Manage Users.
    The Manage Users screen appears.
  2. Click Add User.
    The Edit User window appears.
    edit-user

  3. Enter the following details:
    • Tally.NET ID/E-mail ID – By default, it lists all the Tally.NET ID linked to your account ID. Select an existing Tally.NET ID or enter a valid e-mail ID of a user. If the e-mail ID is not already registered as Tally.NET ID, on adding the user, the e-mail ID is automatically registered as a Tally.NET ID.
    • User Role – You can add a user as a Standard User or Administrator.
    • User Status – Set the user as Active or Inactive, depending on the need. You can edit the status anytime you want to.

      The permissions to Upload/Download Access and Allow to sync local applications can only be given by an owner.

  4. Provide access to upload or download files and folders, if needed.
    • Set Upload/Download Access to Full Access
  5. If you have enabled the option to sync with local application on the portal, you can allow this user to use the sync option.
    • Set Allow to sync local applications to Yes

A message will be displayed allowing the person to sync with local applications. Changes will be effective once you re-login the Virtual Machine. 

Suppose you want to add a user and there is an existing user who has already been given access to sync with local applications,
A message is displayed stating that only one user is allowed to sync Virtual Office with local applications.

advanced-settings

  • Select Yes to allow the user to sync with local applications. 
  • Select No and assign another user to do the sync from,  

If one or more users already have access to sync with local applications, a message is displayed on the Add User screen. To enable the sync for a new user, the sync access for existing users must be disabled. 

add-user

An owner’s account cannot be edited or deleted. The accounts of an admin or a standard user can however be edited and deleted by the owner.

The settings can be edited by the owner if they want to add a standard user or an admin and give the sync permission. 

On adding a user, a computer is automatically assigned based on the user details you have provided and an e-mail with the login credentials, including the Secure PIN, are sent to the user.

You can edit the details of an existing user anytime you need.

  1. On the Manage Users screen, click the ellipse sign (…) under Action, and select Edit.
  2. Change the details as needed, and then click Save.

    You can choose to assign the same computer to a different user by providing the Tally.NET ID or e-mail ID of a different user.

Delete Users

  1. On the Computer & User Management portal, under Action against the account name, click the ellipse sign (…), and select Settings > Manage Users.
    The Manage Users screen appears with the list of existing users.
  2. Click the ellipse sign (…) under Action adjacent to an existing user and select Delete.
    The Delete User screen appears.
  3. Confirm the details displayed on the screen, and then click Delete.

The details of the user along with the user data gets permanently deleted from the Virtual Computer Connection.

Manage Data Backup

Every day, when you start your virtual computer for the first time, an automated backup of the entire system is created. This ensures that your data remains up-to-date, secure, and reliable. Additionally, you have the flexibility to download this backed-up data to your local computer at any time for easy access.

As an administrator or owner, you also have the option to manually back up your virtual machine data whenever needed. All backups—automatic and manual—are securely stored at an AWS backup location provided as part of your plan. With administrator or owner privileges, you can download the complete virtual machine backup to your local computer, ensuring you always have access to your important files and applications.

In this section

View details of data backup

  1. On the Computer & User Management portal, under Action against the account name, click the ellipse sign (…), and select Settings > Manage Backup.

    The Manage Backup screen displays the following details:

    • Plan-related details, such as total space allocated for storage and the available backup space
    • List of all the backup – both automated and manual
    • Timestamp – data and time when the backup was taken
    • Size of the backup file
  2. Click the cross mark (X) on the top-right corner to close the Manage Backup window.

Back up computer data

The backup of your virtual computer includes data of the entire computer that includes all files and applications available under the folders My_Applications, My_Files, and Shared_Folder. Backup can be automatic or manual.

Automatic Backup

An automated backup of the data of the virtual machine takes place on starting the virtual computer. This is applicable for all user roles – Owner, Standard User, and Administrator.

Manual Backup

If you are an administrator or owner of the virtual machine, you can take backup of the data, as an when you need.

  1. On the Computer & User Management portal, under Action against the account name, click the ellipse sign (…), select Settings > Manage Backup.
    The Manage Backup screen opens.
  2. Click Backup Now.
  3. On the Take Backup screen, click Backup.

    A backup of the entire data of your virtual computer is saved at a storage location associated with AWS.

You can see a list of both automatic and manual backup in the Manage Backup screen. All the backed-up data is stored on a dedicated AWS storage location. Based on your plan, when the allocated storage space if full, the oldest backed up data is removed automatically to ensure availability of space for the next backup.

Download backed up data to local computer

You may need to refer to the backed-up data on your local computer, without having to login to the virtual computer every time. In such cases, you can download the backed-up data to the local computer.

  1. On the Computer & User Management portal, under Action against the account name, click the ellipse sign (…), select Settings > Manage Backup.
    The Manage Backup screen appears.
  2. For a Backup Type, under Action, click the ellipse sign (…) and select Download Backup.

    The backup files for each set of data are available in zip format and are password protected. You can click the asterisks (*****) under the Password column to view the password.
  3. Under Action, click the icon next to the zip file that you want to download.
    The zip file gets downloaded to your local computer. The downloaded files remain password-protected to ensure additional security of the data on the local computer.

Delete backed-up data

  1. On the Computer & User Management portal, under Action against the account name, click the ellipse sign (…), select Settings > Manage Backup.
    The Manage Backup screen appears.
  2. For a Backup Type, under Action, click the ellipse sign (…) and select Delete Backup.
  3. On the Deleted Backup screen, click Delete to confirm.

    The backup file will be permanently deleted.

Data Backup Availability after Expiry of Product Plan Subscription

Once you discontinue or cancel your subscription, you will certainly be looking for all the data you had maintained on the Virtual Computer. Your data back up remains safe with us for 7 days, so that you can download the same, anytime within that duration, to your local computer and use it as per your convenience.

Once you have downloaded the data, you can choose to remove the backed up data yourself from the Self Service portal.

On expiry of your subscription, the data backup will be available for download based on the date of deprovisioning of the Virtual Computer:

Deprovisioning of Virtual Computer on Subscription Expiry Date
Subscription expires on 08-Jul-2022
Deprovision on 08-Jul-2022
Backup available till 15-Jul-2022
(Subscription expiry date + 7 days)
Deprovisioning of Virtual Computer Before the Subscription Expiry Date
If expiry date is within 7 days from the date of deprovision
Deprovision on 20-Jun-2022
Subscription expires on 26-Jun-2022
Backup available till 03-Jul-2022
(Subscription expiry date + 7 days)
If expiry date is more than 7 days and within 30 days from the date of deprovision
Deprovision on 20-Jun-2022
Subscription expires on 30-Jun-2022
Backup available till 30-Jun-2022
(Subscription expiry date)
If expiry date is more than 30 days from the date of deprovision
Deprovision on 20-Jun-2022
Subscription expires on 25-Jul-2022
Backup available till 21-Jul-2022
(Date of deprovision + 30 days)
Deprovisioning of Virtual Computer After the Subscription Expiry Date
Subscription expires on 08-Jul-2022
Deprovision on 15-Jul-2022
Backup available till 22-Jul-2022
(Subscription deprovision date + 7 days)

You can access data backup files in the Self Service Portal, after deprovision of the Virtual Computer till the date the data backup is available. After downloading the required data, you can delete the backup files from the Virtual Computer.

Manage Shutdown Schedule

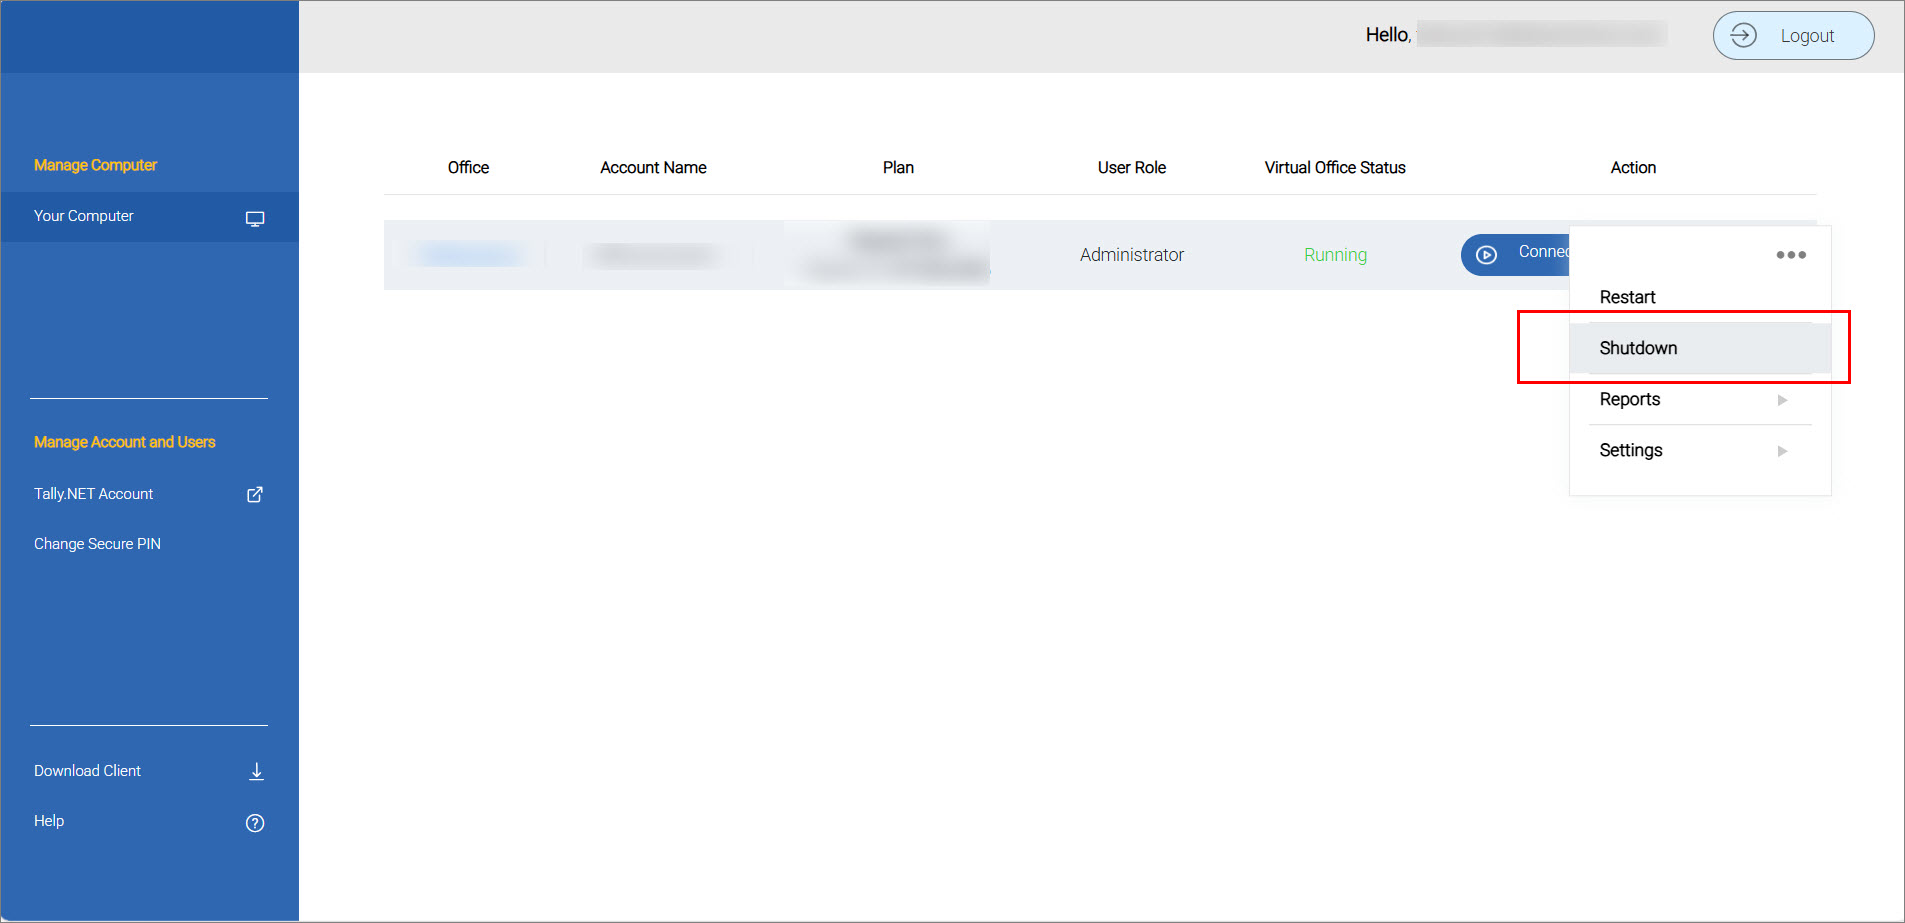
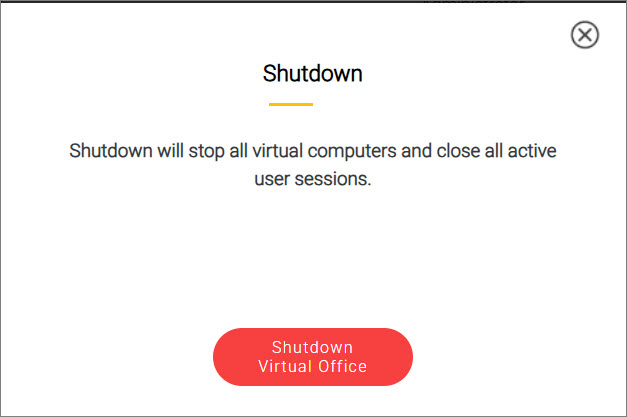
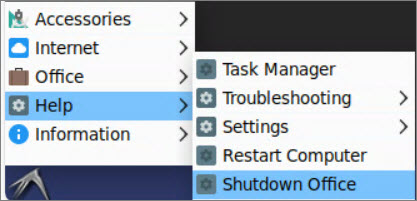
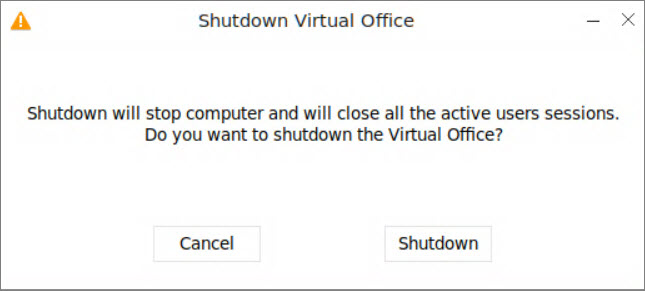
With a TallyPrime on AWS subscription, you have the flexibility to use the Virtual Office as much as needed for your business, depending on your plan. It’s important to track your total usage to ensure it stays within the limits of your subscription. Occasionally, users may log out from the Virtual Computer without shutting down the Virtual Office, potentially causing the usage to exceed the limit unnoticed. Exceeding the usage limit could result in additional charges.

Add Shutdown Time: To help you manage your Virtual Office usage, TallyPrime on Virtual Computer now allows you to schedule a shutdown time. You can set the shutdown to occur at the end of office hours or when you’re sure all users have logged out, such as after showroom closing time. This feature ensures you can control the system’s usage and avoid unnecessary costs.

Edit/Delete Shutdown Time: By default, the scheduled shutdown time is set to 9:00 PM. However, you have the flexibility to modify or delete the shutdown time as needed. For example, if your business closes at 7:00 PM, you can adjust the shutdown time accordingly. The system also ensures mandatory shutdowns at 12:30 AM and 3:00 AM daily. If users forget to shut down the Virtual Office, the system will continue counting usage until the next scheduled shutdown, resulting in additional usage time. For instance, if the system shuts down at 12:30 AM, the total usage could span 5.5 hours.

Skip Shutdown: At times, your business may require extended hours, or certain tasks may take longer than usual. In such cases, you can skip the scheduled shutdown to avoid interruptions, allowing you to access the Virtual Computer without any disruptions.

Auto-Shutdown on Timeout: To help conserve resources, the Virtual Office automatically shuts down if left unattended or idle for a specified period. After the system runs for 30 minutes, it checks for inactivity every 15 minutes. If no activity is detected, the system initiates a seamless auto-shutdown to prevent unnecessary usage. This ensures that your Virtual Office is not running unnecessarily, further helping you manage costs efficiently.

In this section

Add Shutdown Time

Let’s assume that your business hour closes at 09:00 PM. Therefore, you want to shut the Virtual Office down exactly at 9:00 PM each day. Instead of remembering to shut down the Virtual Office every day, you can schedule a time when the Office shut shutdown every day. 

The shutdown time once set will be applicable to you and all users under your Virtual Office account.

  1. On the Computer & User Management portal, under Action against the account name, click the ellipse sign (), and select Settings > Manage Shutdown Schedule.
    The Manage Shutdown Schedule screen appears.
  2. Click Add Schedule Time and select the required options.
    shutdown-time
    1. Shutdown time: Select a time; for example, 09:00 PM. 
    2. Recurrence: You can choose if the shutdown should occur daily or on a few selected days in a week.
      • Daily: When all days of a week are selected under Occurs on
      • Weekly: When a few days are selected under Occurs on
    3. Occurs on: Select the days for the shutdown to occur as per your business needs.
    4. Allow users to delay shutdown by 1 hour: As an administrator, you may want to allow the users, including yourself, to delay the particular shutdown time, depending on the volume of work or other work-related reasons. 
      • Yes – This will allow you, including the Owner and Administrator, to delay the shutdown time by an hour, when there is an alert for shutdown at the scheduled time.
      • No – You will receive a shutdown alert, without any option to delay the shutdown time. 
  3. Click Save to add the shutdown time.

You can schedule more than one shutdown time, depending on the business needs and different working conditions.

Shutdown Alert

Once you have added a shutdown time you and all other users under the same account will get a Scheduled Shutdown Alert 15 minutes prior to the shutdown time.

  • If you had set Allow users to delay shutdown by 1 hour to Yes, the following alert appears:

    Say 15 users, including you, are using the respective virtual computers under the Virtual Office. All 15 users will get the shutdown alert. However, if you click Delay Shutdown (by 1 hour), then the shutdown will be delayed only for your virtual computer by 1 hour, and the Scheduled Shutdown Alert screen will automatically close after 15 minutes. If you do not want to delay the shutdown, click OK.
  • If you had set Allow users to delay shutdown by 1 hour to No, the following alert appears:

Edit Shutdown Time

Let’s assume that you had set a daily shutdown time for 09:00 PM. However, your business operations have recently changed the closure time. From Monday to Friday the working hour is up to 09:00 PM, and on Saturday it is up to 02:00 PM. Sunday has been declared a holiday moving forward. You can edit the schedule shutdown time as per your requirement.

  1. On Manage Shutdown Schedule screen, click the ellipse sign (), and select Edit.
  2. Set Recurrence as Weekly.
  3. Select the days (for example, Monday to Friday) for which you need the shutdown to occur and click Save.
    edit-shutdown
    Once you have saved the edits, the Manage Shutdown Schedule screen appears.
  4. Click Add Shutdown Time.
    1. Set Shutdown time as 02:00 PM.
    2. Ensure Recurrence is set to Weekly.
    3. Under Occurs on, select Saturday.
  5. Click Save to apply the changes.
    The new scheduled shutdown times are added on the Manage Shutdown Schedule screen as shown below:

    Now, the Virtual Computer will shut down at 9:00 PM from Monday to Friday, and at 02:00 PM on Saturdays.

Delete Shutdown Time

Depending on your business practices or increasing scope of work, the working hours might have changed, and your office no longer closes as per the earlier schedule. However, you might have scheduled a shutdown time at a specific hour, which may no longer be required. In such cases, you can delete a shutdown time from the shutdown schedules.

  1. On the Manage Shutdown Schedule screen, against a shutdown time, click the ellipse sign (), and select Delete.
  2. Confirm the details displayed on the screen, and then click Delete.
    delete-shutdown
    The shutdown time gets deleted successfully.

Skip Shutdown

As per your business requirements, you might have scheduled shutdowns at 09:00 PM and 10:00 PM, in addition to the mandatory shutdowns at 12:30 AM and 03:00 AM. For certain activities, you might want to continue using the Virtual Computer, by skipping the shutdowns. In that case you can use the Skip Shutdown feature to set the preferences. 

  1. On the Manage Shutdown Schedule screen, click Skip Shutdown.

    The Skip Shutdown screen appears, displaying all the shutdown times applicable for the next 48 hours from this time.
  2. On the Skip Shutdown screen, click Edit
  3. Select the Date and Time up to which you want to skip the shutdowns.

    The Date and Time in the edit Skip Shutdown screen lists only shutdowns scheduled in the next 48 hours. It is mandatory to enter the Date and Time to proceed with the Skip Shutdown.

  4. Click Save to update the changes. This will ensure that all the shutdowns scheduled until the selected time for that date gets skipped. The following message appears displaying the impact of Skip Shutdown:

  5. Click Ok.
    The Status of the Skip Shutdown changes from Shutdown Scheduled to Shutdown Skipped and appears in Green.  

    Next time you open the Manage Shutdown Schedule screen, a message appears conveying the time till when the shutdowns are skipped.

Update Skip Shutdown

Let’s say you are working extra hours and want to extend the Skip Shutdown till 3 AM instead of the previously scheduled shutdown. You can update the Skip Shutdown by:

  1. On the Manage Shutdown Schedule screen, click Skip Shutdown.
  2. Click Edit.
  3. Enter the Date and Time till when you want to extend the shutdown.
  4. Click Save.
    A message for shutdowns skipped till the selected Date and Time appears on the Skip Shutdown screen.
    At times, the intended activity might take less time than you estimated, and therefore would want to update the Skip Shutdown accordingly.  For example, you may want to update the Time for Skip Shutdown from 03:00 AM to 12:30 PM. You can do so from the Skip Shutdown screen.

    When you open the Skip Shutdown screen, it lists all the shutdowns applicable for the next 48 hours from that time. Therefore, you will see an updated list of shutdown times compared to what you had seen earlier when you select the Date and Time for skipping the shutdowns previously. 

Restore original Shutdown Schedule

Suppose your planned activity is completed before the shutdowns scheduled and you have skipped shutdowns for next 48 hours. Now you may want to restore back all the user-configured and mandatory shutdowns, 

  1. On the Skip Shutdown screen, click Restore Shutdown Schedule.

    A message for restoring the original Shutdown Schedule appears. 
  2. Selecting Yes will restore all the previously scheduled shutdowns.

    The Restore Shutdown Schedule button appears in Grey and will be enabled only when shutdowns are skipped.

Auto-Shutdown on Timeout

Have you ever forgotten to shut down your Virtual Office when you were finished? With the new Auto-Shutdown on Timeout feature, you no longer need to worry about this. It automatically shuts down your system when not in use, helping you save resources, enhance security, and maintain smooth operations effortlessly. The system begins monitoring activity 30 minutes after the Virtual Office starts and checks for inactivity every 15 minutes. If no activity is detected, it initiates an automatic shutdown. 

  1. Inactive User Sessions
    If you manually disconnect the Virtual Machine (VM), the system will shut it down within 15-30 minutes.
    • 10:05 AM: You log into your Virtual Office and begin working.
    • 11:26 AM: You finish your work and close the browser or VCC Client.
      After 15 minutes, the system will detect inactivity. 
    • 11:41 AM: The system detects inactivity.
      After 15 minutes, the system will initiate the shutdown process.
    • 11:56 AM: The system shuts down.
      This ensures the system doesn’t stay powered on unnecessarily, saving resources and securing your environment. 

  2. Unattended Sessions
    If your session remains unattended for 45 minutes, it will automatically disconnect, and the VM will shut down within another 15 minutes—resulting in a total of about 60 minutes of inactivity before shutdown.
    • 10:05 AM: You log in to your Virtual Office and start your day.
    • 11:26 AM: You finish your work and leave the system idle. 
      After 45 minutes, the session will expire.
    • 12:11 PM: The system detects inactivity, and the session expires.
      In 15 minutes, the system will initiate the shutdown process.
    • 12:26 PM: The system shuts down.
      This prevents the Virtual Office from staying on indefinitely, even when left unattended. 

Note: The system actively tracks resource usage, such as CPU and memory. If TallyPrime is not using these resources, the shutdown process will begin automatically.

Exceptions for Auto-Shutdown

Auto-Shutdown will not occur when: 

  • Third-party integrations are syncing with local applications. 
  • The option Allow Tally support personnel to access your Virtual Office for system debugging is enabled.

Event Log

When the system shuts down due to idleness, you’ll see it marked as Auto-Shutdown in the Event Log.

event-log

The Virtual Office displays the following message: 

auto-shutdown-on-timeout

With Auto-Shutdown on Timeout, you can expect a more efficient, secure, and hassle-free Virtual Office experience. The system automatically manages shutdowns when idle or unattended, saving resources and protecting your environment without any manual effort.

Sync with Local Applications

At times, you may need other applications available locally to integrate with TallyPrime, to perform specific business operations. TallyPrime powered by AWS now supports integration of third-party applications to exchange data, when needed. You can enable the Synchronisation feature in the Self Service Portal (SSP) to establish a sync between your local applications and the Virtual Office. You can sync with local applications by installing the Virtual Computer Connection Client 1.2 or above in your computer. 

In this section

Enable Sync with Local Applications in the Self Service Portal

Once you login to the Self Service Portal (SSP), 

  1. Click the ellipses under Actions > Settings > Advanced Settings.
    The Advance Setting screen appears as shown below:
    advanced-setting
    As an Owner, you can give the permission to sync with local applications.
  2. Set Allow synchronising Virtual Office with local applications to Yes.
    advanced-settting
    This will allow the current user, to sync with local applications, when needed. On saving this setting, the following message appears:
    advanced-setting-message
  3. In the Advanced Settings screen
    1. Select Yes, to allow the current user account to sync with local applications.
      You need to re-login to the latest Virtual Computer Connection Client for the changes to take effect. You will also need to have Administrator privileges on the local Windows Computer to start the sync process.
    2. Select No, if you do not want to allow the current user to proceed with the sync process.
      However, at any given time you can give permission to other users to sync with local applications through Manage Users.
      1. Go to Settings Manage Users.
        manage-users
      2. On the Manage Users screen, select Add User.
        To know more about adding users, click the Add/Edit Users section. 
      3. In the Add User screen,
        • Provide the necessary user details.
        • Set Allow to sync local applications to Yes and click Add User.
          add-users

Install the Latest Virtual Computer Connection (VCC) Client 1.2

You will be able to use the Sync with Local Applications feature only if Virtual Computer Connection Client 1.2 or above is installed in the Virtual Computer. If you are an existing user, click on Update Client. For new users, clicking on Download Client will initiate the installation process.

To know more, click here.

Sync with Local Application in the VCC Client

You can proceed with the Synchronisation process when:

  • You have enabled Allow synchronising Virtual Office with local applications.  
  • You have the permission to sync with local applications in the SSP.
  • You have installed the latest VCC client.
  • You have Administrator privileges on the local Windows Computer. 

Now, to sync with local application in the VCC client:

  1. Open the VCC using your Tally.NET credentials and PIN.
    stopped-button-state
    When the sync permission is enabled and you login to the VCC, two new columns appear in the SSP.
      • The Sync with Local apps column displays the sync status and is in the Stopped (Blue) state by default. This indicates that the sync is not established yet.
      • The Settings column displays the options to start the sync automatically and the Sync Connectivity Information.
    1. To start sync with local applications, run the TallyPrime application on the Virtual Computer.  
    2. Click the Stopped button to start the sync. The Sync with Local apps status changes to Started (Yellow). Once you open TallyPrime in the Virtual computer, the Sync with Local apps status changes to Started (Green) indicating that TallyPrime in the Virtual Computer is ready to integrate with third-party applications.
      started-button-state
    3. Check the ODBC connectivity and the port configuration.
      • Click Settings > Sync Connectivity Information.
        You can use these Computer and port details in your third-party application for integrations. The port number here should be the same as in the TallyPrime in your Virtual Computer.
        edit-port-number
      • If you want to update either of the Sync Connectivity Information, 
        1. Click the edit icon. 
        2. On the Edit Port Number screen, enter the Tally Port Number for sync.
          port-number
        3. Click Save to save the changes.
    4. If you now want to start sync automatically, click Settings again.
      sync-connectivity-information
      • Set Connecting to Virtual Office as Yes if you want to enable sync when you connect to the Virtual Computer. 
      • Set Logging in to Client as Yes if you want to start the sync every time you login to the VCC client.

Extracting Data from Local Application to TallyPrime on Virtual Computer

  1. Open Microsoft Excel on your computer.
  2. Click Data > Get External Data > From Other Sources > From Microsoft Query, as shown below:
    microsoft-query
    The Choose Data Source screen appears as shown below:
    data-source
  3. Select TallyOnAWSODBC64_9000*, as ODBC is enabled on the server 9000.
  4. Click OK. The Query Wizard – Choose Columns screen appears.
  5. Click Stock Item and expand the list to select the required fields.
    choose-column
  6. Click Next. The Query Wizard – Filter Data screen with the column names appears as shown below:
    filter-data
  7. Click Next. The Query Wizard – Sort Order screen appears as shown below:
    sort-order
  8. Select Ascending or Descending for each drop-down list under Sort by, as required.
  9. Click Next. The Query Wizard – Finish screen appears as shown below:
    finish-screen
  10. Select Return Data to Microsoft Excel.
  11. Click Finish. The Import Data screen appears as shown below:
    import-data
  12. Click OK. The Microsoft Excel sheet with the imported Data appears as shown below:
    extract-data

Similarly, any data can be extracted from TallyPrime by using the Microsoft Excel Query Wizard.

Sync with Local Applications Status

  • Stopped (Blue): The default state where the sync is not established.
  • Started (Yellow): The sync is established but TallyPrime is not running in the Virtual Computer, or the ODBC Port is not configured in Tally.
  • Started (Green): The sync is established, and TallyPrime is running in the Virtual Computer and configured to the ODBC Port.
  • Transition (Grey): Transition of data between local applications and the Virtual Computer. At this stage, this button is not clickable.
  • Error (Red): Either the channel is in error state or if user tried to start the channel while the Virtual Computer is not running.

Manage Accounts and Users

The Computer & User Management portal provides quick access to the Control Centre for managing your Tally.NET account. In addition, you can change the Secure PIN for the Virtual Computer Connection client from the portal.

In this section

Open Control Centre | Tally.NET Account 

  • On the homepage, under Manage Account and Users, click Tally.NET Account.
    It opens Control Centre where you can manage your Tally.NET Account and other activities related to the account.

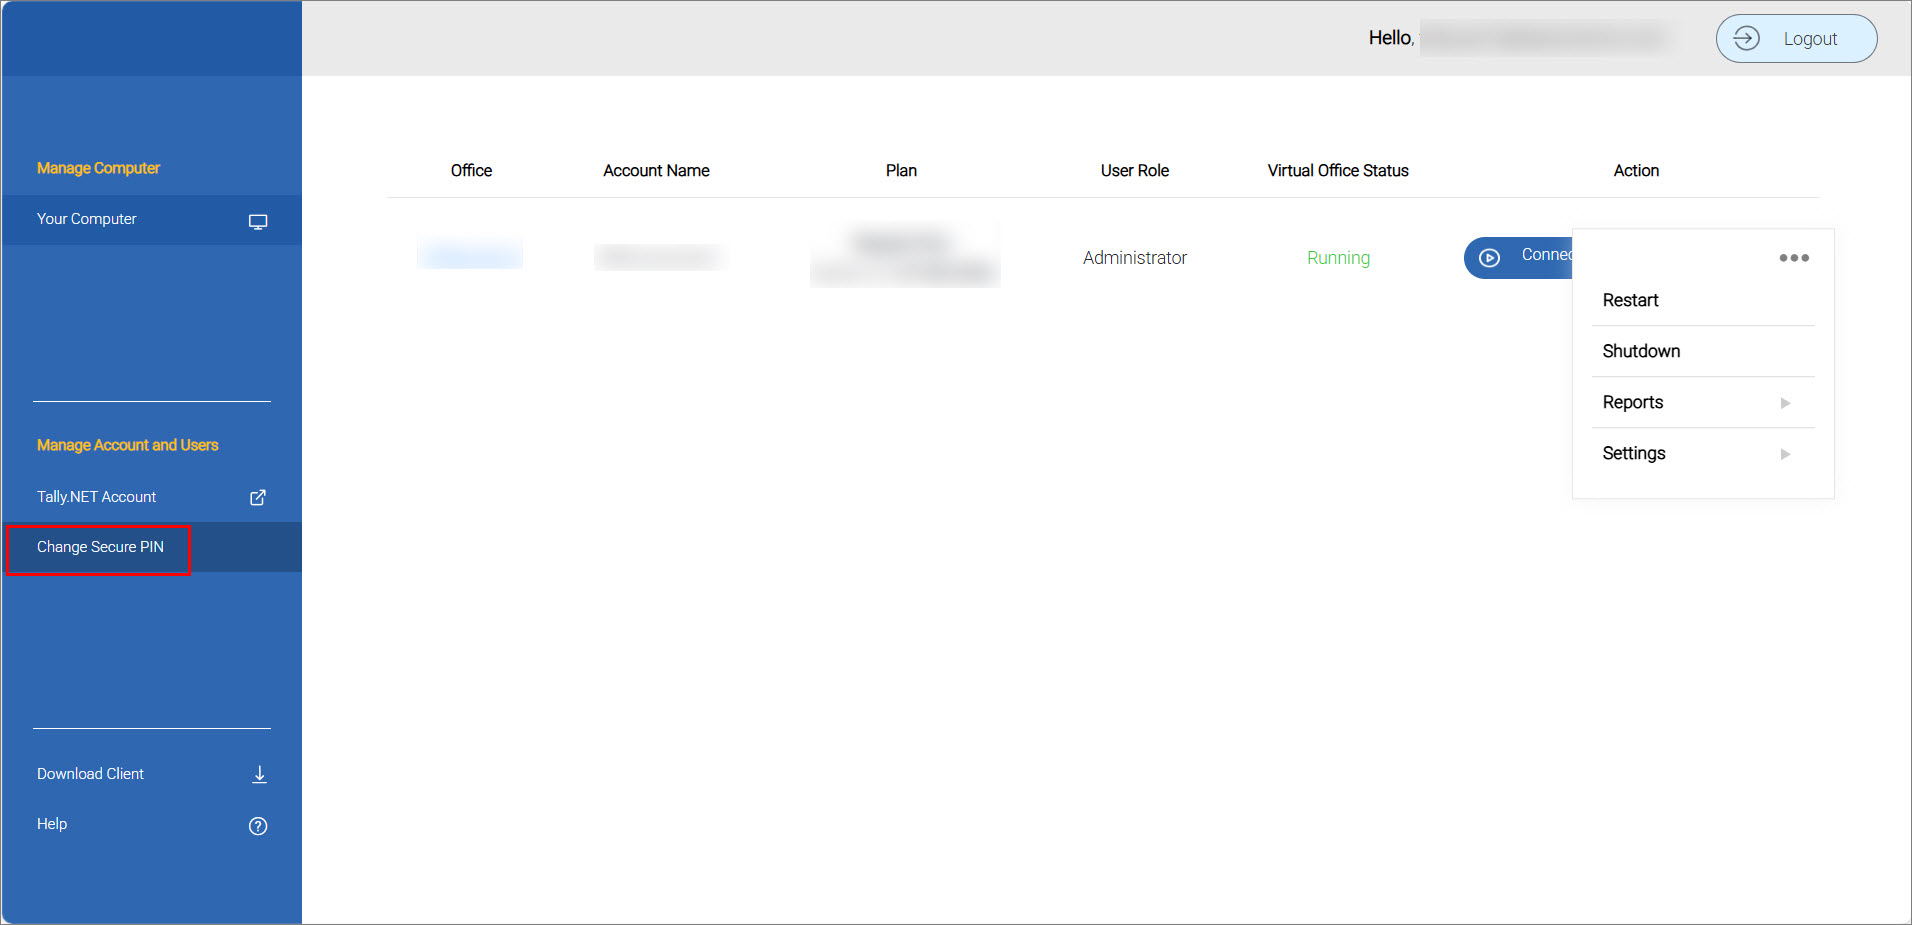
Change Secure PIN

  1. On the homepage, under Manage Account and Users, click Change Secure PIN.
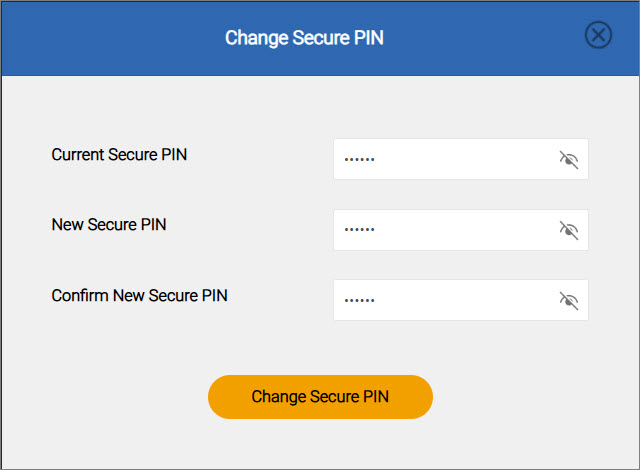
    The Change Secure PIN screen appears.
  2. Enter the Current Secure PINNew Secure PIN, and Confirm New Secure PIN.
  3. Click Change Secure PIN.
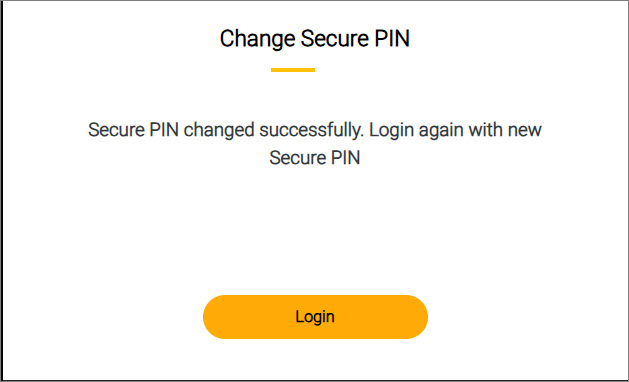
    The Secure PIN of your account gets changed.

You can use the new Secure PIN while logging in to the Computer & User Management portal.

Update VCC to the latest version

When a new update of the client is available, a red dot appears next to the down arrow against the Download Client option. You can upgrade the client to the latest version, if needed.

  1. Click the Download Client.
    The latest installer for the Virtual Computer Connection is downloaded to your local computer.
  2. Browse to the folder where the installer is downloaded, and double-click the Setup.exe file to update.
    The client, including the virtual computer, is updated to the latest version on successful completion of the process.

    There is no impact on your data due to the update.

Access to Accounts & Users Management Portal

While you are using the Virtual Computer Connection, you may require managing your virtual computer and users associated with your virtual machine. Once you login to the portal, you can perform various activities, such as taking data backup, downloading data, adding or editing users, updating TallyPrime application, and so on.

To open the Computer & User Management portal

  1. Under Manage Account and Users, click Computer & User Management.
  2. Login to the portal page by providing your user credentials.

To open the Control Centre portal for managing your Tally.NET account

  1. Under Manage Account and Users, click Tally.NET Account.
  2. Login to the portal page by providing your user credentials.

You can add multiple users to your office account. The number of active users at a given time will depend on your plan. You can also access the Control Centre portal to manage your Tally.NET accounts and users.

Connection Settings

Depending on your business practices, you may need to follow certain network protocols – especially the port and proxy settings for your Internet connection. 

  1. Click Connection Settings.
  2. Configure the network proxy or network transport protocol, as applicable to your business.
  3. Click Save to save the changes.  

About

Click this option to see the following information:

  • Version of the Virtual Computer Connection
  • Version of the virtual computer
  • Terms of license agreement

Open Source Third Party License Agreement

Virtual Computer Connection
Setup  
Microsoft .NET 4.6.2 https://dotnet.microsoft.com/en/dotnet_library_license.htm
Microsoft VC++ https://marketplace.visualstudio.com/items/VisualStudioProductTeam.VisualStudioProjectSystemExtensibilityPreview/license (warning)
https://visualstudio.microsoft.com/
license-terms/mt644918/ (warning)
WIX Bundle https://wixtoolset.org/about/license/
Client  
NICE DCV https://www.nice-dcv.com/eula.html
Extended WPF toolkit by Xceed – v3.7.0 https://github.com/xceedsoftware/wpftoolkit/blob/3.7.0/license.md
Newtonsoft.Json by James Newton-King – v13.0.1 https://licenses.nuget.org/MIT
RestSharp by John Sheehan, Andrew Young, Alexey Zimarev, and RestSharp community – v106.11.7 https://licenses.nuget.org/Apache-2.0
WpfAnimatedGif by Thomas Levesque – v2.0.0 https://licenses.nuget.org/Apache-2.0
Sodium core by tabrath- v1.2.3 https://github.com/tabrath/libsodium-core/blob/master/LICENSE
libsodium by Frank Denis – v1.0.18 https://licenses.nuget.org/ISC
Microsoft.NETCore.Platform by Microsoft – v1.0.1 https://dotnet.microsoft.com/en/
dotnet_library_license.htm
System.ValueTuple by Microsoft – v4.5.0 https://github.com/dotnet/corefx/
blob/master/LICENSE.TXT
Virtual Computer
Desktop environment – LXDE http://www.lxde.org/
https://www.gnu.org/licenses/old-licenses/gpl-2.0.html  tinymce.emotions_dlg.warning
Window manager – IceWM https://ice-wm.org/
https://www.gnu.org/licenses/old-licenses/gpl-2.0.html  tinymce.emotions_dlg.warning
Complement to window manager – Xcompmgr https://wiki.archlinux.org/title/Xcompmgr
https://www.gnu.org/licenses/fdl-1.3.html
File manager – pcmanfm https://wiki.lxde.org/en/PCManFM
https://www.gnu.org/licenses/fdl-1.3.html
Dialog display – yad https://github.com/nkbt/yad/blob/master/LICENSE
mscore fonts on Ubuntu – ttf-mscorefonts-installer – from Microsoft http://corefonts.sourceforge.net/eula.htm tinymce.emotions_dlg.warning
Archive/unarchive tool – engrampa https://github.com/mate-desktop/engrampa
https://www.gnu.org/licenses/old-licenses/gpl-2.0.html
Printing related – CUPS https://www.cups.org/
https://www.cups.org/doc/old-license.html tinymce.emotions_dlg.warning CUPS 2.2 and earlier
https://www.cups.org/doc/license.html tinymce.emotions_dlg.warning   CUPS 2.3 and later
WINE https://wiki.winehq.org/Licensing
Libre Office https://www.libreoffice.org/about-us/licenses
Firefox https://www.mozilla.org/en-US/MPL/
Computer & User Management
jwt-decode https://github.com/auth0/jwt-decode/blob/master/LICENSE
js-sha256 https://github.com/emn178/js-sha256/blob/master/LICENSE.txt
Tweetsodium https://github.com/github/tweetsodium/blob/master/LICENSE
Wix https://wixtoolset.org/about/license/
Python https://docs.python.org/3/license.html
boto3 https://github.com/boto/boto3/blob/develop/LICENSE
Additional Services
requests https://github.com/psf/requests/blob/main/LICENSE
pyjwt https://github.com/jpadilla/pyjwt/blob/master/LICENSE
pynacl https://github.com/pyca/pynacl/blob/main/LICENSE
jinja2 https://github.com/pallets/jinja/blob/main/LICENSE.rst
TallyHelpwhatsAppbanner
Is this information useful?
YesNo
Helpful?
/* */