Create Employee Categories in TallyPrime (Payroll)
While an Employee Group is available by default, an Employee Category provides an additional level of employee classification. An employee category can be used to track the salaries paid to employees working in specific projects or locations such as Head Office and Regional Offices.
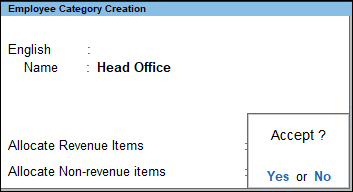
Create Single Employee Category
- Gateway of Tally > Create > type or select Employee Category > and press Enter.
Alternatively, press Alt+G (Go To) > Create Master > Employee Category > and press Enter. - Specify the name of the category to be added, in the Name field.
- Set the option Allocate Revenue Items to Yes to allocate revenue related transaction values for employees created under this category.
- Set the option Allocate Non-Revenue Items option to Yes to allocate non-revenue related transaction values for employees created under this category. In the Employee Category Creation screen , press F12 (Configure) > set Allow allocation of transaction values for Revenue Items and Allow allocation of transaction values for Non-Revenue Items to Yes.

- Accept the screen. As always, you can press Ctrl+A to save.
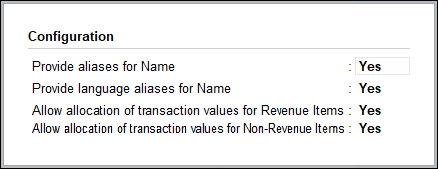
Employee Category Configuration
- Press F12 to add/remove options in the Employees Category Creation screen.

- Set the option Provide aliases for Name to Yes to add the alias names.
- Set the option Provide Language aliases for Name to Yes to add the names in other languages as selected (only while using Multilingual feature).
- Accept the screen. As always, you can press Ctrl+A to save.
Create Multiple Employee Categories
- Gateway of Tally > Create > type or select Employees Category.
Alternatively, press Alt+G (Go To) > Create Master > type or select Employees Category. - Enter the employee category name in the Name field.
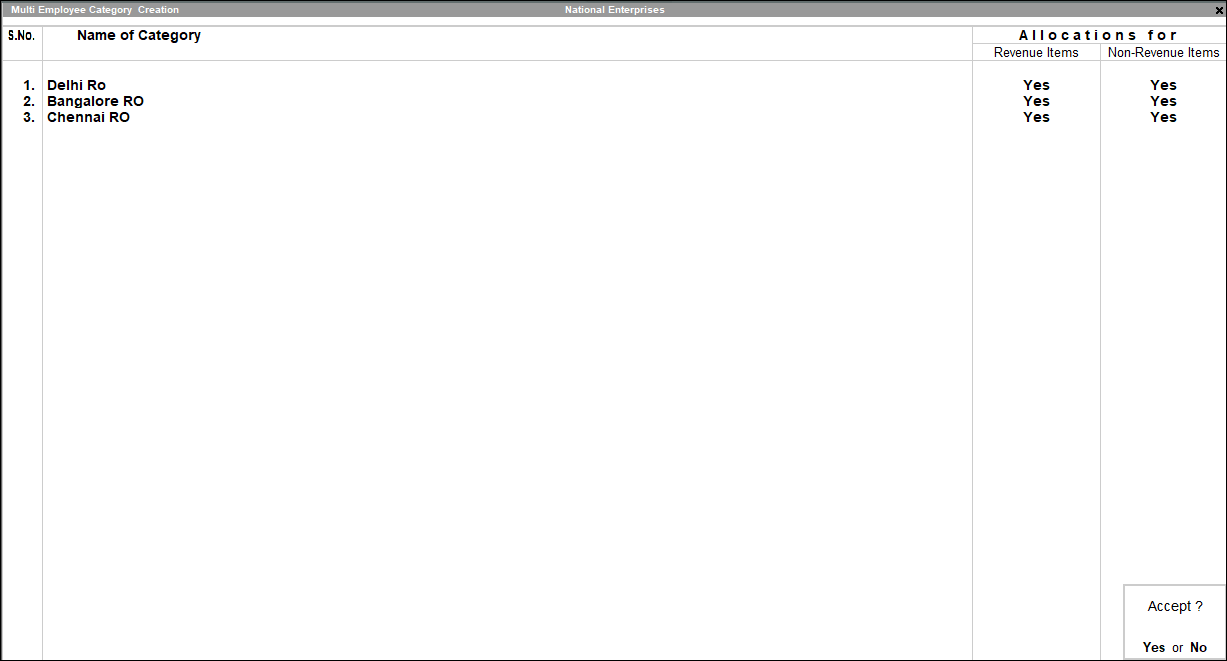
- Enable the options Allocations for Revenue Items and Non-Revenue Items, if required.
The completed Multi Employee Category Creation screen appears as shown below:
- Press Enter to save.


