File GSTR-9 on the Portal Using TallyPrime Data
Release 7.2 & later
GSTR-9 is a yearly return where you summarise all the GST you have reported during the year. It is mandatory if your annual turnover is more than ₹2 crore, and optional if your turnover is ₹2 crore or less.
TallyPrime helps you prepare for filing GSTR-9 with the GST Annual Computation report, a consolidated view of your annual GST data from books.
You can export GSTR-9 data (HSN/SAC Summary or all sections of GSTR-9) to the GSTR-9 Offline Tool. This helps you reduce manual data entry and compare your books data with the data auto-populated on the GST Portal.

Ensure that:
- You have resolved all exceptions in your GST returns before referencing Annual Computation data.
- You have filed GSTR-1 and GSTR-3B for all months in the relevant financial year.
- You have downloaded the GSTR-9 Offline Tool from the GST Portal and kept it in the folder from which you want to export GSTR-9 data.
- You have configured GTSR-9 Offline Tool Excel file for uninterrupted GSTR-9 data export.
- Open Excel file and go to File > Options > Trust Center > Trust Center Settings > Privacy Options.
- Under Document-specified settings, clear the option Remove personal information from file properties on save.
- You are logged in to the GST portal.
Step 1: Review Your TallyPrime Data
- Press Alt+G (Go To) > type or select GST Annual Computation > press Enter.
- Press F2 (Period) and set it to the relevant financial year.
- Review annual data across the sections.
Step 2: Export GSTR-9 Data

- Press F2 (Period) to select the period for which you want to export GSTR-9 data.
- If you have created multiple registrations, press F3 (Company/Tax Registration) > select the company to include all GST registrations, or select a specific GST registration.
- Press Alt+E (Export) > Data for GSTR-9.
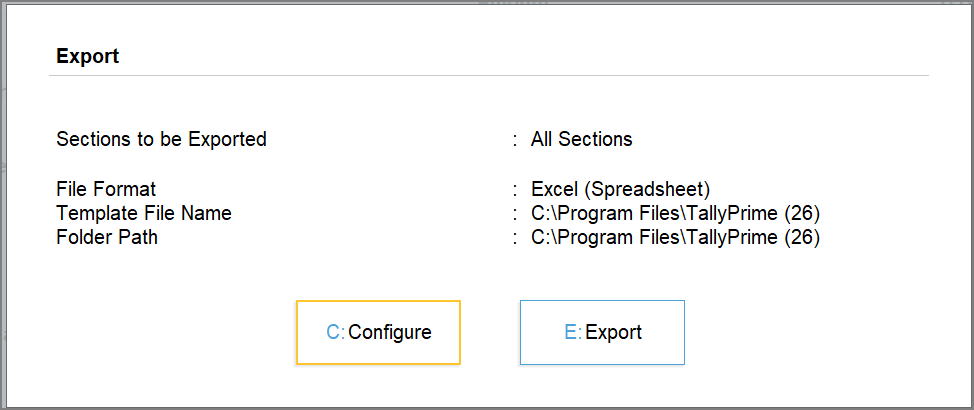
- On the Export Data for GSTR-9 screen, press C (Configure) and set the option as required.
- Sections to be exported, select All Sections or HSN/SAC Summary, as required.
- Specify the Template File Path where the downloaded GSTR-9 Offline Tool is available.
- The Template File Name is prefilled as GSTR-9 Offline Tool (v2.1).
- Specify the Folder Path where you want to generate the exported file.
- Press Ctrl+A to save the configurations.
- Press E (Export) and then press C (Continue) to confirm the export.
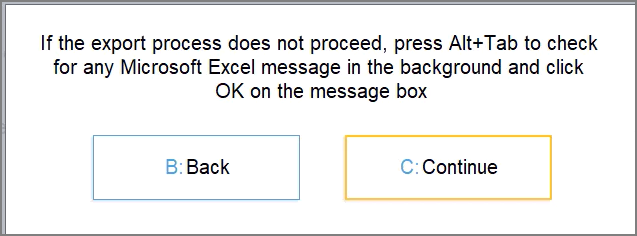
The GSTR-9 Utility file is exported in the specified folder with the selected GSTR-9 data. Use this file to compare your books data with the data auto-populated on the GST Portal.
Step 3: Reconcile Books Data with Portal Data
- Download the auto-populated GSTR-9 JSON from the GST Portal.
- On the GST Portal, go to Services > Returns > Returns Dashboard.
- Select the required financial year and return period, and download the auto-populated GSTR-9 JSON.
- Open a separate copy of the GSTR-9 Offline Tool and import the JSON downloaded from the GST Portal.
- Open the GSTR-9 Offline Tool, go to Home > Open Downloaded Form GSTR-9 JSON File.
- Select the JSON downloaded from the GST Portal.
- Compare the data in the GSTR-9 Utility file exported from TallyPrime with the data in the GSTR-9 Offline Tool containing the portal data.
- If there are any differences, make the required corrections in the GSTR-9 Offline Tool containing the portal data based on your books data.
- In the GSTR-9 Offline Tool containing the portal data, go to Home > Generate JSON File to upload.
Do not import the portal JSON into the GSTR-9 Utility file exported from TallyPrime, as it will replace the existing books data.
If you have exported only the HSN/SAC Summary from TallyPrime:
- Open a separate copy of the GSTR-9 Offline Tool and import the auto-populated GSTR-9 JSON downloaded from the GST Portal.
- Compare the HSN Outward and HSN Inward details in the GSTR-9 Utility file exported from TallyPrime with the corresponding details in the GSTR-9 Offline Tool containing the portal data.
- Update the HSN Outward and HSN Inward details in the GSTR-9 Offline Tool containing the portal data based on your books data.
- In the GSTR-9 Offline Tool containing the portal data, go to Home > Generate JSON File to upload.
Step 4: File GSTR-9 on the GST Portal
- Log in to the GST portal.
- Go to Services > Returns > Annual Return, select the financial year, and click Prepare Online on the GSTR-9 section.
- Upload the JSON file to the GST Portal, and proceed with filing.
To learn more about the different sections of GTSR-9 return form, refer to Form GSTR-9 – Annual Returns.