How to Save View of Your Customised Reports in TallyPrime
The Save View feature in TallyPrime Release 2.0 enables you to save the configuration/setting of a report the way you want for future references. For example, you may prefer to look at your sales report on a quarterly basis. Similarly, you may require to look at your inventory summary with inwards, outwards, opening balance and closing balance. To view these reports with specific details every time, you will need to configure them each time – this could be really time-consuming at times!
In TallyPrime, you can add your customised reports in the Save views very easily by adding the save view and change button to your customised report at the form level.
[Form: Areawise SalesAnalysis]
Add : Button : SaveView, ChangeView
You may use the form-level template DSP Right Button Palette. The form-level template has both buttons Change view and Save View and these buttons are placed as per standard. The template can be altered as needed.
[Form: Areawise SalesAnalysis]
Use : DSP Right Button Palette
If you want to use a trigger report, that variable should have a behave as attribute as given below:
[Collection: Monthly Ledger]
Use : List of Ledgers
Variable : Ledger Name
Report : Ledger Vouchers
Trigger : Ledger Name
Fetch : Name
;; The variable definition
[Variable: Ledger Name]
Use : Master Variable
;; Master variable definition
[Variable: Master Variable]
Behave as : Master Context
[Object : GT Object Ledger Vouchers]
Use : GoTo Report Obj
Name : $$LocaleString:”Ledger Vouchers”
Current Collection : Monthly Ledger
Current Report : Vouchers of Ledger
Context Variable : Ledger Name
If you want to create different variables to control Period, those variables should also have Behave As.
[Variable: SVToDate]
Use : Period Variable
Type : Date
Volatile : Yes
Repeat : ##DSPRepeatCollection
[Variable: DSPToDate]
Use : Period Variable
Type : Date
Volatile : No
[Variable: Period Variable]
Behave as : Period Context
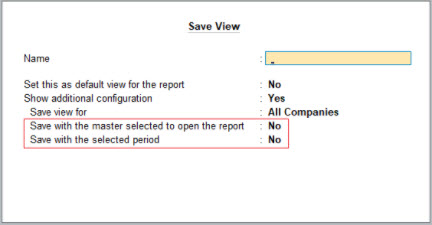
You can set the variable ShowMasterContext and ShowPeriodContext can be enabled or disabled based on your requirement in the given screen.


