
Cancel e-Invoice and Cancel/Delete Voucher in TallyPrime
If you’ve generated e-Invoice for a transaction in TallyPrime, you can cancel the e-Invoice and cancel or delete the voucher along with it.
You can perform these actions using the familiar shortcuts: Alt+X to cancel and Alt+D to delete a voucher. TallyPrime will do the rest for you automatically.
Cancel e-Invoice & Voucher
- Open the voucher in alteration mode and press Alt+X (Cancel).
You will come across one of the two scenarios:
Scenario 1: The 24-hours time limit has not exceeded for e-Invoice.
![]()

- Press I (Cancel e-Invoice & Voucher) to cancel the e-Invoice in the portal and cancel the voucher in the Company Book.
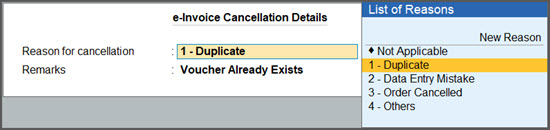
- Fill the Cancellation Details of e-Invoice.

- Press Ctrl+A to save the cancellation details.
You will see a message asking confirmation to send details for cancellation.
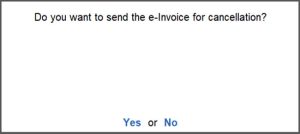
- Select Yes to exchange the e-Invoice cancellation details with the portal.
You will see a confirmation message indicating that the e-Invoice has been cancelled successfully.
Scenario 2: The 24-hours time limit has exceeded for e-Invoice.

You will see a message indicating that the time limit for cancellation has exceeded.
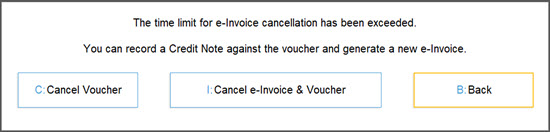
- Press B (Back) to return to the Voucher alteration screen without proceeding further.
- Press C to cancel the voucher in TallyPrime. However, you are not recommended to do so, as this will only cancel the voucher in TallyPrime and will not impact the e-Invoice.
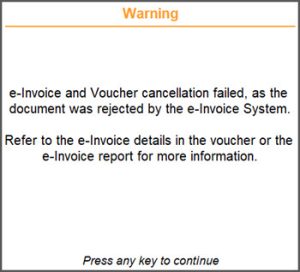
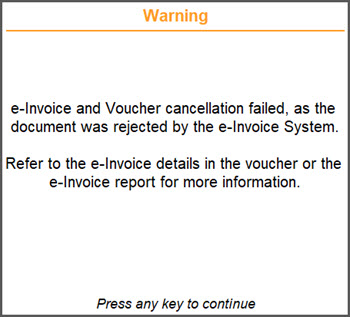
- If you press I (Cancel e-Invoice & Voucher), you will see the message about rejection of cancellation of e-Invoice by the portal and failure to cancel the voucher.
Cancel e-Invoice & Delete Voucher
- Open the voucher in alteration mode and press Alt+D (Delete).
You will come across one of the two scenarios:
Scenario 1: The 24-hours time limit has not exceeded for e-Invoice.
![]()

- Press I (Cancel e-Invoice & Voucher) to cancel the e-Invoice in the portal and delete the voucher in the Company Book.
- Fill the Cancellation Details of e-Invoice.
- Press Ctrl+A to save the cancellation details.
You will see a message asking confirmation to send details for cancellation.
- Select Yes to exchange the e-Invoice cancellation details with the portal.

You will see a confirmation message indicating that the e-Invoice has been cancelled successfully.
Scenario 2: The 24-hours time limit has exceeded for e-Invoice.
![]()
You will see a message indicating that the time limit for cancellation has exceeded.
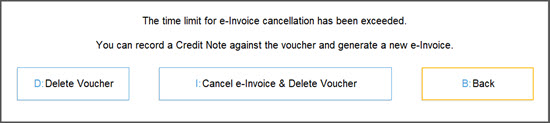
- Press B (Back) to return to the Voucher alteration screen without proceeding further.
- Press D to delete the voucher in TallyPrime. However, you are not recommended to do so, as this will only delete the voucher in TallyPrime and will not impact the e-Invoice.
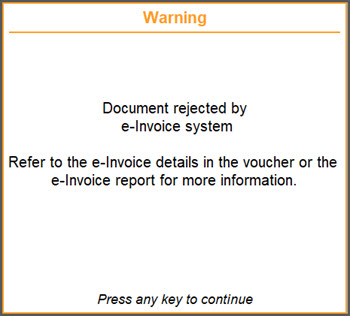
- If you press I (Cancel e-Invoice & Delete Voucher), you will see the message about rejection of cancellation of e-Invoice by the portal and failure to delete the voucher.
Cancel e-Invoice & Retain the Voucher Using More Details
- Open the voucher in alteration mode.
- Press Ctrl+ I (More Details)> Show More > e-Invoice Cancellation Details.
- Fill in the e-Invoice Cancellation Details and save.
- Press Ctrl+A to save the cancellation details for e-Invoice in the voucher.
You will come across one of the two scenarios:
Scenario 1: The 24-hours time limit has not exceeded for e-Invoice.
![]()
You will see a message that the invoice has the cancellation details.
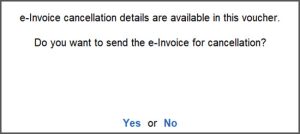
- Select Yes to send the cancellation Details of e-Invoice to the portal.
- If you select No, the cancellation details will be saved.
You can see these vouchers appearing under the section For IRN Cancellation of the e-Invoice report. From there, you can send such e-Invoices for cancellation.
If the e-Invoice is not cancelled and you reopen the same voucher later, a message will appear when you try to save it. This message will confirm that cancellation details are available for the e-Invoice and ask whether you want to proceed with sending them for cancellation.
Scenario 2: The 24-hours time limit has exceeded for e-Invoice.
![]()
You will see a message with the information that the invoice has the cancellation details but the allowed time limit has exceeded.
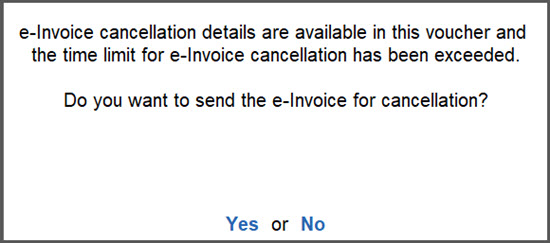
If you attempt to cancel by selecting Yes the cancellation request will be rejected by the e-Invoice portal. The vouchers in TallyPrime will also not get cancelled or deleted.
If you select No, the cancellation details will remain in the voucher but you cannot proceed with the cancellation of the e-Invoice.
In all the above scenarios, the vouchers will not get cancelled or deleted in TallyPrime.
You can update cancellation details for your e-Invoices from the e-Invoice report, using the F10 (Cancel IRN) option.
Cancel e-Invoice (Release 6.2 & Earlier)
Click here.
Sometimes, you may need to cancel an IRN/e-Invoice after it’s generated, such as when item rates change or an order is cancelled. As per regulations, this must be done within 24 hours of IRN generation.
Step 1: Cancel IRN/e-Invoice in TallyPrime
-
Alt+G (Go To) > type or select e-Invoice > press Enter.
Alternatively, Gateway of Tally > Display More Reports > GST Reports > e-Invoice > press Enter.
- Drill down from the IRN generated from e-Invoice system section to open the e-Invoice – Voucher Register screen.
- Select the voucher for which e-invoice needs to be cancelled, and press F10 (Cancel IRN).
Press Ctrl+F10 (Mark as Cancelled) when the e-invoice is cancelled through some other medium on IRP, and you want to update the status in TallyPrime. When you mark the IRN as cancelled, then this invoice will appear in the Marked as IRN Cancelled section under IRN Cancelled, instead of the For IRN Cancellation section under Pending.
- Select the Reason for cancellation and enter the Remarks.
- As always, press Ctrl+A to save the details.
The voucher will move to the For IRN Cancellation section under Pending.
Step 2: Update Cancellation of e-Invoice on Portal
-
Press Alt+Z (Exchange) > Send for e-Invoicing.
In the Send for e-Invoicing screen, you can view the transactions that are pending for generation and cancellation.
-
Select the required transaction and press S (Send) to send the details.
If you press S without selecting any transaction, then all the transactions will be sent for e-invoicing.Note: If you are using the multiple GST registrations feature in TallyPrime Release 3.0 or later versions and e-Invoicing is applicable in more than one GST registrations, then you can select the vouchers that are ready for IRN Generation and Cancellation.
A confirmation screen will appear, with the number of transactions lined up for IRN generation and cancellation.
If you are using the multiple GST registrations feature in TallyPrime Release 3.0 or later versions, then you will be able to view the total number of vouchers for IRN generation and cancellation from all GST registrations. - Press Enter to continue.
- Specify the details in the e-Invoice Login screen, and press Enter.
The Exchange Summary will appear after the cancellation is completed, and you can view the number of e-Invoices that are cancelled.
The vouchers will now move to the IRN cancelled from e-Invoice system section in the e-Invoice report.
You can use the sample data to test this feature in TallyPrime, without affecting your company data. On downloading the Data folder, you will have the Sample Data and the ReadMe file.
The ReadMe file has the instructions on using the sample data.
Q&A
- After the 24-hours time limit has exceeded, can I cancel the e-Invoice and cancel or delete the voucher from my Company Book in TallyPrime?
No, if the time limit has passed, you will not be able to cancel the e-Invoice. Though you can cancel or delete the voucher from your Company Book in TallyPrime, e-Invoice will continue to exist. - I entered the cancellation details for e-Invoice and accepted them, instead of sending it for cancellation, I selected No. Will the cancellation details be saved?
Yes, the cancellation details for the e-Invoice will be saved even if you pressed No while exchanging the cancellation details with the portal. - If I have generated the e-Invoice details in the portal and later updated the IRN in my voucher in TallyPrime, can I cancel e-Invoice from TallyPrime?
No, you will not be able to cancel e-Invoice from TallyPrime as you have generated the e-Invoice on the portal.
For any further queries, refer to e-Invoice – FAQ.


