
Specify Cheque Range and Format to Print Cheques in TallyPrime
TallyPrime takes care of your cheque printing and cheque book management requirements, irrespective of the bank through which you want to make payments. With the flexibility for cheque printing offered by TallyPrime, you can:
Cheque Range: Set cheque ranges for cheque books. Based on the cheque range specified by you, the cheque number applies to the transaction. So, you don’t have to manually select the cheque number and cheque book. As a result, you will also be able to:
- Track assigned cheques.
- Monitor unassigned cheques.
Moreover, you can change the cheque numbers manually, if needed.
Cheque Format: In TallyPrime, you can:
- Set cheque format with dimensions and alignment.
- Alter predefined cheque dimensions.
There are banks that support predefined cheque formats. However, you can alter the format to suit your needs. - Specify User Defined Cheque formats, if the predefined cheque format doesn’t meet your needs.
Amount in Lakhs/Millions: Based on the party’s country of origin, you can specify if you want to print amount in lakhs/millions on cheques.
Company Name: You can disable Company Name in the pre-printed cheques. This feature is especially useful when you have multiple branches and share the same cheque book. Therefore, you would want to disable the Company Name from the cheques so that you can use the cheques for the applicable company.
Specify Cheque Range and Format in Bank Ledger
![]()
- Open the bank ledger.
- Press Alt+G (Go To) > Alter Master > type or select Ledger > and press Enter.
- Select the bank ledger. For example, Kotak Mahindra Bank.
- Enable Set/Alter Bank configuration.
If you are on TallyPrime Release 5.1 or earlier, then you do not have to enable the option. The Cheque configurations are available on the Ledger Creation/Alteration screen. - Set the Cheque book range under Bank Configuration.
- Enable Set/Alter range for Cheque Books.
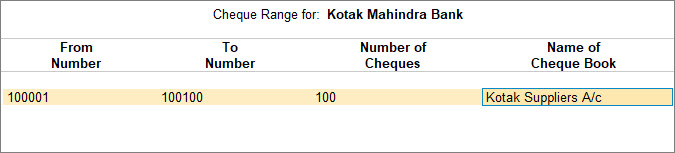
- In the Cheque Book Management screen, enter the cheque number in the fields From Number and To Number. The Number of Cheques appears automatically.
Alternatively, you can enter the From Number and the Number of Cheques. The To Number will appear automatically. - Enter the Name of Cheque Book and press Enter.
- Set Enable Cheque Printing to Yes.
- Enable Set/Alter Cheque Printing configuration.
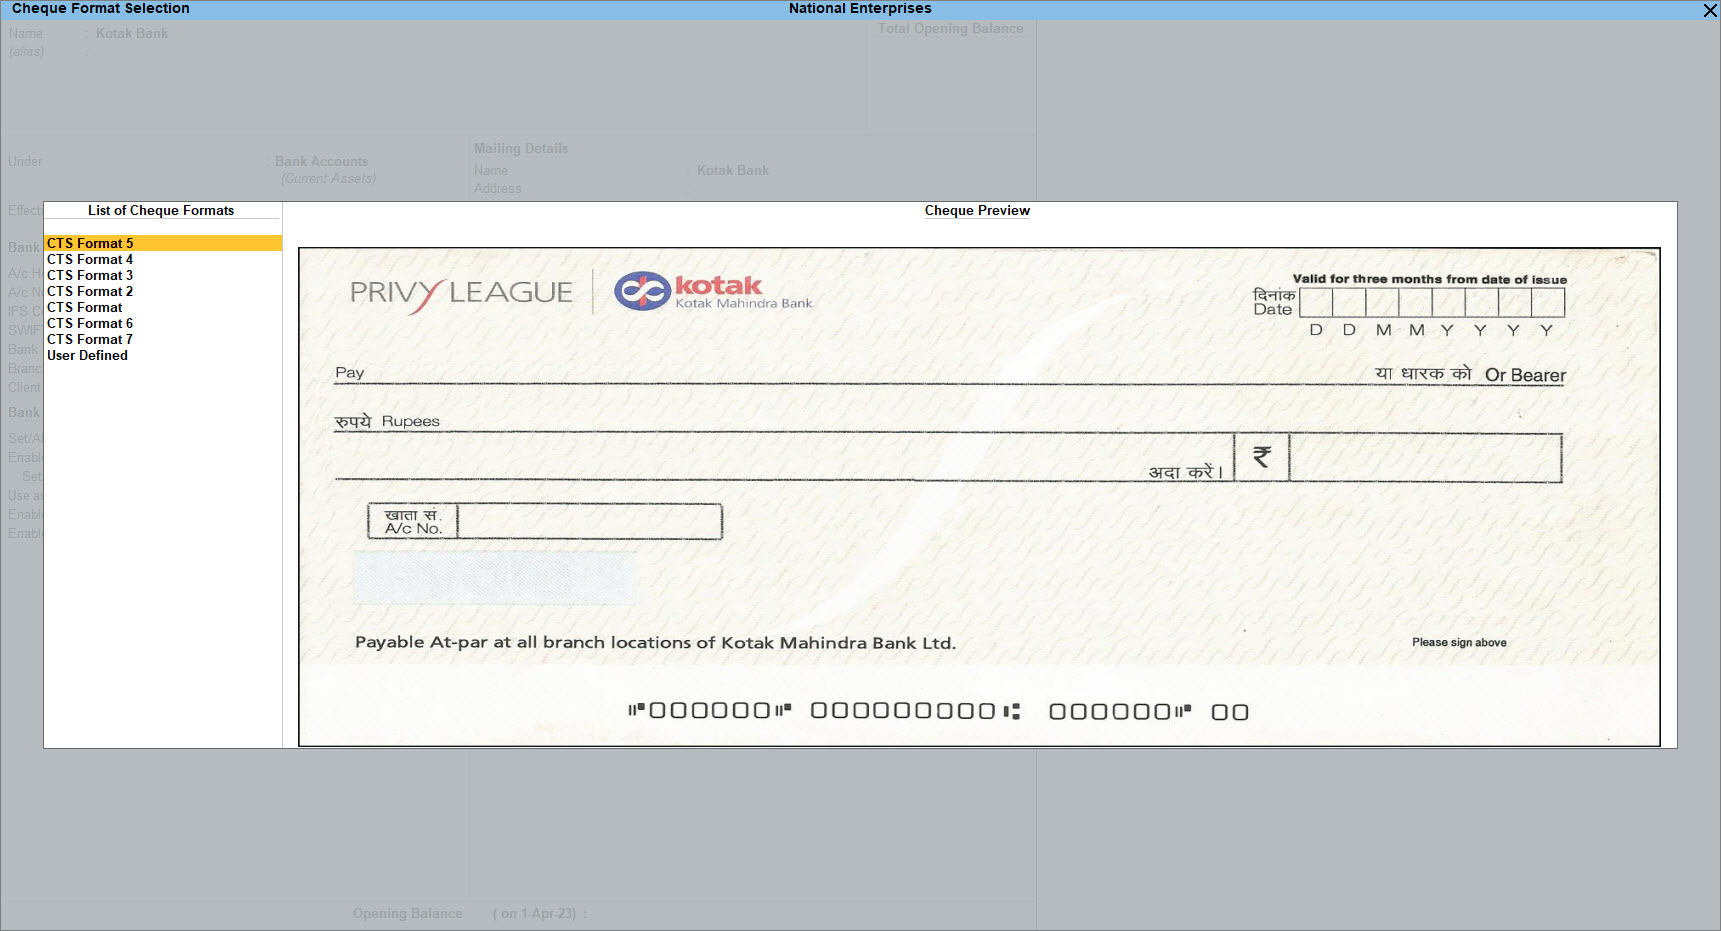
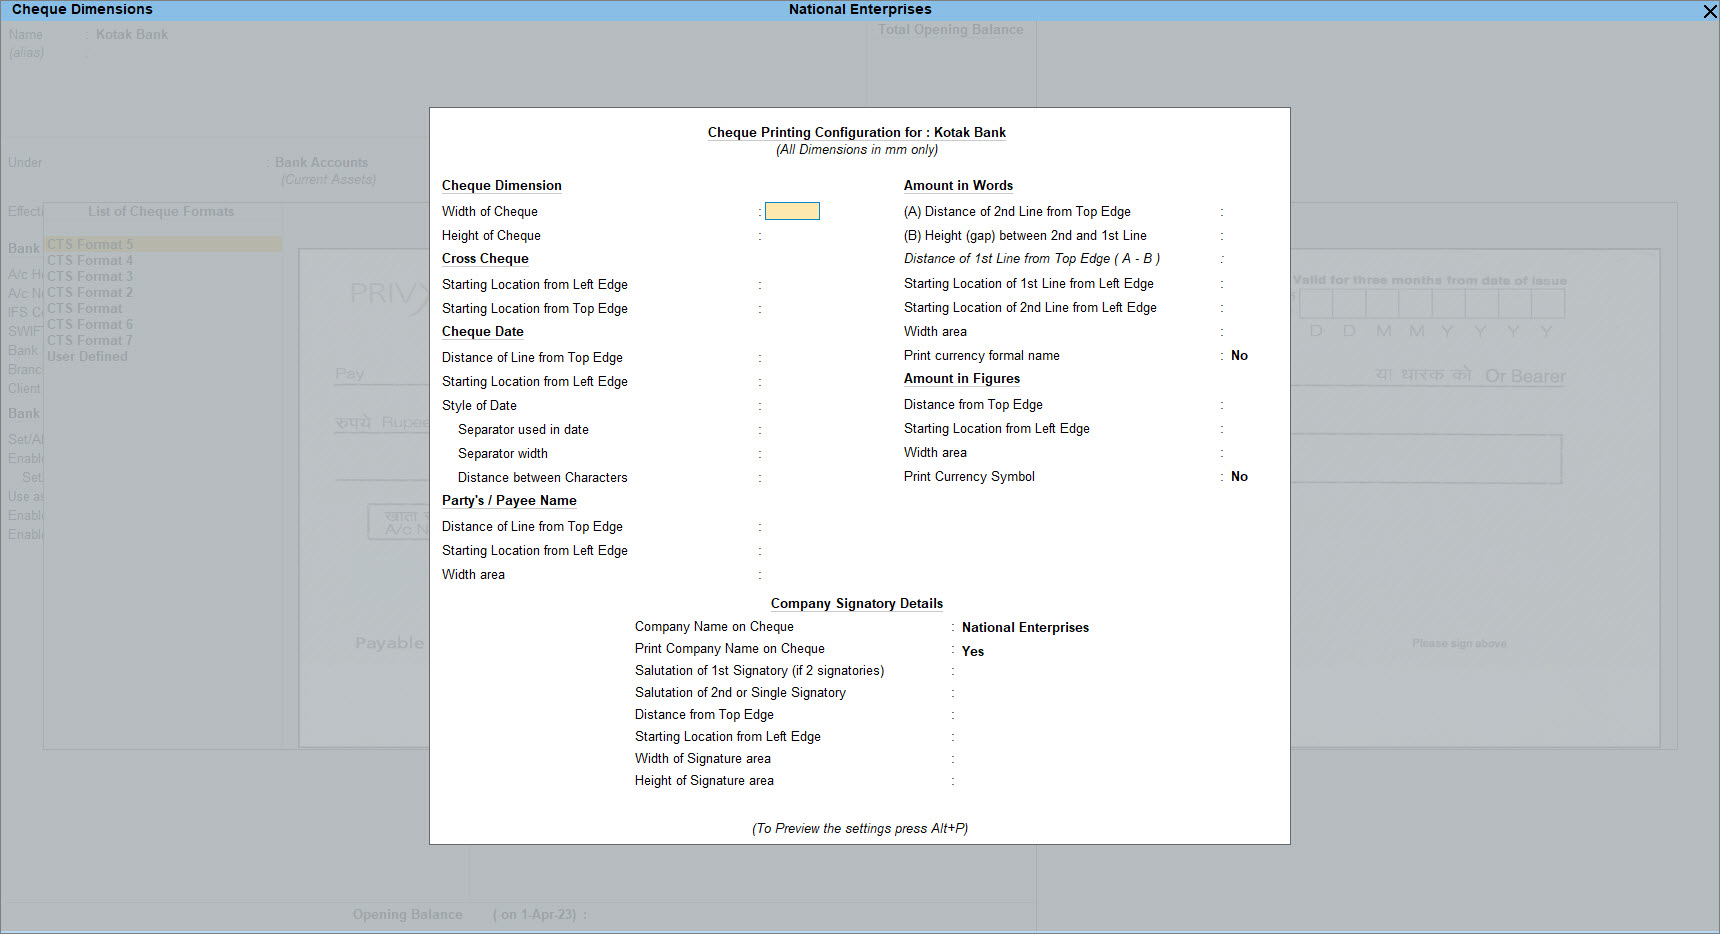
- In the Cheque Format Selection screen, you can view all the cheque formats supported for the bank selected in the Bank name field.
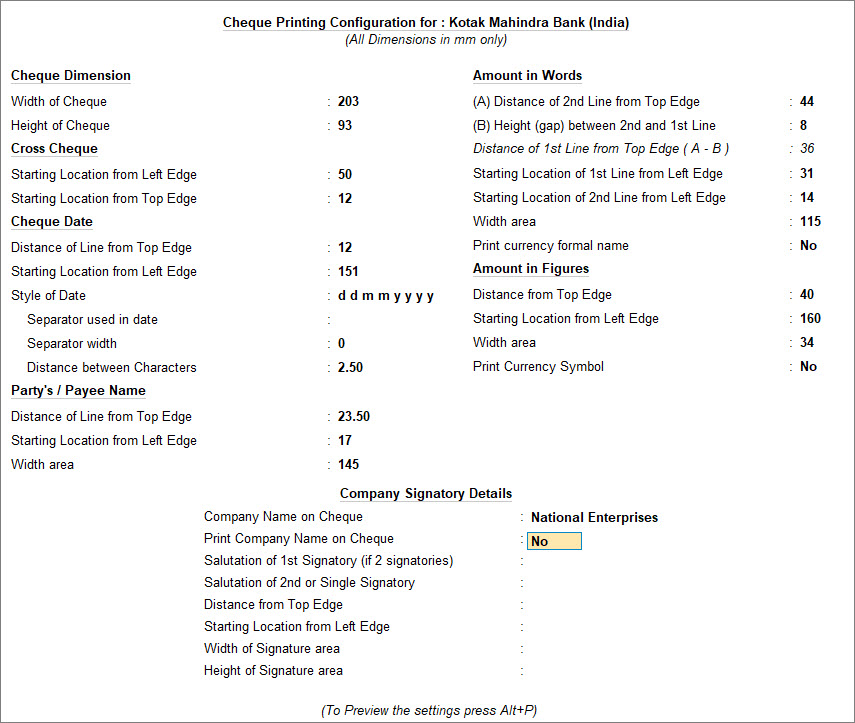
- Select the Cheque Format and press Enter to view/modify the pre-configured dimensions.
- Specify the cheque printing dimensions and other requirements.
- Print the Sample Cheque.
- Press Ctrl+P (Print) > P (Print) to print and I (Preview) to preview the settings. The Sample Cheque Printing screen appears.
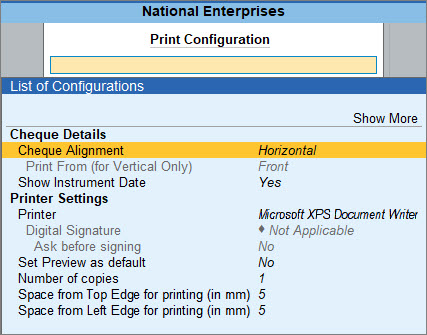
- Press C (Configure) and set the Cheque Alignment.
You can select any one of the options mentioned below for Cheque Alignment.- Horizontal: Print the cheque horizontally (oriented as landscape).
- Vertical-Centre: Print the cheque vertically at the centre of the cheque leaf.
- Vertical-Left: Print the cheque vertically on the left-hand side of the cheque leaf.
- Vertical-Right: Print the cheque vertically on the right-hand side of the cheque leaf.
- Press Esc and press I (Preview) to generate the preview.
- Press Esc to return to the Cheque Dimension screen.
- Press Ctrl+A to save.
You can then print the cheques immediately after the payment voucher is recorded.
Alter Predefined Cheque Dimensions
![]()
- Open the Bank ledger.
- Press Alt+G (Go To) > Alter Master > type or select Ledger > and press Enter.
- Select the bank ledger. For example, Kotak Mahindra Bank.
- Enable Set/Alter Bank configuration.
If you are on TallyPrime Release 5.1 or earlier, then you do not have to enable the option. The Cheque configurations are available on the Ledger Creation/Alteration screen. - Under Bank Configuration, set Enable Cheque Printing to Yes and Enable Set/Alter Cheque Printing configuration.
The Cheque Format Selection screen appears as shown below:
- Update the cheque dimensions.
- Select the required format from the list and press Enter. The Cheque Dimensions screen appears.
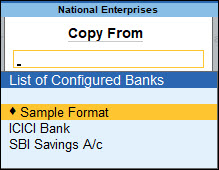
- Alter the cheque dimensions manually or press Alt+B (Copy From) to copy the predefined dimensions from the List of Configured Banks.
If you have previously altered a predefined format for any other bank ledger, then the bank ledger starts appearing under the List of Configured Banks. - Press Ctrl+A to save the Cheque Dimensions screen.
- In the Sample Cheque Printing screen, configure, preview, or print the cheque.
You can then print the cheque with the set dimensions.
Specify User Defined Cheque Format
![]()
- Open the Bank ledger.
- Press Alt+G (Go To) > Alter Master > type or select Ledger > and press Enter.
- Select the bank ledger. For example, Kotak Mahindra Bank.
- Enable Set/Alter Bank configuration.
If you are on TallyPrime Release 5.1 or earlier, then you do not have to enable the option. The Cheque configurations are available on the Ledger Creation/Alteration screen. - Under Bank Configuration, set Enable Cheque Printing to Yes and Enable Set/Alter Cheque Printing configuration.
- Select User Defined from the List of Cheque Formats or press Alt+L (User Defined) to define the cheque dimensions in the Cheque Dimensions screen.
The Cheque Dimensions screen appears. - Press Alt+B (Copy From), if you have defined cheque dimensions for other banks.
Select the format of the required bank from the List of Configured Banks.
In the Cheque Dimension screen, update the details as per your requirement, as shown below:
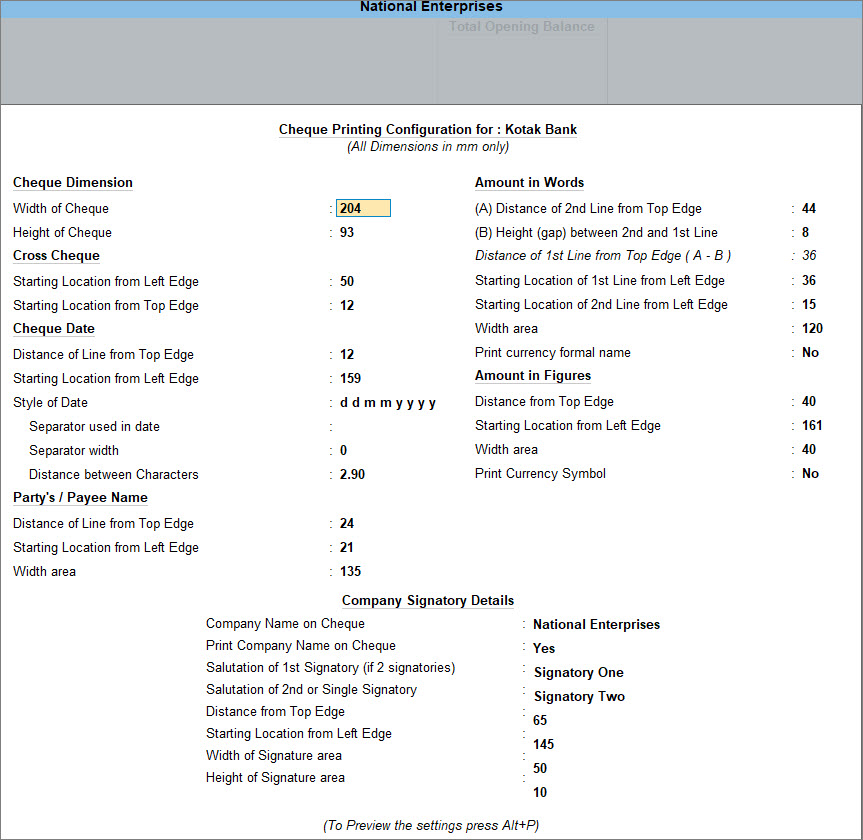
- Press Ctrl+A to save the Cheque Dimensions screen.
You can use the format to print cheques.
Print Amount in Lakhs/Millions on Cheques
![]()
- Press Alt+K (Company) > select Alter.
- Select the company from List of Companies to view the Company Alteration screen.
- Press F12 (Configure) > set Provide Additional Base Currency details as Yes, to enable additional base currency options.
- Set the option Show amount in millions? to Yes to view the amounts in millions in the book as well as print it on cheques.
For example, once the option is set to yes, you can see the amount as 1,000,000 instead of 10,00,000. - Accept the screen. As always, you can press Ctrl+A to save.
You can then print cheques with amount in millions.
Disable Company Name in the Pre-printed Cheques
![]()
- Open the Bank ledger.
- Press Alt+G (Go To) > Alter Master > type or select Ledger > and press Enter.
- Select the bank ledger. For example, Kotak Mahindra Bank.
- Set Cheque Printing under Bank Configuration.
- Enable Set/Alter Cheque Printing configuration, to view the Cheque Format Selection screen.
- Select the required format from the List of Cheque Formats, to view the Cheque Dimensions screen.
- Print the cheque without the company name.
- In the Cheque Dimensions screen, set Print Company Name on Cheque to No under Company Signatory Details.
- Press Ctrl+A to save.
You can then print the pre-printed cheques with other details without overlapping the company name.


