
Moving from TallyPrime Powered by AWS to TallyPrime Cloud Access Hosted on Oracle Cloud
Your Virtual Office is now being migrated from TallyPrime powered by AWS (TPonAWS) to TallyPrime Cloud Access (TPCA) hosted on Oracle Cloud Infrastructure (OCI). This move gives you a faster, more secure, and more capable cloud platform — while keeping your existing setup, data, and user configurations intact.
After migration, your new TPCA Virtual Office will include existing configurations like plan & validity, data, TallyPrime Release, and Users & configurations. Simply restore your data post migration and start working on TPCA.
On TPCA, you will benefit from:
-
Access to Control Panel and file management options
-
Copy-paste and drag-and-drop support
How the Migration Works
The following sections describe the migration process, helping you understand how your Virtual Office is scheduled, transitioned, and made ready on TPCA.
Receive e-mail Notifications
You will be notified about your scheduled migration well in advance before the migration begins.
Ensure your TPonAWS Virtual Office is in the Stopped state during migration. If it remains Running, migration will be skipped and pushed to a later batch, and a new schedule e-mail will be sent.
Before migration, remove unwanted files and ensure enough space for data restoration.
In some cases, the Virtual Office may shut down automatically to continue with migration.
When Migration is Initiated
Once the migration begins:
- The entire data in your current Virtual Office (TPonAWS) is backed up and made available for download.
-
A new Virtual Office (TPCA) is provisioned automatically with existing configurations like plan & validity, data, TallyPrime release, and users.
-
Your backup is securely transferred to TPCA.
However, note that a copy of the same backup is retained in your TPonAWS Virtual Office for 30 days. -
Your TPonAWS Virtual Office becomes inaccessible during this time.
What Changes on TPonAWS
During migration:
-
In the Self-Service Portal (SSP), the Virtual Office Status changes to Migrating Virtual Office.
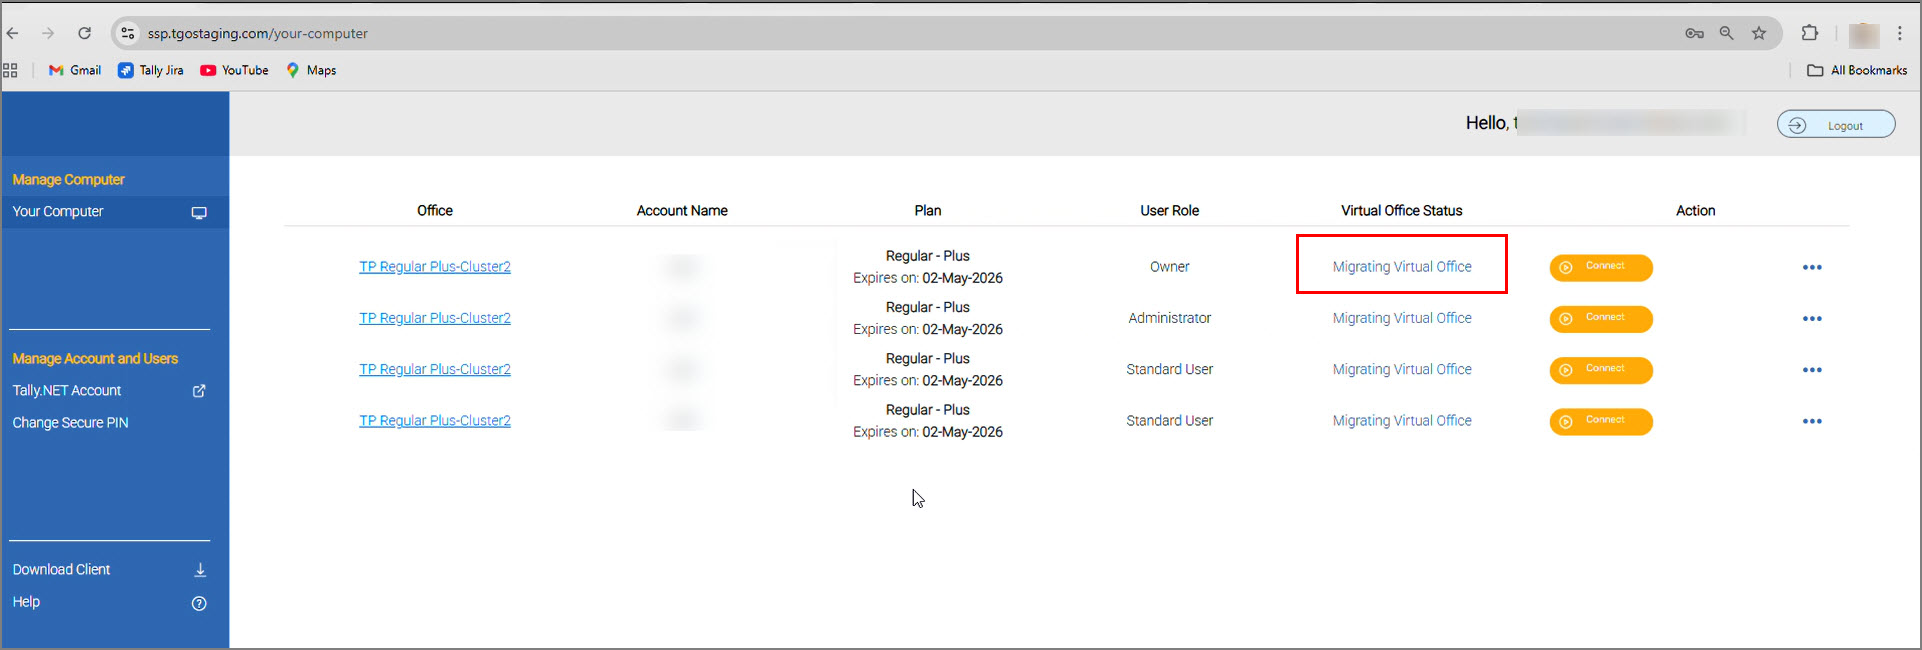
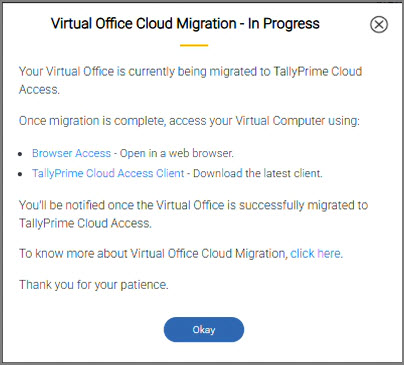
- Clicking Connect displays the current migration status.
After migration:
- The Virtual Office Status is updated to Inactive, along with the migration date.
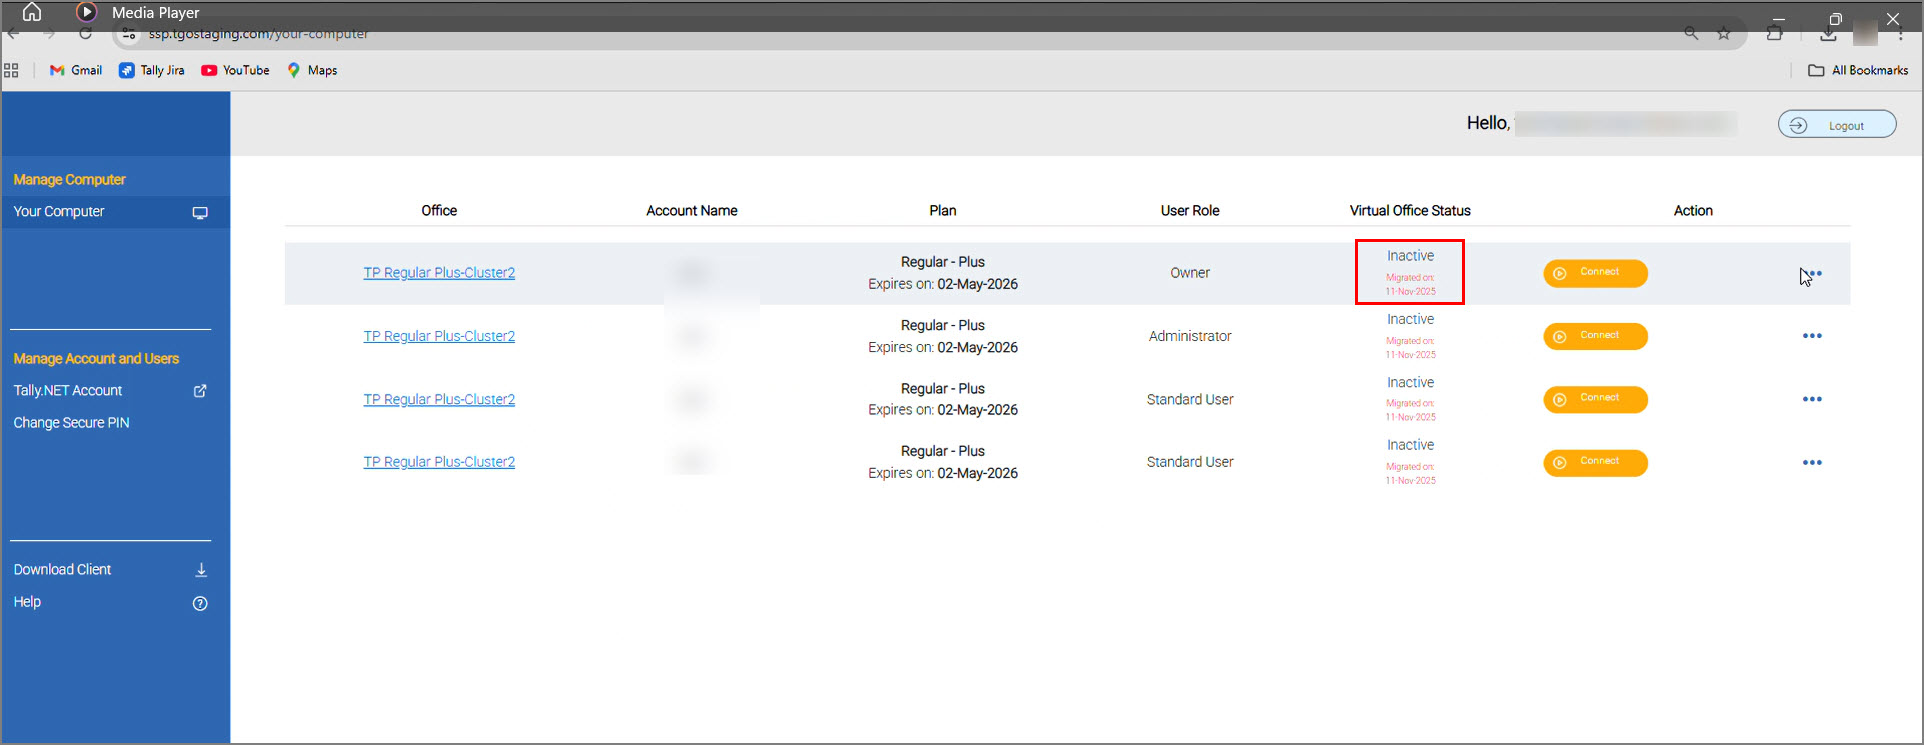
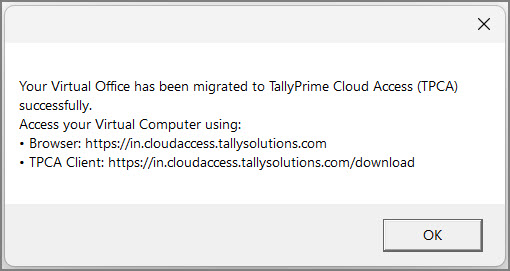
- On clicking Connect, a message is displayed after successful migration.
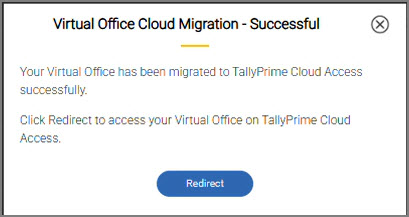
- Click Redirect to go to the TPCA login page.
If you are using the VCC Client, when you click Connect after migration, a message will be displayed confirming that the migration was successful.
Post migration timeline on TPonAWS:
-
Your Virtual Office stays inactive for 5 days, but your data remains intact.
-
After 5 days, the Virtual Office is deactivated.
-
Backup files remain available for 30 days from the deactivation date.
What Happens on TPCA
Once provisioned, your new TPCA Virtual Office includes:
-
The same plan and validity
-
Virtual Office data and TallyPrime configurations
-
All active and inactive users
-
The same TallyPrime release
Only the Full Access (All Folders) and No Access options are supported for upload/download permissions. The Partial Access (My_Files folder) option is not available.
After migration, all users who previously had Partial Access are automatically updated to No Access.
You can review the upload or download requirements for each user and update the permission to Full Access, if required.
On your first login, you must restore your data to start working on TPCA. After restoration, reactivate your license in TallyPrime and continue working normally.
Log In & Connect to TPCA
After migration, log in to TPCA using your existing Tally.NET ID, Password, and Secure PIN (if prompted, reset it).

You can access TPCA via:
-
Browser (Web-Client)
Restore Data Post Migration
On the first login, you must restore your data before the Virtual Computer desktop becomes accessible.
Restoring your data is mandatory and must be completed successfully.
You can restore your data using:
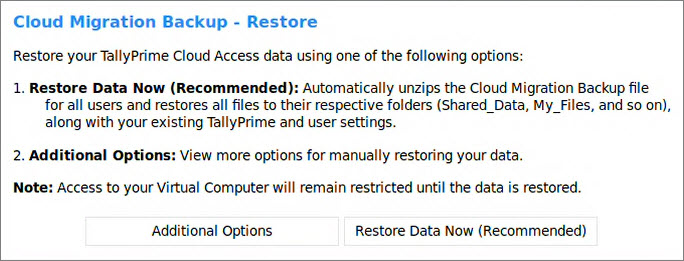
Option 1: Restore Data Now (Recommended)
Use this option to automatically restore your Cloud Migration Backup.
-
Click Restore Data Now (Recommended).
-
Enter your Secure PIN (used while TPCA login) when prompted.
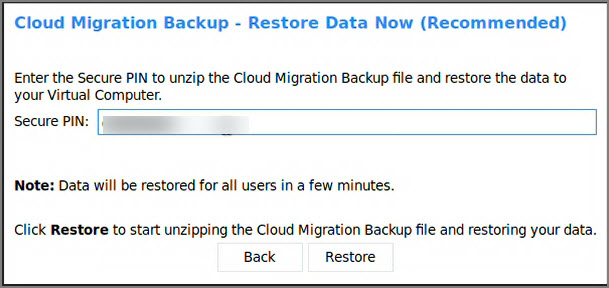
- Click Restore.
This option restores Shared_Data and My_Files for all users. Folder permissions within Shared_Data and its subfolders are retained. Only one user should perform the restore activity at a time to avoid conflicts.
If another user has already initiated restoration, a progress screen appears for all users. Once complete, you will be taken to your Virtual Computer desktop.
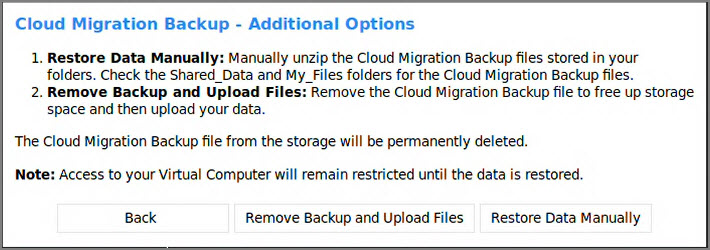
Option 2: Additional Options (Administrator/Owner)
Use these options only if:
-
You want to manually restore data, or
-
You want to upload new/fresh data, or
-
The recommended automatic restore fails
This is time-consuming and should be used after consulting a Tally Partner or Tally Support.
Remove Data & Upload Files
Use this if you want to start afresh by uploading your own data. This will delete the Migration Backup file stored during migration.
-
Zip your data folder on your local system.
-
Open File Manager from the right-side Control Panel.
-
Go to Shared_Data > Data.
-
To upload your files:
-
Copy and paste the files from your local system into File Manager, or
-
Click Browse Files to select the required files and then click Upload File.
-
-
Go to D:\Shared_Data\Data, right-click, and select Extract Here.
The disk space will become empty because the respective folders contain no files.
-
This will remove all the files from the Shared_Data and My_Files folders for all the Users.
Restore Data Manually
Use this only if automatic restoration fails.
-
Go to Shared_Data and unzip migration_shared.zip (if not already unzipped).
-
Go to My_Files > migration_data and unzip your user backup file (e.g., migration_user001.zip).
-
When prompted, enter the Password for the Migration Backup file.
To get the password:
-
Go to Self-Service Portal > Action (…) > Settings > Manage Backup.
-
Select Cloud Migration Backup > Action (…) > Download Backup.
-
Click Password, copy it, and paste it when prompted.
Each user must unzip their respective migration_user000x.zip file. This retains all files in the Shared_Data and My_Files folders for all users.
Switch Back to Automatic Data Restore (if required)
If you want to use Restore Data Now (Recommended) after starting manual restoration:
-
Click Home > Help > Cloud Migration Backup – Restore.
An Attention screen appears to inform that the Administrator/Owner has chosen to continue with manually restoring the data for all users. -
Choose:
-
Confirm Completion: to confirm that you have manually restored your data, or
-
Restore Data Now (Recommended): to automatically restore the Migration Backup file.
This will overwrite the manually restored data.
-
If data restore fails:
-
Admin/Owner: Click Retry, or use Additional Options.
-
Standard User: Click Retry, or contact your Admin/Owner
If the Admin/Owner opens the Restore screen after restoration is already complete, you will see a confirmation message that data has already been restored.
Reactivate License & Continue Working on TallyPrime
Once your data is restored – automatically or manually:
-
Open TallyPrime.
-
-
In the Reactivate License screen, enter the Tally.NET ID and password of the Administrator.
-
Press Enter to confirm surrender license.
-
Press Enter to reactivate the license.
-
-
Start working with your existing data on TPCA.
Your Virtual Office is now fully ready on TPCA, giving you better speed and enhanced cloud capabilities.
Q&A
-
How do I know if my TallyPrime on AWS (TPonAWS) Virtual Office is eligible for migration to TallyPrime Cloud Access (TPCA)?
Your Virtual Office is eligible for migration when all the following conditions are met:-
Your Virtual Machine (VM) is in Active state.
-
Your plan is valid for 15 or more days.
-
If you use plans with lesser than 96 or 128 users.
-
Ensure that Sync with Local Application is set to No, under Action > Settings > Advanced Settings.
If any of these conditions are not met, your Virtual Office will be moved to a later migration batch after the issue is resolved.
-
-
When will my Virtual Office be migrated?
Your Virtual Office will be moved as per the migration schedule assigned to you. You will receive an e-mail with the exact date and time of your migration.
The migration will start automatically at the scheduled time only if your Virtual Machine (VM) is in the Stopped state.
If your VM is running at the scheduled time:
-
The migration will not start.
-
Your Virtual Office will be moved to a later batch.
-
You will receive an updated migration notification with the new schedule.
-
-
Why am I being migrated from TallyPrime on AWS (TPonAWS) to TallyPrime Cloud Access (TPCA)?
The migration to TPCA provides a faster, more stable, and feature-rich cloud experience with improved remote access, better system performance, and enhanced file-handling capabilities.
-
Will I experience downtime during migration?
Yes, your TPonAWS Virtual Office will be inaccessible during migration. However, you can still download your backup files during the migration process and continue your work on Local Computer.
-
Can I access my backup files in TPonAWS during migration?
Yes, the backup files remain accessible in TPonAWS during migration, even if your Virtual Office does not.
To access the file:
-
Log in to the SSP in TPonAWS.
-
Click Action > Settings > Manage Backup and select the Backup you want to download.
Backup files are retained for 30 days from the date of deactivation.
-
-
How long does the migration take?
The process happens in automated stages. The total time depends on your data size and batch load.
-
Which browsers are supported for TPCA?
Google Chrome is the recommended browser on both Windows and MacOS for using TPCA.
-
Will any of my data be lost during migration?
No, your data is backed up on TPonAWS and moved to TPCA. You must restore the data on TPCA when logging in for the first time.
-
What should I do if the automatic data restore process fails?
If the automatic restoration does not complete successfully, you can manually restore your data and take full control of the process. To know more how to manually restore your data, refer to Restore Data Manually section. Consult your Tally Partner or Tally Support if you need assistance during manual data restore.
-
Can I opt out or reschedule my cloud migration?
Cloud Migration rescheduling is allowed only in genuine, critical cases. Contact your Tally Partner or Tally Support for further assistance.
Have more queries? Refer to the Moving from TPonAWS to TPCA section.


